The Legend of Zelda: Ocarina of Time/Printable version
| You can access their strategy guide and walkthrough at https://strategywiki.org/wiki/The Legend of Zelda: Ocarina of Time |
| This is the print version of The Legend of Zelda: Ocarina of Time You won't see this message or any elements not part of the book's content when you print or preview this page. |
The current, editable version of this book is available in Wikibooks, the open-content textbooks collection, at
https://en.wikibooks.org/wiki/The_Legend_of_Zelda:_Ocarina_of_Time
Gameplay
Starting a new game or loading a game
edit
Upon starting the game, the title screen appears which shows Link riding Epona in Hyrule Field and various scenes from the game. Pressing Start (or the Plus button for the Wii Classic Controller) once will display the game logo, as will simply waiting as the scene plays out. Pressing Start (or the Plus button for the Wii Classic Controller) while the logo is fully displayed opens the file select screen.
In this menu three save game slots are shown, along with the options to erase or copy a saved game. Furthermore, there's an options menu which allows you to change sound settings, the way the Z-targeting system works and some shades of black and grey to help set the brightness setting on television. Highlighting a save game slot and pressing the A button and choosing Yes opens that saved game. If no saved game exists, selecting a save game slot opens the file name screen. Entering a name and choosing End will create a new game save file.
Movement
editThe first thing to learn is how to run around using the Control Stick. Pressing it a little bit will make Link walk very slowly, which is good for navigating small walkways. Pressing it all the way to the edge will make Link run as fast as he can, which is necessary to Jump. If the players walk off a ledge, Link will fall a bit and hopefully grab the ledge, otherwise he will fall straight down and may take damage based on the distance of the fall.
Jumping
edit
In The Legend of Zelda: Ocarina of Time there is no jump button. Instead, Link will jump off of ledges if he approaches them while running. There must be caution on positioning, because it is easy to fall long distances.
Falling
editIf Link happens to fall off of a ledge, he will either hit the ground and take damage, or roll. To roll, the players must simply hold the control stick in the direction he is moving (most often Up).
HUD
edit
- Action button
The action button shows you what A button will make Link do. For instance, if you have your sword in hand and you are standing still, the action button will say Put Away. Pressing the button will cause Link to sheath his sword. If you are running, the action button will change to Attack, and pressing the A button will make Link do a somersault.
- Item assignments
At the top right of the screen are the three button assignments. These act as a way to keep track of what items are currently assigned to. By pressing a button with an assigned item, Link will pull out the item immediately and use it (draw an arrow and aim the bow, load and aim the slingshot, swipe with an empty jar, use a filled jar, etc.). You can change the button assignments by using the pause menu and navigating to the inventory section. Pressing a button while an item is selected will assign that item to the button pressed.
The buttons for the items are:
- Nintendo 64: C-left, C-right, C-down
- Nintendo GameCube: C-Stick (left, right, down) or Y, Z, or X
- Wii Classic Controller: Right Control Stick (left, right, down) or Y, X, Zl/Zr
- Nintendo 3DS: Y, X, and buttons on the Touch Screen
- Minimap
The minimap appears in the bottom left corner of the screen. This helps you quickly keep track of your location in a room, the direction Link is facing, and the floor or zone you are in. A world map is available on the pause menu outside of dungeons, and a larger dungeon map is while inside of them.
Press L to turn the minimap on or off.
Pause menu
edit
The pause menu can be viewed by pressing Start (Plus button for the Wii Classic Controller) Here you are able to save, view the world or dungeon map (depending on your location), view and equip items, and view additional items.
- Inventory
Your inventory helps keep track of what items you've acquired, what items are currently assigned to the C buttons, how much ammo you have left, and whether or not you have anything contained in jars.

- Heart pieces
While on your adventure, you might stumble upon a Heart Piece; these rare items will automatically combine into an extra Heart Container (your maximum health will increase by one) if you find four of them. The inventory tracks how many Heart Pieces you have by filling in the heart container diagram until you form a new Heart Container.
- Songs
After you receive an ocarina, you will be able to play songs that have special powers. These songs play an important role in solving puzzles and traveling quickly throughout the game.
- Gold Skulltulas
One of the many secret items you can collect in Ocarina of Time is the Gold Skulltula Token. These are acquired by killing a Gold Skulltula and then grabbing its token.
Equipment
edit
On the equipment page, you will be able to toggle between the different armor and weapons that Link has acquired. These will come in handy when maximizing your offensive and defensive capabilities, and when necessary to solve certain puzzles.
- Weapons
Throughout the game you'll acquire stronger swords and weaponry to help you solve increasingly complex puzzles and defeat enemies more efficiently.
- Ammo
Some weapons require ammunition to use. If you run out, they will be unable to function, so try to keep a good supply on hand, or keep track of where you can find more. Remember that destructible objects and enemies have a chance to drop items such as ammo.
Saving your game
edit
During the game, you can save your game at any time by bringing up the pause menu with the Start button (Plus button for Wii Classic Controller), then press B. Select "Yes" at the confirmation screen. The menu will close. The game has now been saved.
If you die and get a "Game Over", the game will ask you if you want to save, then if you want to continue. Choosing not to continue will send you back to the title screen.
Note that when you save the game, it does not save your location. Every time you start the game you will appear in Link's House in Kokiri Forest, if your last save was as a child. If your last save game was as an adult, you will start at the Temple of Time. If you save in a dungeon you will instead appear just inside of the entrance to the dungeon regardless of age.
Rupees
editLike all Zelda games, Rupees are used as a currency within the game.
Objects
editYou will find objects throughout the game that can be interacted with or destroyed. Destructible objects have a chance to drop items such as ammo and rupees.
| Object | Methods of interaction | Methods of destruction |
|---|---|---|
| Chests | Open. | N/A |
| Doors | Open. | N/A |
| Gossip Stones | Speak, sword, boomerang, hookshot, or bomb. | Bomb |
| Grass | Pick up. | Throw, cut, or bomb. |
| Stones | Pick up. | Throw or bomb. |
Dungeons
edit
Dungeons are a primary part of the game. Each dungeon must be completed to finish the game. A dungeon is considered complete if the special item is found and, if there is one, the boss is defeated.
Dungeon-specific items
editCertain items can only be found within dungeons. Some of these are dungeon-specific. That is, after you find them, they cannot be taken elsewhere and are only available when you are in that dungeon.
Special items
editEach dungeon has a unique item that will help Link progress through the game. These special items are necessary to overcome puzzles and defeat bosses, so make sure you get them!
Controls
Link
edit| Action | Nintendo 64 | Nintendo GameCube | Wii (Virtual Console) | Nintendo 3DS |
|---|---|---|---|---|
| Wii Classic Controller | ||||
| General | ||||
| Move | Control Stick | Control Stick | Left Control Stick | Circle Pad |
| Jump Roll Interact Context sensitive |
A | a | a | a |
| Crouch | R | R | R | R |
| Use assigned item or weapon | ||||
| C left button | C-Stick (left) or Y | Right Control Stick (left) or Y | y | |
| C right button | C-Stick (right) or X | Right Control Stick (right) or X | x | |
| C down button | C-Stick (down) or Z | Right Control Stick (down), Zl or Zr | Stylus | |
| Nintendo 3DS version: There are two item slots on the touch screen. | ||||
| Targeting system | Z | L | L | L |
| Locks on to the nearest object, monster, or person While locked on, use b to attack, or a to talk | ||||
| It can be configured in the options menu: In "switch" mode, press ZN64/LGC/Wii/3DS once to lock on, and again to unlock In "hold" mode, hold ZN64/LGC/Wii/3DS to lock on and release to unlock "Switch" is recommended for beginners; "Hold" is recommended for veterans for more challenge in using controls | ||||
| First-person view | C up button | C-Stick (up) | Right Control Stick (up) | Top left of Stylus |
| Center the camera | Z | L | L | L |
| Show/hide minimap | L | D-Pad | D-Pad | |
| Pause menu | Start | Start | Plus | Gear/Map/Items on Stylus |
| Save game | B on pause menu | B on pause menu | B on pause menu | start or select |
| Dialogue and writing | ||||
| Respond to Navi | C up button | C-Stick (up) | Right Control Stick (up) | Top left of Stylus |
| Advance | A | a | a | a |
| Skip | B | B | B | b |
| Attacking and defending | ||||
| Horizontal Cut | b z + (C left button or C right button) + b |
b L + (C left button or C right button) + b |
Lstick or right|Lstick) + b | b L + (C left buttonpad or C right buttonpad) + b |
| Vertical Cut | Z + b C up button + b |
L + b C up button + b |
lstick + b | L + b C up buttonpad + b |
| Power Stab | R + B | R + B | R + B | R + B |
| Power Stab uses the attack power of the previous move; if a Deku Stick + Jump Attack was used last, Power Stab does 4x the damage of the Kokiri Sword. | ||||
| Thrust | z + C up button + b | L + C up button + b | lstick + b | L + C up buttonpad + b |
| Spin Attack | b | b | b | b |
| Hold the Spin Attack button to increase attack power, then release to attack | ||||
| Weaker Spin Attack | Control Stick + b | Control Stick + b | Left Control Stick + b | Circle Pad + b |
| Rotate the Move stick in a circle and press the Attack button; it must be performed quickly | ||||
| Jump Attack | z + a | L + a | L + a | L + a |
| Roll Attack | a | a | a | a |
| Press the button while running | ||||
| Raise shield | R | R | R | R |
| Use to deflect projectiles and block attacks If targeting an object, Link can move around while blocking If an enemy is Targeted while Link is swimming, the shield can still be used | ||||
| Aim weapon | Control Stick | Control Stick | Left Control Stick | Circle Pad |
| Performing on the ocarina | ||||
| Take out ocarina | Assigned by the player | Bottom left of Stylus | ||
| Play music note | C up button | C-Stick (up) | Right Control Stick (up) | a |
| C left button | C-Stick (left) or Y | Right Control Stick (left) or Y | x | |
| C right button | C-Stick (right) or X | Right Control Stick (right) or X | y | |
| C down button | C-Stick (down) or Z | Right Control Stick (down), zl or zr | r | |
| A | a | a | l | |
| Note Modifiers |
R | R | R | Dpad |
| Z | L | L | Dpad | |
| Control Stick | Control Stick | Left Control Stick | Circle Pad | |
Pause Menu
edit| Action | Nintendo 64 | Nintendo GameCube | Wii (Virtual Console) | Nintendo 3DS |
|---|---|---|---|---|
| Wii Classic Controller | ||||
| Select | Control Stick | Control Stick | Left Control Stick | Circle Pad or D-Pad |
| Scroll subscreen | Z / R | L / R | L / R | L / R |
| Confirm | A | a | a | a |
| Back | B | B | B | b |
| Assign item or weapon | ||||
| C left button | C-Stick (left) or Y | Right Control Stick (left) or Y | y | |
| C right button | C-Stick (right) or X | Right Control Stick (right) or X | x | |
| C down button | C-Stick (down) or Z | Right Control Stick (down), Zl or Zr | Stylus | |
| Nintendo 3DS version: There are two item slots on the touch screen. | ||||
Wii U VC configuration: It's basically the same as the Classic Controller with the ZL and ZR on the backs instead of the top middle. In addition, you're allowed to configure the controls with the exception of the D-Pad. You can access the Virtual Console menu by touching the Wii U GamePad screen.
The best recommendation in setting up the controls follows like this:
- ZL for targeting (Z).
- ZR for blocking normal and range attacks (R).
- L for C up button.
- R for C down button
- Y for C left button.
- X for C right button.
- Minus for map (L).
- A for action (A).
- B for sword attack (B).
- Left Control Stick for control stick (Control Stick).
- Right Control Stick for the C Buttons.
- Plus as a pause button (Start).
If it works, then use this as a template for many other games to make it easier for people who are used to the basics of playing Zelda games as it normally intended.
Nintendo 3DS configuration: Roll when falling off a high place does not seem to work in this version.
Versions
It is important to be specific when referring to the different versions of Ocarina of Time. In keeping with the established Zelda tradition, pre-ordered copies of Ocarina of Time on the Nintendo 64 featured "gold" cartridges. Additionally, the game's box was made of sturdy plastic instead of cardboard and exhibited the boxed phrase "Collector's Edition." Gold carts were the first American release of Ocarina and were only offered in a limited number, making them collector's items.
The game was also released in different software versions. All of the gold cartridge games that came out in November 1998 are version 1.0, and some grey cartridges released soon after are also version 1.0. Version 1.1 grey cartridges began to be released in early 1999, in which Nintendo fixed a number of bugs and glitches from the first version. This was followed by version 1.2.
The most notable difference between version 1.0 and the following versions is that in version 1.0, if one were to save and reset the game during the final Ganon fight, they would be able to play the game without Link's sword, which in turn would allow them to use any item on Epona. Version 1.1 is similar to version 1.0 except the above glitch was fixed (there is, however, a different known method that works on all versions, including GameCube ones). Ganon's blood at the end of the game appears red in versions 1.0 and 1.1, but was changed to green in version 1.2. Also for version 1.2, the original theme for the Fire Temple, similar to an Islamic prayer chant, was replaced in version 1.2 with a new theme. The GameCube version is similar to 1.2 but has some differences including button icons changed to their GameCube colors.
In 2002, Ocarina of Time was re-released as a bonus disc on the Nintendo GameCube for those who pre-ordered The Legend of Zelda: The Wind Waker. The bonus disc also included the Ocarina of Time Master Quest, a previously unreleased version of Ocarina of Time with redesigned dungeons and supposedly greater difficulty. Later that year it was again reissued (without the Master Quest add-on) on The Legend of Zelda: Collector's Edition as part of a limited-time promotion. This disc also included The Legend of Zelda: Majora's Mask, The Legend of Zelda and Zelda II: The Adventure of Link. In all the GameCube re-releases Nintendo changed the crescent moon and star symbol of the Gerudo to an original design.
In 2011, the game was remastered as The Legend of Zelda: Ocarina of Time 3D for the Nintendo 3DS. It featured updated graphics, redesigned inventory, a boss challenge mode, and hint movies. It also included the Master Quest, which is unlocked after beating the game. The gyro sensor built into the 3DS can be used to aim for some items. The Stone of Agony was replaced by the Shard of Agony, which chimes and displays an icon in the top left corner of the screen when near secrets. Also in the 3ds version there are shieka stones can use to guide you through the game.
In 2015, Ocarina of Time was re-released on the Nintendo eShop for the Wii U. This is a direct port of Ocarina of Time version 1.2, with any changes simply being due to emulation inaccuracies.
Main version difference in consoles
edit- The N64 version (with The Legend of Zelda: Majora's Mask) appearance has the usual button settings with the rumble pak.
- The GC version with Master Quest (and Majora's Mask) has a different colour setting with the rumble feature. Master Quest in particular (available in the GameCube and the 3DS version of the game) has all dungeons redesigned for veterans who find the original too easy or familiar.
- The Wii version (with Majora's Mask) has the N64 button settings in which you can use the classic and gamecube controls without any access to a rumble pak or feature.
- The 3DS version, The Legend of Zelda: Ocarina of Time 3D, features remastered graphics, some changes to HUD sprites, ways to use motion sensor controls, touch screen menus, a shortcut to the 3DS Game Notes application, a hint system featuring "Sheikah Stones" (which use videos to give hints and show you what to do, much like in Skyward Sword), The Legend of Zelda: Ocarina of Time 3D Master Quest (unlocked after beating the normal game; it uses the same new features, but this time the game's maps and are mirrored - similar to the Wii and GameCube versions of Twilight Princess or more recently Twilight Princess HD with the Hero Mode), and a "boss challenge" mode that lets you either fight bosses you have beaten before or take on all of them in one continuous battle.
- The Wii U eShop version features the same controller layout as the Wii Virtual Console's; However, the controls can be customized to the players preference.
Heart Containers
| A reader requests that more images be included in this page or book. Images are useful for presentation and explanation. Free images can be found at Wikimedia Commons and used here at Wikibooks. If you have created relevant images, you should consider donating them. Remove this template when suitable images have been added. Please continue to edit this book and add images, even after this message has been removed. Discuss this books particular needs on the discussion page. For questions, go to WB:PROJECTS. |


Heart Containers represent Link's health and life energy. The maximum number of Heart Containers that Link can have is twenty: he begins with three, and collects eight more after completing each of the eight dungeons in the game. The remaining nine are earned by collecting the 36 Heart Pieces hidden throughout the game. For each four Heart Pieces Link collects, another Heart Container will be added to his health.
The 36 Heart Pieces can be found in the following locations:
The Lost Woods
edit| Heart Piece | Location | Age | Notes |
|---|---|---|---|
| 1 | Lost Woods | Child |
 While standing on the small tree trunk located to the left of the Kokiri Forest entrance (on the right of the Kokiri Forest entrance in the Master Quest version), pull out your ocarina and play Saria's Song (the song can be obtained by speaking to Saria at the end of Sacred Forest Meadow maze; see The Lost Woods section of the walkthrough for further details on how to get the song) for the Skull Kid standing on the tall tree trunk to the left and he will give you a Piece of Heart in return as a symbol of his friendship. |
| 2 | Lost Woods | Child |
 Go to the right of the Kokiri Forest entrance (located on the left of the Kokiri Forest entrance in the Master Quest version), and climb down the ladder that is in front of you to find a tree with a target hanging from it. Walk to the right of the tree (the left in the Master Quest version) to see a funny looking log. Climb the small stump and two Skull Kids will appear. Pull out your ocarina and they will ask you to follow along with them to their song. Win the Skull Kids' memory game three times and you will earn a Piece of Heart as their way of proving your mastery of their memory game. See the minigame section for further details on how to better play the game. |
Lon Lon Ranch
edit| Heart Piece | Location | Age | Notes |
|---|---|---|---|
| 3 | Lon Lon Ranch | Child |
Once you enter Lon Lon Ranch (located in the middle of Hyrule field), pass through both the house and the barn to the field with horses (horses only come out during the day, and can be found in the barn, located next to the house; at night there are crows in the sky that can attack you, like the way Keese attack you). On the back end of the ranch you can see a tower on the right of Lon Lon Ranch (on the left for the Master Quest version), go towards the tower, and open the door found conveniently in front of the tower. Once inside the tower, begin by pulling the blocks facing the wall located on the left of the tower (on the right of the tower in Master Quest version) to reveal a small hole in the wall in the corner, crawl into the hole and move to the end of the hole to find a secret room, in the room is a Piece of Heart in a pile of hay. |
Hyrule Field
edit| Heart Piece | Location | Age | Notes |
|---|---|---|---|
| 4 | Hyrule Field | Either |
At the entrance to Lake Hylia in Hyrule field at the bottom/south end of the map, there is a fenced off squared area. Climb inside the fenced area and throw or set a bomb in the center of the fenced area, on the ground, to reveal a hole. Inside the hole is a Business Scrub that will sell you a Piece of Heart for ten Rupees. |
| 5 | Hyrule Field | Adult |
In Hyrule field, find a lonely tree near the small river located on the left of the Hyrule castle (on the right in Master Quest version). Place a Bomb or use your Megaton Hammer next to the tree to reveal a hole into the ground. Go into the hole and you will see a deep pool of water. The Piece of Heart is at the bottom of the pool, but to reach it you will need either the Iron Boots or Golden Scale. |
Hyrule Town Market
edit| Heart Piece | Location | Age | Notes |
|---|---|---|---|
| 6 | Hyrule Town Market | Child |
In the Hyrule Town Market (at night) there is a lady that lives in a house in the back alley (located on the left of the building with the picture of a Bombchu above the building's door (on the right in the Master Quest version) who has lost her white dog. The white dog is located in the corner of the Town Market, next to a stand near the bazaar (note that there are other dogs that if you go near them then the white dog will not follow you. To get rid of the dog that is following you, show the dog to the lady in the back alley and the dog will stop following you. You can get past the other dogs by hugging the walls all the way to the white dog on the other end of the Town Market). Touch the white dog near the bazaar and the white dog will follow you, then return to the lady in the house in the back alley and talk to her for a Piece of Heart. |
| 7 | Hyrule Town Market | Child |
 While in Hyrule Town Market (at night) go into the door on right of the building, located the right of the Drawbridge entrance (on the left in the Master Quest version). Once inside the building you will see a tattooed muscleman leaning over a counter. Talk to him and he will let you play the Treasure Chest game for ten Rupees, as well as giving you a key that you can then use to unlock the door next to the tattooed muscleman. One of the possible prizes is a Piece of Heart. See the minigame section for details on prizes and how to play this game. |
| 8 | Hyrule Town Market | Child |
 While in Hyrule Town Market (at night) enter the building with the picture of a Bombchu on the front of the door of the building, enter the door and you will see a lady sleeping on the counter, talk to her and she will let you play a game of Bombchu Bowling for 30 Rupees. One of the possible prizes is a Piece of Heart. See the minigame section for further details on prizes and how to play this game. |
Kakariko Village
edit| Heart Piece | Location | Age | Notes |
|---|---|---|---|
| 9 | Kakariko Village | Either |
You will need to collect 50 Gold Skulltula Tokens. After you collect the 50 Gold Skulltula Token, head to Kakariko Village (located on the top right side from Hyrule Town Market; left side in the Master Quest version) you will need to go to to the first house on the opposite hill from the Death Mountain Trail's entrance gate (located on the right side when entering from the Hyrule field entrance or the left side in the Master Quest version). Enter the house and you will see a bunch of dusty items and furniture covered in cobwebs proceed forward were you will see all five of the fathers children released of the curse, each one of them will give you a item that will help you on your quest. One of them will be a Piece of Heart. See Gold Skulltulas section for the location of all one hundred Spiders of the Curse. |
| 10 | Kakariko Village | Either |
While in Kakariko Village, go to the windmill (located in the back of the village) and climb up the stairs. Open the door on the windmill, then use your Boomerang and aim it at an angle towards the Piece of Heart (located on the right of the windmill) located on the left edge of the windmill entrance (right edge in the Master Quest version) and you should get it after a couple of tries.
From the windmill, climb down the stairs and run to the right (on the left in the Master Quest version) until you get to the cave like hole next to the windmill, go through the hole in the wall and then you will find yourself in a graveyard. From the graveyard entrance, run up the graveyard and turn left (right in the Master Quest version). Pass through the split fence were the path leads and pull the back of the tombstone that has flowers growing in the front of it. A hole will appear in the front of the tombstone you just moved. Enter the hole and then you will appear in a room with four pillars circled around you. Dampé will be there, talk to him and he will prompt you to race or follow him down these dark catacombs. Follow him all the way to the end of the cave were he rewards you a giant chest (which holds the Hookshot) after you acquire the Hookshot, continue on until you find a big blue block with a sun symbol on it. Take out the Ocarina of Time and play the Song of Time (you learn the Song of Time when you get the Ocarina of Time). The block will disappear to reveal a flight of stairs, climb up the stairs and you will emerge in the windmill where you will see the Piece of Heart. Jump on the rotating edges to get to the Piece of Heart. See the minigame section for tips on how to beat Dampé's race. |
| 11 | Kakariko Village | Either |
In Kakariko Village, there is a man that is sitting on the roof of the blue vine-covered roof Potion Shop building that an old lady owns (Located on the left of the well near the windmill. To get to him, you can use the Longshot (The Longshot is an upgrade of the Hookshot, is given to you in the water temple, and makes this Piece of Heart a lot easier to get as an Adult) to shoot from Impa's roof (The house that the Cucco lady is usually standing next to in the day time), and then shoot from Impa's house to the blue vine-covered roof that the man is sitting down on, talk to him and he will give you a Piece of Heart. If you don't have the Hookshot upgrade you can use the regular Hookshot as well. First, open and go through the Potion Shop door (Located next to the Bazaar, near the Death Mountain Trail entrance) and go passed the left end of the counter that a man with he crossing his arms (on the right end of the counter in the Master Quest version) once outside you should find yourself in a fenced off area, and standing on a ledge. From the ledge stand on the end corner next to the ladder You should just be in range of the blue vine-covered roof, Hookshot to the bottom edge of the blue vine-covered roof, talk to the man and he will give you the Piece of Heart. Alternatively, from the ledge behind the Potion Shop next to the Bazaar, press and hold the Z targert trigger button/right trigger button and make a precision side jump at just the right angle on the edge of the platform you are on, and if done correctly Link will grab hold of the edge of the fence near the blue vine-covered roof house. Climb on top of the fence and walk on the top of the fence to the blue vine-covered roof, climb up on the roof and the talk to the man sitting on the roof and he will give you a Piece of Heart for your troubles (Note this is the hardest method of getting this Piece of Heart, but makes it feel the most rewarding).
In Kakariko Village, run to the watch tower (Located next to the Potion Shop, near the Death Mountain Trail gate entrance). Once you get to the watch tower, and climb up the ladder all the way up to the top of the tower. After reaching the top, press and hold the Z target trigger button/right trigger button and jump sideways off of the right side of the watch tower and aim for the tall fence beside the blue vine-covered roof.(Note that this method is a lot easier than the last method, but it may take a few tries to climb the tall fence). Once you climb on the tall fence, walk across the fence tours blue vine-covered roof that the man is sitting down on, climb the rooftop, walk to the guy, and talk to him which he will then give you the Piece of Heart. |
| 12 | Kakariko Graveyard | Child |
 While in Kakariko Graveyard (Located behind the windmill in Kakariko Village) you will see a man that resembles Quasimodo. He will be following the stone-paved path while walking (Note he will only appear walking around in the Graveyard at 6 through 9 P.M.). Go up to him, talk to him, he will tell you his name and ask you if you would like him to dig in the spot that he is standing on for ten Rupees. The the way to get the Piece of Heart is to wait for him to walk on a soft spot of dirt where there is no stones, talk to him and accept his offer, he will then dig the spot and you will be awarded either; a Rupee from a scale of one to twenty, or by sheer luck, you will be give a Piece of Heart (See the minigame section for further details on how to better play this game). |
| 13 | Kakariko Graveyard | Either |
While in Kakariko Graveyard (Located behind the windmill in Kakariko Village) in the back row of the tombstone graves, move the 2nd grave from the right of the middle path (On the left in the Master Quest version) to expose an hole in front of the grave you just moved. Go into the hole. Inside the hole is a Redead. Take out your Ocarina and play the Sun's Song (Sun's Song can be obtained by playing Zelda's lullaby next to the biggest tombstone, in the back of the Graveyard) to reveal a chest in behind the Redead, containing a Piece of Heart. Walk to the platform were the Re-dead is standing frozen and then you can either kill the Re-dead or steal the Piece of Heart and run for your life. |
| 14 | Kakariko Graveyard | Adult |
Buy some Magic Beans from the guy that sells them in Zora's River. After buying the beans, go to Kakariko Graveyard and you will find a soft pile of soil near the ledge on the left (on the right in the Master Quest version). Go back to the Temple of Time (located near Hyrule Town Market), put back the Master Sword in its pedestal. Return to the Kakariko Graveyard as an adult, and go back to were you planted the Magic Beans where you will find the now giant, leaf-like platform in its place. Ride on the leaf platform all the way to the top of the edge and then jump off the platform to reveal a crate. Break the crate and a Piece of Heart will appear in front of you. Pick the Piece of Heart to add it to your collection.
Alternatively If you're too lazy or impatient to go from child to adult, you can use your Longshot or Hookshot to get to that crate, by going and standing on the 2nd grave next to the edge, aim your Longshot/Hookshot at the crate, shoot at the crate, and break it to reveal the Piece of Heart. |
| 15 | Kakariko Graveyard | Adult |
You will need to beat Dampé in another race (location of the race can be found by repeating the 10th Piece of Heart guide) and finish his challenge in under one minute (See the minigame section for further details on tips on how to better beat this race). |
| 16 | Kakariko Village | Either |
Go to the windmill at the back (north side) of Kakariko Village. Walk up the stairs of the windmill to the porch (located in front of the windmill). Then, climb the fence (located on the left side of the windmill's porch or on the right side in the Master Quest version), and with your Hookshot/Longshot, shoot at the roof of the Shooting Gallery Building (the side of the Building you would be looking at has a picture of a Bull Skull with 2 arrows crossing) on the left of the blue vine-covered roof that a man is sitting on. Next, shoot the Hookshot/Longshot at the top of Impa's roof (the house the Cucco lady stands at in the day time). Then, walk to your left side of Impa's roof (on the right side in the Master Quest version) and climb down the edge of the roof to land on the wooden awning. From the awning you will see a giant hole in the side of Impa's house, enter the hole, and when you appear inside of her house you will see Link trapped in a cage with a cow. The Piece of Heart is next to the cow. An alternative method as an adult is to walk to Impa's house (located near the Shooting Gallery Building) and stand in front of the two crates out front of the House, as close to the edge as you can. Hookshot to the roof of the Skulltula House (the red-roofed house next to the Shooting Gallery Building). Then get as close to the left corner as you can get (almost falling off). You should just barely be able to hookshot to the roof of Impa's house. Go to the side where the Cucco pen is and drop down onto the shade, then enter the hole from there (while inside keep in mind you can get milk from that cow by playing Epona's Song).
There are three options:
|
Death Mountain
edit| Heart Piece | Location | Age | Notes |
|---|---|---|---|
| 17 | Death Mountain Trail | Either |
As a child, plant a magic bean in the soil just outside the entrance to Dodongo's Cavern. Ride the platform up above the entrance to the Heart Piece. Alternatively, backflip over the fence near the Bomb Flower to land on the ledge--you have to backflip into the corner toward the Heart piece. You could also equip the hover boots and hover off the ledge right of the bomb flower. You'll take damage but it will heal once you got the heart piece. |
| 18 | Goron City | Child |
After opening Darunia's house, light the four torches around the pot at the bottom of Goron City. From the second level, throw a Bomb Flower into the top of the spinning pot to stop it. It will stop showing one of three faces, depending on what time you threw the bomb flower in. Alternatively you can wait until after you get bombs from Dodongo's Cavern and use them instead. If the pot stops on 'happy', a Heart Piece will fly out. |
| 19 | Death Mountain Crater | Adult |
As a child, warp in using the Bolero of Fire and plant a magic bean in the nearby soil. Ride the platform as an adult until it reaches the Heart Piece in the smoke. |
| 20 | Death Mountain Crater | Either |
Either ride the bean platform or climb down the wall to the Heart Piece. |
Zora's River
edit| Heart Piece | Location | Age | Notes |
|---|---|---|---|
| 21 | Zora's River | Either |
Pick up the Cucco at the Hyrule Field end and go to the small rise near the Water Tektites. Jump off it and float towards the platform with the Heart Piece. Alternatively, plant a magic bean in the soft soil next to the Bean Seller as a child. Return as an adult, ride the platform, and jump off at the right moment to obtain the Heart Piece. As an another alternative, you can just aim your boomerang and it will come to you. You also can use Cucco to get to ladder and climb up to other Cucco and use it to glide to heart piece. |
| 22 | Zora's River | Either |
Pick up the Cucco at the Hyrule Field end and carry it all the way to the waterfall. You will occasionally have to throw it onto a platform in order to climb up, and be sure not to throw the Cucco in the water. Once you have reached the waterfall, float over to the Heart Piece on the separated platform. This also works with the hover boots you get in Shadow temple. Alternatively once you have the boomerang, aim at the heart container and it will come to you, which is the easier way to get it. |
| 23 | Zora's River | Child |
Play the Song of Storms to the frogs on the log near the Water Tektites, and they'll give you a Heart Piece. |
| 24 | Zora's River | Child |
Complete the bug-catching game with the musical frogs to earn a Heart Piece. See the minigame section for further details. |
| 25 | Zora's Domain | Child |
Successfully light the torches near and behind the waterfall to make a chest appear which contains the Heart Piece. You can get a Deku Stick and run the flame from the throne room to the bottom of the stairs, then to just outside the shop, then to the torch in the water, and then behind the waterfall (without falling in the water). Alternatively, you can use Din's Fire behind the waterfall, then run a flame from behind the waterfall to the torch in the water, and then to outside the shop. Or do this in reverse order using Din's Fire on the torch outside the shop. |
Lake Hylia
edit| Heart Piece | Location | Age | Notes |
|---|---|---|---|
| 26 | Lake Hylia | Child |
Catch a nine-pound fish in the Fishing Pond as a child. See the minigame section for further details. |
| 27 | Lake Hylia | Either |
Dive to the bottom of the pool in the laboratory, then talk to the professor for a Heart Piece. This requires the Golden Scale, and will not work if you try using the Iron Boots. |
| 28 | Lake Hylia | Adult |
As a child, plant a magic bean in the soil outside the laboratory. Return as an adult and ride the platform up to the roof, and climb the observatory to find this Heart Piece. An alternative to this method would be to teach the scarecrow in the garden a song (as a child). This becomes the "Scarecrow's Song" (by making the song a simple repetition of two notes is best, nothing fancy or it will be hard to remember and play). As an adult, stand next to the laboratory and play the Scarecrow's Song to make a scarecrow appear on the roof. You can then use the Hookshot or long shot on him to pull yourself onto the roof and climb the ladder to the Heart Piece. (Note: Watch out for the Guay when going to climb ladder. You might need to kill it first with arrow or hookshot.) |
Zora's Fountain
edit| Heart Piece | Location | Age | Notes |
|---|---|---|---|
| 29 | Zora's Fountain | Adult |
On the farthest ice platform. You must jump onto several spinning ice platforms to reach it. |
| 30 | Zora's Fountain | Adult |
Once you've found the Iron Boots and Zora Tunic, sink to the bottom of the lake to find a Heart Piece. |
| 31 | Ice Cavern | Adult |
One of the side rooms has a blue fire fountain next to a block of red ice. Melt the ice for a heart piece. In Master Quest, this Heart Piece is located in the room holding the compass. There is a switch buried under the ice in the center of the room. Use a bomb to activate the switch, removing the block that was covering the Heart Piece. |
Gerudo Valley
edit| Heart Piece | Location | Age | Notes |
|---|---|---|---|
| 32 | Gerudo Valley | Either |
As a child, plant a magic bean in the soil on the stone platform along the cliff (you may need a Cucco to reach it). Ride the platform as an adult and jump through the waterfall to this Heart Piece or put on your Iron Boots and walk under the water up the river to find a ladder, or as child, grab the Cucco and jump off the cliff and head to the waterfall. Slowly lower into the middle of the waterfall and glide into the alcove. As a child, you can also grab the Cucco and glide down to the ledge where the Gerudo is with her cow. Now walk to the edge closest to the waterfall and jump into the water. Swim toward to waterfall and you will eventually swim behind the waterfall. There is a ladder that goes straight up to the heart piece. |
| 33 | Gerudo Valley | Either |
Along the cliff face is a crate containing a Heart Piece. Fall onto a ledge on the Hyrule Field side of the cliff, and use the Longshot to pull yourself to the crate. Alternatively as a child, you can grab the Cucco and glide towards the crate to reach it. |
| 34 | Gerudo Fortress | Adult |
On the roof of the middle building is a chest containing a Heart Piece. Use the Longshot to reach it. Alternatively, you can summon Pierre using the Scarecrow's Song and reach the platform using the Hookshot. |
| 35 | Gerudo Fortress | Adult |
The prize for scoring at least 1000 points in the Horseback Archery game is a Heart Piece. See the minigame section for further details. |
| 36 | Desert Colossus | Adult |
As a child, warp here using the Requiem of Spirit and plant a magic bean in the soil here. Return as an adult and ride the platform to the nearby Heart Piece. |
Fairy Fountains
Hidden throughout the land of Hyrule are six Great Fairy Fountains. The Great Fairies inside will give Link helpful power-ups and magic spells that increase both his offensive and defensive power.
In each Great Fairy Fountain, Link must stand on the golden Triforce emblem and play Zelda's Lullaby to awaken the Great Fairy and receive a new ability.
Death Mountain Peak
edit
Reward: Spin Attack
The first Great Fairy Fountain that you are likely to encounter is at the top of Death Mountain. After obtaining Bombs and the Hylian Shield, journey to the mountain's peak. Find the flagpole nearby Goron City and climb the adjacent slope. Use your Bombs to destroy any boulders blocking your way. Soon after the mountain will begin to erupt, and shower you with debris. Equip the Hylian Shield and crouch to protect yourself, continuing only when the showers momentarily pause. You will eventually reach a wall which you are able to climb, but before doing so, kill any Skulltulas clinging to it. Once you have climbed the wall, you should find an entrance to Death Mountain Crater on the right, and a conspicuous rock wall on the left, with a sign post and owl in between. Use a bomb to destroy the rock wall and gain entrance to the Great Fairy Fountain.
Here you learn the spin attack for your sword and get a magic meter for it.
Hyrule Castle Grounds
edit
Reward: Din's Fire
Enter the Hyrule Castle Grounds and climb the nearby vine to avoid the gate blocking your path. As you reach the gate, either go down the ladder into the guard room or jump off the gate roof. If you walk across you will be caught. From there walk up the road until the path branches. To your right should be a sign that says dead end and a boulder at the end of the path. Use your bombs to destroy the boulder and crawl through the passage to enter the Great Fairy Fountain.
This Great Fairy gives you the spell, Din's Fire, that will burn anything inside its attack radius. This spell is needed to complete the game. You need it to have access to the Shadow Temple.
Zora's Fountain
edit
Reward: Farore's Wind
Go to the portion of Zora's Domain where Jabu-Jabu rests. As you enter, go on the right side of Jabu. Swim to a small peninsula behind Jabu with bushes and a lone tree on it. There will be a boulder next to the back wall. Place a Bomb next to this wall and the wall will be destroyed, revealing yet another Great Fairy Fountain.
The reward here is Farore's Wind, a spell that quickly lets you warp in dungeons.
Death Mountain Crater
edit
Reward: Doubled Magic Meter
As an adult, enter Death Mountain Crater, preferably through Darunia's throne room. It is the fastest way and will allow you to reach the great fairy even if you don't have a red tunic. Once you enter take a right and walk across the bridge. Alongside the wall of the crater should be two boulders blocking a passage. Use the Megaton Hammer to destroy the boulders and the pathway to the Great Fairy's Fountain will be open.
This Great Fairy will double your magic meter, which will help in the future.
Desert Colossus
edit
Reward: Nayru's Love
When you first reach the Desert Colossus from the Haunted Wasteland, look towards the right wall for two nearby palm trees. Be careful however, because you will be bombarded with an endless supply of enemies while you are on the sand. Between the two trees is a suspicious wall that can be destroyed with a Bomb. Lay a bomb down and the wall will be blown open, allowing access to the Great Fairy Fountain.
You'll get the spell Nayru's Love, which will allow you to cast a barrier around you. It takes twice the magic of the previous spells, however. Also you will still flinch from attacks.
Ganon's Castle
editReward: Doubled Defense

After completing the temple-related trials in Ganon's Castle and receiving the Golden Gauntlets, return outside the castle and find the dead end near many boulders. At the dead end should be a huge black slab. Use the Golden Gauntlets to lift this slab, revealing the final Great Fairy Fountain. This is good to use against Ganondorf.
The final Great Fairy shall increase your defensive power. Your hearts will have borders appear around them, and damage you take will be cut in half.
Item Trading
In The Legend of Zelda: Ocarina of Time there is one main side quest: a long chain of item trading. Get item A from person A and then take it to person B to receive item B. It continues on until you get the legendary Biggoron Sword. The quest is livened up by interesting items and time limits to race to the next person. Whenever a time limit occurs, never use a warp song, because the timer will automatically hit 0.
The only requirements to get the sword is to have the Longshot and/or Epona (Epona makes the whole thing both easier and faster to complete); this means you can have the Biggoron Sword for every dungeon as an adult!. If you want to get the Hookshot first, you'll already be in Kakariko village and close to Anju (the first person in the series of trades). Also note that you will have to unfreeze King Zora: you'll need to venture a few rooms into the ice cavern to bottle up some Blue Flames, or buy some blue fire from the potion shop in either Kakariko Village (or if you're a child Hyrule Castle Town) or from Zora's Domain as a child. The entrance to the Death Mountain crater in Goron City will need to be open as well for a shortcut.
Pocket Egg
edit
Talk to Anju (the lady allergic to chickens) as an adult. She will give you the pocket egg to take care of. Wait a day for it to hatch or just play the Sun's Song a couple times until it hatches into a Pocket Cucco.
Pocket Cucco
editTake the Pocket Cucco to Talon (he should be sleeping inside a house in Kakariko Village). Pull out the Pocket Cucco and it will crow and wake him up. If you leave the building and return, Talon will have left and gone back to Lon Lon ranch. The Pocket Cucco will now be happy because it woke up an extremely lazy person. Take the Cucco back to Anju and she'll trade it for Cojiro, a rare blue chicken that was once her brother's, but now rarely crows.
Cojiro
edit
Take the Cojiro to the slumped over man in the lost woods (head left from the Kokiri Village entrance). He will trade the Cojiro for an Odd Mushroom. The Odd Mushroom will spoil, so hurry to Kakariko Village and give it to the old hag in the potion shop.
Odd Mushroom
edit
Take the Odd Mushroom to the old woman in the blue potion shop in Kakariko Village within three minutes. Don't warp! She will use it to create Odd Medicine.(Talk to her to get button for item to work.) If you don't make it, you'll end up back in the Lost Woods and have to trade Cojiro again. The best way to get back to Kakariko Village is through the entrance into the Goron City in the Lost Woods. From there, run down the mountain into the Village. Just past the gate into the Village, there's a house with a blue roof above you. You can get on top of that roof with the Hookshot if you position yourself just right. Go to the railing outside the windmill door and jump on it, but be careful not to fall off. From this position you should be able to position your Hookshot so it will catch on the roofing material on top of the blue house. When you're on top of the roof, jump down into the backyard and run up the stairs to the door of the house with the blue roof. Talk to the old woman inside to trade the mushroom.
- Alternate method 1
Follow the above instructions until you're back in Kakariko Village. As soon as you enter the town, look diagonally left - you'll see the red roof of a Potion Shop jutting out from the edge of the rocky wall (sadly, its not the one you're trying to get to). Get within range, pull out your Hookshot and aim it at the red portion of roof just above the point where the rock wall and the triangular wooden framing of the house intersect - as long as the red Hookshot reticule is visible while hovering over a red section of the roof you should be ok. You'll end up pulling yourself somewhat through the rock wall and onto the roof. From there, run diagonally left off the end of the roof and you will land on or near the stairs to the Potion Shop with the old hag. Go in and approach the counter, trigger the mushroom with "C," and she will reward you with the Odd Potion.
- Alternate method 2
If you planted a bean in tunnel to left as a child, you can use it as a shortcut to get out of the lost woods and to Hyrule Field and ride epona to the village.
- Easy method
Follow the above instructions to get to Kakariko village. Once you arrive, look at the potion shop on your left. If it is night time, play the song of suns, otherwise you can just run straight in through the door. There is a back door, which will let you out to the top of a ladder. Climb or jump down, then run to the top of the nearby flight of stairs. Enter the building and press "C" to trigger the mushroom to give it to the old lady.
Odd Medicine
edit- Warning!
In versions other than the Nintendo 3DS version, you must obtain the Deku Nut upgrade in the Forest Stage before getting the Poacher's Saw. Failure to do that will result in the Deku Nut upgrade being unobtainable.

Return to the place where you traded Cojiro. Fado, one of the Koriki girls, will be there instead. She says the man turned into a Stalfos. She demands that you give her the potion, but will give you the Poacher's Saw he left behind anyways.
Poacher's Saw
edit
Go to the carpenter's tent in Gerudo Valley and trade this to the boss of the carpenters (if you have not yet rescued the carpenters from the Gerudo Fortress, you will need Epona or the Longshot to cross the broken bridge). He has not seen it since he left it with his wife, so he'll be shocked. He'll give you the Broken Goron's Sword in return.
Broken Goron's Sword
edit
Take this up to the Biggoron on top of Death Mountain. When looking for Biggoron, don't be confused - he is massive and located outdoors (he is not the big goron rolling around in Goron City that you may have blown up and purchased the "knife" from). He will trade the broken sword for a prescription. His eyes have been blinded by a recent eruption on the mountain, and he can't work on the sword until you clear them up for him.
Prescription
edit
Take the prescription to King Zora (be sure to unfreeze him via a Blue Flame first). Remember that Zora's Domain has been frozen over by Ganondorf, so you won't be able to get there via the Lake Hylia shortcut. The king will take the prescription and tell you he doesn't have the medicine but does have the ingredients for it and give you a perishable Eyeball Frog . He will tell you to give it to the scientist in Lake Hylia. If you don't make it, you will automatically go back to Zora's domain and must make the Prescription transaction again.
Eyeball Frog
edit
You must give the frog to the professor in Lake Hylia in three minutes. DO NOT WARP THERE, your clock will go down to one second left if you warp. If you can get it to the professor in time, he'll mistake it for his dinner, then make you the World's Finest Eyedrops. However, there are no preservatives in it, so it will spoil. If you don't make it, you automatically go back to Zora's domain and must make the Prescription and the Eyeball Frog trades again.
The best way to do this is to exit Zora's Domain and dive down to the shortcut to enter the Lost Woods. Exit the Woods and then the Kokiri Forest into Hyrule Field. Call Epona if you have her. If you don't have Epona, use your map to aim Link in a straight line to Lake Hylia, then turn 180 degrees. Now hold down the Z button, and run backwards to the Lake (it's faster than running forward). When you reach Lake Hylia, go to the house and talk to the professor.
Eyedrops
edit- Tip
If you are almost out of time in Death Mountain Crater, then jump in the lava and you will be returned to the entrance with 1:10.

Now you must get back to the Biggoron within four minutes, again do not warp! The best route to take is to take Epona and ride her to the Kokiri Forest (if you don't have her, use the backward-walking method described above to get there faster). From the Kokiri Forest, enter the Lost Woods and enter the Goron City. Hop down to the lowest level of the City and enter Death Mountain Crater. Here, turn to the right and make your way to the ladder. Climb up and take the exit to the outside. Give Biggoron the drops. When you give him the Eyedrops, he uses them and gives you a Claim Check to claim the sword because it will take three days to fix the broken sword. Alternatively if you're going the normal way, if you already planted magic bean while you're a child, as an adult, you can use it to travel up to the volcanic path to where Biggoron is.
Claim Check
edit
Either sit around patiently for three days or play the Sun's Song six times and talk to Biggoron again. When you do, you get the Biggoron's Sword from him. After getting the Claim Check, it will remain in your inventory permanently.
Biggoron's Sword
edit
The strongest blade this game has to offer, the Biggoron's Sword itself is twice as powerful as the Master Sword. It takes two hands to wield just like the Giant's Knife, but this one doesn't break on you. You'll only run into problems when facing enemies that you need to use your shield against, like Octoroks.
The Happy Mask Shop
The Happy Mask Shop is located in Hyrule Castle Town Market, to the right of the path to the castle. It will not open until you have shown Zelda's Letter to the guard by the gate to Death Mountain Trail in Kakariko Village.
The shop itself does not sell masks; rather, it lends them to aspiring individuals for sale. If a mask is sold, you pay back the price of the mask but get to keep any extra rupees, and are granted access to a newer mask model to sell. You can borrow masks you have already sold again; however, you can sell each model of mask only once. Masks are event items and you can carry only one mask at a time. To see if someone is interested in purchasing a mask, talk to them while wearing it.
The Masks
editWearing masks while speaking to people can elicit different responses.

Keaton Mask - This popular mask is modeled after the wily keaton fox.
Sell it to the Hylian guard by the Death Mountain gate in Kakariko Village. Talking to Gorons and Zoras will result in a simple answer but talking to King Zora, Princess Ruto or Darunia will result in some slightly funny text. Children like it and will talk about how much they like it.
Adults might remember their childhood by seeing it. They might be confused or they might admire the mask.

Skull Mask - This mask will make you look like a monster.
Sell it to the Skull Kid in the Lost Woods that is on the tree-trunk (not the trunk where there are two Skull Kids). The mask also prevents Keese from attacking Link.

Spooky Mask - This scary mask is similar to a ReDead's face.
Sell it to the kid in the Kakariko Graveyard. If you talk to people while wearing this mask they will get scared. The mask will actually glow in the dark. The scientist at the Lakeside Laboratory will say that it was carved from wood taken from a coffin and Dampé will ask what kind of mask it is and why he is wearing it then. ReDeads have a mask similar to the spooky mask.

Bunny Hood - This mask will make you look like a bunny.
Sell it to the guy running around Lon Lon Ranch. He will then give you 500 rupees. When worn at night, Stalchildren will not appear in Hyrule Field.

Goron Mask - A mask that looks like a Goron.
King Zora will reminisce about his old friend Biggoron when you show this mask to him.

Zora Mask - A mask that looks like a Zora.
Princess Ruto will express her happiness that Link has became a Zora if he talks to her wearing the mask.

Gerudo Mask - A mask that looks like a Gerudo.
It makes people think that Link is a woman and Gerudo thieves get a bit annoyed. Darunia will say he hates Gerudos because Ganondorf sealed Dongodos Cavern. Nabooru says it looks a bit like her. King Zora says it gives him the chills. Ruto will say Link is a funny guy. Talon will say it reminds him of his wife. If Honey and Darling is spoken to, Darling will apologize and say he does not want to look at any woman except Honey. Saria will say it looks cool but frightening.

Mask of Truth - A mask that can obtain hints from Gossip Stones.
It was passed on by the Sheikah. One theory holds that it is one of 3 items (Lens of Truth, Mask of Truth and Stone of Agony) made by the Sheikah to give the holder untold power.
The Trading Sequence
edit- Bunny Hood Bonanza
The man who buys the bunny hood pays Rupees until your wallet is completely full, so you should buy some items, play some minigames, and get the largest wallet before selling him the Bunny Hood.
- Keaton Mask: This is the first mask you can borrow from the Happy Mask Shop. Take it to Kakariko Village and wear it while talking to the guard protecting the gate to Death Mountain. He will buy the ten rupee mask for fifteen rupees, and you will be able to borrow the Skull Mask.
- Skull Mask: After obtaining this mask, enter the Lost Woods from Kokiri Forest and go left. You must stand on the stump and play Saria's Song to befriend and receive a piece of heart from the Skull Kid before giving him the mask. Put on the mask, stand on the stump, and talk to the Skull Kid. He will only give you 10 rupees for the 20 rupee mask, but you will now be able to borrow the Spooky Mask. Note: This is also a good time to head to the Forest Stage detailed below.
- Spooky Mask: During the day, go to the Kakariko Graveyard and show the kid there the Spooky Mask. He will buy it at full price for thirty rupees.
- Bunny Hood: After borrowing the Bunny Hood and beating the Jabu-Jabu's Belly dungeon and have all three spiritual stones in your possession, there will be a man running laps around the outside of Lon Lon Ranch during the day. Follow him until he stops, then talk to him while wearing the Bunny Hood. He will give you all his money for the mask. This will finally grant you access to the Mask of Truth, Gerudo Mask, Goron Mask, and Zora Mask.
The Forest Stage
editAny time you have a new mask, drop by the Forest Stage. From the Kokiri Forest entrance, take a right, then take a left, then another left. You'll see a pool of water ahead. Take a left and one last left. Here you find a meadow with a couple of Business Scrubs. There's a tree at the back. There to the left of the tree is a group of butterflies hovering around the same general area. Walk around this area (to the right of the butterflies when facing towards the meadow from the entrance) until you fall through a hole. You've arrived at the Forest Stage. Note: you can acquire these at any time, and in any order.
Put on a mask and approach the front of the stage (the raised portion with the sign on it). Many scrubs will pop up and dance around you joyfully. Walk over to the larger, older Scrub on the right. He will reward you with something, depending on the mask that you are wearing.
Forest Stage Rewards
edit- Keaton Mask: Win Rupees. Occasionally they do not like the mask.
- Skull Mask: They increase your Deku Stick capacity. They are attracted to this mask.
- Spooky Mask: Win Rupees.
- Bunny Hood: They don't like it. Occasionally they will give you rupees.
- Goron Mask: They don't like it.
- Zora Mask: Win Rupees. Occasionally they do not like the mask.
- Mask of Truth: They increase your Deku Nut capacity. The older Deku scrub says that you have a "horrible face" and the younger scrubs duck into their holes if you walk near them.
- Gerudo Mask: Win Rupees. Occasionally they do not like the mask.
Before you collect the Poacher's Saw in Gerudo Valley, use the Mask of Truth at the Forest Stage. There is a glitch in versions of the game other than 3ds that stops the Deku upgrade after getting the Poacher's Saw.
Gold Skulltulas
| A reader requests that more images be included in this page or book. Images are useful for presentation and explanation. Free images can be found at Wikimedia Commons and used here at Wikibooks. If you have created relevant images, you should consider donating them. Remove this template when suitable images have been added. Please continue to edit this book and add images, even after this message has been removed. Discuss this books particular needs on the discussion page. For questions, go to WB:PROJECTS. |

Many years ago, a wealthy family in Kakariko Village was cursed for their greed and were thus turned into Skulltula monsters. In order to break the curse, Link must destroy all one hundred of the Gold Skulltulas scattered about Hyrule and collect the Gold Skulltula Tokens that they drop as proof of his deed. When a certain number of Gold Skulltulas have been destroyed, a family member will return to human form and reward Link for his trouble.
Quest Rewards
editAs you defeat Gold Skulltulas, each family member released from the curse will reward Link. These rewards are:
| # Defeated | Reward |
|---|---|
| 10 | Adult's Wallet: Holds up to 200 rupees. |
| 20 | Secrets|Stone of Agony: Rumbles when you run over secret holes. In the 3DS version, this is replaced by the {{im/oot|Secrets|Shard of Agony, which chimes and appears in the top-left corner of the top screen when near secret locations. |
| 30 | Giant's Wallet: Holds up to 500 rupees. |
| 40 | Bombchu (10): A rare type of bomb that runs along the ground, and crawls up walls and ceilings. |
| 50 | Piece of Heart: One-fourth of a Heart Container. |
| 100 | Huge Rupee: A huge, golden rupee worth 200 rupees. Each time you visit the man, he will give you another one, so effectively it is a limitless supply of rupees. |
If you are playing on the Wii's Virtual Console, the {{im/oot|Secrets|Stone of Agony will be totally useless. Anyone playing this version can safely ignore this feature. The GameCube version will ask you if you want to use the rumble feature (unless you're playing with the Wavebird, which renders this item useless). In the 3DS version, the Stone of Agony is replaced by the Shard of Agony, which chimes and appears in the top-left corner of the top screen when near secret locations.
Hunting Tips
editGold Skulltulas are scattered throughout the game world and can be found as both young and adult Link. Most often, Gold Skulltulas can be found at night, either clinging to walls or hiding in soft patches of soil. Here are some tips for hunting them:
Hunt at Night
editMany Gold Skulltulas don't appear during the daytime. You should play the Sun's Song on your ocarina to change the time of day before beginning your search.
Use your Ears
editGold Skulltulas make a distinct "shuffling" sound every few seconds when they move around. The sound can alert you to the presence of a nearby Skulltula, although it is difficult to use to pinpoint the creature's exact location.
Check your Map
editAfter you have defeated all the Gold Skulltulas in an area, a Gold Skulltula icon will appear next to the name of your current location on the map screen. If you don't see it, then there are still more Gold Skulltulas to find in the area.
- Note: The world map DOES NOT cover Gold Skulltulas in Temples, Dungeons, the Kakariko Well or the Ice Cavern. To check if you have collected all tokens in those areas, you must enter that specific area and check the map of that place.
Check Common Hiding Spots
edit- Nintendo 64
After releasing the captured bugs, quickly press the C Down button again. This will capture one of the three bugs you just released so you can re-use them later.
A Gold Skulltula resides in every patch of soft soil in Hyrule except for the one next to the bean selling man in Zora's River. To evict the Skulltula from its burrow, empty a Bottle of Bugs nearby.
To capture bugs, look for rocks on the ground as they have the highest rate of causing bugs to appear. Pick up these rocks to release the bugs underneath and then quickly capture one with a bottle. You can also find bugs by cutting grass. Bugs are always found under the same rocks and grass and are not random. You can also buy them from potion shop for 50 rupees.
Gold Skulltulas can also be found inside crates and trees. Roll into either one to dislodge a Skulltula.
If a Skulltula is on a wall or far away, Gold Skulltulas can only be reached with certain items, namely the Boomerang and Hookshot/Longshot. When hunting, be sure you have both items.
Gold Skulltula Locations
editThe following is a complete list of the locations of the 100 Gold Skulltula|display=Gold Skulltulas scattered about Hyrule.
Kokiri Forest
edit| Gold Skulltula | Time | Age | Notes |
|---|---|---|---|
| 1 | Nighttime | Child |
On the back of the Know-It-All Brothers' house. Use your sword to kill it and then backflip or jump attack into the token. |
| 2 | Any | Child |
Next to the Kokiri Shop is a small patch of soil. Drop a Bottle of Bugs on top of it to release a Skulltula. |
| 3 | Nighttime | Adult |
On the top of the House of Twins, use the Hookshot to kill a Skulltula and claim its token. |
The Lost Woods
edit| Gold Skulltula | Time | Age | Notes |
|---|---|---|---|
| 4 | Any | Child |
Take two left turns to the area with the bridge leaving Kokiri Forest. Release a Bottle of Bugs on the soil there to find a Gold Skulltula. |
| 5 | Any | Child |
Turn right, left, right, left, left to find another patch of soil in a room with a lone tree and two Business Scrubs. Release a Bottle of Bugs on the soil there to find a Gold Skulltula. |
| 6 | Nighttime | Adult |
As a child, plant a Magic Beans at the same soil patch where you released the bottled bug to find the fifth Gold Skulltula. As an adult, ride the plant to the nearby ledge and kill the Gold Skulltula. |
Sacred Forest Meadow
edit| Gold Skulltula | Time | Age | Notes |
|---|---|---|---|
| 7 | Nighttime | Adult |
Climb the lone ladder at the end of the maze, turn to your left, and look on the wall right in front of you for a Skulltula. You need the Hookshot. |
Inside the Great Deku Tree
edit| Gold Skulltula | Time | Age | Notes |
|---|---|---|---|
| 8 | Any | Child |
In the room with the Compass, activate the rising platforms and then jump over to the left alcove. |
| 9 | Any | Child |
In the first basement is a Skulltula clinging to the vines that allow you to return to the first floor. |
| 10 | Any | Child |
In the first basement, a Skulltula is climbing on a nearby grate. Use the Fairy Slingshot to kill it, or slash it, then leap from the nearby ledge to claim the token. |
| 11 | Any | Child |
Return to the Deku Tree after you receive Bomb|display=Bombs and the Boomerang. In the basement room with three Gohma Larvae, burn the web and destroy a bombable wall. In the next room is a Skulltula. Use your boomerang to get the token. |
Hyrule Field
edit| Gold Skulltula | Time | Age | Notes |
|---|---|---|---|
| 12 | Any | Both |
At the corner between Hyrule Castle and Kakariko Village is a single tree. Place a Bomb at its base to reveal a secret grotto. Inside, destroy the Skulltula on the wall and use your Boomerang or Hookshot to retrieve the token. |
| 13 | Any | Both |
Near the entrance to Gerudo Valley is a circle of rocks. Destroy the boulder in the center and place a Bomb there to reveal a grotto. Use either Din's Fire or a Fire Arrows to burn down the webs and find a Skulltula. You will need your Boomerang or Hookshot to grab the token after killing the Skulltula. |
Hyrule Castle Town Market
edit| Gold Skulltula | Time | Age | Notes |
|---|---|---|---|
| 14 | Any | Child |
In the Market, enter the guardhouse next to the drawbridge. Roll into the second crate right of the soldier to find a Skulltula. |
Hyrule Castle
edit| Gold Skulltula | Time | Age | Notes |
|---|---|---|---|
| 15 | Any | Child |
Enter the main Hyrule Castle area from the Market. Ahead is a lone tree with three rocks at its base. Roll into it to dislodge a Skulltula. |
| 16 | Any | Child |
Enter the main Hyrule Castle area and make your way to the small moat. In the nearby corner is a lone tree. Stand beneath it and play the Song of Storms to reveal a grotto. Use Bomb|display=Bombs to destroy the wall on your left (slightly behind you) until you find a Skulltula. Note: This Gold Skulltula location can be abused to get an infinite number of Gold Skulltula Tokens. See Glitches for more details. |
Ganon's Castle (Exterior)
edit| Gold Skulltula | Time | Age | Notes |
|---|---|---|---|
| 17 | Any | Adult |
Look to the right of Ganon's Castle and behind the remains of a ruined gate to find a Gold Skulltula. You will need the Hookshot |
Lon Lon Ranch
edit| Gold Skulltula | Time | Age | Notes |
|---|---|---|---|
| 18 | Any | Child |
Next to the ranch house is a lone tree. Roll into it to dislodge a Skulltula. |
| 19 | Nighttime | Child |
On the far side of the horse corral is a feeding shelter for the horses. Look on the back of it to find a Skulltula. |
| 20 | Nighttime | Child |
A Skulltula resides on an upper window of the ranch house. Kill it and retrieve its token with your Boomerang. |
| 21 | Nighttime | Child |
To the right of the silo at the back of the ranch is a Skulltula high on the fence. Use your Boomerang to retrieve the token. |
Kakariko Village
edit| Gold Skulltula | Time | Age | Notes |
|---|---|---|---|
| 22 | Nighttime | Child |
The large tree near the entrance to Kakariko has a Skulltula in its branches. Roll into it to dislodge it. |
| 23 | Nighttime | Child |
You will find a Skulltula lurking on the side of the House of Skulltula. |
| 24 | Nighttime | Child |
Look on the center pile of bricks of the building currently under construction to spot another Skulltula. |
| 25 | Nighttime | Child |
The house to the left of the gate leading to Death Mountain has a Skulltula on its side. |
| 26 | Nighttime | Child |
Use your Fairy Slingshot or Bombchu to kill a Skulltula on the ladder of the tall lookout tower, then climb up to grab the token. |
| 27 | Nighttime | Adult |
This Skulltula is on the roof of Impa's house. To get there, stand in front of the door of that house and Hookshot over to the roof of the House of Skulltula. Then, Hookshot onto the roof of Impa's house. This is easier with the Longshot, but it can be done without. As a child, at the summit of Death Mountain is Kaepora Gaebora. Talk to him, and he will fly you back to Kakariko, placing you atop Impa's house. (Cannot be obtained as a child in the US version.) |
Graveyard
edit| Gold Skulltula | Time | Age | Notes |
|---|---|---|---|
| 28 | Nighttime | Child |
In the Kakariko Graveyard, look on the right wall near the Royal Family's Tomb. Kill the Skulltula there and retrieve the token with the Boomerang. |
| 29 | Any | Child |
On the left side of the Graveyard is another soft soil patch. Use a Bottle of Bugs to evict the Skulltula from its burrow. |
Death Mountain Trail
edit| Gold Skulltula | Time | Age | Notes |
|---|---|---|---|
| 30 | Any | Child |
After clearing the boulder blocking the entrance to Dodongo Cavern, you will see a patch of soft soil. Use a Bottle of Bugs to find a Skulltula. |
| 31 | Any | Both |
Before you reach Dodongo Cavern is a suspicious wall on the right side of the trail. Destroy it with a Bomb and kill the Skulltula inside, then climb the wall to claim the token. |
| 32 | Nighttime | Adult |
Go to the spot where you used to a Bomb Flower to unblock Dodongo Cavern, and look for a red rock. Destroy it with the Megaton Hammer to uncover a Skulltula. |
| 33 | Nighttime | Adult |
Go to the climbable wall near the summit of Death Mountain. At the base of the wall is another red rock concealing a Skulltula. Destroy it with the Megaton Hammer |
Goron City
edit| Gold Skulltula | Time | Age | Notes |
|---|---|---|---|
| 34 | Any | Child |
On the top floor of Goron City is a passage that leads to a room full of rocks. Use Bomb|display=Bombs to make your way to the far end, where you will find two treasure chests containing 50 rupees a piece, a Gossip Stone, and a crate. Roll into the crate to find a Skulltula. |
| 35 | Nighttime | Adult |
This Skulltula resides on the back of the pedestal in the center of Goron City where the Spiritual Stone of Fire once rested. Stand on one of the nearby ropes so that you can see the Skulltula and Hookshot it. Be careful not to hit the wooden platform instead. |
Death Mountain Crater
edit| Gold Skulltula | Time | Age | Notes |
|---|---|---|---|
| 36 | Any | Child |
After beating Dodongo's Cavern, make your way to the summit of Death Mountain. Enter the crater by the entrance at the summit and roll into the nearby crate to find a Skulltula. |
| 37 | Any | Child |
After learning the Bolero of Fire as an adult, first return to the past and then warp to Death Mountain Crater as young Link using the Bolero of Fire. Drop a Bottle of Bugs on the nearby patch soil to force out a Skulltula. |
Dodongo's Cavern
edit| Gold Skulltula | Time | Age | Notes | ||||
|---|---|---|---|---|---|---|---|
| 38 | Any | Both |
From the main entrance, enter the room to the southeast, a jagged corridor with Baby Dodongos. Use Bomb|display=Bombs to destroy the weak wall in the corridor (or lure a Baby Dodongo there and kill it). In the next room is a Skulltula, protected by Keese. | ||||
| 39 | Any | Adult | After putting the stairs back down in the north west room go up and around the stairs like normal but when you look back there will be a hole. Use the longshot or the bow to kill it and take its token. | ||||
| 40 | Any | Both |
After entering the giant Dodongo skull, turn right to enter a room with several low walls. Destroy the fake wall at the far end of this room with a Bomb to find a Skulltula behind an Armos. | ||||
| 41 | Any | Both |
After activating the pillar elevator, exit and then reenter the dungeon and ride it to the second floor. Make your way around the second floor until you reach the room with the staircase, which should now be in its original position. Take the path to the left (west) and you'll find a climbable wall on the side of the staircase allowing you to reach the alcove with the Skulltula. You will need the Boomerang to reach the token. Alternatively, return as an adult and simply use the Longshot to obtain the token. | ||||
| 42 | Any | Adult |
Enter this dungeon as an adult, after having learned the Scarecrow's Song. Go to the corridor before your first Lizalfos battle as a child. There is an alcove here that will attract Navi when you look at it. Play the Scarecrow's Song to make Pierre appear, and then Hookshot him to find the Skulltula. {{- {{sidebar |
float=right | width=250px | title=Nintendo 3DS | display=Bombs and take a few steps towards the statue, using L-targeting to back away in a straight line. A well timed back flip will put you on the statue, where you can jump onto the raised ledge, kill the skulltula, and get the token.
Note: It is possible to obtain this token as a child by using the above statue strategy, although this method is somewhat difficult to pull off. You must push one of the statues to the alcove, but then push it all the way over to wall opposite the alcove. You can then backflip onto the statue and use some well-placed Fairy Slingshot shots to just barely clear the ledge and hit the Skulltula. After the token appears, you can grab the token with an aimed Boomerang throw, as it will be too far away to Z-target. |
Zora's River
edit| Gold Skulltula | Time | Age | Notes |
|---|---|---|---|
| 43 | Any | Child |
At the start of the river, where you met the owl and have to blow up the boulders in the way, roll into the tree at the left to knock out a Skulltula. Kill it with your sword and grab the token. |
| 44 | Nighttime | Child |
At the top of the river, drop down into the shallow water and walk to the ladder. The Skulltula is on the ladder. Kill it with the Fairy Slingshot or Boomerang, then climb up to collect the token. |
| 45 | Nighttime | Adult |
As you enter Zora's River, venture up to where the bean seller used to be and cross the river. Walk down the pathway about 60 feet, and then look high up on the south wall. Take the Skulltula down with your Longshot (Hookshot isn't long enough). Alternatively, you can use the Hookshot to retrieve the Skulltula if you planted the Magic Beans in the hole next to where the bean seller used to be as a child. Ride the platform and jump off once you reach the tall middle area or you can go down the river and climb the ladder in the narrow pathway to get to the tall middle area, and the Skulltula will be within reach. |
| 46 | Nighttime | Adult |
As you approach the curve that leads to the entrance to Zora's Domain, stand on the final "bridge" and face the entrance. Turn around and you'll see the Gold Skulltula high up on the wall. Use your Hookshot to take it down. |
Zora's Domain
edit| Gold Skulltula | Time | Age | Notes |
|---|---|---|---|
| 47 | Nighttime | Adult |
Walk up to where King Zora's throne is, and then take a left and go down the hallway where the Zora Diving Game was. Approach the ledge, and look left. Use your Hookshot to bring down this Gold Skulltula. |
Zora's Fountain
edit| Gold Skulltula | Time | Age | Notes |
|---|---|---|---|
| 48 | Any | Child |
Roll into the tree near the Great Fairy's Fountain for another Gold Skulltula. |
| 49 | Nighttime | Child |
Run up on the giant log that is to the right of Lord Jabu-Jabu. You will see a Gold Skulltula on the wall. Take the token with your Boomerang. |
| 50 | Nighttime | Adult |
Lift up the silver boulder near the entrance to the Great Fairy's Fountain with your Silver Gauntlets File:OoT Items Silver Gauntlets.png then use a Bomb. Drop down into this hole, and be wary of four invisible Skulltula that hang from the ceiling. Avoid them, or use your Lens of Truth and shoot them down. Climb up the rough wall behind them. On your right is a Big Skulltula, and on your left is the Gold Skulltula. Use your Longshot to obtain the token. |
Inside Jabu-Jabu's Belly
edit| Gold Skulltula | Time | Age | Notes |
|---|---|---|---|
| 51 | Any | Child |
After you meet Princess Ruto and she allows you to carry her, venture into the door on her left. Carry her into the water in the center of the room, and throw her onto the ledge opposite from which you came. Immediately take out your Fairy Slingshot and shoot the Gold Skulltula that is on vine covered wall to your right. To obtain the token, raise the water level, quickly swim towards the vines, and climb up. |
| 52 | Any | Child |
This Gold Skulltula is on the wall near the entrance to Bigocto's Chamber. (Right after you drop through the hole where the Green Tentacle used to be). This particular Skulltula is closer to Bigocto's door than the other. Use your Boomerang to obtain the token. |
| 53 | Any | Child |
This Gold Skulltula is on the wall near the entrance to Bigocto's Chamber. (Right after you drop through the hole where the Green Tentacle used to be). This particular Skulltula is further away from Bigocto's door than the other one. Use your Boomerang to obtain the token. |
| 54 | Any | Child |
As you enter the chamber right before you face Barinade, walk forwards until you hit the wall, and then turn to your right and slightly behind you. Up this vine-covered wall is a Gold Skulltula. Take it out with your Fairy Slingshot or Boomerang, and climb up to receive the token. |
Lake Hylia
edit| Gold Skulltula | Time | Age | Notes |
|---|---|---|---|
| 55 | Any | Child |
Drop a Bottle of Bugs into the patch of soft soil next to the Lakeside Laboratory to unearth a Gold Skulltula. |
| 56 | Nighttime | Child |
Walk behind the Lakeside Laboratory and onto the bridge. As soon as you get on the bridge, look left at the Lakeside Laboratory wall to spot a Gold Skulltula. Use your Boomerang to claim the token. |
| 57 | Nighttime | Child |
On the secluded island in the middle of Lake Hylia, with the two pillars (where Link acquires the Fire Arrows as an adult), lies a Gold Skulltula on one of the columns. Walk up and take it. |
| 58 | Nighttime | Adult |
Use your Longshot to pull yourself to the top of the dead tree on the island with the warp pad. Up here lies a Gold Skulltula. Obtain the token by using your Longshot. |
| 59 | Nighttime | Adult |
Inside the Lake Hylia lab is a pool the alchemist draws water from for experiments. At the bottom of the pool is a crate. Sink down into the pool with the {{im/oot|Equipment|Iron Boots and do a rolling attack to break the crate to expose the Gold Skultula. |
Forest Temple
edit| Gold Skulltula | Time | Age | Notes |
|---|---|---|---|
| 60 | Any | Adult |
At the entrance of the Forest Temple, look for climbable vines to the right. Climb up and you should see the Skulltula. Kill it with the Hookshot. |
| 61 | Any | Adult |
At the north door in the main room face right, on the wall is a Skulltula. Kill it with the Hookshot. |
| 62 | Any | Adult |
In the east courtyard, there is a Skulltula on one of the walls. Find a chest up on a ledge near the well. ling onto with the Hookshot and you'll see a Skulltula clinging to the wall. Kill it with your Hookshot. |
| 63 | Any | Adult |
In the west courtyard is a Skulltula on a high wall. Once you get up on the ledge with the Big Deku Baba, hop onto the pillar with two hearts to find it. Kill it with the Hookshot. You may also Longshot from the bottom of the wall. |
| 64 | Any | Adult | Before The boss In the room with the rotating walls, right after you light all torches and go down into the floor, adust the walls and you'll find a room with the Skulltula on the wall. Kill it and get its token with the Hookshot. |
Fire Temple
edit| Gold Skulltula | Time | Age | Notes |
|---|---|---|---|
| 65 | Any | Adult |
In the first room you unlock with the long bridge, go over to your left and you should find a door with a Time Block above it. Play the Song of Time to move the block down to you. Climb up to find a door. Inside are Floor Tiles, a Like-Like, and a Gold Skulltula. |
| 66 | Any | Adult |
Within the boulder maze is a bombable wall. Hit it and it will sound strange. Bomb it to reveal another Gold Skulltula. |
| 67 | Any | Adult |
Once you reach the second floor of the boulder maze, you'll see a platform from above in a corner. Go to the platform near it by the door you used to get up here and play the Scarecrow's Song. Hookshot onto Pierre when he appears. Then, look to your right and you'll see an elevator. Hookshot onto it and it will bring you to the top floor. Go through the door. Inside this room is a Skulltula. |
| 68 | Any | Adult |
Climb up above where the last Gold Skullula was to find another door. Go into this next room and on the ledge you'll see another Gold Skulltula on the wall. Kill it with your Hookshot. |
| 69 | Any | Adult |
Once you enter the room after the one with all the Fire Keese and Torch Slugs, you'll find more Floor Tiles, another Like-Like, and a Gold Skulltula. |
Ice Cavern
edit| Gold Skulltula | Time | Age | Notes |
|---|---|---|---|
| 70 | Any | Adult |
In the room where you find the Compass, this Gold Skulltula hangs in a small alcove on the wall. Use the Hookshot to obtain the token. |
| 71 | Any | Adult |
There is a Gold Skulltula behind some icicles in the room where you collect Silver Rupees. |
| 72 | Any | Adult |
In the room with the movable ice blocks, this Skulltula is on a nearby wall. Use the Hookshot to obtain the token. |
Water Temple
edit| Gold Skulltula | Time | Age | Notes |
|---|---|---|---|
| 73 | Any | Adult |
Drain all the water in the temple and head south into a corridor. Once you reach the end of the corridor, use the Spin Attack to hit the crystal switch. Take out the Skulltula on the other side. |
| 74 | Any | Adult |
After dropping down into the underground river, hop into the water (with the {{im/oot|Equipment|Iron Boots on), and look at the left wall for a Skulltula. Use the Longshot to collect the token. |
| 75 | Any | Adult |
Go inside the pillar at the center of the temple, then climb up to the second floor. A Gold Skulltula is on the wall that can be killed with the Longshot. |
| 76 | Any | Adult |
On the top floor is a room with moving platforms. Look to the right to find a Gold Skulltula. |
| 77 | Any | Adult |
On the bottom floor. Just before you find the Boss Key, there will be a corridor with rolling rocks. At the source of one of the rocks is a Skulltula on the wall that can be killed with the Longshot. |
Bottom of the Well
edit| Gold Skulltula | Time | Age | Notes |
|---|---|---|---|
| 78 | Any | Child |
From the large room in the center of the dungeon, take the northeast door. Make your way to a room with a Like-Like and a Gold Skulltula on the wall. Use the Boomerang to get the token. |
| 79 | Any | Child |
Find a small key and use the Lens of Truth to unlock the left room in the center area, where a Gold Skulltula is crawling on the wall. Use the Boomerang to get the token. |
| 80 | Any | Child |
Find a small key and use Lens of Truth to unlock the right room in the center area. Use the Lens of Truth to find the safe path around the outside of the pit, then kill the Gold Skulltula and snatch the token with the Boomerang. |
Shadow Temple
edit| Gold Skulltula | Time | Age | Notes |
|---|---|---|---|
| 81 | Any | Adult |
One is on the wall in the room with invisible spinning blades after you fight a Stalfos. |
| 82 | Any | Adult |
In the room with the falling spikes, push the block to stop the spikes, then look in the cage to your left. |
| 83 | Any | Adult |
The room with the large skull that's top is on fire has a Gold Skulltula on the wall behind that skull. |
| 84 | Any | Adult |
Stand on the platform next to the boat and play the Scarecrow's Song. Longshot the scarecrow and destroy the Gold Skulltula that is on the wall with your Longshot. If you do not have the Scarecrow's Song, you can stand on the boat before you activate it and get a straight look at the Skulltula. You can hit it with your Longshot from there. |
| 85 | Any | Adult |
After riding the boat, there will be a room with three rotating skulls. There is a Gold Skulltula behind one of them. |
Gerudo Valley
edit| Gold Skulltula | Time | Age | Notes |
|---|---|---|---|
| 86 | Nighttime | Child |
As you enter Gerudo Valley from Hyrule Field, follow the path up to the small wooden bridge near the little waterfall. At the mouth of the waterfall is a Gold Skulltula. Use your Boomerang to obtain the token. |
| 87 | Any | Child |
At the valley's edge, grab the cucco to the left of the large bridge, and drop down into the valley below. Fly towards the wall in front of you, and land near the Gerudo and her cow. Take out a Bottle of Bugs, and evict a Gold Skulltula from its patch of soft soil next to the cow. |
| 88 | Nighttime | Adult |
Behind the carpenters tent lies a Gold Skulltula on the rock wall. Use your Hookshot or Longshot to obtain the token. |
| 89 | Nighttime | Adult |
On the underside of the rock arch in front of the Carpenter's Tent lies another Gold Skulltula. Claim the token with your Hookshot or Longshot. |
Gerudo's Fortress
edit| Gold Skulltula | Time | Age | Notes |
|---|---|---|---|
| 90 | Nighttime | Adult |
Go to the Horseback Archery Range. As you enter, take a left and walk all the way down to the target at the end. A Gold Skulltula is scuttling about on the front of the target. Use your Hookshot or Longshot to claim the token. |
| 91 | Nighttime | Adult |
Go to top of Gerudo's Fortress. A gap lies between you and a chest containing a heart piece. On the rock wall inside of this gap lies a Gold Skulltula. Use your Hookshot or Longshot to claim the token. Or simply jump. |
Haunted Wasteland
edit| Gold Skulltula | Time | Age | Notes |
|---|---|---|---|
| 92 | Any | Adult |
Cross the River of Sand with the Longshot and follow the flags up to the stone building where the Ghost Guide waits. Drop down into the basement of the building. On the wall in front of you lies a Gold Skulltula. |
Desert Colossus
edit| Gold Skulltula | Time | Age | Notes |
|---|---|---|---|
| 93 | Any | Child |
Acquire a Bottle of Bugs. Warp to the Desert Colossus with the song of Requiem of Spirit and run to the entrance of the Spirit Temple from the warp pad. Find the soft soil insert to the left of the entrance of the Spirit Temple and pour bugs on it. A Gold Skulltula will pop out of cover. Dispatch it with your sword to collect a token. |
| 94 | Nighttime | Adult |
You must first warp to the Desert Colossus using the Requiem of Spirit. Then move quickly to the flat rock near the dried-up Fairy Fountain pool from the warp pad. On back of the crown of the palm tree near the dried-up pool lurks a Gold Skulltula. Finish it off with Longshot in between fighting off attacking enemies. |
| 95 | Nighttime | Adult |
As a child, warp to the Desert Colossus with the Requiem of Spirit and go to the soft soil near the entrance of the Spirit Temple. Plant Magic Beans. Alternatively, you may Longshot from the back side of the rock. |
Spirit Temple
edit| Gold Skulltula | Time | Age | Notes |
|---|---|---|---|
| 96 | Any | Child |
Go through the small hole at the beginning, and go through the door on the right. There is a Gold Skulltula on the fence in this room. Use the Boomerang to collect the token. |
| 97 | Any | Both |
After you battle some Lizalfos, there is a climbable wall that leads to the second floor. When you reach the top, turn around to find a Gold Skulltula. Use the Boomerang to collect the token. Alternatively, you can return here as an adult and use the Hookshot to grab the token. |
| 98 | Any | Both |
In the room leading to the first Iron Knuckle battle is a Gold Skulltula on the wall. Use the Boomerang to collect the token. Alternatively, you can return here as an adult and use the Hookshot to grab the token. |
| 99 | Any | Adult |
In the room with the Silver Rupees and boulders, play the Song of Time near the blue block to make a Gold Skulltula appear. |
| 100 | Any | Adult |
Play the Scarecrow's Song at the top of the staircase (the one you went down as a kid) in the statue room. Longshot onto the scarecrow and kill the Gold Skulltula beside him with the Longshot. (This is the official way to obtain it, but in reality, you can see the Skulltula really clearly from the top of the stairs anyway. You can easily Longshot it right from there.) |
Minigames
Through his quest, Link will have the opportunity to participate in a number of minigames. Although none of them are mandatory to complete, they often have rewards that are well worth obtaining. Many minigames can be completed multiple times, but after each special prize is obtained, the reward will usually be rupees. Detailed strategies and relevant maps will be provided for some of the more complex minigames.
Fishing
editThe fishing pond is located at Lake Hylia and can be accessed as both a child and an adult after the lake is filled. You can also use a Magic Bean or play the Scarecrow's Song to get up there if you have a Hookshot. It costs 20 rupees to rent a fishing rod, for an unlimited amount of time.
After renting a fishing rod, you can Z-Target a fish and then cast your line with the B button. Press the A button to brake the line while it is being cast. When the lure drops into the water, wiggle it with either the Control Stick or the B button. Reel in your lure with the A button, and hold down the button along with the R button to reel it in faster. If you feel a hit, press the A button and the Control Stick to set the hook, then use the A and R buttons to reel it in. Tilt the Control Stick left or right to tilt the fishing rod in the corresponding direction. and hopefully pull the fish closer to you. After you cast, you can change your view with the Z button. If you have a Rumble Pak or Rumble Feature on the GameCube, you can feel the vibrations of a fish on your hook.
The biggest fish ever caught at the pond (by Link) is displayed in a fishtank on the counter. You can keep only one fish at a time. If you caught a fish smaller than your largest catch, throw it back. If you caught a larger fish, take it to the man at the counter to receive your reward. If you catch a fish weighing over 7 pounds as a child (over 9 pounds in OOT v1.0 US) or 14 pounds as an adult, you will receive a Piece of Heart and the Golden Scale, respectively.
Fishing Tips
editThe best time to fish is right before the sun rises or sets; simply play the Sun's Song before entering the pond. There are two optimal fishing spots: near the small stream and on the log in the pond. The largest fish can usually be found near this log or near the group of three water reeds. Try not to attract small fish, as they will scare the bigger fish away if they bite.
To quickly and easily reel a fish in, turn the Control Stick right or left when the fish turns in the corresponding direction. This should surprise the fish. Once the fish gets so close that you can see Link, reel him in normally but hold the Control Stick either left or right to apply tension to the line. If you overdo this, however, the fish might get away.
It is sometimes helpful to equip the Zora Tunic and Iron Boots to go underwater to find big fish. When near the log, after you cast, reel in until the fish starts to follow the bobber. Then tap the A button repeatedly until it bites. There's a good chance that it will work every time.
The Sinking Lure
editAt any time as a child or adult after claiming prizes, it is possible to find the secret, illegal sinking lure somewhere in the pond. It is most commonly found in the grass along the wall of the pond, but is sometimes hidden by the rocks near the stream or on the log in the pond. With the sinking lure, it is much easier to catch any fish, including the mysterious Hylian Loach.
Please note that the fisherman will not let you claim any prizes if you use the sinking lure because it is against the pond rules, and any fish displayed in the fishtank caught with the sinking lure will include the disclaimer, "With illegal sinking lure." After finding the sinking lure, however, if you talk to the fisherman he will eventually make the sinking lure legal for you to use.
The Hylian Loach
edit
The Hylian Loach is a long, eel-like fish that appears very rarely in the fishing pond. The loach usually weighs about 35 pounds as adult Link and about 16 pounds as young Link. If you catch it, the fisherman will reward you with a purple rupee (50 rupees), but will not keep it in his fishtank because the loach is an endangered species.
The loach primarily resides on the bottom of the pond, and is thus very hard to catch. Every few minutes, the loach will come up for air for a few seconds. When it reaches the top of the water, it makes a sort of "thap" sound. This is the only time that you will be able to Z/L-Target the loach. However, you cannot catch the loach while it is swimming around. Wait until it is resting in one spot on the lake floor, and cast the sinking lure so it lands right in front of him. Now wait. Don't move the lure, or he won't bite. Just let it sit in front of him and he'll either swim away or check out the lure and bite it. But it's a few minutes of a wait (usually one-two minutes).
If you catch the Hylian Loach, the fisherman says: "Well, well... WOW! What a rare fish! This is a Hylian Loach! For this fish, size doesn't matter. I'll give you this prize! Recently, the number of these fish has decreased tremendously, so I'm going to release this one."
Oddities
edit- The fisherman's hat
As adult Link, it is possible to hook the fisherman's hat with your lure. He will then add a new rule: "No aiming at people." He will get mad at you and ask you to return it. If you cast his hat back into the pond, he will charge you a 50 rupee fine for it.
Glitches
edit- The following are glitches that have most likely been fixed for the 3DS version. Further research is required.
- Stealing the pole
It is also possible to take the fishing rod out of the pond. After getting a rod, equip the Hover Boots and run onto the water. Quickly cast the line, hold Z (or L in the GameCube and Wii releases) and do a back flip. If performed correctly, Link will still be able to walk around (but the camera view is weird) and leave the pond with the rod. Outside, Link looks like he is holding an invisible fishing rod. Trying to cast while outside will crash the game, however. You can get your sword back by re-equipping and selecting the Master or Biggoron's sword at the weapon select screen.
In the 3DS version, you cannot cast the line while the Hover Boots are active. However, it is still possible to steal the fishing rod using the Use Restricted Items Glitch. To do this, have either the Iron Boots or the Hover Boots set to any of the item buttons (X or Y buttons preferred). Then switch the boots with bombs or Farore's Wind (if you set a warp point outside of the Fishing Pond). When you close the item menu, the button where your boots used to be will be active for a split second. When you press that button if timed correctly, you will use either the bombs or Farore's Wind. If you are using bombs, quickly cast the rod and let the bomb damage you so you can freely move around with the rod still cast. Then, exit the Fishing Pond. If you use Farore's Wind and you have a warp point, return to that warp point.
- Acquiring the Golden Scale as a child
You can get the Golden Scale as a child, which helps with various shortcuts and Pieces of Heart. Because you normally receive a Piece of Heart for catching a fish, it is possible to lose the chance of receiving that reward. If you want the Piece of Heart and the Golden Scale, acquire the Piece of Heart before attempting this glitch.
As a child, catch a fish bigger than the fish in the tank at the desk. After you do this, swim into the middle of the pond. Shift your view so that Navi is not hovering over any fish, then press and hold Z and R and don't let go. Make your way to the front desk and talk to the fisherman (don't let go through the conversation). Have him weigh your fish. Instead of giving you a Piece of Heart like he should, he'll give you the Golden Scale. Sometimes, depending on the fish and how the game decides to see the glitch, pressing the R button is not needed. Once the Golden Scale has been acquired through this glitch it is also possible for the sinking lure to be found as a child. Note: Make sure you have a Deku shield equipped for this, as the Hylian shield makes you crouch and you will stop moving.
- off the Hook
When you steal the fisherman's hat he will make you pay 50 rupees. This is avoidable, when the fisherman screams "WHAAAAT" after you lose his hat, run to the door and do not continue the conversation, he will then forget about the hat and tell you not to leave without the fishing pole.
Horseback Archery
editAfter saving the carpenters from Gerudo Fortress and becoming an honorary Gerudo, you can participate in the Gerudo Horseback Archery game provided that you have a horse on which to ride. It costs 20 rupees to play, and if you score over 1,000 points or 1,500 points, you receive a Piece of Heart and the Biggest Quiver, respectively.
If you play, you get twenty arrows with which to score as many points possible while Epona follows a set course. Epona first passes a row of seven pots, with three large targets on the wall behind, then rounds a large target at the end before passing by the row of pots again, towards a final target on the opposite end of the course. On the first pass, it is advisable to aim for the pots (100 points) first, and then try to score at least two bulls eyes on the far target. When coming back, score as many points as possible on the targets on the wall, before shooting at the final target. It is easy to accomplish both of these goals with a little practice. The most successful way of doing this is that if you have arrows remaining near the end, you can use all the arrows to try to hit the bulls eyes on the final target.
Bombchu Bowling
edit The Bombchu Bowling Alley is located in Hyrule Market as young Link. For 30 rupees, you are given 10 Bombchus, with the goal of using the Bombchus to hit three targets. The reward for each game is different, and is not revealed until after you decide to play. These rewards include Bombs, Bombchus, a Bigger Bomb Bag, a Piece of Heart, or a Purple Rupee. The first target and the final target are always in the center on the screen. The middle target, however, can be either on the left, right, or center. It is easiest to hit the target if it is in the center. In general, it should take no more than four Bombchus to hit the first two targets.
First Level: In the first level there is only one obstacle, a spike trap sliding back and forth, and the target is relatively close.
Second Level: In the second level an additional obstacle is added—a small Cucco. The Cucco waddles left and right and occasionally stops for a moment. If the Cucco is hit, it will stand still in shock for 5 seconds, obstructing further shots.
Third Level: The third and final level includes a large Cucco in addition to the other obstacles. Careful timing is needed to win a prize. As with the other Cucco, it stands still when hit. Wait until the big Cucco is facing you right in the middle and the little one on the far right is facing the right wall.
Alternate strategy: If you angle the bomchu towards the wall the right way you should be able to avoid the spike trap and both Cuccos completely, this may take a bit of practice, but it should pay off.
Horse Racing
edit- Glitch
- quickly steal a horse
If you save the game after winning Epona, you can restart your game, go to Hyrule field, and play Epona's song. She will come to you, without you having to jump her over the gate at Lon Lon Ranch.
The first horse race in which Link can participate is against Ingo, the proprietor of Lon Lon Ranch after Link first becomes an adult. Pay Ingo to let you into the corral, and then use Epona's Song to call Epona. Ride her around the corral for a bit, jumping over the fences by pressing the A button just before you reach them, earning back what you paid to ride in the first place. Pay to come in again then talk to Ingo while on her to challenge him to a race. You will race Ingo around the corral twice. Always try to stay on the inside of the track, make tight turns, and use carrots wisely. Either get ahead of Ingo and try to stay ahead of him by using your carrots and blocking him, or wait until you're near the end and speed past him by using all your carrots. If you win, Ingo will let you keep Epona, but he will lock you inside the ranch. To escape, you can either try to jump over the gate he closed, or jump over one of the ranch walls. Epona is not required to beat the game, but she will make things easier. Even if you do get her, you don't have to use her if you don't want to.
After Link obtains Epona, Malon will allow you to try an obstacle course. You will have to race around the circumference of the corral twice, using your carrots to successfully jump over gates. You do not need to use carrots to jump over the very small gates, but you must approach every gate head-on to make Epona jump. If you can complete the course in under 50 seconds, Malon will deliver a cow to your house to provide you with an endless supply of Lon Lon Milk. If you race again and beat your old record, she will give you a Purple Rupee.
Shooting Gallery
editAs a child, Link can test his accuracy at the Shooting Gallery in Hyrule Castle Market. If he manages to break all ten of the targets, he will be rewarded with a Bigger Deku Seed Bag, or a Purple Rupee.
As an adult, Link can test his accuracy at the Shooting Gallery in Kakariko Village. If he manages to break all ten of the targets, he will be rewarded with a Bigger Quiver, or a Purple Rupee. The most successful way of doing this is, since the order is random, is to aim towards the middle to minimize the distance that you have to move to hit any given rupee. Move left and right when the Blue Rupees appear, and quickly move up and shoot the jumping Green Rupee when it appears.
Treasure Chest Game
edit The Treasure Chest Game can be played in the Hyrule Castle Market as young Link, but only at night. In each room, you are presented with two chests—one contains a rupee, the other a key to the next room. As you progress, the value of the rupees increases, until you reach the final room which contains a Piece of Heart (or a Purple Rupee).
If you equip the Lens of Truth, however, you are able to see the contents of each chest and easily reach the final room. The game is reset each time you play, so it can end up costing a bit more money.
Racing Dampe
editAs an adult, there is one additional grave in the Kakariko Village Graveyard. Pull back the gravestone to reveal the grave of Dampe the Gravekeeper, whose ghost is all too willing to race you.
The first prize for racing Dampe is the Hookshot, which can be obtained simply by successfully following Dampe to the finish.
The second prize for racing Dampe is a Piece of Heart, which can be obtained only by finishing the course in under one minute. The keys to this are to know the layout of his grave, and to make efficient use of the roll attack. Rolling will carry your momentum, but at the end of a roll you have none, so ensure you don't roll again right away.
Alternatively, if you have the Longshot, in the room with a winding ramp before the finish you can use it to grab a torch near the doorway; you should reach the finish before Dampe's ghost.
Diving Game
editThe diving game can be found in Zora's Domain as a child, at the top of the waterfall near King Zora's Throne Room. After paying 20 rupees to play, the game's proprietor will throw five Blue Rupee into the water below. Dive off the waterfall and try to collect them all within the time limit to receive the Silver Scale. If you play the game after that, she will sometimes throw more valuable ones, such as Red Rupees, Purple Rupees, and if you are really lucky Orange Rupees into the water.
This game relies on being able to quickly locate and collect the underwater rupees. The dispersion of the rupees is random. Dive where you see the bubbles coming up at the surface to land on the rupees.
Skull Kid Jam Session
edit Enter the Lost Woods and take a right to find two Skull Kids. Hop on the nearby stump and show them your ocarina, after which they will invite you to play a musical memory game with them. They will start by playing, twice, a three note tune, the notes of which you will be able to see on the staff. You will then have to repeat the notes, and they will add a note to the tune until you either fail to repeat them correctly or they are satisfied with your performance and reward you with rupees and, eventually, a Piece of Heart.
It is not overly difficult to remember the tune, but the easiest way to win is to simply write down the notes as they are played.
Musical Frogs
editAs young Link, there are five frogs near a log in Zora's River. Use your ocarina on the spot in front of the log (it looks shaved or smoothed out compared to the rest of the log) and they will assemble into a choir of sorts, waiting for you to play a song. You will have to play all of the white non-warp songs to the frogs in Zoras River near the logs in order to get some rewards. Some songs will make a frog grow in size. Each frog that you help grow will give you a purple rupee, worth 50 rupees. To get a Piece of Heart, play the Song of Storms.
To make each frog grow up, play these songs:
- White frog: Epona's Song.
- Blue frog: Zelda's Lullaby.
- Yellow/orange frog: Saria's Song.
- Aqua/teal frog: Sun's Song.
- Red/magenta frog: Song of Time.
After all five frogs have grown, they will ask you to play along with them to help them catch bugs in their mouths. A butterfly will appear over one of the frogs, and you must play the note on your ocarina that corresponds to that frog to make it jump and eat the butterfly. Feed all of the frogs to earn a second Piece of Heart.
The notes you must play, to help the frogs catch the bugs, are:
- Nintendo 64: A, C-left, C-right, C-down, C-left, C-right, C-down, A, C-down, A, C-down, C-right, C-left, A
- Nintendo GameCube: A, Control Stick (left), Control Stick (right), Control Stick (down), Control Stick (left), Control Stick (right), Control Stick (down), A, Control Stick (down), A, Control Stick (down), Control Stick (right)
- Wii Classic Controller: A, Right Stick (left), Right Stick (right), Right Stick (down), Right Stick (left), Right Stick (right), Right Stick (down), A, Right Stick (down), A, Right Stick (down), Right Stick (right), Right Stick (left), A
- Nintendo 3DS: L, X, Y, R, X, Y, R, L, R, L, R, Y, X, L
Dampe's Gravedigging Tour
editDampe the Gravekeeper's Heart-Pounding Gravedigging Tour can only be accessed at night, from 18:00 to 21:00 Hyrule Time. Dampe will walk around the Graveyard with a shovel, and dig wherever you tell him to for a nominal fee. He can only dig on patches of soil, uncovered by cobblestones, and will eventually unearth a Piece of Heart. The location of this Piece of Heart can be in any random soft soil patch that Dampé passes. Often, two items are hidden within one patch of soil, so try digging on each half of an individual soil patch when looking for the Piece of Heart.
Magic Beans
| |
A Wikibookian has nominated this page for cleanup. You can help make it better. Please review any relevant discussion. |
| A Wikibookian has nominated this page for cleanup. You can help make it better. Please review any relevant discussion. |
There is a man in Zora's River who sells Link 10 beans, one at a time, for 10 rupees apiece. There are 10 locations of soft soil to plant the beans. To find him, you must bomb some rocks near the river. When Link is an adult, planted beans will have grown into a sprout that you can ride on to help reach new locations.
- Zora's River next to bean selling man: Can be used to float up to the top of Zora's River to bypass Octoroks also to get to highest cliff where can reach Gold Skulltula easier at night or can be used to get to closer heart piece.
- Lake Hylia next to Observatory: Can be used to get on top of roof of Observatory to get heart piece can also be used to get to fishing pond if water still not back up.
- Gerudo Valley down on very low big platform at water: Takes you for ride down and back up through first 2 waterfalls picking up a red rupee at both then halfway up the third waterfall where you can jump to get a heart piece in an opening in wall inside the waterfall.
- Death Mountain Trail at entrance to Dodongo's Cavern: Can use it to get up on top of cave to get heart piece or can use it to get to Goron city to bypass boulders and red tektites and to get to where boulders rain down too.
- Graveyard next to Dampe's grave: Takes you up to ledge where crate with heart piece is in.
- Kokiri Forest next to shop: Takes you to ledge where there is a red rupee with a circle of green rupees.
- Death Mountain Crater next to Fire Temple entrance need to warp with Bolero of Fire to get there as child: Takes you up where you can jump of on pillar to get heart piece then goes over to wall you can climb where there is an opening with another heart piece that you can jump in to get.
- Lost woods from Kokiri Forest entrance left then left: Takes you to where you can jump on bridge that connects from Kokiri Forest to Hyrule Field 1 thing can help with is saving time for Odd Potion run to Kakariko Village in Item trading.
- Lost woods from Kokiri Forest entrance right left right left then left then next to Business Scrub on right: Takes you up to ledge above where there is a Gold Skulltula at night.
- Desert Colossus next to Spirit Temple entrance: Takes you to where you can jump on platform where there is a Gold Skulltula at night then goes where you can jump onto rock arch outside Temple entrance where there is a heart piece up there.
Gerudo Training Grounds
The Gerudo Training Grounds is a totally optional dungeon that can be accessed after you obtain the Gerudo's Token. To enter the dungeon, talk to the Gerudo woman in white who is standing outside of a blocked gate (not the big closed gate that leads to the Desert Colossus; a smaller one that leads into the Gerudo Fortress main building). If you pay her a small fee of ten Rupees, she will open the gate, allowing you to enter the Gerudo Training Grounds. Each time you leave the dungeon, you will have to pay ten Rupees to get in again, so it's better to do it in one fell swoop, once you have the required items. If you complete the Gerudo Training Grounds you will get another Magic Arrow, the Ice Arrow. Like the Fire Arrow that you obtained after beating the Water Temple, the Ice Arrow uses up a small amount of magic power, and it temporarily freezes enemies on contact.
In order to fully complete the dungeon, you need all of the items from all of the Temples (and the Lens of Truth and the Iron Boots), and it is recommended that you have the Fire Arrows, as well. However, in order to get the Ice Arrows, you only need the Fairy Bow from the Forest Temple, the Megaton Hammer from the Fire Temple, and the Longshot from the Water Temple (and also the Iron Boots). It is also recommended that you obtain the Lens of Truth and the Fire Arrows, but it is technically possible to get the Ice Arrows without them.
There are a total of 9 keys in this dungeon, but you only need 7 to complete it.
Entrance
editYou'll arrive in the large main room, with three doors leading inside the level. The middle door leads to the treasure of this temple, but you'll need to collect the small keys hidden in this level if you wish to collect it. The other two doors lead to the various challenges.
The visible treasure chest to your left contains a blue rupee. Turn around and shoot an arrow at the eye switch above the entrance to make another treasure chest appear to your right (it contains arrows). You can also play the song of storms for a pink fairy to appear in the center of the room. Go to the left and open the door to start the challenges. For every challenge, you'll get a short message on what to do.
You can go to the right too to complete the challenges in reverse order, but this requires the Scarecrow's Song.
First room
editYou have a time limit of one minute. Walk forward and two Stalfos appear to challenge you. Walk to the right to get out of the sand, as staying in the sand will render you largely immobile. You can try to pick off the two Stalfos with arrows or wait until they come to you. Once they're dead, a treasure chest with a small key will appear. Open it, then go to the next room.
Second room
editYou have a time limit of 1:30 minutes to collect all five silver rupees.
- The first one is right above you as the message appears. Use the Hookshot on the target to get it (it might take some tries).
- The second one is reachable by another Hookshot target at the front. Latch yourself to it, then jump off the cliff to grab the silver rupee floating in mid-air.
- For the third one, go to the left from the entrance. Wait until the rolling boulder has passed (watch out for the Wallmaster), then go to the left and get the silver rupee there.
- After getting the previous one, turn around and run all the way up to get the third one. Again, wait somewhere for the rolling boulder to pass.
- The last silver rupee is in a passage to the right. If you try to go directly to it, a flame wall will stop your progress - run around by taking the second passage to the right to avoid it.
After getting all silver rupees, the door will open. To find it, go to where the second silver rupee was and look forward. There's another flame wall here, use the Hookshot target behind it to go through it.
Third room
editAs you enter the room, a Wolfos will appear. Move forward and a second one appears. Take care of both, then run to the back of the room to make two White Wolfos appear, kill them as well to make a treasure chest appear (it contains arrows). Destroy the fake door if you wish, then use the Lens of Truth to notice a hidden alcove. Use the Hookshot to pull yourself inside, and step on the switch to open a hidden door. Go back to the room and use the Silver Gauntlets to push the large block forward, then open the door behind it.
Fourth room
editThis room is full of Like-Likes. You can use Fire Arrows on them. Kill them all and several treasure chests appear in the room. The one on top of the pedestal just freezes you, the other two contain a blue and a gold rupee, respectively. Look in the pit which has no treasure chest and use the Lens of Truth to discover an invisible treasure chest containing a small key. Afterwards, return to the third room, go into the hidden alcove again and open the door there to go to the next room.
Fifth room
editYou'll start on a high ledge. Jump down onto the circular platform to get your objective. You have to shoot arrows into the eyes of the statue so they're red while the circular platform spins around. You'll have to shoot all eyes in one go, but you have unlimited tries. This objective requires quite careful aiming, once you've managed to do it, the door will unlock and a treasure chest will appear in front of the statue, jump over to open it and to collect a small key.
If you learned the Scarecrow's Song, you can use it to make a Scarecrow appear which takes you to the top, if you didn't, jump into the lava to reappear at where you entered the room. Go around and enter the just unlocked door. There, open the single treasure chest for another small key, then return to the previous rooms and go through the door at the lower level.
Sixth room
editThere's no time limit here either. Kill all the Torch Slugs and Fire Keese wandering around, this will open the door to the next room and make a treasure chest appear (it contains arrows). Equip the Megaton Hammer and smash the blocks to the right of the treasure chest to make an eye switch appear, hitting it unlocks the door to the previous room. Go to the right and smash the single block there to uncover a switch, step on it to make the fire in the center go out, open it to get a small key. You're done here, so continue to the next room.
Seventh room
editYou'll have to collect the five silver rupees here. This time there's no time limit, but falling into the large lava pit forces you to restart. You might want to have Hover Boots for this room.
- The first silver rupee is right in front of you, suspended in mid-air. To get it, run past it and turn around to notice a Hookshot target, use it to get the silver rupee.
- Jump down to the first pillar to collect the second silver rupee (it's a tricky jump).
- By jumping across the pillars, you can get the third and fourth silver rupees the same way.
- Jump in front of the unreachable ledge and Navi will turn green. Play the Song of Time here to make blocks appear which allow you to climb up to the ledge. At the top, you'll find a small key out in the open. Jump off to the left and you'll find a switch which deactivates the fire engulfing the last silver rupee on the other side. Step on it, then quickly jump across to collect it.
Collecting all five silver rupees will open the door at the side. Jump into the lava to return to the entrance, then go across and go through the door you can also longshot torch.
Note: Where there is a small key out in the open is an opening to get to treasure room that is where you need all 9 small keys to get through that way.
Eighth room
editThe floor is covered by Song of Time blocks. Step in front of them and play the Song of Time to make the blocks disappear, this reveals an underwater room. Equip the Iron Boots and Zora Tunic and dive down, where you'll find another Silver Rupee puzzle. You'll probably want to kill all the Shell Blades as they like to cause trouble.
The first silver rupee is right in the center of the room (watch out for the spike there, though). To collect the others, use the provided Hookshot targets and line yourself up with the silver rupees. You could also try swimming around with the Kokiri Boots, but that is harder as this room is actually a whirlpool and takes you around. Once you've collected all the silver rupees, a treasure chest will appear, resurface and open it to get a small key. Go back to the previous room, and go to the left to get to the last room.
Ninth room
editYou get 1:30 of time to destroy all the enemies. Throw a bomb in the middle of the room to take care of the Beamos, afterwards, bother with the two Dinolfos. Going to the edge of the room will make flame walls appear, so try to not get cornered. Once all the enemies are dead, a treasure chest will appear, open it to get a small key.
Go through the door and you'll return at the entrance room. You now have all the small keys you need, so go through the center door to get to the treasure room.
Treasure room
editNote: There are chests in this room that contain items like Bombchus, arrows, and rupees.
Go to the left and open the first locked door. Use the Lens of Truth here and look up to notice a gap in the ceiling. Use the wire to climb up, and open the treasure chest there to get the last small key. Now, go down and open all the doors to get to the treasure chest in the middle which contains the treasure of this place - the Ice Arrows, a magical arrow which freezes most enemies it touches. You've now completed this place, so you can leave.
Dungeon Items
Certain items can only be found within dungeons. These are dungeon-specific. That is, after you find them, they cannot be taken elsewhere and are only available when you are in that dungeon.
![]() Dungeon Map
Dungeon Map

If you find the map in a dungeon, you can see where all of the rooms are. There is a map in each dungeon, and if you find one, it will show what room you are in and what floor you are on. It will also reveal where all of the other rooms are, even if you have not been to them. The rooms that have not been visited appear as gray, while visited rooms show up as blue. The map will also display a skull icon beside the door to the boss. Note that a map found in one dungeon will not reveal the locations of rooms in any other dungeon, so a new map can be found in each dungeon.
![]() Compass
Compass

If you find the compass in a dungeon, you will be able to see which direction you are going. There is a compass in each dungeon, and if you find one, it will specify where you are and what treasures are on the map. Also shows where boss is. Note that a compass found in one dungeon will not work in any other dungeon, so a new compass can be found in each dungeon.
![]() Small Key
Small Key
Small Keys are found in dungeons later on in your journey. They are required to open locked doors inside of the dungeons. A small key will only work in the dungeon that you find it in and will not be usable in other dungeons.
![]() Boss Key
Boss Key
You'll start finding Boss Keys in many of the dungeons that also contain small keys. These are required to access the bosses in these later dungeons. Boss Keys will only work in the dungeons that you find them in as well and cannot be used to open the boss door in other dungeons.
Equipment
These are the items you find during your journey that Link can equip. They can't be assigned to buttons but are instead equipped on the equipment sub-screen. There are four main slots: Tunic, Boots, Sword, and Shield. Only one of each kind can be equipped at a time.
Swords
edit| Location | Kokiri Forest |
| Child | Yes |
| Adult | No |
| Optional | No |
 Kokiri Sword
Link "borrows" this sword, a blade of much importance to the Kokiri, at the beginning of his quest. It does a small amount of damage, and is often hard to use to defeat powerful monsters.
| Location | Temple of Time |
| Child | No |
| Adult | Yes |
| Optional | No |
 Master Sword
The legendary sword that only the Hero of Time can wield. Taking the sword out of its pedestal will transport Link seven years into the future, while putting it back will return him to the past. This sword does a higher level of damage to monsters, and is the only sword that can defeat pure evil.
| Location | Goron City (adult) |
| Child | No |
| Adult | Yes |
| Optional | Yes |
 Giant's Knife
This powerful blade can be crafted by a giant Goron, Medigoron, in Goron City for 200 rupees, provided that you've opened his shop using Bombs. Link needs two hands to wield this sword, leaving him without a shield for defense, but the strength and length of the blade are worth it. Unfortunately, this blade will shatter after eight hits, or if you strike a wall, but you can purchase another one from Medigoron if you break it. You can't re-purchase this if you obtain the Biggoron Sword.
| Location | Anywhere |
| Child | No |
| Adult | Yes |
| Optional | Yes |
 Giant's Knife (Broken)
This is what you'll get if you misuse the Giant's Knife. Its length and power have been severely weakened (it is about 1/4 of the power of the fixed version) to the point where it rivals a pocket knife, but it can still be used to attack enemies. Link can't use a shield alongside this weapon. If you obtain the Biggoron Sword or re-purchase the Giant's Knife, this weapon will disappear from your inventory.
| Location | Death Mountain |
| Child | No |
| Adult | Yes |
| Optional | Yes |
 Biggoron's Sword
This sword is by far the most powerful of them all, it's pretty much the same as the Giant's Knife, but unlike the Giant's Knife, it will never break. The Biggoron Sword can only be obtained through completion of the item trading quest. It requires two hands to use but is worth it as it can take out a poe in one hit and regular ReDeads in two hits. It is an advantage to use this once you get it because you can take out enemies much faster.
Shields
edit| Location | Various |
| Child | Yes |
| Adult | No |
| Optional | No |
 Deku Shield
Small wooden shield that Link obtains near the start of his adventure. This shield is flimsy and made of wood, so fire-based attacks can easily burn and destroy it. This is used by Young Link as a standard shield, but is not recommended for use in Dodongo's Cavern, since many fire enemies are found inside. If it's destroyed, you can just buy another one to replace it. In fact, one is for sale in Dodongo's Cavern, and one can be found in a chest. Like Likes find this shield to be delicious, and they will try to eat it.
| Location | Various |
| Child | Yes |
| Adult | Yes |
| Optional | Yes(not required) |
 Hylian Shield
When you can first obtain this shield as Young Link, don't buy it right away, as a guard you must talk to later in the game will give you a discount off its regular price. Young Link cannot efficiently use this shield because of his size, so he will instead use it like a turtle's shell on his back. When Link is an adult however, he can use the shield normally. This can be retrieved for free from Kakariko Graveyard at night (pull back the tombstone with flowers and jump in). LikeLikes might eat this shield if they attack Link, but it can be recovered if they are defeated quickly. Even if the shield is lost, another one can be purchased from several different shops.
| Location | Spirit Temple |
| Child | No |
| Adult | Yes |
| Optional | No |
 Mirror Shield
This magical shield can reflect light, some magical spells, and just deflect regular attacks like a regular shield (some attacks may not be deflected, like Octorok rocks). Unlike the Hylian Shield, this item cannot be eaten by Like Likes. Like Likes despise the shield because its mirrory surface is so bright. Hint: if you are being eaten by a Like Like, quickly switch to this shield to avoid losing your Hylian Shield to the Like Like!
Tunics
edit| Location | n/a |
| Child | Yes |
| Adult | Yes |
| Optional | No |
 Kokiri Tunic
This is the basic green tunic that Link begins his adventure with. There are no special effects, it's just what Link and Kokiri normally wear. It's the only tunic Young Link can use and it is automatically equipped. It cannot be removed.
| Location | Goron City |
| Child | No |
| Adult | Yes |
| Optional | No |
 Goron Tunic
There are two main ways of obtaining this tunic. One is to stop the small Goron rolling around Goron City with a bomb when Link is an adult, and the other is to purchase it for 200 rupees from the Goron Shop. If you purchase it from the shop first, the rolling Goron won't even mention anything about a tunic.
This fire-red tunic protects Link from the intense heat of the volcanic interior of Death Mountain and Fire Temple. Without it, the Fire Temple cannot even be attempted. While Link is wearing this, Like Likes might eat it if they attack him. If they are defeated quickly, Link will be able to retrieve his lost tunic. If its eaten permanently by a Like Like, another one can be purchased in the Goron Shop.
| Location | Zora's Domain |
| Child | No |
| Adult | Yes |
| Optional | No |
 Zora Tunic
Much like the Goron Tunic, there are two ways to obtain the Zora Tunic. The first can only be done when Link is an adult: Unfreeze King Zora with blue fire from Ice Cavern. The second option is to purchase it for 300 rupees in the Zora Shop. If you obtain it in the shop before unfreezing King Zora, he won't give you a tunic.
This blue tunic allows Link to magically breathe underwater. The Zora Tunic item is used extensively in Lake Hylia and the Water Temple, and is often used alongside the Iron Boots. However, the Water Temple can be completed without the tunic. While Link is wearing this, Like Likes might eat it if they attack him. If they are defeated quickly, Link will be able to retrieve his lost tunic. If it’s eaten permanently by a Like Like, another one can be purchased in the Zora Shop.
Boots
edit- Nintendo 3DS
The Iron Boots and Hover Boots are items that can be assigned to X, Y, or one of the touch screen's buttons.
| Location | n/a |
| Child | Yes |
| Adult | Yes |
| Optional | No |
 Kokiri Boots
Link's original boots. these don't have any special properties, they're just what he normally wears. These are the only boots Link can wear as a child.
| Location | Ice Cavern |
| Child | No |
| Adult | Yes |
| Optional | No |
 Iron Boots
These heavy, iron-coated boots increase their wearer's weight dramatically, and are normally hard to walk around in. When worn underwater, they can be used to walk along the bottom of lakes and rivers. The Iron Boots can also be used to withstand powerful gusts that would otherwise blow the wearer away. They are found in the Ice Cavern after defeating the White Wolfo.
These will often be used in conjunction with the Zora Tunic in Lake Hylia and the Water Temple. They can also prove useful in the Shadow Temple, although they aren't a necessity.
| Location | Shadow Temple |
| Child | No |
| Adult | Yes |
| Optional | No |
 Hover Boots
These boots let Link briefly walk across midair. To activate the boots, simply walk off of a ledge. Link will keep moving as if there were still solid ground beneath him, but this effect will only last for a few seconds. When Link wears them on land, he becomes a little faster. They can be found in the Shadow Temple after defeating the Dead Hand.
Items
| |
A Wikibookian has nominated this page for cleanup. You can help make it better. Please review any relevant discussion. |
| A Wikibookian has nominated this page for cleanup. You can help make it better. Please review any relevant discussion. |
These are items that, depending on the release, are equipped to:
- Nintendo 64: the C-left, C-right, and C-down buttons
- Nintendo GameCube: C-Stick directions or Y, X, and Z
- Wii Classic Controller: the Right Stick or Y or ZL
- Nintendo 3DS: use stylus at top-left part of the bottom screen, or press X or Y
Note that in the GameCube and Virtual Console re-releases versions, the C button icons, depicted on-screen as large yellow circles, are retained) and can be used with a quick press of the button. They are mostly made up of items obtained from dungeons.
These sticks can be used as torches if they touch fire, and can also be used as weapons. They possess roughly twice the power of the Kokiri Sword, and are thus very valuable for Link as a child, but they will break after a single attack. Link can normally stock up to ten of these at once.
|
When thrown onto the ground, Deku Nuts will create a luminous flash that will stun nearby enemies. Link will be able to hold up to 20 of these at a time when he first obtains them.
|
When Link first leaves the Kokiri Forest, Saria will give him this Ocarina. It can be used to play various songs needed throughout the game.
|
Link can find this ocarina after obtaining all three Spiritual Stones and returning to Hyrule Castle Town. It can effectively play the Song of Time which the old ocarina cannot. Zelda's Ocarina will replace the Fairy Ocarina.
|
This slingshot can be used to attack enemies from a distance, but it generally won't be effective against strong enemies. Deku Seeds are used as ammunition for this weapon; Link can hold up to 30 of these seeds when he first finds the Slingshot.
|
Carries Bombs: explosives that will detonate a few seconds after you take one out, or immediately if Link throws them at an enemy. They can be used to blow open new pathways in cracked walls. The Bomb Bag can hold up to 20 bombs when Link first obtains it.
|
This is the second projectile item you get as a child, and it can help you retrieve far away items (like Skulltula Tokens). It is only usable as a child, but it is a very versatile weapon, and has no limit to its use. It will only damage certain enemies, but most will at least be stunned by it.
|
You can purchase these from the chubby fellow in front of the Zora River gate as a child. When you plant these into dirt patches as a child, a sprout will appear. As an adult, you can ride the plants that now sit there to reach new heights. The rides of these plants will often lead to rewards like Pieces of Heart or a treasure trove of Rupees. The sprout will only grow temporarily if the Song of Storms is played, providing only an immediate release of fairies.
|
This is a moving bomb that resembles a mouse. Once set down, it goes straight in the direction it is facing, even up walls. After a period of time, or if it runs into something, it will explode just like a bomb. These can be purchased at night in the Castle Town Alley or from the flying merchant in the Haunted Wasteland.
|
This is, well, a bow that shoots arrows. It's one of the most useful long-ranged weapons Link will find, and is the only weapon that can be used from the back of Epona. When Link obtains this, he can hold up to 30 arrows at once. This weapon's projectiles can upgraded with Fire Arrows, Ice Arrows, and Light Arrows. Arrows are more effective than Deku Seeds, and can pierce Skulltula armor.
|
This weapon allows you to latch onto certain objects and pull yourself towards it, or pull it towards you. When used on enemies, most will be stunned by it, and some weaker foes will be damaged by it, but it doesn't have any effect on some strong monsters. This item is later replaced with the Longshot when it is found in the Water Temple.
|
This is basically just the Hookshot with a longer-extending chain. It will replace the Hookshot when you obtain it in the Water Temple.
|
This spell allows Link to enchant the arrows he shoots with fire, although each shot costs a little bit of magic power. These arrows not only deal more damage, but can be used to light torches or set various things ablaze. The spell can be obtained in Lake Hylia by standing above the entrance to the Water Temple, aiming the Fairy Bow between two nearby pillars, and shooting an arrow as the sun rises between them. This will only work after the Water Temple has been completed and Lake Hylia has been re-filled with water. These arrows make the Shadow Barrier in Ganon's Castle much easier to complete.
|
This spell, much like Fire Arrows, allows Link to empower his arrows with ice, although each shot will cost a little magic power. While these projectiles deal more damage than usual, they can also freeze their target. This spell can be obtained by clearing the Gerudo Training sidequest in Gerudo Fortress.
|
When Light Arrows are used, they can make the bow one of the most powerful weapons in the game. However, each shot costs a rather large chunk of magic power. They are necessary for victory against Ganon. If you defeat any enemy with this arrow it will drop a Purple Rupee.
|
A spell received from a Great Fairy, Din's Fire consumes magic when used. It creates a wall of fire around you that spreads out and can severely damage, if not kill, most enemies. It can also be used to light torches, and is necessary to open up the door to the Shadow Temple.
|
You may receive this from a Great Fairy. Farore's Wind allows you to create a warp point, which consumes magic, and warp back to that one point any time you wish. The warp point disappears after you warp back to it. This can only be used in dungeons, and only has an effect within each individual dungeon. However, it can be used to warp between dungeons if cast in one and used in another.
|
This spell slowly drains magic after its activation, and can be cancelled at any time. It will protect you from receiving damage as long as its active, but you will still flinch from any attacks received. You can receive this from a Great Fairy.
|
| | ||
Not only can this weapon be used to massacre foes, but it will also cause a shock wave when it slams on the ground that will cause most nearby enemies to be damaged and/or stunned. It can be used to destroy rocks, push down rusty switches, and solve various puzzles. While wielding it, Link cannot use a shield.
|
This nifty item allows you to see normally invisible enemies and even peer through fake walls and traps! The downside to this is that it constantly drains your magic power while it's active. The Shadow Temple is impossible without it because it is the only way to see the boss.
|
Link can obtain many various items on his quest that can be traded in order to progress through the story. Some are optional, but others are crucial towards specific moments in the game.
|
In all, there are four obtainable bottles within the game. Bottles cannot be purchased.
|
Weapons
| This page was imported and needs to be de-wikified. Books should use wikilinks rather sparsely, and only to reference technical or esoteric terms that are critical to understanding the content. Most if not all wikilinks should simply be removed. Please remove {{dewikify}} after the page is dewikified. |

Many fictional weapons and other items are collected by the player in the Nintendo 64 game The Legend of Zelda: Ocarina of Time (1998) to help him on his quest. The player is allowed to assign 3 different objects for quick access, with one for "C-Right," "C-Down," and "C-Left."
Sticks and Swords
edit- Note: In the descriptions below, a standard hit is defined as a single, connecting sword slash using the B button. It does not include jump attacks (Target lock on + A button), for which all damage figures given below are multiplied by a factor of 2.
- The Kokiri Sword is the basic sword that Link is able to use while a child. It is needed to enter the Great Deku Tree. One acquires the sword by going through the hole in the back of the Kokiri forest at the very start of the game. It is the basic weapon in the game and inflicts 1 unit of damage per standard hit.
- Deku Sticks are long wooden branches that can be swung by using the assigned "c" button. They inflict 2 units of damage per hit, and 4 units of damage per hit while lighted, making them the most powerful weapon available to Young Link. Deku Sticks can be acquired mainly by destroying the Deku Baba while it is in the upright position. The only downside of the Deku Sticks is their lack of durability: they break on impact. They can also be used to carry fire from torches to other objects that require lighting. The carrying capacity of Deku Sticks can be upgrades from 10 to 20 sticks by purchasing the upgrade in the Lost Woods from a Business Scrub. The carrying capacity can then be upgraded to 30 by wearing the Skull Mask (or Bunny Hood) at the forest stage in the Lost Woods.
- The Master Sword is the sword pulled from the Pedestal of Time by Link after his seven year slumber. The Master Sword is located behind the Door of Time within the Temple of Time. The Master Sword deals 2 units of damage per standard swing, a jump slash does double damage to enemies (same with fully charged spin attack). This sword is also called the "Legendary Blade" or "The Blade of Evil's Bane." The sword is said to be the only tool against true evil.
- The Giant's Knife can be purchased for 200 Rupees from Medigoron, a smith in Goron City, as adult Link. The sword must be wielded two-handed due to its size, making Link unable to hold his shield, so instead of blocking normally, he bends over and blocks with the shield on his back. The sword breaks after 100 slashes on regular enemies or three strikes with walls or other hard objects. When unbroken, it deals 4 units of damage per hit; after it breaks, it becomes a Broken Giant's Knife that deals 1 unit of damage per hit. It disappears when Link receives the Biggoron Sword.
- Biggoron's Sword is received from Biggoron after the completion of a rather long and complicated trading sequence. It is identical to the Giant's Knife, except it is unbreakable. The sword is a reward to Link for getting Biggoron eye drops to cure the eye irritation caused by the fumes from Death Mountain. Like the unbroken Giant's Knife, it deals 4 units of damage per standard hit, double for jump slash and fully charged spin attack. It forces him to keep his shield on his back. Unlike the Giant's Knife, it will never break.
- Special note 1: During the final battle with Ganondorf, since the shield has absolutely no use, the Giant's Knife and Biggoron Sword are a much better weapon to equip, as they have a longer reach for reflecting his energy blasts back at him, and do more damage when attacking up close.
- Special note 2: During the final battle with Ganon when Link temporarily loses his Master Sword and is expected to continue fighting with his arrows, he can simply equip either the Giant's Knife or Biggoron Sword to continue fighting. He cannot finish Ganon with it though.
Arrows and similar weapons
edit- One receives Deku Nuts by killing enemies, chopping bushes, smashing rocks and vases, or even from buying them in shops. They are natural stun grenades and can be used by Link regardless of his age. Impa and Sheik use them to disappear from sight.
- One can get Bombs by killing enemies, chopping bushes, smashing rocks and vases, or even from buying them in shops. They can kill enemies and knock down fake walls. Link is able to use them as a child or adult. They deal 2 units of damage per hit.
- A Bombchu is a bomb in the shape of a chu (mouse). When Link uses one, the fuse is lit (if Link does not release it, then it will explode in his hands), then when he releases it, it will travel for a while then explode. Bombchus will travel on any surface, so if the player faces a wall and lets it go, it will climb the wall, then probably traverse the ceiling, as well. They are useful in hitting fixed objects - such as crystal switches - from afar, but are a poor combat weapon because exact timing is required to hit an enemy or other moving object. Sub-games involving the Bombchu challenge the player to hit small wall-based targets within a time limit. Majora's Mask features an enemy named "Real Bombchu", a malevolent mouse creature with a fizzing bomb on the end of its tail. They deal 2 units of damage per hit.
- The Boomerang is a curved weapon found in Lord Jabu-Jabu. It is used to attack or stun enemies at a distance as well as grab or strike distant objects like switches and heart pieces. The boomerang is best used while targeting with the Z button. It can only be used by child Link.
- The Hookshot and Longshot are spring-loaded, trigger-pulled hooks attached to lengthy chains. They are found in Dampe's Crypt in Kakariko Village and the Water Temple, respectively. They can attack enemies at a distance as well as attach onto certain surfaces (like wood) and pull Link across large distances. It can only be used as an adult.
- The Longshot replaces the Hookshot and has twice the chainlength. It can only be used by adult Link. Both deal 2 units of damage per hit.
- The Megaton Hammer is found in the Fire Temple, and is required to defeat Volvagia. It is also useful in opening hidden holes, and defeating Dark Link. It can only be used when Link is grown up, and requires the use of both hands, so using a shield while wielding it is impossible. It deals 2 units of damage per hit. Jump-smashes deal double damage. It's also very useful for flipping tekites over, making them vulnerable and stationary (temporarily) for a sword strike or smash with the hammer.
- The Fairy Slingshot is the big treasure inside the Deku Tree. It fires Deku Seeds and Link can use it to hit enemies or switches at a distance. It can only be used by child Link and deals 1 unit of damage per hit. The carrying capacity of the seeds can be upgraded to 40 seeds by shooting three 100 point bullseyes in a row in the Lost Woods.
- the Fairy Bow is the big treasure in the Forest Temple. It shoots arrows and Link can use it to hit enemies or switches at a distance. It can only be used by the adult version of Link.
- Fire Arrows charge Link's Fairy Bow with flaming arrows that burst into flames and burn enemies upon contact. These are received by following the instructions inscribed on the plaque on the island in Lake Hylia. It is possible to shoot a "makeshift" fire arrow by shooting a normal arrow through the flame of a lit torch. They aren't needed to beat the game.
- The Ice Arrows charge Link's Fairy Bow with freezing arrows that leave their target frozen solid. These arrows are the prize for completing the Gerudo Training Ground. Like the Fire arrows, these arrows are not necessary for completion of the game.
- Light Arrows charge Link's Fairy Bow with shining arrows of light that can pierce pure evil. They are needed to defeat Ganondorf, and are automatically received as a gift from Princess Zelda after Link completes all five temples. They are the only magic arrow needed to complete the game.
Ammunition holders
edit- The Bullet Bag comes with the Fairy Slingshot and is where Link keeps the Deku Seeds he uses as ammunition for that weapon. It originally holds 30 Deku Seeds but upgrades in the Lost Woods and the Hyrule Castle Town Shooting Gallery can increase its size to hold 40 and then 50 seeds. When Link is an adult, the Bullet Bag is replaced by a Quiver.
- The Bomb Bag is where Link keeps his bombs. It is the big treasure in Dodongo's Cavern. It originally holds 20 bombs but upgrades in the Bombchu Bowling Alley and Goron City can increase its size to hold 30 and then 40 bombs.
- The Quiver comes with the Fairy Bow and is where Link keeps the arrows he uses as ammunition for that weapon. It originally holds 30 arrows but upgrades in the Kakariko Village Shooting Gallery and the Gerudo Archery Range can increase its size to hold 40 and then 50 arrows. When Link is a child, the Quiver is replaced by a Bullet Bag.
Shields
edit- The Deku Shield is Link's first shield in the game. It is a wooden shield (and therefore flammable) with a red design resembling the Kokiri Emerald carved on it. It must originally be purchased in the shop in Kokiri Forest but can be found later in the game if lost/burnt. Link can use this shield only as a child. Once the Master Sword is grabbed, the Deku Shield is replaced by the Hylian Shield.
- The Hylian Shield (Hylia Shield in the Japanese version) is a large, adult-sized shield (though Link can use it as a child) made of wood overlaid with metal and bearing the crest of the Hylian Royal Family. It can be purchased at the Bazaar in Hyrule Castle Town or found in a tomb in Kakariko Graveyard. Good for deflecting most missiles back at enemies. As a child, Link can only crouch down and use the shield to protect his back as he is too weak to use it normally. Link does this as an adult with either the Hylian Shield or Mirror shield when wielding a two-handed weapon.
- The Mirror Shield is a large shield made of highly polished metal inscribed with the symbol of the Gerudo race which can reflect magical attacks, in addition to light. It is the big treasure in the Spirit Temple. Link cannot use this shield as a child. Not good at reflecting most missiles, it is too powerful and will cause them to break up. In the original Ocarina of Time for Nintendo 64, the Mirror Shield had a Crescent Moon and Star (4-pointed) symbol on its face. For the re-released versions (post-September 11, 2001) of Ocarina of Time for the Nintendo Gamecube, this symbol was changed to a brand new symbol so as not to cause controversy. Most fans prefer the crescent moon and star symbol though.
Magic Spells
edit- Din's Fire uses up 6 magic points when cast. The spell unleashes fire in all directions, and deals 4 units of damage to anything which it comes into contact. It can also be used to light torches. It is found at the fairy fountain at the dead end at Hyrule Castle and is the only spell of its type necessary to complete the game.
- Farore's Wind uses 6 magic points when cast. The spell, when first used, places a marker in the dungeon in which Link finds himself. When used again within that dungeon, Link will warp back to that spot. In addition, if Link places a marker in one dungeon and then re-casts the spell in another, he will be transported back to that dungeon. It is found at the fairy fountain in Zora's Fountain after placing a bomb by the wall with the blue rock.
- Nayru's Love uses 12 magic points when cast. The spell erects a temporary barrier around Link, protecting him from enemy attacks. This is obtained at the Desert Colossus outside the Spirit Temple between two palm trees.
Dungeon items
edit- Dungeon Maps are found in every dungeon and mini-dungeon. They show which rooms one has visited, and which room one is currently in. When paired with a compass, they show which rooms contain chests, which rooms have not yet been visited, and the dungeon boss' room.
- The compass allows the player to see the locations of treasure chests in the dungeon, and show the direction Link is facing, as well as where he entered the room.
- The Small Key unlocks certain regular doors within dungeons, and is usually found within chests. These are only needed when Link is an adult.
- The Big Key unlocks the dungeon boss' room, and is usually the last item to be found in a dungeon. They are kept in chests decorated in blue and gold (similar to the Master Sword's sheath). These are not present in mini-dungeons or in child dungeons.
Miscellaneous
edit- Heart Containers are found at the end of every dungeon, as a reward for defeating the boss. They add another heart container to the end of the player's life gauge, and completely refill Link's health.
- Heart Pieces can be found anywhere in Hyrule. If four are collected, another heart container is added to the end of Link's life gauge. At the moment Link finds one, his health is refilled.
- Link can collect up to four Bottles to hold various items in from various errands. These include, but are not limited to: fairies (to serve as extra lives if Link dies in battle), various potions, Lon Lon Milk, Poes, bugs (useful for scaring Gold Skulltulas out of holes), blue fire, and fish. A programming glitch allows the player to hold more than four bottles at one time at the expense of other items. Both child and adult Link can use bottles and their contents.
- Bottle Locations:
- Prize for winning the Super Cucco Game at Lon Lon Ranch
- Under Lake Hylia, near the entrance to Zora's Domain
- Obtained by recovering the 7 cuccos at Kakariko Village
- Prize for catching all 10 Big Poes in Hyrule Field.
- Magic Beans can be purchased from the Magic Bean Seller sitting at the gate at the mouth of Zora's River. They are initially 10 rupees each but each successive purchase raises the price by 10 rupees as they become "more popular". As a child, Link can plant them in pre-dug plots of soft soil. As an adult, Link can return to a planted location and will find a large plant has grown over the seven years he misses. The plant can be used by Link to ride around the area he is in in a short time. Ten such plots are scattered around Hyrule.
- The Goron's Bracelet is a bracelet made of gold with the symbol of the Goron race on it, and is received as a gift from Darunia as thanks for cheering him up with Saria's song. The Goron Bracelet gives the wearer the ability to pick Bomb Flowers. Both child and adult Link can wear the Goron's Bracelet. It is superseded by the Silver Gauntlets.
- The Silver Gauntlets (Silver Gloves in the Japanese version) are the big treasure in the child portion of the Spirit Temple. The Silver Gauntlets greatly improve the strength of their wears allowing them to lift or push most rocks and boulders. They can only be used by adult Link and they disappear once he receives the Golden Gauntlets.
- The Golden Gauntlets (Golden Gloves in the Japanese version) are the big treasure in the Shadow Room of Ganon's Castle. The Golden Gauntlets further improve the strength of their wears allowing them to lift or push almost every object in the game. They can only be used by adult Link.
- The Lens of Truth is a special eyepiece found in the bottom of the well of Kakariko Village. It can reveal false objects like fake walls and floors, as well as detect invisible monsters and obstacles. It can also reveal a treasure chest's contents before it is opened. Link can use the Lens of Truth as a child and adult.
- The Silver Scale is an aptly named silver scale encased in a blue sphere of water that Link receives as the prize for winning the Zora's Domain diving game. It allows Link to dive for up to 6 seconds, and can be used when he is either a child or an adult. It disappears once Link receives the Golden Scale.
- The Golden Scale a gold scale encased in a gold/yellow sphere of water that Link receives as the prize for catching a fish larger than that he caught as a child. It allows Link to dive for up to 9 seconds and supersedes the Silver Scale. It is necessary for obtaining a piece of heart from the scientist at Lake Hylia.
- The Fairy Ocarina a memento given to link by Saria when Link leaves Kokiri Forest for the first time. Link is able to play songs on it until he receives the Ocarina of Time and it disappears.
- The Ocarina of Time is a gift from Princess Zelda as she and Impa fled from Ganondorf . Link must use it, along with the three spiritual stones and the Song of Time to enter the Sacred Realm. It replaces the Fairy Ocarina.
- The Iron Boots are found in the Ice Cavern. They are very heavy and can be used to dive deep underwater and reach the bottom of Lake Hylia which is where the entrance to the Water Temple is. When Link wears them on land he can hardly walk. Can only be worn by Adult Link.
- The Hover Boots are found in The Shadow Temple and are used to hover in mid-air for a short period of time. However, they have little friction and Link slides about when he wears them. Can only be worn by Adult Link.
- The Goron Tunic makes Link resistant to heat. It is given to him by Darunia's son (who Darunia named Link) after Link stops him from rolling around Goron City and promise to recuse to Gorons from the Fire Temple. It can also be bought at the Goron City Shop. Can only be worn by Adult Link.
- The Zora Tunic helps Link to breath underwater. It is given to Link by King Zora after he frees him from the ice when Zora's Domain is frozen. It can also be bought in the Zora's Domain Shop. Can only be worn by Adult Link.
- The Wallet is where Link holds his rupees. Link begins the game with a Child's Wallet which holds up to 99 rupees. Collecting 10 Gold Skulltula Tokens earns Link the Adult Wallet which can hold up to 200 rupees and 30 Gold Skulltula Tokens earns him the Giant Wallet which holds up to 500 rupees.
- Gold Skulltula Tokens are the tokens Link receives after killing a Gold Skulltula to prove that he killed one. Once he has fifty he can go and visit the cursed brothers' house in Kakariko Village and he'll receive a heartpiece. Once he has a hundred they'll supply him with 200 rupees for as many times as he wants. Earning ten enables him to get the Wallet (above). There is also a glitch that allows the player to get more than 100 tokens.
- Masks are traded in Ocarina of Time for money and then more masks, leading up to a main prize. The player starts the challenge by collecting the Keaton Mask at the Happy Mask Store in Hyrule Square. Wearing certain masks can change how certain people will react to Link.
- The Stone of Agony is received after getting 20 Gold Skulltula Tokens and visiting the cursed house in Kakariko Village. When Link is standing near a hidden hole, the Stone will cause the controller to shake (if it is equipped with a Rumble Pack). Hidden holes can be opened with a Bomb, the Megaton Hammer, and/or by playing The Song of Storms.
Upgrades
These items will appear on the equipment subscreen, but can't be "used" like swords or shields, they improve Link's abilities automatically. For heart and power upgrades see Heart Containers and Fairy Fountains. In some instances such as the Bomb Bag upgrade, the order in which you received the upgrades can be reversed. The list provided is the most sensible way to go about things but it can be approached backwards as well.
Heart Containers and Piece of Hearts
edit
Throughout the game you will pick up Heart Containers and Pieces of Heart that will increase your health. This enables you to take extra damage before dying. The locations of the Pieces of Heart you can find throughout the land of Hyrule are noted here.
 Heart Container
Full Heart Containers are left behind by bosses after they have been defeated. Picking one up will immediately increase your health by one heart and fill your life energy totally.
 Piece of Heart
A Piece of Heart is a quarter of a Heart Container. Picking up one won't immediately increase your health in any way. For every four Pieces of Heart you pick up you will complete a Heart Container and your health will increase by one heart and fill your life energy totally. You can see how many Pieces of Heart you have towards the progress of your next Heart Container on the Quest Status screen in the pause menu.
Wallets
editWallets determine the maximum amount of rupees Link can carry. He starts out with the Child's Wallet, which maxes out at 99 rupees. He can later obtain wallets that hold a higher maximum of rupees through the Gold Skulltulas sidequest.
 Adult's Wallet
Holds a maximum of 200 rupees. Can be obtained after collecting 10 Gold Skulltula Tokens.
 Giant's Wallet
Holds a maximum of 500 rupees. Can be obtained after collecting 30 Gold Skulltula Tokens.
Strength Enhancers
editAll three strength enhancers give Link strength to lift things he normally wouldn't be able to. Some just make Link stronger.
| Location | Goron City |
| Child | Yes |
| Adult | No |
| Optional | No |
 Goron's Bracelet
This small golden bracelet is given to Link as a child by Darunia, the leader of the Goron tribe. It is needed to pick Bomb Flowers, which are needed to enter and traverse Dodongo's Cavern. When Link becomes an adult, he no longer needs the bracelet, as his maturity has given him enough strength to pick the explosive plants by hand.
| Location | Spirit Temple |
| Child | No |
| Adult | Yes |
| Optional | No |
 Silver Gauntlets
These gauntlets are given to Link as an adult when he helps Nabooru. They are silver-plated gloves with flashing red magic gems that enhance his strength. They allow link to lift giant blocks. They also let Link lift heavy gray boulders. However, Link cannot move under the weight of them.
| Location | Ganon's Castle |
| Child | No |
| Adult | Yes |
| Optional | No |
 Golden Gauntlets
These shining gloves will allow Link to lift objects with superhuman-like strength; however, only a handful of objects need these in order for Link to lift them. For instance, when you enter the castle of Ganondorf, in order to break the Fire Seal protecting the tower, in the room where it is necessary to retrieve silver switch crystals, one of which is covered by a giant rock pillar that you need the gloves to remove.
Scales
editScales are magical items from the Zora tribe that allow Link to dive deeper than he would normally be able to.
| Location | Zora's Domain |
| Child | Yes |
| Adult | Yes |
| Optional | No |
 Silver Scale
This scale enables Link to hold his breath underwater for five seconds, allowing him to dive deeper than before. Complete the Diving Minigame as a child to earn this item.
| Location | Fishing Pond |
| Child | No (Glitch) |
| Adult | Yes |
| Optional | Yes |
 Golden Scale
This item allows Link to hold his breath underwater for nine seconds. This can be a handy ability, although it is unnecessary to complete the game. The Golden Scale can be obtained by catching a fish of 13 pounds or more in the Fishing Pond as an adult.
Quivers
editQuivers hold the arrows Link uses with his Fairy Bow. When he first obtains the bow, he inherits a regular Quiver which lets him hold 30 arrows, but larger quivers can be found later in the game.
 Bigger Quiver
This replaces the regular Quiver that came with the Fairy Bow, and allows Link to hold up to 40 arrows. It can be obtained by clearing the Shooting Galley minigame in Kakariko Village as an adult.
 Biggest Quiver
This replaces the Bigger Quiver (or regular Quiver), and allows Link to stock up to 50 arrows at once. It can be obtained through the Horseback Archery minigame in Gerudo Fortress.
Bomb Bags
editLink finds his first Bomb Bag in Dodongo's Cavern, which enables him to use and hold up to 20 bombs. Other bags can be found later which hold even more bombs.
 Bigger Bomb Bag
When Link is a child, if he stops the Goron rolling around Goron City, the "Hot-Rodder Goron" will award Link with the Bigger Bomb Bag. To do this you must place a bomb in his path, or send a bombchu flying his way. And, he must be within the tunnel when you stop him. This will replace his regular bomb bag and allow him to carry up to 30 bombs.
 Biggest Bomb Bag
This can be obtained as one of the random prizes from the Bombchu Bowling Alley in Hyrule Castle Town or Kakariko Village. It will replace the (Bigger) Bomb Bag and allow Link to hold as many as 40 bombs.
Deku Seed Bags
editThis bag holds Deku Seeds to be used as Slingshot ammunition. Link receives the smallest Seed Bag, capable of holding 30 seeds, when he finds the Slingshot.
 Bigger Deku Seed Bag
To find the bigger Deku Seed Bag, enter the Lost Woods and go right. You should see a tree with a target hanging from it. Use your Slingshot to hit a bulls-eye three times in a row and you will receive a bag capable of holding up to 40 seeds.
 Biggest Deku Seed Bag
This replaces the (Bigger) Seed Bag that came with the Slingshot, and allows Link to hold up to 50 seeds. It can be obtained by clearing the Shooting Gallery minigame in Hyrule Castle Town as a child.
These side quests can be completed in reverse order, where completing the Shooting Gallery minigame will upgrade your capacity to 40 seeds, and hitting the bulls-eye three times will upgrade you to 50 seeds.
Deku Stick Capacity
editTechnically, this doesn't appear anywhere on the subscreens, but the amount of Deku Sticks Link holds can be increased like Bombs or Arrows. At the game's start, he can hold up to 10.
 More Deku Sticks
Enter the Lost Woods and go left, left, to the room with the bridge exiting Kokiri Forest. Go to the opposite wall to find a Deku Salesman who will bestow you with the ability to carry 20 Deku Sticks for 40 Rupees.
- Most Deku Sticks
To carry 30 Deku Sticks, first borrow the Skull Mask from the Happy Mask Shop. Then go to the Lost Woods from Kokiri Forest and go right, left, right, left, left. In this room is a lone tree, to the left of which are a number of butterflies hovering over a grotto hidden by the grass. Walk around this area until you find the grotto and enter "The Forest Stage." Put on the Skull Mask and step into the spotlight. The Deku Scrubs will like your mask and enable you to store 30 Deku Sticks.
Deku Nut Capacity
edit- Poacher's Saw bug
Due to a bug, the Deku Nut upgrade in the Forest Stage is unavailable after acquiring the Poacher's Saw in all versions other than the Nintendo 3DS version.
Like Deku Sticks, the maximum amount of Deku Nuts Link can carry can be upgraded throughout the game, but there aren't items representing it like the Quiver or Bomb Bag. When Link first obtains a Deku Nut, he'll be able to store up to 20.
 More Deku Nuts
First, get the Mask of Truth from The Happy Mask Shop. Then go to the Lost Woods in the Kokiri Forest: from the start of Lost Woods' maze go right, left, right, left, left. In the back of the room above the grass, you'll see some butterflies flying. There is a hidden hole under them. Enter it and put on the mask. Walk up to the scrubs and they will have varying reactions. Present the mask until they offer to increase your Deku Nut capacity to 30.
One version of the game allows you to still obtain this upgrade after becoming Adult Link. To do so, find the room containing two Business Scrubs, a patch of soft soil, a large field of grass, and a tree. Look through the Mask of Truth. Above the grass, you'll see some butterflies flying around near a hole. Enter it. Put on the mask, and walk up. The Scrubs will look at you. Walk up to the Scrub with the mustache and talk to him. He will give you the upgrade.
- Most Deku Nuts
To further increase your capacity, go to the room in the Lost Woods with the entrance to the Sacred Forest Meadow. There, destroy the large rock and enter the grotto. The Business Scrub there will bestow Link with the ability to carry 40 nuts (at a cost of 40 Rupees for the upgrade).
Walkthrough

This guide will take you step by step through all of Ocarina's fields, towns, and dungeons.
The Beginning

The journey of a lifetime begins! A great tree, a surreal and disturbing dream, and an eternal forest—these are the beginnings of an adventure beyond imagination. In this tale a young hero named Link must journey from the woodland home he has known all his life into the great world in order to save all he knows from destruction. Does he have the power to change an uncertain future? Does he have the wisdom to know what to do? Does he have the courage to endure? Perhaps the most important question of all—will he be able to survive the evil that awaits?
Welcome to the Kokiri Forest!
edit
The adventure begins with a narration by the Great Deku Tree, the guardian of the forest and the father of its human inhabitants, the Kokiri. Link, our young hero, is the only boy in the Kokiri village without a fairy. Suddenly, he is awakened from a particularly disturbing nightmare to find a fairy in his room. The fairy, exasperated, beckons Link to come with it to the Great Deku Tree in order to hear some urgent news.
The young boy bursts through the doors of his home only to be greeted by Saria, his childhood friend. She is overjoyed that Link has finally gotten a fairy of his own, but Link knows deep inside that this was not to be the happy day his friends would expect it to be.
The jealous Mido will do his best to make sure of that too. Shocked inexplicably by the apparent favor that both Saria and the Great Deku Tree have shown to Link, he will do everything in his power to prevent you from seeing the great tree. He insists that you must have both a sword and a shield before you can pass. What a jealous fellow, indeed!
Proving yourself to Mido
editClearly, this portion of the game was designed in order for you to become accustomed to the controls and game functions. Fortunately, this is unlike almost any other in-game tutorial out there: it's fun. Already, you have been presented with a problem—that Mido is blocking your way—and now you must set out to find a solution. You will need to find the Kokiri Sword and Deku Shield. While you can get the items in any order, getting the sword first may help you acquire the 40 Rupees necessary to purchase the shield.
Getting the sword
edit
The sword isn't very difficult to find. To reach it you must first locate a hole in a wall the "Forest Training Center," a fenced area up on a hill. Using your mini-map, head to the western side of Kokiri Village. The hill is on your left. Make your way through the fences, approach the crawlspace at the end, and press the A button when prompted to crawl through it. Be careful—on the other side. You'll have to dodge a huge rolling boulder. You can do this by ducking into alcoves when it is rolling toward you. Once the large rock has passed, simply run behind it. If you explore this section, you may find two Blue Rupees beside the tall, skinny weeds. Collect them, as they will be helpful for purchasing the Deku Shield. You'll easily locate the chest by zigzagging to the left then to the right from where you entered. Open it to get the Kokiri Sword (but there is another chest that contains a blue rupee, which might cause confusion to you)!
You're now half-way toward getting past Mido. Wait for the boulder to pass again before you head back to the crawlspace and the Kokiri village.
Training with the sword
editIn the Forest Training Center (where you crossed through to reach the crawlspace), you will notice a house to the right of the fences. You can ask the people in the house to tell you about the game's controls, weapons, and other lore. Within the fences you will find a boy staring at a rock. Talk with him for an introduction on how to use your sword and the game's targeting system using the Z button. Read the various signs to learn new tricks, or talk to the other Kokiri. Make sure to spend a little time here getting used to the mechanics because you'll certainly need to be well versed in them ahead. You might find some Green Rupees when you backflip targeting the rocks or thrusting the signs or jumping from fences.
-
 With targeting, you can slash…
 -
 …do backflips…
 -
 …and talk to distant people.


Getting the shield
editThe Deku Shield can be purchased at the shop for 40 Rupees, the staple currency of the Zelda universe. Of course, you start the game off with no money at all, so you'll have to do a little exploring in order to track down the cash! Some free-standing rupees are sitting around town, so be sure to look behind buildings and use the first person view to help find them. Cutting bushes and running through the tall grasses is also advised.
There are many ways to get Rupees...
-
 Run through grass.
 -
 Slash bushes.
 -
 Throw rocks...
 -
 ...and pots.
 -
 Look behind buildings.
 -
 Try to walk to the end of the bridge.
 -
 Or jump straight on the blocks in the water.
 -
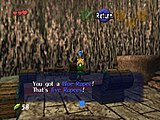 Mido's house has chests with rupees.


| Kokiri Shop List | ||
|---|---|---|
| Item | Quantity | Rupees |
| Arrows | 10 | 20 |
| Arrows | 30 | 60 |
| Deku Nuts | 5 | 15 |
| Deku Nuts | 10 | 30 |
| Deku Seeds | 30 | 30 |
| Deku Shield | 1 | 40 |
| Deku Stick | 1 | 10 |
| Recovery Heart | 1 | 10 |
A quick way to earn some rupees is by running and jumping across the square platforms in the water near the shop. Each time you successfully jump across without falling in the water, you earn a Blue Rupee. You can do the same thing if you go to the door of the house across from the shop, and jump onto the larger island in the water, and then to the smaller island. After you get both, just enter a nearby building and then go straight back out. The rupee rewards will be reset. You can collect the rupees as many times as you wish, so by doing this you are quickly approaching your target wealth while as getting used to the controls at the same time. Also, in the shop, look to the right and you should see a small area to the side of the counter. Enter that passage and you will find a Blue Rupee. (NOTE: This will only work once.)
Once you have 40 rupees, head to the shop and get your shield. You won't need to buy anything else, as you'll soon encounter the other items. After you've purchased the shield, don't forget to equip it! Then it's time to show Mido your new Deku Shield!
Exploring the Lost Woods
editYou have the option to open up more of the map. There is not much you can do here presently, but you may wish to get familiar with the area now before you have to come back later in your quest.
To the Great Deku Tree!
edit
Show your stuff to Mido, and he will pout—he didn't anticipate that you could actually complete such a task. However, he has to keep his word, and he now allows you access to the Great Deku Tree. Poor Mido doesn't feel loved.
Be aware: some withered Deku Babas haunt the road ahead, but it is a short road. Just dispose of the creatures with your new sword, grab any Deku Sticks that their corpses leave behind, and head on down the path. Do not linger or the monsters will regenerate. Or you can keep defeating them until you have maxiumum of 10 deku sticks if you don't have upgrade. After a short dialog with the Great Deku Tree, he beckons you to enter his trunk and to break an evil curse...
Inside the Deku Tree
The Deku Tree has granted Link a fairy and summoned them both to meet him. After obtaining both a sword and a shield, the equipment necessary to fight battles, Link stands before the huge tree.
The Deku Tree has become infected with a great evil, and he asks Link and Navi to venture inside him and kill it...
Inside the Deku Tree
edit
Be warned — you now face death! The inside of the Deku Tree opens up to reveal a large cavernous space filled with monsters!
In the great entrance, you are greeted by Deku Babas. Unlike the withered ones you faced before, these Deku Babas are full of energy and will lunge at you. When you kill Deku Babas, be aware that sometimes they will regenerate. For every normal Deku Baba you kill, you can get a Deku Nut, an item that stuns enemies. Withered Deku Babas that do not lunge at you will yield Deku Sticks; you can also "stun" a normal Deku Baba after it lunges at you and chop it at the stem to get the sticks. Take note that the ones that regenerate and look blackened are the ones that are the withered Deku Babas. Deku Sticks will prove very useful throughout this dungeon.
When you have defeated the Deku Babas, take note of the plants growing on the ground. You can chop these with your sword to get rupees, Deku Nuts, and—most importantly—hearts! Grass like this that leaves its roots visible after cutting will regenerate after a short time.
Going up
edit
Take note of the spider web on the floor. You'll need to make use of it later. The only way to go is up for now, so begin to climb up the ladder or the vines. When you reach the top, begin heading right, as this leads upwards. If there are any gaps in the path, simply press the control stick in their direction and Link will jump—there will be areas ahead to familiarize yourself with jumping.
On your way up, there will be a chest that contains the Dungeon Map. Every dungeon has one of these, and they are really useful if you become lost.
Getting the Fairy Slingshot
edit

Do not climb the vines behind the map, as there are spiders called Skullwalltula that will knock you off if they face towards you. Instead, go forward, continuing your journey up. You'll come across a door you'll need to enter. Inside is a Deku Scrub, a type of hostile merchant. It is the mini-boss of this dungeon. You must use your shield to deflect its nuts back into the creature. When you hit him, he will try to run away—chase him. When caught, he offers advice and will unlock the door ahead.
Quickly jump across the platform to the other side. It will disintegrate below you, leaving no way to get back. In the chest is the dungeon item: the Fairy Slingshot. Note: in nearly every Zelda game, the dungeon item is used to defeat the dungeon's boss or solve its key puzzles. It is no different here.
On the left, there are vines you can climb to reach a chest containing a Recovery Heart. Use it if you need it.
Now, in order to get ammunition for your slingshot, chop the plants at the bottom of the main floor, the room you got the slingshot in, or any other grass outside of the dungeon until they drop Deku Seeds, hard seeds that hurt when they hit someone. You can buy them if you want from the shop in Kokiri Forest. Right now, you can carry up to 30 of them, but that limit can later be increased.
After this, turn around and look at the unreachable door. Just above it, there is a ladder that you will need to shoot with the slingshot. Make your way back to the main chamber to where you found the chest containing the map.
An alternate method for this room is to jump down from the door, ignoring the floating platform, and climbing up the vines to the slingshot chest. Then you can use the platform to quickly get back to the door, saving time and ammo.
To the very top
edit(There is also a chest with a recovery heart.)
Gold Skulltulas make a scratching noise. Use this to find them. Shoot them and recover their tokens. There are a few more in this dungeon, and many in the overworld.
Start to collect Gold Skulltula tokens early in the game, as they will be useful to obtain key upgrades later. Be sure to read the Gold Skulltula guide for more info.Remember where you couldn't proceed to climb before because of the Skullwalltulas blocking your way? Now you have a way to attack them! Target all three of them with your Fairy Slingshot, then make your way up the vines and head right. You can ignore the Big Skulltulas for now. Enter the lone door.
Jump on the button near the lit torch to bring up three platforms. Quickly but carefully, jump across the platforms to the opposite end of the room. If you fall off the platforms during the jumping sequence, you'll have to start over—there isn't enough time to make a single mistake. Watch out for the Deku Baba in the pit and at the opposite end of the room, as well as the Skulltula guarding the side nook. Open the chest at the other end to find the Compass, which reveals the locations of all unopened treasure chests and the dungeon boss.

On your way out, you may choose to begin a sidequest. In the nook to the left of the room as you entered, there is a Gold Skulltula. Read the sidebar for more information.
To leave the room, equip a Deku Stick and light it on fire with the lit torch. Carry the flaming stick to the unlit torch. Once the torch has been lit, the door will become unlocked. Be careful that your Deku Stick does not burn away. If you want to save a Deku Stick from burning after it has been lit, simply swing your sword, or stand still until the action button says "Put away".
Through the spider web
editAt the top of the Great Deku Tree, in the main hall, go to one of the three openings in the spiderweb. Big Skulltulas will plunge down from the ceiling, but they are easy to defeat. The spider will turn to reveal its soft belly, so strike it with your sword to kill it!
Peer over the edge back to the first floor. You need to jump towards the first floor log that is sticking out to fall to the giant spider web directly beneath the heart in the center of the room. If you do this correctly you will fall through the giant spiderweb you saw on the first floor. If you do not land in (or near) the center of the spiderweb, you will only bounce off instead of falling through. Climb to the top and try again!
-
 Stab the big spider in its back.
 -
 Jump towards the floating heart.
 -
 You'll fall through the spiderweb...
 -
 ...and land in a new room.


The basement
editNext to the watergate, there is another Gold Skulltula. Again, kill it with your slingshot or slash with sword. You'll have to jump from one of the button switch ledges to get its token.
Very rarely will you encounter two or more Gold Skulltulas in one location, so don't always expect to find several all at once.Once downstairs, there is a lot to do. As you probably landed in the water, you will notice three ledges circling you. On one side, there is a single large ledge with a block sitting atop it—ignore this one, it is inaccessible for now. On the opposite side, there are two other ledges: one large one, and one small one that barely sits above the waterline. Between the smaller ledges is a vine you can use to get back up to the main level of the dungeon. Climb onto the ledge with the button switch. Since there is shallow water, you can stand in it. Use this to climb onto the ledge. Press the switch to light the torch behind you. This will also catch the spider web on fire and reveal a small chest with a Recovery Heart inside.
You must light a Deku Stick and carry it across the shallow water to the other end where you will light a spider web on fire. Beware of the single Deku Baba. Kill it if you need another Deku Stick. Once you have lit the web, go through the door it was previously blocking.

A clue for later
edit
In this room there is another Deku Scrub. Use your shield to deflect its nuts back into it. Run after the scrub to get it to tell you how to defeat it's brothers.
The order is... 2 3 1. Twenty-three is number one! Do you think I'm a traitor?—Deku Scrub
You'll have to defeat the scrub's brothers in that order.
Use your Fairy Slingshot to shoot the eye switch above the locked door. You'll see tons of these eye switches in later dungeons, so familiarize yourself with them.
Getting dangerous
editIn the next room, you will notice a floating platform that is meant to carry you to the other side of a large pool of water. Unfortunately, exactly level with the waterline is a giant rotating bar of spikes that will most certainly do you harm if you touch it. Navi will tell you how to dive into the water. Surely this is a hint at how to solve this room's puzzle. In the water there is a timed switch that you can hit to lower the level of the water, and make it safe to use the platform to cross. There is plenty of time, so don't worry.
At the other side, there is a Skulltula that you will need to defeat. You will notice that the door towers above you, and that there is a strange block just to the left of the door. Navi will tell you how to push and pull blocks, and this is your clue that you will need to push this block under the door, then climb it. In this room, there are shrubs that you may use to get items to replenish your health and ammo. You may need them for what lies ahead.
In the next room, there are two withered Deku Babas, one lit torch, and two unlit torches. Light the unlit torches with a burning Deku Stick to open the locked door. Pretty easy fare, until…
-
 Don't run into the spikes!
 -
 Find the button and dive towards it!
 -
 Push the block, then climb it!


A heated battle
editAs soon as you enter the next room, a Skulltula drops from the ceiling right in front of you! In the room there is a withered Deku Baba, and new enemies drop from the ceiling: Gohma Larva. The Gohma will actively follow you and try to jump on you — depending on where you run in the room, there will be 1-3 larvae trying to attack you, so be careful. The larvae won't drop unless you run underneath them. You can also shoot them before they hatch and fall to attack. If you stay inside the doorway that you first came in at, where the Skulltula once dropped down, aim your Fairy Slingshot towards the center of the ceiling. You will see three red-ish sacks hanging. Aim to hit these sacks right where they connect to the ceiling. If your aim is true, they will disintegrate and be rendered harmless.
In this same room, you have two spider webs to burn. One of them leads to a "dead end", but it can be opened later in the game when you have the right equipment (note: It contains another Gold Skulltula). The other path leads to a crawlspace tunnel back to the main underground chamber where you first entered, only this time you will be on the ledge that was impossible to reach before.

Yet closer…
editWhen you emerge from the tunnel, you will immediately notice a spider web in the floor as well as Deku Babas. You will have to light the web on fire, but you will notice that all of the torches on this ledge are too tall to reach. For now, ignore the web and run to the left—there is a block you can push into the water. It will form a sort of bridge you can use make it possible to get back up to this ledge without having to go through all of those puzzles again.
Jump across the bridge that you just formed. Light a Deku Stick on the torch there, and quickly jump back across the gap. Swipe your deku stick on the web quickly, roll with it, or crouch by attempting to use your shield to light the web on fire. You will fall into the lowest level of the dungeon.
-
 Carry the flame across the block bridge.
 -
 Swipe the stick, or roll over the web to set it ablaze.


Twenty-three is number one
edit
You land in a pool of water. There is a vine behind you for you to crawl back up in case you need to. Here, there are hearts in the water. Dive to get them if you need them, then swim on to land.
You'll need to remember what the earlier Deku Scrub told you: Twenty-three is Number One! You must attack the three deku scrubs in that order, counting from left to right. (That is, middle first, rightmost second, and leftmost third.) The scrubs turn a blue color when you have stunned them. After you defeat the last scrub, he will give you a hint on how to beat the "queen": attack when she's stunned.
Are you ready for what lies behind the next door…?
Boss: Gohma
edit
The room will appear empty, but advancing to the center and looking at the ceiling with the Fairy Slingshot or in first-person view reveals the evil infecting the Great Deku Tree…
Gohma is basically an over-sized version of the larva you fought previously. The eye of Gohma is her weak point, but only while it is flashing red. When it flashes, a hit from your Fairy Slingshot or a Deku Nut will render it vulnerable to your blade.
You can't back out now, as the door behind you has shut. The only way forward is over Gohma's dead body — it's time to squash this bug.
Attack strategy
edit- Wait until Gohma is on the ground and starts heading towards you.
- Once Gohma's eye changes color to red, shoot it with your Fairy Slingshot or a Deku Nut to stun Gohma. The slingshot will stun Gohma for a longer amount of time than a Deku Nut will.
- Run up to Gohma and start slashing her eye while it's on the ground and stunned. Keep slashing it as many times as you can.
- The most effective method to kill Gohma is to use three jumping vertical chop with a Deku Stick when it is on the ground. Even if it survives the initial attack, it will not have much health left.
- The stick is mightier than the knife
The Deku Sticks are actually twice as powerful as your Kokiri Sword. It is almost always more effective to use your Deku Sticks over your sword. Just keep in mind they are a limited resource and you must continue to replenish them lest you run out.
Avoid the larval eggs
editAfter you attack Gohma, she will run off and start climbing up the wall. Keep an eye on Gohma, and when its eye is open, quickly shoot it with your Fairy Slingshot. If you don't hit Gohma when it is on the ceiling, she will lay three eggs that hatch into Gohma Larva—the tough critters you battled before. If eggs are dropped, try to slash or throw a Deku Nut at them before they hatch. Otherwise, quickly dispatch the larva. Obviously, it is wisest to prevent any of this from happening.
If you shoot Gohma while she is on the ceiling preparing to drop eggs, she will fall to the ground stunned and ready to slash at again. Otherwise, if you aren't successful, just wait for Gohma to start chasing towards you again and hit her in the eye with the Slingshot or a Deku Nut before you start slashing again. Continue to attack Gohma when she is stunned until the monster is no more.
Vanquished!
editNow that you have killed Gohma, as her body disintegrates you will see a Heart Container appear in its place. As the door is still shut tight behind you since the beginning of the battle you need another way out. A blue light will appear in the room which will take you back outside. Make sure you grab the heart container first to increase your life energy by one heart and then step into the blue light.
-
 Queen Gohma appears!
 -
 Attack with your sword while Gohma is stunned!
 -
 While on the ceiling, Gohma tries to lay eggs. Stop her! If you fail, destroy the eggs quickly!


Aftermath
edit
After all of this has transpired, you'd expect a great deal of revelation, wouldn't you? There's probably more than you expect. Either way, these answers will only lead to new questions.
The first thing the Deku Tree does is congratulate Link after his safe return. Soon, however, he begins to tell the tale of the evil which has befallen him and the world. A tale of a wicked man of the desert who sought power… The great tree further explains the origin of the land of Hyrule, as well as the origin of a great power – the Triforce – which was formed at the spot where the goddesses of creation left the world.
It is said that the Golden Triangles possess great power.
After all Link has done, it is revealed that it is already too late for the Deku Tree. His fate was sealed even before Link entered his great mouth. Before he passes, however, the Deku Tree entrusts to Link the Kokiri Emerald, which the desert man had sought to take. Now it is up to Link to protect it. With his last words, the Deku Tree bids Link and Navi farewell, then dies.
Link bids farewell
edit
Link can no longer stay in the Kokiri village; so now the time has come for his journey to begin. Kokiri lore states that if a native Kokiri ever tried to venture into the world, they would surely die. It takes only a few steps to prove that Link is no native Kokiri.
Saria meets Link at the bridge leading to the exit and presents him with her Fairy Ocarina as a memento.
Hyrule Castle

To the castle! When the cutscenes are over, you need to follow the path to Hyrule Castle Town. Remember that you can only enter Hyrule Castle Town during the day, as the drawbridge shuts at night. As you enter Hyrule Field, you'll be greeted by a large owl, Kaporea Gaebora. He'll often stop by to give you advice, and occasionally give you a ride on his talons.
The dangers of Hyrule Field
editGold Skulltulas often prefer to come out at night because they like the dark.
Many of them only come out then, so keep a close eye and ear out for them.In order to make it into Hyrule Castle, you must travel a long distance. However, there are monsters along the way that can give you serious trouble.
During the day, large plants called Peahats are stationed in the field, and they are quite nasty. They will attack if you get anywhere near them, and the only way to kill them is to strike their root. Some are particularly dangerous and will spawn Peahat Larva. These are practically invincible and will hunt you down. The only way to avoid them is to outrun them or make them hit the ground. Along with the threat of Peahats, nightfall brings more evil.
Skeletal monsters called Stalchildren come out at night. These creatures can be felled quickly, but they just keep coming. If you kill enough, a larger Stalchild will appear. These take more hits to kill. However, standing on a dirt path will keep any Stalchildren from coming out. If you can survive the night, you'll reach Hyrule Market. If you make it to the bridge, but it closes before you can cross it, simply stand on the rock ledge by the moat or swim in the moat and the Stalchildren will not be able to reach you. You can also just wait on the dirt path and the Stalchildren will not even spawn.
If you're going to other areas like Gerudo Valley, Lake Hylia, Zora's Domain and Kakariko Village for the first time before Hyrule Castle, Kaepora Gaebora (the old owl) will stop you in your tracks to give you more hints into the game before he flies off. It's best to stick to your main route to Hyrule Castle as the day goes quite quickly.
Hyrule Market
edit
In the marketplace you will see two men talking. One of them tells you how he tried to get into the castle and see the princess. He also tells you of a small opening into the castle in which he got stuck. Over by the fountain, a girl named Malon tells you that her dad still hasn't returned from the castle.
Shooting Gallery
Before continuing, stop by the Shooting Gallery to receive the Bigger Deku Seed Bag. The game costs 20 rupees. To win, you must hit 10 targets (in this game, they are rupees!) in a limited time with 15 bullets. If you hit seven or less, the game is over. If you hit eight or nine targets, you get another free try. Upon successful completion, you will be able to carry 40 Deku Seeds instead of 30.
Bombchu Bowling Alley
Once you finish the next dungeon and acquire the Goron Ruby, the Bombchu Bowling Alley will be open to you.
Treasure Chest Game
The Treasure Chest Game can be played in Hyrule Market, but only at night. In each room, you are presented with two chests--one contains a rupee, the other a key to the next room. The game is entirely dependent on luck. However, a later item in the game will reveal what's inside the chests.
If you are short on rupees, you can enter the door to the guard house next to the drawbridge. This room contains a lot of vases, which may be broken to get rupees. This may be repeated as often as required to collect as many rupees as necessary. There is also a Gold Skulltula inside of the lone box next to the soldier. Run up to the box and roll into it to reveal the Gold Skulltula.
Shops
editRub up against the dog, and he will follow you. Enter the woman's house in the back alley to collect your Piece of Heart for finding "Richard". Next time you will get 5 rupees.
| Bazaar | ||
|---|---|---|
| Item | Quantity | Rupees |
| Arrows | 10 | 20 |
| Arrows | 30 | 60 |
| Arrows | 50 | 90 |
| Bombs | 5 | 35 |
| Deku Nuts | 5 | 15 |
| Deku Stick | 1 | 10 |
| Hylian Shield | 1 | 80 |
| Recovery Heart | 1 | 10 |
| Potion Shop | ||
|---|---|---|
| Item | Rupees | |
| Blue Fire | 300 | |
| Bottle Bug | 50 | |
| Deku Nuts (5) | 15 | |
| Fairy's Spirit | 50 | |
| Fish | 200 | |
| Green Potion | 30 | |
| Poe | 30 | |
| Red Potion | 30 | |
In the Bazaar there is not much you can buy at this point. Do not buy the Hylian Shield at this time. You do not need it now. You will soon, and by that time, a soldier will put in word for a discount for you. There is also a way to get it for free.
As for the Potion Shop, again, not much available. One, you need a bottle to put the items in. Two, at this time you can only carry 99 rupees at most. However, throughout the course of the game you will acquire Empty Bottles and your wallet will expand to carry more money.
Entering the Castle
edit
Head north. After you get the introduction scene for Hyrule Castle, head back to the market. Now head back to Hyrule Castle again. Malon is now waiting by some vines on the wall. When you speak to her, she gives you a Weird Egg.
Climb the vines (the central vine is the only one to reach the top), and move toward the castle gate. Then drop down into the hole with the ladder. Now exit the door. Once the path starts to curve left, keep out of sight of the guards by walking up the hillside to your left. Head straight across the grassy area to a brick wall on the left side of the main gate. If you see a guard, move out of his line of sight. Climb the wall and head toward the castle. Drop into the moat. Swim all the way to the bars on the right (you should be able to pick up some rupees by staying near the middle) and climb onto the shore.
A man will be sleeping next to a couple boxes. It's Malon's dad! He's dreaming about kids at the ranch... If a day has passed and the Cucco has hatched, then use it on him and he'll wake from his delighted slumber. Of course, he realizes what he's done by making Malon wait so long for him, and runs off in a hurry. Now, you can push the blocks to a position from which you can enter the castle.
- A hot magic spell
On the path to Hyrule Castle, starting at the gate, heading to the right instead of the left you'll notice a boulder with a sign in front of it that reads "Dead End." Once you obtain the Bomb Bag you can return here to acquire Din's Fire.
An Audience with the Princess
edit
- Note that you cannot do this at night!
In order to reach the princess, who is in the castle courtyard, you must make your way past a number of guards in five different areas. Keep your distance and keep to the rear of any guard. Timing is important. However, make sure you enter the courtyard before nightfall. The only time you can attempt to sneak into the courtyard is during the day. At night, two guards stand vigilant and prevent anyone from entering. But, if you sneak in past those guards, they won't kick you out.
The princess is found standing at a window across the courtyard. Zelda is shocked at first to see you, but soon recognizes that you are from the Kokiri. Upon showing her the Spiritual Stone of the Forest, she reveals to you a dream she had in which you played a part. She then tells you of the secret of the Sacred Realm. The Sacred Realm holds the Triforce, which is imbued with the power of the goddesses, the power to grant the wish of whoever holds it. She also reveals that the Temple of Time, (located off the Market) is the entrance to this Sacred Realm blocked by the Door of Time.
In order to open the Door of Time, you must gather the three spiritual stones (one of which you already have) and the Ocarina of Time.
-
 Dodge the guards.
 -
 Talk to the Princess.
 -
 Ganondorf: King of the Gerudo.


Princess Zelda then asks you if you would see the other man from her dream, the enemy. Upon looking through the window, she tells you his name: Ganondorf.
Departure
edit
Zelda gives you Zelda's Letter and sends you on your way with Impa, the Sheikah. Impa teaches you Zelda's Lullaby, your first melody.
Zelda's Lullaby
- Nintendo 64: C-left, C-up, C-right, C-left, C-up, C-right
- Nintendo GameCube: C-Stick (left), C-Stick (up), C-Stick (right), C-Stick (left), C-Stick (up), C-Stick (right)
- Wii Classic Controller: Right Stick (left), Right Stick (up), Right Stick (right), Right Stick (left), Right Stick (up), Right Stick (right)
- Nintendo 3DS: X, A, Y, X, A, Y
She then instructs you to go to Death Mountain, home of the Gorons, but not before speaking to the villagers of her hometown, Kakariko Village, which is located at the foot of the mountain.
Sidequests
editBefore heading over to Kakariko Village, take some time to visit some of the areas currently available to you and find some new upgrades and Gold Skulltulas.
Lon Lon Ranch
editYou can find Lon Lon Ranch in the very center of Hyrule Field. You'll see the entrance simply by looking out from the drawbridge of Hyrule Castle Town.
Entering the first door on the left will bring you to Talon, sleeping once again. Speak to him and you can play the "Super Cucco-findin' game". This game is much easier if you throw most of the Cuccos into the gap between the table and the stairs before talking to Talon. If you lose, you lose 10 rupees. Winning will give you a bottle of Lon Lon Milk. A dose of this will restore five hearts of health, and there are two doses in the bottle. After drinking all the milk, you can return and buy more for 30 rupees. Winning again will also garner you a refill. Or you can fill the Empty Bottle with something else. Note: upon losing, you are given the option of playing the game again for only 5 rupees.
Out in the corral is Malon. When you speak to her, she introduces you to a young horse, Epona. However, the horse is afraid of you and runs away. Speak again until she mentions her mother's song. Equip your ocarina and she teaches you a new melody, Epona's Song.
Epona's Song
- Nintendo 64: C-up, C-left, C-right, C-up, C-left, C-right
- Nintendo GameCube: C-Stick (up), C-Stick (left), C-Stick (right), C-Stick (up), C-Stick (left), C-Stick (right)
- Wii Classic Controller: Right Stick (up), Right Stick (left), Right Stick (right), Right Stick (up), Right Stick (left), Right Stick (right)
- Nintendo 3DS: A, X, Y, A, X, Y
Play this song and Epona is no longer afraid of you. Also, with this song and an empty bottle, any cow you find will give you free Lon Lon Milk.
Now, go to Kakariko Village and enter it during the day.
At the southwest corner of Lon Lon Ranch, outside the corral, is a stone building. Entering the door reveals two cows and several boxes. a small hole with a Piece of Heart is behind the boxes.
- Gold Skulltula catch-up
With a bottle, you can now capture bugs. You can either purchase them in a shop or look for them in grass or under rocks. Bottle up a bug and head to the Kokiri Forest. There is a small patch of soil near the shop. Drop the bug out near the hole and they'll go in. What comes out? A Gold Skulltula! Along with the ones that appear at night, a few Gold Skulltula can be hiding in soft spots of soil. All it takes is a little bug to lure them out.
Gerudo Valley
editIn the west of Hyrule Field you'll find the entrance to Gerudo Valley. This area is a huge gorge with a waterfall flowing down into a fast moving river below. Following the river will eventually lead one to Lake Hylia. There is a bridge across the gorge, far above the river, leading to the hideout the Gerudo thieves call home, Gerudo Fortress. This is where Ganondorf hails from and rules over.
Currently, there is a barrier raised at the far end of the bridge with one Gerudo woman standing guard in front of it, and two Gerudo guards patrolling behind it. The one standing in front will simply tell you a kid like you has no business there. Even if you were to find a way beyond the gate behind her, the guards would toss you down into the river.
Along the edges of the deep valley are a few small ledges that haven't been eroded away by the river over time. You can see a crate lying on one. Even further below there is a large ledge holding another Gerudo woman and a cow.
There is not much you can do here now, but you'll be returning here much later in your quest, and there will be several more things you can do beyond the valley.
Grab the Cucco and jump off the cliff and head to the waterfall. Slowly lower into the middle of the waterfall and glide into the alcove containing the Piece of Heart.
Along the cliff face is a crate containing a Piece of Heart. You can grab the Cucco and glide towards the crate to reach it.
Lake Hylia
editIn the south of Hyrule Field you'll find the entrance to Lake Hylia. The large gates may appear to block your way through, but along the wall to the west of the gates that wraps around the cliff nearby is a ladder you can climb allowing you to pass by them from above.
Lake Hylia is the vast lake of Hyrule where the water from Zora's Domain eventually comes to rest. Here the Zora race guard a temple that has sunken below the surface of the water long ago. You'll also find a laboratory here with an old scientist who chooses to study how the waters of the lake can be used to create new medicines.
If you wish to take a break from your journey, you can stop by the fishing pond for a little leisurely activity as well.
The Scarecrow's Song
editNear the underwater entrance to Zora's Domain in Lake Hylia, you will find two Scarecrows, Bonooru and Pierre, on the shore. Bonooru will ask you to play a song for him, which he claims he will remember. The song you play will be listed as the game's Scarecrow's Song. It is your own creation but must be eight notes long. You can change the song as you please. If you forget it, Bonooru will give you the melody you last played. Remember the song, as it will be very useful one day. Unfortunately, you cannot use the same note eight times in a row, so the best thing to do is just use two and switch back and forth (left right left right, etc.).
You can also create melodies in front of Pierre, but they don't have to be only eight notes long. They can even have special tunes in them if you wish. The song you create for Pierre won't become a new song when you play it, but is used for a little Easter egg at the end of your quest.
Drop a Bottle of Bugs into the patch of soft soil next to the Lakeside Laboratory to unearth a Gold Skulltula.
On the secluded island with two pillars in the middle of Lake Hylia lies a Gold Skulltula on one of the columns. Kill it and take the token.
Kakariko Village

Once you enter Kakariko Village, you'll find it a busy place. A construction project is under way. Up the hill to your left is the gate to Death Mountain Trail, and to the right of the windmill is the path to the Kakariko Village graveyard.
The gate to Death Mountain
edit
In order to get to Death Mountain, you need to open the gate. Speak to the guard at the gate. He won't let you through unless you have royal permission, but when you show him Zelda's Letter, he opens the gate for you. However, he suggests that you have a "proper shield". According to him, you can buy this shield in the Bazaar in the Hyrule Castle Town Market. After you talk to the guard, you can go to the Market to find the Bazaar shop. He'll take off a random amount off the price (as much as 40 rupees off) for the Hylian Shield. Though you may want to wait just a moment before deciding to head all the way back there right now, as there is an even better deal available to you.
Additionally, the guard makes a request that you pick up a popular mask from the Happy Mask Shop for his son. It seems that his son really wants the Keaton Mask from Hyrule Market but he can't leave his post to get it. If you want you can run back to the Hyrule Market and get the mask from the mask shop. Bring this mask to the guard to sell it to him for a 5 rupee profit. While it's not much, you will get access to other masks later in the game which can bring you much bigger profits and upgrades.
Before heading up through Death Mountain Trail, go to the graveyard and enter the grave second from the left on the first row. It will have three tiny flowers on the ground in front of it. If you already have the Hylian Shield the chest will instead contain Blue Rupee. Return later with bombs to uncover a Fairy's Fountain behind the chest. You can heal from these fairies or capture them, but you need an Empty Bottle to carry them in.
The Gorons' problem
editAs you move up Death Mountain Trail, you'll meet several Red Tektites. Beyond them is a large boulder with a smaller boulder to the right. Surprise! When you approach the smaller boulder, it turns out to be a Goron. He explains the problem the Gorons are having. They feed on rocks, and the best rocks come from Dodongo's Cavern, but recently a Gerudo came and sealed up the cavern with this giant boulder. Additionally, the cavern has filled with monsters. After speaking with him, continue up the mountain.
Sidequests
editThere may be a few things to do here before continuing up Death Mountain Trail.
The large tree near the entrance to Kakariko has a Gold Skulltula in its branches. Roll into it to dislodge it.
You will find a Gold Skulltula lurking on the side of the House of Skulltula.
Look on the center pile of bricks of the building currently under construction to spot another Gold Skulltula.
The house to the left of the gate leading to Death Mountain has a Gold Skulltula on its side.
Use your Fairy Slingshot or Bombchus to kill a Gold Skulltula on the ladder of the tall lookout tower, then climb up to grab the token.
The House of Skulltula
editThe first house on the right is the House of Skulltula. Don't get startled by its inhabitants; you will find Skulltulas inside, but they can talk and look like people! The one who drops down in the center of the room explains the Skulltula curse that has befallen his family. He promises to make you "very rich" if the curse is broken. The breaking of the curse requires that you kill all 100 of the Gold Skulltula and obtain their tokens. For every 10 Gold Skulltulas you kill, a child is relieved of the curse, and you can return to this house for a reward. However, after you kill 50, you will need to kill the other remaining 50 to get the final reward from their father.
Cucco round-up
edit
If you talk to Anju, the woman by Impa's house, you'll learn that her cuccos have ran away. If you find all seven and bring them back to the pen, you'll be rewarded with an Empty Bottle.
The first cucco is right near her. Simply pick it up and throw it into the pen. The second one is near the gate to Death Mountain. Pick it up, run across the rooftop of the house by the watchtower, jump right off the end, and use it to fly over to the high fence near the Skulltula House to reach the third cucco. You can also simply throw a Deku Nut at the cucco from the other side of this fence. This will upset it, and it will run off of the ledge. Just don't hit it again, or you will make it very angry. You can now run down the stairs and grab it. Throw both cuccos off the ledge and take them to their pen.
The fourth cucco is near the entrance to Kakariko Village, and the fifth is in a crate near the steps that are left of the village entrance. Roll into the crate to smash it and grab the cucco inside. Keep the cucco with you and go up the stairs by the graveyard entrance where the carpenter jogs.

With the cucco in hand, jump off the ledge diagonally towards the rust colored house with the small fence in front of it - this is how you circumvent the tall gate. After landing, throw the cucco back over the fence to the area you came in from. There is a secret hole in this area which leads to a chest with Rupees inside if you need them, otherwise toss the sixth cucco running around here over the fence like before, then climb the tall ladder to collect the seventh and last cucco. Grab him, glide down, throw him in the pen, then round up the two cuccos you threw over the fence.
Once all seven cuccos are back in the pen, talk to Anju to get the Empty Bottle. After this, you'll get a Purple Rupee each time you round them up again, but you'll lose Rupees, for throwing cuccos out of the pen.
There is one important thing you should remember about cuccos: never attack them. If you strike one enough times, it will call its buddies and they will swarm on you! If that happens, run for your life!
Kakariko Village graveyard
editFrom Kakariko village proper, you can enter the graveyard through the opening to the right of the windmill. In the graveyard, there are many graves, some which hold strange secrets. If you look far back to the end of the graveyard, you'll see an unreachable entrance that seems peculiar. This place will be a later part in your quest, and you'll learn a song to reach this mysterious area behind all the graves.
There is a little boy who monitors the graves during the daytime, so you can't fool with any until night time. At night, during 18:00 to 21:00 game hours, Dampe will be awake and will run the Heart-Pounding Gravedigging Tour. If you want, you can pull graves to find things at night, but you may disturb Poes, ghosts that will attack you if you provoke them. If you kill one, you can capture it, but it has a random effect if you are daring enough to drink one, or nothing may happen. If you uncover the second grave from the left, the one with three flowers in front of it, and fall down the hole there is a Hylian Shield waiting for you.
If you go up to the tombs in the far back, a storm will occur. The graves beside the large tomb are the ones of the Composer Brothers Sharp the Elder and Flat the Younger. Reading their graves will summon them, and they will attack you! Defeat them to hear their stories about studying a song that can control day and night.

At the back of the graveyard is the Royal Family Tomb. The Triforce symbol is on the ground in front. Play Zelda's Lullaby on your ocarina. This will cause the storm to grow more violent, and a lightning bolt will destroy the royal family's tombstone, leaving a hole in the ground. Jump in the hole.
The Royal Family Tomb
edit
At first glance, this place looks harmless, but danger lurks in the dark. In the first room is a locked door. The chamber holds several Keese, which are weak and easy to kill. The locked door opens after you've killed them all. If you light the torches near the door with Din's Fire later in the game, you can find a chest with Bombs inside. Before you move on, investigate the bones littered on the floor. Navi will fly to certain ones and tell you what they say. One gives you a warning, while the other gives advice, and you had best listen, because in the next room is a group of ReDeads, and poison on the floor that hurts on contact. Avoid fighting the ReDead. They're slow, but they freeze you with their screams.
Beyond them is an inscription with a poem. Read it and you'll learn a new tune, the Sun's Song.
Sun's Song
- Nintendo 64: C-right, C-down, C-up, C-right, C-down, C-up
- Nintendo GameCube: C-Stick (right), C-Stick (down), C-Stick (up), C-Stick (right), C-Stick (down), C-Stick (up)
- Wii Classic Controller: Right Stick (right), Right Stick (down), Right Stick (up), Right Stick (right), Right Stick (down), Right Stick (up)
- Nintendo 3DS: Y, R, A, Y, R, A
This song can be used to calm the dead. It can also be used to turn night to day or day to night, which is very handy when you don't want to wait. It even can summon Big Fairies, which instantly heal all your health and restore your magic if you call them. This song will freeze Re-Dead and Gibdo, a enemy you'll encounter later in your quest.
The Heart-Pounding Gravedigging Tour
editWhen you go to the graveyard at night between 18:00 and 21:00 you'll find Dampé the Gravekeeper outside his shack. This is a short time immediately after the wolf howls in a place where time passes normally. Using Sun's Song in an area where time doesn't pass will change the time to 00:00 which is too late, so the best way to get the correct time of day is by playing the Sun's Song in Hyrule Field and walk back into Kakariko Village after you hear the wolf howl.
Speak to Dampé and he'll explain his tour. He'll dig anywhere you want him to along his rectangular path, but you have to pay him 10 rupees each time. You'll usually get a green or blue rupee, but sometimes you can get a red rupee worth 20. See the Minigames section for further details.
Goron City

As you continue up the trail, you will come to a place where the path opens up. A wide, steep path leads to the left, and a small path leads to the right. The left path, which leads to Death Mountain summit, is blocked by boulders. It is impassable to you at the moment, so head to the right. The path begins to descend, and you'll pass a circular group of stones. Beyond them is the entrance to Goron City.
Getting to Goron City
editWork your way up the trail to reach Goron City. You can talk to the various Gorons you meet here to hear of their plight. They'll tell you that Ganondorf has sealed up the entrance to Dodongo's Cavern. That's where the Gorons get their food. Ganondorf has said that he won't remove the boulder until the Gorons give him the Goron's Ruby. On the way up, watch out for a rather wild Goron rolling down the hill.
Most of this area is impossible to reach without bombs, so it's a straightforward path to Goron City, but you can get one Piece of Heart if you're crafty. After having a chat with the Gorons, head inside Goron City to meet Darunia.
Goron City
edit
Once inside Goron City, you can talk to many Gorons who are scattered throughout. Most of them will tell you about how hungry they are and go back to sleeping. Head to the bottom floor of this cavern by finding the steps on each floor, or by just jumping down from the top.

Darunia, the head Goron, has locked himself in his room at the lowest level of Goron City.
After arriving at the door you'll notice a mat with the symbol of the Hylian Royal Family in front of it. As with every encounter with this symbol, as a royal emissary, you should play Zelda's Lullaby to proceed. After the music is played, the door will open on its own. However, when you speak to Darunia inside, you find that he is in an awful mood. He refuses to explain the problem. He claims that it is a "Goron problem" and should not be discussed with Hylians.
If you play Saria's Song to Darunia to sooth his anger he will then give you the Goron's Bracelet which allows you to carry heavy objects such as the fruit of the bomb flower. This is important because a bomb flower is required to blow up the large boulder blocking Dodongo's Cavern.

Livening Up Goron City
edit| Goron City Shop | ||
|---|---|---|
| Item | Quantity | Rupees |
| Bombs | 5 | 25 |
| Bombs | 10 | 50 |
| Bombs | 20 | 80 |
| Bombs | 30 | 120 |
| Goron Tunic | 1 | 200 |
| Red Potion | 1 | 40 |
| Recovery Heart | 1 | 10 |
| Recovery Heart | 1 | 10 |
After speaking with Darunia, go outside. The Goron outside says that Goron City is exciting when the fires are lit. You use a Deku Stick with the fires in Darunia's room to light the other torches. This causes the central jar to rotate. It also provides you with sources of fire which you can use to light Bomb Flowers. Light the bomb flowers on the lowest level and a doorway opens up. Inside is a Goron Shop, although there isn't much you're interested in right now.
A Goron on the second level says that all Gorons enjoy the music he hears coming from the passage near him. You notice boulders blocking the passage, but also bomb flowers growing around the boulders. Using a Deku Stick, take fire to one of the flowers. The passage is now clear. Upon entering, you find yourself in the Lost Woods.
The Lost Woods

Whenever you walk through a passage in The Lost Woods, you might inadvertently end up back in Kokiri Forest. It can be easy to get turned around.
Follow your ears
edit
Kaepora Gaebora, the lighthearted owl, instructs you to follow the sound of the music. As you stand at each possible exit, only one has music emanating from it. Follow it into the next area. Listen for the music at each passage and follow the tune. Also, if you look down a path and there is a star of light, this indicates an exit from the Lost Woods. Most of these paths place you back at Kokiri Forest. Eventually, this will lead you into the Sacred Forest Meadow. It is the only exit which has music playing from it.
Note: If you've come here immediately after getting your sword and shield, you'll certainly get lost. If your intention is revealing the first part of the map, go right and forward to reveal a small part of Goron City. You can't go through currently because of the boulders in the way. For directions to the Sacred Forest Meadow where the Forest Temple is, go right, left, right, left, forward, left and right. It will foreshadow things you'll have to deal with later in the game.
Sacred Forest Meadow
edit
When you reach the meadow, you'll see that a gate blocks your path. If you approach it, a Wolfos will appear. This beast is a tricky foe, but easy to defeat, and you must kill it to open the gate. When it attacks backflip then jump attack its tail. You can also simply walk backwards a short distance when it winds up to attack, and use a Deku Stick instead of your sword to kill it without jump attacking. Enter into the narrow passageway and use your shield and your Deku Nuts or slingshot to defend yourself against the Mad Scrubs throughout this area, and you will make it to the opposite side. Down a final, narrow passage is a pair of Mad Scrubs blocking a staircase. After dealing with them, you'll enter into a meadow where Saria sits on a stump playing her ocarina.
Note: You can also do this when you first get your sword and shield. If you defeated the Wolfos prior to this, you will not be forced to face him again.
A new song
edit
Speak to Saria and she will teach you Saria's Song. With it you can speak to her whenever or wherever you are.
Saria's Song
- Nintendo 64: C-down, C-right, C-left, C-down, C-right, C-left
- Nintendo GameCube: Z, X, Y, Z, X, Y
- Wii Classic Controller: ZR, X, Y, ZR, X, Y
- Nintendo 3DS: R, Y, X, R, Y, X
To exit the Sacred Forest Meadow, go back the way you came until you see a ladder that will allow you to to bypass the maze from above. Climb it and you will also see a hole in the middle. If you drop down there, and you will find a Fairy Fountain. Handy if you happen to have an empty bottle. These fairies can revive you automatically whenever you die.
Sidequests
editAt this point, you can continue on your quest, or you may want to stop off at some of the other attractions woods have to offer.
More Deku Sticks
editWhile in the forest, you may decide to explore a little. Taking the wrong path always leads you out to Kokiri Forest. Do this and head back into the Lost Woods, then turn left. A boy Skull Kid is playing and dancing on a stump. Turn left again. Here is the bridge from which you left Kokiri Village earlier. Climb the ladder down the ledge nearby to the and move to the other side of the area and find a Business Scrub. You can defeat him by reflecting the nuts he shoots with your shield, by throwing a Deku Nut at him, or by shooting him with your Fairy Slingshot. After you defeat him, he offers to increase your Deku Stick capacity in exchange for 40 rupees.
You'll be able to carry 20 instead of 10 from here out. It's not much, but it's helpful later on.
Target practice: More Deku Seeds
edit
From Skull Kid, you go right, back toward the Kokiri entrance, but then straight ahead. Here you find what appears to be a cymbal hanging from a tree. Aiming well with your Fairy Slingshot, you hit it dead-center three times in a row. A Deku Scrub emerges from the top of the tree and gives you a Biggest Deku Seed Bag.

Below the target practice area is another stump. Stand on it and two more Skull Kids appear. When you pull out your Fairy Ocarina, they invite you to play some music together. You must repeat whatever they play.
Forest Stage: Mask performance
editAny time you have a new mask, drop by the Forest Stage. Facing the Goron City entrance, take a right. You'll see a pool of water ahead. Take a left. Take another left. Here you find a meadow with a couple of Business Scrubs. There's a tree at the back. There to the left of the tree is a group of butterflies hovering around the same general area. Walk around this area until you fall through a hole. You've arrived at the Forest Stage.
Put on a mask and approach the front of the stage. Many Deku scrubs will pop up and dance around you joyfully. If you wear the Mask of Truth here, the scrubs will say that you have a most hideous face, but will give you a Deku Nut upgrade anyways. However, this must be done before you progress too far in the Item Trading quest, otherwise the Deku Scrubs will only reward you with a few rupees instead. Finally, wearing the Skull Mask here will give you a Deku Stick upgrade. Wearing the same mask over and over will make them attack you or just stare at you.
Dodongo's Cavern
To enter Dodongo's Cavern, which Ganondorf has sealed off with a gigantic boulder, you must first speak to Darunia. He will give you the strength you need to continue on your quest.
Opening the Cavern
edit
To quickly reach Goron City from The Lost Woods, as long as you have already opened the passage linking the two domains, head to the Target Practice area and turn left. There, go directly to Darunia, take out your ocarina and play Saria's Song. The song lifts his mood, and he begins to dance. After he finishes dancing, he tells you more of Ganondorf. Then he gives you the Goron's Bracelet. You can now pick up Bomb Flowers that are growing on the ground. You then need to leave Goron City, returning to Death Mountain Trail.


Outside Goron City, bear right at the circle of rocks. There you'll see a lone Goron sitting by a lone Bomb Flower. If you look closely, you'll notice that Dodongo's Cavern is directly below. You'll also notice that the fence behind the Bomb Flower is a bit lower than the rest of the fence. Pick up the Bomb Flower and throw it over this low fence. With a proper throw, the bomb will destroy the boulder in front of the cavern. Dodongo's Cavern awaits!
Back-flip over this low fence to receive the heart piece bellow if you have not already. Also, be sure to drop a bottle of bugs on the patch of dirt revealed after destroying the boulder for a golden skultulla token.
The Dungeon
edit
You'll enter the first room, a deceivingly small room with Bomb Flowers growing on either side. The wall directly in front of you seems to be made of a different kind of material. Take one of the Bomb Flowers, set it by this back wall and step away. Boom! The main cavern is revealed.
The Main Cavern
editMove forward and you'll see a platform that moves up and down and beyond that a larger platform with a Beamos on it. Up above is a giant Dodongo head. Some bridges are suspended from the ceiling. Along the west wall, the one to the left, is a barred door, a bombable wall, and a small grotto. Along the east wall are two more bombable walls and a passage whose entrance is raised. There are also Beamos and Bomb Flowers against either wall. Down below, the floor is made of hot, cracked rock. Obviously, that would be painful to touch.

Quickly leap across the central platform and over to the west side, careful to avoid the blue beam of the Beamos, as it will attack upon sighting you. Bombing the wall on the left reveals a treasure chest. It's the dungeon map! After taking care of the Beamos, look around, and you'll find a Business Scrub in the grotto. When he's defeated, he offers to sell you a Deku Shield. This may come in handy later...
The East Side
editSince the door on this side is still barred, head over to the east side. Behind the wall to the left is a Gossip Stone. Use it to replenish your health by playing Zelda's Lullaby while standing in front of it. Or if you have an empty bottle trap the fairy for later. The raised passage is inaccessible from here, so move on. After killing the Beamos on this side, use a bomb flower to bomb the other destructible wall.
Unlocking a Door
editEnter and you find yourself in a hallway. As you move along the hall, Baby Dodongos erupt from the floor. Nearby is a destructible wall. Since the Baby Dodongos explode after death, you could try and use them to open this wall. Behind, you'll find a room with a couple keese and a gold skultulla. At the end of the hall, you see a blue switch. You can step on it and unlock the door there, but when you step off the switch, the door locks again. Blue switches need to be weighted down to work. Remember that. By testing one of the nearby statues, you'll find them movable. Push one of the statues onto the switch so the door stays open.
Getting the Gold Skulltula
editBy equipping a Deku Stick, standing directly in front of the token, Z-targeting-targeting it, and pressing the B button, it is possible to obtain the Golden Skulltula token as Young Link. If you want to acquire it as an adult, you will need the Scarecrow song and the hookshot or longshot. Alternately, you can backflip into it.
A Brief Delay
editYou'll enter a short hallway with some Keese perched in between. Simply peck them off with a couple of Deku Seeds and proceed onward.
A Nasty Pair
editThe next room has a pair of Lizalfos, the minibosses of the cavern. Using Z-targeting, you can lock onto them, dodge their attacks (the Hylian Shield really works wonders here) and retaliate with your sword. They run away after they've been damaged a few times, but they return. After defeating them, the doors unlock, and you may continue on. These lizard-like creatures are stunned, briefly, by throwing Deku Nuts at them. For a faster kill, target them and use your slingshot.
These Aren't Babies
editTo the right, just before the next room, is a destructable wall. Behind it is a Deku Scrub that offers to sell Deku Sticks for 15 Rupees each after being defeated.
In the next room you enter, you'll find three full-sized Dodongos. Their tails are vulnerable, but be careful as they can swipe you with those tails. When defeated, their explosions are much larger than the babies'. Neither shield will protect you from their fire breath, so dodge to the side when one is getting ready to attack. You can also kill them by placing a bomb near their mouth; they will eat the bomb and die, although there is a chance they will ignore the bomb.
Once they are defeated, you'll see the door exiting the chamber is still locked. You'll also notice a number of unlit torches. Returning to the entrance of this chamber, you'll find some lit torches. With a lit Deku Stick, run down the line of torches. You must be fast, since these torches will go out after a short time. Doing this will open up the door.
To the West Side
editNow, you are back in the center room again, but you are in an area where you couldn't reach before, the slightly raised passage looking down from the west side. In front of you is a switch. Stepping on it causes the door across the room to unlock. Hop over the middle again and go through the door.
A Tenacious Statue
editThis next room is filled with a crop of Bomb Flowers. To the left is a destructible wall. Destroy it with the lone Bomb Flower next to it and enter the door into the next room. There are three statues surrounding a chest. The two off to the sides can be yanked away, but that does no good. One still blocks the chest, not to mention the door's barred shut. Strike the statue with your sword, and it comes alive! This is an Armos, and it will charge after you for disturbing it. Use Deku Nuts or the provided Bomb Flowers to stun it and then attack it with your sword. It will then self-destruct, so stay clear of it. Now, you are free to leave, and able to open the chest here, getting the Compass as a reward.
Onward and Upward
editNow, go back to the room with all the Bomb Flowers. There is a gap between the them where a seemingly missing one can fit. Pick up the one that's separate from the others and place it where there is a gap. Boom! They all explode and a staircase descends. Climb up to the next level. You'll discover at the top of the winding passage a Skullwaltula and a Gold Skulltula. Use Deku Seeds on both to get rid of them, and climb the vines to grab the token.
The Second Floor
editIn this room, there are some Fire Keese flying around. Be very careful that they don't burn your Deku Shield. You might want to equip the Hylian Shield now. After killing the Keese, take a look at the central column. Around it stand four statues, but given your experience with those statues, you know they can be dangerous. You'll notice a ladder behind one. That statue does not spring to life when you hit it, so you may move it aside and climb up. Press the switch on top, and the door is unlocked.
You'll enter the main room once again, but now on one of the bridges spanning the top of the room. Run across the bridge, taking care not to get hit by the Fire Keese. A door is at the far side, and you can enter it.
Danger Around Every Corner
editThe next room is gray with a floor sunken in below the level of the entrance. In the room are many square pillars with narrow passages between. Looking around carefully, you'll notice a set of square spikes that looks suspicious. Carefully climbing down the ladder, don't be too surprised- when those same spikes rush by you if you get too close! These are Spike Traps, which you can't defeat, and they guard these passages well. Navi suggests that you use Z-targeting to peek around corners. Doing so, make your way over to a ladder with a gray block underneath it, dodging the pesky traps. Stand on the block and use it to climb the ladder, or pull it back to find a Recovery Heart if you need one. After climbing the ladder, you'll arrive at a destructible door. Look away from the door and you'll see a platform. Jump here.
On the platform is a small chest and a Bomb Flower. Open the chest to find a Red Rupee. A ladder across from you leads to a destructible wall. This will take some timing to blow up. Pick up the Bomb Flower here. Hold it for about 3-4 seconds and throw, or aim for the narrow ledge. With a successful toss, the wall will be destroyed, and you can continue onward.
A Fiery Barrier
editIn the next room there are three platforms, but one is on fire. Directly in front of you, you'll notice an eye. Using your slingshot, you can shoot the eye. The fires subside, and you can jump across into the next room, but act fast or the fire will return. Run through the passage beyond this room fast, since Baby Dodongos thrive along the path to door out of here.
Another Nasty Pair
editThe next room is actually the same room you fought the Lizalfos in previously. However, this time you are at a higher level. Once more, 2 Lizalfos await you. Battle them in the same way as before. On a section overhanging the lower level are some hearts for your use when necessary. Of course, be very careful not to fall down if you need them!
Two Fiery Barriers
editIn the next room there are four platforms. but the middle two are on fire. Once again you can shoot up at an eye switch, but only the first fire dissipates. After hopping over to the next platform, turn to the left and you'll see another eye. Quickly shoot the second eye to remove the second fire barrier. Now that the flame is down, quickly hop onto the platform where the second flame barrier was and then leave this room.
Into the Maw
editYou will find yourself back into the room that is filled with many spike traps, but you'll be on a higher level and you can reach the mysterious treasure chest you may have seen earlier in the room. If you hop over across the platforms, you can walk up to this chest. When you open it, you will finally get the Bomb Bag! Now, you can hold bombs with you. Not only that, it can hold 20 Bombs, already filled to capacity. In the next room, you'll find a switch. Pressing the switch causes one of the platforms in the main room to now extend to the second floor when it rises up, moving twice as fast. A plaque sits there, looking out over the main cavern saying, "Giant dead Dodongo...when it sees red, a new way to go will be open". A hint, perhaps? On the bridge above the giant Dodongo's head, you'll see two gaps, one above each of the Dodongo's eyes. Dropping a bomb through each gap and into its eyeholes puts fire in its eyes when they explode. When both eyes are lit, its mouth opens, revealing a door.
However, by continuing across the bridge you are on, you will find a door you can bomb. Blow it up and inside is a Deku Shield! However, if yours hasn't been turned to ash, you'll find a Blue Rupee instead. Another Deku Shield is available in this dungeon too; it is for sale by a Business Scrub on the first floor of the main room. This shield will cost you 50 rupees. They only cost 40 rupees in the Kokiri Forest, but let's face it: a Business Scrub has to pay his bills too, and a place like this CAN'T be good for business.
The Last Leg
edit
Several Fire Keese are flying around in the next room, and they will attack from high above, so look out. After taking care of them, you'll see a little square in the middle of the room. Inside this hole is a switch. Pressing the switch causes the door to unlock, but when you get off of the switch, the door locks again. Something needs to push this switch permanently down.
Go right into the next room. There are a few Fire Keese in this room also. Go through the room until you get to its exit, but before leaving, hit the pots in this room to find a Fairy. It can revive you if you run out of health. If you catch it in a bottle, it will still provide its help, because you might need it for the boss, or fully restore your health anyway if you nudge up against it. Push the block up against the destructable wall and blow it out with a bomb. Kill the Armos in here and claim another Gold Skulltula. Go out of that room and go through the tunnel and push the block until it falls to the lower platform. Then push and pull it until it falls on to the switch. Then enter into the next room. Open the chest for bombs, then bomb the odd shaped floor and jump down. However, with a few stomps, a hungry monster approaches you...
Boss: King Dodongo
edit
Right away you should be able to see the boss, Infernal Dinosaur, KING DODONGO. What you have to do is throw a bomb in his mouth before he breathes fire at you. After you throw a bomb in his mouth it will blow up and he will be stunned. Run up and hit him with your sword. To inflict the most damage possible, do jumping slashes. Then he will roll around the room.
The best way to avoid him when he rolls is to hide in one of the corners, but if you can't get to a corner in time, just stand on the crease bordering the lava pool. He shouldn't hit you. If you crouch under your Hylian Shield while he is rolling, you will be virtually invincible to his rolling attack. When he stops rolling, he will try breathing fire at you again. Throw another bomb in his mouth. Do this four times and you will defeat him.
King Dodongo will end up rolling into the lava in the middle of the room and fry himself to a crisp. Get the Heart Container and leave.
Goron Jubilation
edit
When you exit Dodongo's Cavern, Darunia meets you with great joy. He is happy you got rid of the monsters in the cavern, but knows it was foolish to anger Ganondorf. He decides your bravery is that of a Goron brother, and he happily gives you the Spiritual Stone of Fire.
Darunia also reminds you that a Great Fairy lives at the summit of Death Mountain. He has been there before, and knows she holds great magical powers.
With that advice, he gives his thanks with a "big Goron hug". The other Gorons then attempt to give you a hug, at which point you run for your life screaming.
You and Darunia are now brothers! This will become important later in the game.
To the Summit
edit As you head up the mountain, you come to a fork. Bearing right would lead you to Goron City. If you bear left and move farther up the mountain, a few boulders block your way, but they are easily taken care of by a few bombs. Once you get past these boulders, you can hear a cow mooing! You can use another bomb to destroy the boulder atop the ridge. Drop down in the hole to find a cow and some Rupees. If you play Epona's song for the cow, you get some free milk! Continuing farther up the mountain, your Hylian Shield comes in handy as fiery rocks rain straight down on you from above. Finally you reach a shear rock wall. Climb it, but watch out for the Skullwaltulas. At each platform, clear out the Skullwaltula from above you. Finally you'll reach the top where you find Kaporea Gaebora. After he speaks to you, bomb the wall to the left of him. Venturing inside reveals a fountain, but no fairy. However, when you play Zelda's Lullaby on the fountain's crest, the Great Fairy appears and gives you a Magic Meter and the Spin Attack ability. With this, you can now charge up a spin attack with your sword that can take out several enemies at once, and when it's charged at full power, it becomes a Super Spin Attack with farther reach. However, each charge takes a little magic to use, but you can refill your Magic Meter with Magic Jars you'll find, or when you swig down a Green Potion.
The Next Destination
editSince it seems your work is done in this area, at least for the time being, you wonder where next you should go. When last you met with Saria, she gave you a song by which to communicate with her at any time. Playing this song now, she tells you what she knows: the Zoras, an aquatic people living in the east, possess the Spiritual Stone of Water.
Before Moving On...
edit- There are many holes in Hyrule blocked by boulders. Blow them all up for many secrets.
- In the Lost Woods, the Bigger Deku Seed Bag is obtained from the area where there is a target hanging from a tree branch in the room to the right of where you enter the Lost Woods from Kokiri Forest. You must score three perfect bull's eyes in a row. A perfect bull's eye is worth 100 points, whereas other shots are worth 30 points.
- The Bombchu Bowling Alley and Bombchu Shop are now open in the Castle Market.
- In Goron City, stop Hot Rodder Goron on the third floor using a bomb to receive a Bigger Bomb Bag upgrade. However, you must stop him near the tunnel or sign.
- There are two other destructible walls on the sides of Death Mountain Trail. Bomb them find a golden skulltula and rupees.
The Bombchu Bowling Alley
editIf you return to Hyrule Market, go to the into building with a Bombchu sign by the door. This is the Bombchu Bowling Alley. Talk to the girl at the counter and she'll let you play for 30 Rupees. You'll get 10 Bombchus, bombs that crawl up walls. Stand directly in front of the hole in the wall and press B to use a Bombchu, then press B again to let it go. Watch the movement of the spike trap nearby so it won't skewer your Bombchu. If the Bombchu is released correctly, it'll go in the hole and blow up the first wall. The wall will then drop to reveal a second hole with a Cucco moving around in front of it. This next hole will appear in on of three spots: the left side of the wall, the right side, or the top. Position yourself accordingly and intently take time to check your positioning. If this Bombchu makes it to the hole, the second wall will blow up and drop to reveal the final hole. However, the most agitating obstacle lies in front of it: a giant Cucco that moves in front the hole! If you can center this Bombchu past all three obstacles and it makes to the hole, you're a winner!
Now, you'll get a prize offered at the start of the game.
Prizes
editThere are a few prizes that you can win more than once:
- One Purple Rupee, worth 50 Rupees
- A bundle of Bombs.
- 10 Bombchus (you can hold up to 50 of them).
There are also two prizes that you can win one time:
- A Piece of Heart.
- A Bigger Bomb Bag or the Biggest Bomb Bag. If you go to Hot Rodder Goron first, you'll get the Big Bomb Bag. Now, if you win the Biggest Bomb Bag, you'll get a bag that holds the most bombs at once: 40 Bombs!
Bombchus will help you later in your quest. Win them to stock up. The Bombchu Shop also has Bombchus, but it opens only at night and the Bombchus are limited. The prices will raise with the more purchases made until the owner is sold out.

The Shooting Gallery
editAt the Market, there is a building that has an arrow and target sign up by the door. Enter the building. This is the Shooting Gallery. You can play for 20 Rupees and win a prize. The object of the game is to shoot the Rupees that appear before they disappear. This is a list of how they appear in order:
- A Green Rupee; from the center platform
- Two Blue Rupees; one on the left and on the right, one before the other
- Another Green Rupee; from the center platform that flies up in the air
- Two More Blue Rupees; on the left and right at the same time
- Two Red Rupees; across one of the cables that move above you
- Two More Red Rupees; same as before, only faster and further spaced apart
Each time you hit a Rupee, you'll see it appear in your scoreboard (the spaces on the floor in front of you). If you hit 7 or less Rupees, the game's over. If you hit 8 or 9, you get a free try at it again. Hit all 10 to get the Largest Bullet Bag and carry up to 50 Deku Seeds!
Jabu-Jabu's Belly
The Great Fairy at the summit of Death Mountain mentioned that another of her kind lived near Hyrule Castle, so you make your way there. After going through the market, you climb the vines you see on the right just as before. On the other side of the gate and straight ahead, you see a sign. Beyond it you find a big boulder. After using one of your new Bombs, the boulder is no more. Crawl into the tunnel that was hidden behind it.
As with the previous Great Fairy, go in and play Zelda's Lullaby on the Triforce symbol. This time the fairy grants you Din's Fire. This magic causes fire to erupt all around you, injuring enemies and starting fires. You then exit the area and return to Hyrule Field. Your next destination is Zora's Domain which lies to the East. It is south of Death Mountain and Kakariko Village and north of the Kokiri Forest and the Lost Woods.
A Missing Princess
edit- Zora's River: Pick up the Cucco at the Hyrule Field end and go to the small rise near the Water Tektites. Jump off it and float towards the platform with the Piece of Heart. Alternatively, plant a magic bean in the soft soil next to the Bean Seller as a child. Return as an adult, ride the platform, and jump off at the right moment to obtain the Heart Piece. As an another alternative, you can just aim your boomerang and it will come to you.
- Zora's River: pick up the Cucco at the river entrance and carry it all the way to the waterfall covering the entrance to Zora's Domain. You will occasionally have to throw it onto a platform in order to climb up, and be sure not to throw the Cucco in the water. Once you have reached the waterfall, float over to the Piece of Heart on the separated platform.
From Hyrule Castle, look at the town's moat. The water for it extends to the East, so follow it upstream. Eventually, you'll arrive at an area where you must leave Hyrule Field in order to follow it any farther. At this point you'll enter the area called Zora's River.
Making Your Way Upstream
editAs you enter, Kaborea Gaborea the owl is waiting for you once again. Once he is gone, use your Bombs to get rid of the boulders blocking your path. Beyond here you will find a man sitting near a fence eating something. It turns out that he's selling Magic Beans. The first one costs 10 rupees, but each one beyond that costs 10 more rupees than the last. He'll sell you a total of 10 before he is all sold out. They can be very useful later on in your quest.
Unable to continue past the fence, you can pick up a nearby Cucco (chicken) and jump across the river with it to reach the other side. If you're feeling confident you can also just jump across the river where the ground looks like the paths all around Hyrule Field. Continuing on, you should notice some purple monsters constantly jumping out of the water to spit rocks at you, and then retreating into the river. They are called Octoroks. To defeat them, use your Deku Shield to bounce the rocks they spit back at them or use your slingshot to attack them. If you get too close to them, they will disappear into the water.
Follow the edge of the river until you get to the spot where there is a narrow streaming flowing out. Jump over it, then keep running forward up the hill. If you jump off here you should land on a small island in the middle of the river. Jumping from here you should be able to reach the other side before the river's flow whisks you away. Now, head to the right. Near hear you will notice a log extending into the water. Navi should fly over to it momentarily as you pass to draw your attention to it. If you step onto the log your fairy tells you that some frogs are looking at you. If you play a song on the Ocarina, they will give you Purple Rupees. This can be used to help you purchase more beans. You'll also notice each song cause a frog to grow. Remember to come back here with each new song you find and play it for them. You might just like what you get.
From here you just have to keep climbing upwards and following the river to its source. You should find a waterfall at the end. Stand in the middle in front of the waterfall, pull out your ocarina, and play Zelda's Lullaby. Then jump through the part of the waterfall that opens up.
| Zora Shop List | ||
|---|---|---|
| Item | Quantity | Rupees |
| Arrows | 10 | 20 |
| Arrows | 30 | 60 |
| Arrows | 50 | 90 |
| Deku Nuts | 5 | 15 |
| Fish | 1 | 200 |
| Recovery Heart | 1 | 10 |
| Red Potion | 1 | 50 |
| Zora Tunic | 1 | 300 |
The Silver Scale
editThis is Zora's Domain, the residence of Hyrule's aquatic beings. Stay on the path and follow it until you have two choices, up or down. Go up to King Zora's Chamber. After talking to him, he tells you that Princess Ruto is lost. Afterwards, go to your left and you will see a Zora at the waterfall's edge. Talk to him to play the Diving Game. It costs 20 rupees and you have a minute to collect five rupees from the waterfall bottom. If you are successful, you will be awarded the Silver Scale. This will increase the depth you can dive from 3 meters to 6. Dive down to the water and look for an underwater tunnel. Once you find it, dive down and navigate through the passageway to find yourself in Lake Hylia. You can also reach the lake on foot if you head southwest in Hyrule Field. There is a ladder on the right side that will allow you access to get past the gates.
Letter in a Bottle
editOnce you get to Lake Hylia, go forward and Navi will spot a submerged item. Z-Target it. The cursor should turn green. Dive down there to get the item. You will find a letter in a bottle. It is from the alleged missing princess, saying that she is waiting for you in the belly of Jabu-Jabu (the Zora's deity). Return to Zora's Domain and show the letter to the King. He will allow you into Zora's Fountain, the dwelling place of Jabu-Jabu.
- Hyrule Field: In the fenced off region before Lake Hylia, bomb the center to find a secret grotto. Inside, defeat the Business Scrub and he will offer you a Piece of Heart for 10 rupees.
- Zora's Domain: Go to the area where King Zora sits. Take the fire from the room and light the torch you see going down. Now light the other four torches in the domain. One is next to the Zora Shop, one is near a circle of rocks, and the last two are behind the waterfall. Don't try to switch Deku Sticks; each torch resets the timer for the stick burning, so you have plenty of time. The Piece of Heart will appear in a chest behind the waterfall near the last two torches.
Fish Offering
edit Before accessing the fountain, you will need a fish. Go back down and follow the path to the left, past the store entrance and into the shallow water. You'll see a small circle of rocks with some fish swimming around in the middle or close by. Use an empty bottle and catch a fish in it. If you have the Adult's Wallet and you don't mind wasting rupees, you can also buy one at the shop for 200 rupees. Go back up to King Zora's Chamber and enter through the new pathway behind the king that leads to the next area.
Upon entering Zora's Fountain you should see a humongous whale, Lord Jabu-Jabu. Equip the bottle with the fish in it and use it to release the fish from the bottle directly in front of Jabu-Jabu. Lord Jabu-Jabu will open his large mouth and vacuum up the fish, and then continue to suck up air until Link gets pulled in as well.
If desired, there is a hidden Great Fairy Fountain here in Zora's Fountain. Head due east from the entrance to the fountain from Zora's Domain until you see a small spot of land with trees and a gray boulder. Place a bomb next to the gray boulder. The wall behind will collapse and you will be free to enter. Once inside, play Zelda's Lullaby on the Triforce symbol. The fairy will give you the Farore's Wind spell. If you activate it in any room in a dungeon, you will be able to warp to that spot at any time from anywhere in any dungeon in the game. You may dispel it at any time as well to create a new warping location. The spell is also dispelled when traveling through time.
Inside Jabu-Jabu's Belly
editParasitic Invasion
editJabu-Jabu's Belly is a strange dungeon full of odd places and strange new enemies. You will first encounter two Octoroks when you enter the belly. Try to get past them and head up to the door. It looks nothing like a regular door though, and a strange gunk covers its surface, locking it shut. Turn around and look up. Then Z-Target on the switch (white, protruding object) and hit it with your slingshot or boomerang (found later in this dungeon), and the door will unlock. Go into the next room.
In the second room there are several jellyfish called Biri. Keep away from them. They are invulnerable to Deku Seeds from your Slingshot and give you a shock if you try to kill them with your sword. However, remember the Spin Attack you learned? Utilize that attack on them so that they won't injure you. If you hold the attack long enough, it will grow more powerful and you can release a Super Spin Attack that reaches further. However, it takes magic to use this attack. Some enemies drop Magic Jars you can use to keep your magic meter filled. If you have deku sticks with you, you can use them to fight the Biri without getting shocked.
Princess Ruto
editTry to get past the Biri and head into the next room. However, someone else is in here as well: its Princess Ruto! However, she is in an angry mood and doesn't want to talk to you. She will try walking away, but will fall into one of the holes that are in the floor. Follow her through the same hole. Talk to her twice, and she will allow you to carry her.
Dungeon Companion
editUp to the Top
editPick up Princess Ruto and go into the door behind you. You'll enter a room with a few Shaboms in a tunnel that leads to a pool of water. Go through the water over to the other side, and throw Ruto onto the ledge above. (Throughout this whole dungeon, you have to keep Ruto away from high water and bring her with you into each room. If Princess Ruto disappears, backtrack and you'll eventually find her.) Note that several Stingers swim through the water. Stepping on a Stinger's tail will make it emerge into the air and fly around after you. Hit the switch in the center of the pool of water to raise its level, then climb up to Ruto.
Carry her again and go into the next room (the bottom room of the basement) slingshot the thing on ceiling to get through door. Wait for a platform to come all the way down and then jump on it to go to the top floor again (if you are going to throw Ruto onto the platform first, make sure you are as close to the door as possible before tossing her, otherwise she'll end up in the water on the other side of the platform). However, there is a hidden grotto in the water that takes you to a Business Scrub if you need supplies. What is a creature like him doing in Jabu Jabu's Belly? (beware of the octorock bounce rock back at him with deku shield)
From Biri to Bari
editThe platform will take you back up to where the Biri are. Go through the door to the right again to find the room where you first met Princess Ruto. Try not to fall in any of the small holes again, or else you'll be making a repeat performance of what you just did (watch out for the giant hole with the vines on the left side of the room!).
As you head for the other side, watch out for the Biri, and keep a look out for Bari, the stronger version of Biri. Avoid them as they drop down from above and try not to fight them, because they can electrocute you quickly. Not only that, a Bari is really three Biri spliced into one, and killing it separates it into the Biri. If you haven't figured it out already, you can use Ruto as a weapon. Try throwing her at the Biri and see what happens. Take note of the hole blocked by the green tentacle, kill or avoid the enemies here, and then head into the next room.
The Tailsparan
editThis room forks into several different paths. Some paths have moving floors that drag you along if you stop moving. Be extremely cautious in this room, because there are Tailsparan in the ground that chase after you if you get near them. The Tailsparan are lethal, and it would be unwise to attack them as they can only be hit from the back, and after being killed you will be shocked for half a heart worth of damage (the safest way to kill them is to use a Deku Nut followed by a well placed bomb).
Not only do you have to deal with these things, but a red and blue tentacle is blocking two doors right now, so take the path to the right. There is a switch here, but it requires some extra weight to press it. Step onto it while holding Princess Ruto (even if you do this, you'll still see Navi's message about the switch) and the combined weight will force it down. The door at the end of the path will open, so enter while holding Ruto.
The Boomerang
edit
This room has several Stingers inside, and you're trapped inside this room until you get rid of them all. Drop Ruto if you have her, and step on the Stingers' tails to provoke them into the air and strike each of them with your sword as they come charging at you, you then eliminate them (the safest way is to use Deku Nuts and your slingshot or use bombs). Once you kill them all, a chest will appear in the middle of the room. Open it to receive the Boomerang and equip it. You can now reach things from a distance.
The Red Tentacle
editGo back outside and find Princess Ruto (if you're not already carrying her). No matter how many times it happens, Ruto doesn't take too well to being left behind. Pick her up and come right back to the fork in the room. This time, take the left path. Place Ruto on the switch to open the door and then enter the room. A red Parasitic Tentacle (also known as the red tail) dwells in this room. Approach it and it will pop out of the ceiling. Look for a section on the tentacle that is narrower than the rest. Z-Target it and hit it with the boomerang while strafing to avoid its movements (if it retracts into the ceiling, throw the boomerang then run close to it so when it comes down to attack it gets hit immediately). It takes only a few hits to rid Jabu-Jabu of this tentacle. A chest holding the Dungeon Map will appear. Grab it and head out.
Pop go the Shabom
editFind Ruto again, near the switch, and pick her up. You can find the Compass in the room that red tentacle was blocking (turn left from the switch and go north). Killing it caused it to disappear, and now you can go through the door.
There are a lot of Shabom floating around in this room. You have only 40 seconds to kill them, or you'll lose one heart and have to do it again. Take the boomerang and pop all the Shabom, use Din's Fire a couple of times, or throw a Deku nut when in the center of the room most likely popping them all at once to make a chest appear, which holds the Compass. The room right next to the one where you discovered the Boomerang has also opened up, so head back and enter it.
The Blue Tentacle
editNow you'll encounter the blue Parasitic Tentacle. The weak spot is in the same place, so you'll know how to kill it quickly (it only takes four hits).
The Green Tentacle
editGo down the middle and final hallway you haven't ventured into and you'll find the door the blue tentacle guarded. Go through the door and you'll encounter the green tentacle. Recognize it? It's the thing blocking the hole in the room you saw before. However, this tentacle holds more importance than the red and blue ones did, and as a precaution, several Biri are guarding it. Kill them off first, then make your move on the tentacle. It has a weak point just like the other two. Eliminate this final tentacle to open up passage into the hole it blocks in the room where you first found Princess Ruto.
With Princess Ruto, go back to the room where you first met her. Find the hole that the green tail blocked. It is on the far right (north west side). Drop down through and you will land on an unfamiliar platform in a familiar room. You'll be able to enter a new door to the west now.
Mini-Boss: Big Octo
editOnce you find this room, Princess Ruto will notice a strange gem. It's the Zora's Sapphire! Excited, she demands that you throw her up onto the platform it resides on. Once you throw her up there, an unexpected lurch sends the platform up. In the room above, Ruto encounters a monster, and then it comes down into the room you're in! It's Big Octo, the Mini-Boss!
Once this battle begins, Big Octo will be running around the room, chasing after you, along with several spikes on the platform whirling around in the opposite direction of Big Octo. There is only one way to make Big Octo stop running: throw your boomerang at him. For a moment, it will stun him, then the enlarged Octorok will spin in a circle. When he stops, he will either turn to face you, or turn his back to you. If he turns his back, quickly hit him with the Boomerang to stun him again. This will reveal a large green blob on Big Octo's backside. Slash away at it to injure him. If you're more focused on moving on than battling him, jump-slash the blob once with a Deku Stick (or twice with your sword) to kill him. If not, continue fighting him with the same strategy until he dies.
He either drops three hearts or a few green rupees after his defeat. Once this monster is gone, you can use the platform to ride up into the upper level of the room, where you can find some pots to smash open and find several goodies, including a helpful fairy. One problem presents you now: where's Princess Ruto?
Finding the Boss
editElectric Jelly
editHead on into the next room. Two Biri are waiting for you, but you can kill them easily. In the next room, kill the Octorok. There are also two strange jelly blobs in the room that look like platforms that reach a nearby ledge, but you'll find they don't take lightly to outsiders. Hit them both with your boomerang to stun them and use them as platforms to reach another door.
Extending the Path
editYou'll enter a room with nothing but two platforms, separated by a gap in the middle of the room. Jump across the gap and it will lower into place. If you remember this room, it is where you first encountered the Biri, the second room of the dungeon. The ledge you jumped onto has now become a bridge to another door, but it is locked. The switch by it needs something to hold it down, and since you don't have Princess Ruto, you'll need something else. On the other side of the room are crates. Grab one and take it to the switch. Don't bother with the Biri. Place the box on top of the switch to open up the door.
A Tricky Switch
editThere are several Biri moving around the halls of this room. Get rid of them all with your boomerang to save yourself some trouble. There is a big wall covered in vines. Climb its face until you reach the small ledge on top. Turn and face the center of the room to see a switch. However, if you try to attack it you'll notice that a transparent wall keeps you from having a straight shot at it. Hitting the switch requires clever use of the boomerang. Back away from the glass, Z-target the switch and then unleash your boomerang. If it moves in the right way, it will curve around the glass and hit the switch. Or grab a wooden box, from the other side of the room, and drop it on the switch. The door to the boss will open to the north. Jump down and then go through the door to find the boss.
Boss: Barinade
edit
As you enter this room, several enlarged Biri (jellyfish) seem to be acting up. They've noticed you! They swarm around a strange monster and attach to it as it awakens.
The boss of Jabu-Jabu's Belly is Bio-Electric Anemone: Barinade. This beast is the monster wreaking havoc upon Jabu-Jabu. When you come face-to-face with Barinade, you'll see three tentacles coupled to the ceiling. Z-target the tentacles, and throw the boomerang at them. This will detach Barinade from the ceiling, but there are several electric tentacles attached to it that will constantly shoot waves of electricity at you as you do this, so be ready to strafe.
The moment Barinade is uncoupled, all of the jellyfish will detach from its body and it will start spinning around with them tethered to it. Wait for Barinade to stop spinning (or run up and stun it with your boomerang) and you'll have a chance to kill some of the jellyfish by using your boomerang or run in close and slash at Barinade without mercy, causing the jellyfish to pop. Without the jellyfish covering Barinade, the center of its body will be exposed. Hit it with the boomerang to stun it and then attack with the sword. Doing this will cause Barinade to rise up higher and release a second set of jellyfish. They will be spinning much faster than before, so wait for them to stop and kill them off.
Now unprotected, Barinade will start firing electric waves at you again. Toss the boomerang at its body until you manage to stun it, then strike it as many times as you can with your sword. Watch out, because once Barinade takes a few hits, it will relentlessly shoot electricity from all directions. If you can get around its attacks, you can finish it off for good.
After taking so much damage in battle, Barinade will swell up like a balloon and pop like a zit, spewing acid on the floor. Such a disgusting end for a parasite. Grab the Heart Container and make your way to the portal. Princess Ruto will be waiting for you on the other side of the portal, so enter it! Reunited, the two of you will leave Jabu-Jabu's Belly.
Terms of Engagement
editOutside of Jabu-Jabu, Ruto asks Link if he wants a reward, where Link can either ask for the sapphire or for nothing. In either case, Ruto will give the sapphire in exchange for a future engagement to marry her! After Ruto's mother gave it to her, she made her promise to give the stone only to the one she would marry. Now engaged, she gives Link Zora's Sapphire, eagerly awaiting marriage.
After traversing through the Deku Tree, Dodongo's Cavern, and Jabu-Jabu's Belly, you have all three Spiritual Stones. Zelda awaits you at Hyrule Castle. However, something is about to happen...
Sidequests
editNone of the following tasks are necessary to completing the game, but will only make you stronger!
The Scarecrow's Song
editNear the underwater entrance to Zora's Domain in Lake Hylia, you will find two Scarecrows, Bonooru and Pierre, on the shore. Bonooru will ask you to play a song for him, which he claims he will remember. The song you play will be listed as the game's Scarecrow Song. It is your own creation but must be eight notes long. You can change the song as you please. If you forget it, Bonooru will give you the melody you last played. Remember the Song, as it will be very useful one day. Unfortunately, you cannot use the same note eight times in a row, so the best thing to do is just use two and switch back and forth (left right left right, etc.). It is important to know that you must return to Bonooru as an adult to activate Pierre. Simply remind him of the song that you played as a child as he has forgotten.
You can also create melodies in front of Pierre, but they don't have to be only eight notes long. They can even have special tunes in them if you wish. The song you create for Pierre won't become a new song when you play it.
Beans, Beans, the Magical Fruit
editYou will plant Magic Beans in ten patches of soft soil scattered throughout Hyrule. With the exception of the patch near the salesman, you can also use a bug to dig up a Gold Skulltula from the soil. The patches are located:
- Next to the Magic Bean Salesman. (Zora's River)
- Behind the Kokiri Shop. (Kokiri Forest)
- In the section of the Lost Woods where the forest stage is located. (Two Business Scrubs will also be there.)
- From the entrance to the Lost Woods, head left and then head left again. You should immediately find a patch of soft soil.
- Near the south end of the row of graves on the left. (Graveyard)
- Near the entrance to Dodongo's Cavern. (Death Mountain Trail)
- Near the entrance to the Fire Temple. (Death Mountain Crater) **Note: You will need to use the Bolero of Fire to warp to this area as a child, after learning it as an adult.
- Next to the Lakeside Laboratory. (Lake Hylia)
- On the left side of the Gerudo Valley river. (Use a Cucco to help you reach it. A Gerudo and her cow will be there.)
- A little ways off to the right of the Spirit Temple. (Desert Colossus) **Note: You will need to use the Requiem of Spirit to warp to this area as a child, after learning it as an adult.
Mask Trading Sequence
editAt this point, you will be able to finish the Mask Trading sequence. If you have not already, obtain the Bunny Hood from the Happy Mask Shop owner. There is a man running around Hyrule Field now. He is usually resting in the northwest area by early day and rests somewhere near the Kokiri Forest entrance at night. Wear the Bunny Hood and speak with him. He will pay you a huge amount of money that fills your wallet. Pay back the money at the shop. You are now free to borrow the following masks:
- Mask of Truth
- Goron Mask
- Zora Mask
- Gerudo Mask
Deku Nut Upgrade
editBorrow the Mask of Truth from the Happy Mask Shop and head to the Lost Woods. Enter the Forest Stage. Put on the mask. The Deku Scrubs will stare at your mask for a brief moment, titling their heads. They will confront their leader about this. They think your face is hideous, but they will give you a "prize" anyway. You Deku Nut carrying capacity will be increased by ten.
- Inside the Deku Tree: Return to this dungeon. Drop down to the area that was originally covered by a web (B1). Go to the other side and find the crawlspace. Go through it and find a wall you can destroy using a bomb. (It should be blocked by a Deku Baba. If you haven't already destroyed the web, do so with nearby fire, or Din's Fire.) Once in the room, the Gold Skulltula will be on the wall. Kill it and retrieve with the boomerang.
- Hyrule Field: At the corner between Hyrule Castle and Kakariko Village is a single tree. Place a Bomb at its base to reveal a secret grotto. Inside, destroy the Skulltula on the wall and use your boomerang to retrieve the token.
- Hyrule Field: Near the entrance to Gerudo Valley (to the West. On the map, it is above the entrance to Lake Hylia.) is a circle of rocks. Destroy the boulder in the center and place a Bomb there to reveal a grotto. Use either Din's Fire or a Fire Arrow to burn down the webs and find a Skulltula.
- Lon Lon Ranch: At either daytime or nighttime, roll into the tree next to Talon's house.
- Lon Lon Ranch: Visit the Ranch at night. It will be up high on one of the windows outside of Talon's house.
- Lon Lon Ranch: At night, it lies high on the rock wall on the western side of the Ranch, northwest of and close to the Silo.
- Lon Lon Ranch: At night, there's one on the south side (outside of the corral) on the back of the little shelter (it has three pots in it).
- Graveyard: At night, it lies high on the right wall of the Graveyard, (Next to the right end of the second row of graves.)
- Zora's River: At the start of the river, where you met the owl, roll into the tree at the left to knock out a Skulltula. Kill it with your sword and grab the token.
- Zora's River: At the top of the river, at night, drop down into the shallow water and walk to the ladder. The Skulltula is on the ladder. Kill it with the Slingshot or Boomerang, then climb up to collect the token.
- Lake Hylia: Drop some bugs into the patch of soft soil next to the Lakeside Laboratory to unearth a Gold Skulltula.
- Lake Hylia: At night, walk behind the Lakeside Laboratory and onto the bridge. As soon as you get on the bridge, look left at the Lakeside Laboratory wall to spot a Gold Skulltula. Use your boomerang to claim the token.
- Lake Hylia: At night, on the secluded island in the middle of Lake Hylia with the two pillars lies a Gold Skulltula on the bottom of one of the columns. Use your boomerang to obtain the token.
- Zora's Fountain: At night, climb up on the log that is to the right of Jabu-Jabu. You will see a Skulltula on the wall. Take the Gold Skulltula token with your boomerang.
- Zora's Fountain: Roll into the tree near the Great Fairy's Fountain for a Gold Skulltula.
- Gerudo Valley: At night, as you enter Gerudo Valley from Hyrule Field, follow the path up to the small wooden bridge near the little waterfall (before you get to the bridge with the Gerudo women). At the mouth of the waterfall, is a Gold Skulltula. Use your boomerang to obtain the token.
Temple of Time
Only a true hero can discover the secret of the Temple of Time. The Light Temple is the ultimate destination for the solver of the puzzle.
When you leave the Zora's River, Navi will tell you that she feels that something is happening at Hyrule Castle. She isn't the only one feeling something wrong. Play Saria's Song, and Saria will say she senses something bad is happening at the castle as well. As you near the market, the drawbridge is up, and a storm is starting to brew. Something very terrible has happened...
The Ocarina of Time and Ganondorf
edit

As you approach the drawbridge outside of Hyrule Castle, a cutscene will occur. Looks familiar? It's the dream Link had at the start of the game. Zelda and Impa are fleeing from Hyrule Castle on a white horse! In the scene, Zelda will throw a mysterious object into the moat. You will then encounter none other that Ganondorf himself, who is sitting on a black stallion. He demands you tell him where the white horse went, but you refuse. Ganondorf shows you his wrath for doing that; by blasting you with a ball of magic. Then he rides off, chasing after Zelda and Impa. After the cutscene ends, look for an object in the moat. Dive down and get it, and you will find that it is the Ocarina of Time. Navi says it has a mysterious glow. Another cutscene will occur; you will learn the Song of Time, and Zelda will tell you to play it at the Temple of Time.
Song of Time
- Nintendo 64: C-right, A, C-down, C-right, A, C-down
- Nintendo GameCube: X, A, Z, X, A, Z
- Wii Classic Controller: X, A, ZR, X, A, ZR
- Nintendo 3DS: Y, L, R, Y, L, R
The Temple of Time
edit
As you enter the market, the people will be stirred up about the sudden turn of events. If you explore the alley, you'll find a soldier is slumped over.
When you speak to him, he will try to tell you that he attempted to stop Ganondorf, and that Zelda requested you go to the Temple of Time. Sadly, his wounds are fatal, and after speaking to you, he perishes.


The Temple of Time is the large, church-like building off Hyrule Market, which you can reach by a path on the right side of the market (when facing the castle). When you enter the temple, go straight to the stone plaque in front of the big stone door, which is the Door of Time. Stand on the mat and play the Song of Time, and you'll reveal their secret. The Spiritual Stones will spin around and place themselves into the stone in front of you, the Triforce emblem above will activate and turn gold, and the Door of Time will open. This will reveal the second part of the Temple of Time. Venture in, and Navi will discover the most sacred weapon ever created...


Inside is the mythical Master Sword. Go and take the Master Sword from the pedestal with the A button.


This will cause a bright blue light to light up everything on the pedestal and around you and a cutscene to take place.
Ganondorf will reveal that you have let him into the Sacred Realm. He knew that even without the stones, he could enter through the sealed passageway of the golden gates through Zelda's plan. This is not good. This means Ganondorf will get the Triforce! Or will he fail?
Geh heh heh! Excellent work! As I thought, you held the keys to the Door of Time! You have led me to the gates of the Sacred Realm... Yes, I owe it all to you, kid! <laughs>—Ganondorf
All Grown Up!
edit
After pulling the Master Sword, everything will change. Instead of finding yourself before the Triforce, a voice calls out to you. You will find yourself in a strange room: the Chamber of the Sages. You will be spoken to by Rauru, the Sage of Light. Rauru is an ancient guardian of the Triforce, but has a terrible revelation. Time has passed on while you have been locked away in the Sacred Realm. He tells you to take a look at yourself, and that you have changed as well.

You will discover that you have aged by seven years because the Master Sword is only worthy of a Hero of Time, a mature adult. Because Link was a child, the sword locked him away until he grew into one. However, this has allowed a terrible thing to happen.
Ganondorf has gained the power of the Triforce and has taken over the land. The door you opened in the Temple of Time allowed Ganondorf to enter the Sacred Realm and find the great Temple of Light, the resting place of the Triforce. The Chamber of Sages is actually part of this temple. Even though you've entered the Temple of Light and the Sacred Realm, there is no longer a treasure to claim. Fortunately, Link is the chosen Hero of Time!

Rauru will tell you something of great importance, so listen well. He is one of the Six Sages who protect the Sacred Realm and Hyrule from siege. Rauru is in dire need of help, because he is the only sage that exists. The others are yet to awaken. He asks you to find them and awaken them, and gives you the Light Medallion, which holds his power. You need five more medallions to boost your power and the power of the sages.
Rauru reminds you of your new duty as Hero of Time as you leave the Temple of Light.
Sheik of the Sheikah
editYou will be teleported back to the Temple of Time. Navi will soon notice a disadvantage to growing up: You've outgrown some of your equipment you could use as a child and can't use it anymore. However, before leaving the temple, you'll find another person has appeared like magic, and wishes to talk...

You will be spoken to by a young Sheikah called Sheik, who will tell you that the remaining sages exist within five temples. Sheik also knows you need another item to find the first Sage, a forest girl you know, and that it can be found inside of Kakariko Village.
Make sure you return to the Temple of Time and talk to Sheik again after awhile. She will soon show you the Prelude of Light, to teleport you to the Temple of Time later on in your quest. Right now, though, you have great changes in the world to deal with ahead of you. A lot happens in seven years time in Hyrule!
The Adult World
editQuite a lot is different in the Adult World. The most important of these changes is that you can use almost none of your child items, and almost all of the world has changed. You can also gain Epona the horse from the Lon Lon ranch, which you should do as soon as possible, after which you should probably go and get the Biggoron Sword (this will make enemies much easier to defeat and thus reduce the amount of time to complete the game), and there are many other minigames, items, Gold Skulltula, and Pieces of Heart that can now be gained.
Getting Epona
editWhen you leave the Temple, you will see that Hyrule Town has been burnt to the ground and it is full of ReDeads. Play the Sun's Song to paralyze them and leave to Hyrule Field, and then head to Lon Lon Ranch. As you approach it, you will notice a gloomy cloud hovering above.
Enter Lon Lon Ranch during the day. If it is night time, before entering the ranch play the Sun Song. When you enter Lon Lon Ranch, who should you find in charge but Ingo. He tells you that he overthrew the Ranch after Ganondorf got in power and he kicked Talon out of the ranch. Poor Malon is still at the ranch, but more or less being used as a hired hand- an overworked one to boot. You can't let this greedy punk get away with this! You need to outsmart him at his own game!
First off, Ingo likes to make profit off showboating the ranch's prized horses. He'll let you in the corral to ride the horses for ten Rupees. After you pay him you have one minute to ride whatever horse you dare to find. Ingo will tell you the basics to riding a horse upon request. Take a look around the ranch for any horse you like. However, one of those horses... has a fair white mane! It's Epona! Play Epona's Song to get her to come to you with gusto. When she does, mount her, then ride Epona around for a while to catch Ingo's attention. When time runs out pay 10 rupees to come in again. Before time runs out, ride over to him and speak to him. Ingo has taken a liking to your skills and he will challenge you to a race. One lap around the ranch, and the winner take all.
The Races
editThe first race, Ingo will bet 50 Rupees. He will keep his horse up to a decent pace as he dashes down the ranch. Try to get Epona galloping at a fair pace, and speed up whenever you come to the fences on the track. Slowing down will make Epona buck and come to a halt. As long as you don't let Ingo gain the upper hand, you can smoke him in the first race. However, he's not ready to call it quits with you.
After you win the first Race, Ingo will freak out at the sight of Epona, realizing you just beat him with his finest horse. Feeling humiliated, he will ask for a re-match. This time he'll bet Epona. However, Ingo's going to charge his horse up as fast as he can manage, so you will be forced to keep Epona from slowing down at any point in the race. One mistake could cost you first place. Do your best to stay in front of Ingo, and hopefully, Epona and you will win.
Needless to say, Ingo is flabbergasted. It turns out he was going to present Epona to Ganondorf for sale! Suddenly, a wicked smile crosses his face. He's going to keep his promise and give you Epona... but you'll never get to leave the ranch! With a smirk, he locks the gates of the ranch shut!
Well, Ingo's got you backed into a corner, but he forgot you have a horse that can leap over fences with Herculean strength!
Ways to Escape
edit- HARD WAY- Ride Epona and get her into a speedy gallop. Charge straight toward the locked gate Ingo is at. With luck, she'll hop over in one bound! [You have to be perfectly lined up with the fence, or else you'll just run into Ingo!]
- EASY WAYS- on the left and right sides of the ranch there are fences low enough for Epona to leap over. Heading from the entrance towards a wall, run at an angle. It doesn't have to be perfect, the horse can jump over it either way.
After outsmarting Ingo, you'll get a satisfying cut scene of Link and Epona making a daring escape from Lon Lon Ranch (there are three different cut scenes, one for each escape route in the ranch).
Impressive work, hero! You've got Epona at your beck and call from here on out! Whenever you want, just play Epona's Song and she'll come to you ready to gallop. Epona may only be used in Hyrule Field, Lake Hylia, Lon Lon Ranch, Gerudo Valley and Gerudo's Fortress.
How to control Epona
editMove the joystick in the direction that you want to go. Press the A button to feed Epona for a burst of speed. Now you have Epona and you'll go across the Hyrule Fields much faster than on foot. If you go back to Lon Lon Ranch, Malon is now the owner and awaits her father's return. If you talk to her, she'll remember you and will tell you she owes you one. Poor Ingo has returned to his old job but can't even remember running the ranch, and stranger still, he seems more humbled than usual. What, did two witches bewitch him or something...?
With Epona now your trusty steed, you've found yourself an important friend for your travels. She may not look like much, but that horse is a titan that can help you jump over the biggest canyons you find blocking your path ahead, and deliver precious goods in record time. However, she won't go where places are cramped, confusing, or dangerous. Treat her with excellent care, just like Malon wants.
Epona is an optional but vital part of the game, though getting her right this moment wasn't top priority. You need to set your sights on Kakariko Village, where a strange device awaits your fingertips...
Getting the Hookshot
edit
Head to Kakariko Village and enter the Graveyard. Sadly, old Dampe is now dead as a doornail, and the Graveyard is overrun by devious Poes. If you read his diary, he mentions a strange gadget he buried a while back. That secret was apparently taken with him to his grave. Hey, wait... if it's taken to his grave, why not pay a visit... on second thought, is it really a good idea to disturb the man's tombstone? There's not much other choice.
Go to the left-hand side of the graves, up past the stairs where a patch of soil stands out. You'll notice one gravestone has flowers decorating the sides. Pull back the gravestone all the way backward, minding the massive Poe infestation! A hole will appear- jump down it to meet Dampe's Ghost, who will challenge you to a race. You don't have to win it, just to follow him to the end of his treacherous path. Be careful; Dampe drops flames from his burning lantern as he moves along. If you can't keep up, a door may shut at a place Dampe went through, sending you back to the start of the race with one heart of damage done to your health, and should you explore the wrong area of the tombs, you will indeed bump into Re-Dead, but only if you stray from the path- the sounds of moaning should be a strident warning not to go down certain corridors. If you reach the end of the grave, Dampe will commend you for finishing and tell you to come back sometime for another race. When he leaves, he'll tell you be careful on your way out, just to make sure you get out safely. After he departs, he makes a treasure chest appear before you. Open the chest that appears to obtain the Hookshot. It's a tool that extends from a short chain to reach things, pulling you to them, or pulling them to you. In a bind, it can act as a makeshift weapon, spearing monsters with the harpoon-shaped tip at the end of its metal chain. This fancy contraption is what Sheik was alluding to!
(Note: If you go decide to go to the Forest Temple and skip getting the Hookshot, expect harrowing disappointment for ignoring Sheik's advice. You'll realize that you don't have any items to help you reach the entrance on the tree ledge! At least you'll get the warping melody to return in a flash.)
The Mysterious Time Block
edit- If you race Dampé again and manage to finish the race in under one minute, you'll also be rewarded a Heart Piece. If you don't manage it you will get rupees or other things.
After Dampé leaves, go into the room nearby; you'll be locked in, with a big stone blocking your way forward - you're boxed in! Fortunately, Navi comments that the carving on the block is the same design found on the Door of Time. That's a good clue - play the Song of Time and the block will disappear! Now run down the tunnel out of the grave, and you'll come out on a ledge in the windmill. Before precipitously jumping down, make sure you get the Heart Piece located on the right upper ledge (see sidebar). Afterwards, jump down and talk to Guru-Guru the organ-grinder - he'll whine about a certain boy he met seven years ago. When he finishes complaining, pull out your ocarina and he'll teach you the Song of Storms, a melody that creates a storm where you play it. Nearby secrets are revealed by it if you know where they are, but not all secrets appear this way - make sure you have the Stone of Agony for secret hunting!
Note: Remember the "Song of Storms" far later in your quest. You will need it for the "Bottom of the Well" dungeon and many side quests that requires that song to make it work.
Heading to the Forest Temple
editNow if you return to the Temple of Time and talk to Sheik, she will say it looks like you have the skills to enter the temple and that the forest girl awaits. But beware: the Kokiri Forest has taken a drastic turn in seven years time. As you head for the forest, Hyrule Field is now rid of Peahats and Stalchildren, but you must watch out for Angry Poes. These Poes are more skilled and will use their lanterns to drop flames, so watch out if one attacks. You'll soon find that Hyrule is truly a land of monsters now...
Special note: If you're keen more on preparations than just following the guide, you can also get the red and blue tunics, more warp music, go through the Ice Cavern with the hookshot and getting Epona across the broken bridge to save the carpenters after you acquire the Biggoron Sword. You shouldn't worry too much if you prefer to do those first before entering Forest Temple. Lastly, you're going to need the Scarecrow's Song in Lake Hylia to make hookshotting a lot easier.
Forest Temple
| A reader requests that more images be included in this page or book. Images are useful for presentation and explanation. Free images can be found at Wikimedia Commons and used here at Wikibooks. If you have created relevant images, you should consider donating them. Remove this template when suitable images have been added. Please continue to edit this book and add images, even after this message has been removed. Discuss this books particular needs on the discussion page. For questions, go to WB:PROJECTS. |
Amongst the ruins of past and mysterious secrets lies the Forest Temple. It is a long forgotten dungeon, filled with undergrowth, monsters, and the remains of faded souls.
A Changed Forest
editUpon entering the Kokiri Forest, you should find that it is severely overrun with monsters. Because of this, the children have barricaded themselves in their homes. Head into the Lost Woods. On your way to the Sacred Forest Meadow, you should eventually find Mido blocking your path. Play Saria's Song for him. He will be convinced that you are a friend of Saria's, and he will let you pass. If you play the song to hear Saria, she will tell you she is in the Forest Temple and needs your help.
To get through the Lost Woods to the Sacred Forest Meadow, go right, left, right, left, straight, left, right.
Remember the song
editIf you decided to go to Lake Hylia as a child and play a song to the scarecrow Bonooru, go back to Lake Hylia and play it again. Bonooru will remember it and you will have the Scarecrow's Song to play. Now the wandering scarecrow Pierre will appear if he hears your song in some places. He will become a stationary target that can be latched onto with the Hookshot. If Navi flies to a far away spot, try playing the song. You can actually get to places faster this way. It even lets you skip the maze in the Sacred Forest Meadow if you want to do that.
Sacred Forest Meadow
edit
Instead of Mad Scrubs populating the area, there are Moblin Guards, monstrous, dog-like guards patrolling the corridors. If they see you, they will ram you into the wall. This time, there is no top-down view when navigating the area. To safely traverse the meadow, wait for a guard to pass you or change direction. When it does, sneak up behind it and use the Hookshot to kill it. If you are an advanced player, use the walking sideways technique (which Navi describes to you before navigating the meadow) to check to see if it is safe to progress though a certain spot. If you play the Scarecrow's Song, you can bypass the maze by using the Hookshot on Pierre at the start. When you finish navigating the maze, you will find a much larger guard, a Club Moblin, much more menacing because it holds a club. He will ram his weapon into the ground to send a vibration that will knock you down and injure you. Run straight towards him, but dodge the tremors that he sends. When you are behind him, attack him with your sword three times to receive a lot of Rupees upon his defeat. Alternatively you can use Bombchus to defeat him from a safe distance.
At the end of the meadow, there is a silence as Link walks to the tree stump where Saria sat, only to find that she isn't there. Sheik then appears out of nowhere, and teaches Link a melody that will transport the player to the Forest Temple entrance at any given time: The Minuet of Forest.
The Minuet of Forest
- Nintendo 64: A, C-up, C-left, C-right, C-left, C-right
- Nintendo GameCube: A, C-Stick (up), C-Stick (left), C-Stick (right), C-Stick (left), C-Stick (right)
- Wii Classic Controller: A, Right Stick (up), Right Stick (left), Right Stick (right), Right Stick (left), Right Stick (right)
- Nintendo 3DS: L, A, X, Y, X, Y
For now, Sheik will use a Deku Nut to disappear, but not for good, because for the rest of your quest, every time you are about to enter a new temple, Sheik will appear to teach you a song that will lead you to its entrance. The spot you will be transported to is a fairly large white platform with a marking of the Sage Medallion in the center. For instance, the large, white platform at the entrance to the Forest Temple is where you will be transported if you play the Minuet of Forest.
Take out your hookshot and aim it at the tree hanging over the broken stairs. You should see a red dot when you aim at it (if you can't, move closer). Hookshot to it and enter the temple. Occasionally you will land on top of the tree, and from there you can jump down into the entryway. However, if you jump forward far enough, instead of running in you'll fall through the floor! (It's probably a glitch.)
Entering the Forest Temple
editImmediately when you enter the temple, kill the two Wolfos and then climb the vines to the east. Climb up, run and jump across to the other tree (or use the hookshot on the chest), and open the chest to get the first small key. For all of the dungeons as an adult, you will use these keys to progress. Enter north into the next room.
Make quick work of the Big Skulltula and enter the next room. If you use the Hookshot to hit the Skulltula, you don't have to wait for it to drop and turn its underbelly towards you (the Hookshot kills it instantly).
The Poe Sisters
editThis is the main room of the temple. You will see four poes, the Poe Sisters, who steal the fire from the torches surrounding an elevator, its power source. As a result, the elevator goes down and shuts off. You must re-light to the torches to reactivate the elevator, which leads to the Boss Room. In order to re-light the torches, you must kill the four Poe Sisters.
Miniboss: Stalfos
editGo straight into the room in front of you. Kill the Blue Bubble (the flying skull surrounded by blue flames) by using your shield to defend against it (if it runs into you, it will lose its blue flames) and then attack it with your sword. You can also throw a bomb to distract it. When the bomb goes off, it will lose its flames, and is left open to attack.
Enter the next room. Here you will fight two Stalfos, restless skeleton armored warriors. Z-target them and then use your shield (it's best to use the Master Sword for this fight). Their attacks will damage your health severely, so be careful when fighting them. When one attacks, dodge it, and then attack it (simply defending won't always work as they use an arced strike that can go behind your shield). They have shields, too, so don't let them counter your attacks. Your hookshot can also stun them if the shot is timed right. Kill both of them and retrieve the small key from the chest that appears and go back to the main room. There is a fairy in one of the pots in the back of the room.
The Abandoned Courtyards
editHead to the northwest to find a Time Block with the symbol from the Door of Time on it (it's southeast of you when you exit the room). Play the Song of Time and it will disappear. Enter the room.
Avoid the Octorok and the Big Deku Baba (if you haven't seen them before, it's an enlarged Deku Baba). Go to the right side and use your Hookshot to kill the Skullwalltulas that are on the vines. You may have to step further away from the wall to reach the third. Or, if you really can't reach it, climb up the right side of the vines and avoid the top one; it's easiest to just ignore it (if it turns purple, it will attack you!). However, there is an alternate way. Did you remember to get Bombchus? Use one and aim it at the last Skullwalltula. That takes care of the third! Climb the vines to the door at the top. Enter the next room and kill the Blue Bubble inside to get the Dungeon Map and unlock the doors.
The next room is actually one of the balconies above the northeastern courtyard. Kill the big Deku Baba then use your Hookshot to hit the black target with a crescent moon (it looks like two concentric circles from far away) on it on the northern wall (to your left as you come onto the balcony). You will be pulled toward the spot and fall down on another balcony. Step on the red switch to drain the water from the well. Now jump or climb the vine down to the ground and into the well (you'll be in the long hallway of B1). There is a small key in a treasure chest you need near the western wall.
After you get the key, climb up the vines behind the chest (this will take you back to the northwestern courtyard). Climb out of the well and head towards the Big Deku Baba and turn right into the door (the main room). Stay to your right, climb the little step and go up the stairs to the western door. It's locked, so you'll have to use one of the small keys you found to open it (just press the A button in front of it like a normal door). Head through the door and kill the Big Skulltula.
Block Puzzle Maze
editIn the next room a Blue Bubble will come after you. Just go around it and walk forward (west) until you reach the ladder: climb up both of them. Head around the corner through the archway into a small room. There are three yellow arrows painted on the ground (Navi will remind you).
Look to the left and you'll see a big greenish-blue block behind a yellow arrow. Pull the block until it can fit through the passage to the right. Walk around to the left side of it and push it along the arrow until it hits the wall (the puzzle success sound will trigger).
Before venturing onward, go back and climb the now uncovered ladder, then go around the corner to find a red block. Push it until it hits the wall.
Go back down the ladder and find the green block. Climb atop it, then jump up to the next ledge on the right (it is kind of hidden).
Walk around the corner and you'll be reunited with the red block. Push it all the way until it clicks into place. Climb up onto the red block and then up to the pathway above.
Run around the corner to the right and climb up the ladder. Up here are two Blue Bubbles (you don't need to fight them) and a locked door; if you can, just ignore both of them. Enter through the locked door into the next room.
The Evil Hand
editStrangely enough, this corridor is twisted. Just walk straight through it and go into the twisted room at the end of the passageway. Be careful, a devious enemy called a Wallmaster lurks in this room. It will fall from above to capture you, and you'll be at the start of the dungeon afterward. Avoid it while it drops by running (you'll see a small shadow appear on the ground), then when you see it drop, kill it for a Rupee bounty. If you look around this room you'll notice an intricate chest is on the wall. Navi will comment on it if you target it. Don't try to latch onto it, though, as the Hookshot can't pull you towards chests like that and you might get snagged by a Wallmaster. After jumping across to the platform to the right of where you exit the twisty corridor continue through the door.
The Fairy Bow
edit
Go down the two flights of stairs (make note that a Poe Sister appears in one of the three paintings randomly here) and enter the mini-boss room. Kill the first Stalfos in this room without falling into the hole (you can try to use your Hookshot to stun him from a safe distance). After you kill the Stalfos a platform will come down in the middle with two more Stalfos. After you kill one of them his remains are still on the ground. After about a minute he will get back up. You need to have them both killed at the same time. This can be tricky at times. A treasure will appear in the middle of the room once the Stalfos are gone. Open the chest, and you will receive the Fairy Bow! Now you can shoot arrows, which you need to get through this strange, mysterious temple.
The First Two Poe Sisters, Joelle and Beth
editGo back to the previous room. In this room, there are three paintings of a Poe Sister on the wall. Two are blank. Use an arrow to shoot the painting with the Poe. If you get too close to it the Poe Sister will disappear and go to a different painting. Shoot the three paintings and then fight the real Poe Sister. This is Joelle, the Poe Sister who stole the red torch. When fighting her, she will often disappear and swing her torch towards you. Simply use your Hylian Shield to protect yourself until she reappears, but don't Z-target her. You can use the Fairy Bow (your most powerful option), the Hookshot, or the Master Sword to defeat her. You can also get her in a corner and then repeatedly use the no-charge spin attack, which you use by spinning the analog stick once and then pressing the attack button really fast,in this way you can kill her in 4-5 seconds. Once she's defeated she will lose the red flame, so the red torch will light in this room and by the elevator in the main room of the dungeon. Upon Joelle's defeat you will see a chest appear that has a small key inside. Don't forget to grab it! Now go back through the mini-boss room where you got the Fairy Bow and into the room on the other side. Here you have to go through the same sort of fight again, but with the second Poe Sister. She is Beth, the Poe Sister who took the blue torch. Kill her and the blue torch will light like the red one did and a chest will appear which has the Compass. Don't go through the locked door at the top of the staircase in this room yet. You need another key first.
The Boss Key
editGo all the way back out to the room you reached at the end of the block puzzle (right before the twisted corridor) with the two Blue Bubbles. After leaving the twisted corridor, turn around and shoot the silver eye with the Fairy Bow. The corridor will untwist. Walk back down the now non-twisted hall and jump down to the floor to find the beautifully decorated blue and yellow chest that you saw on the wall.

Inside it is the Boss Key. This key allows you to open the door to the Boss Room. For the remainder of the game, all of the Boss Keys will be in this type of chest. Now you need to get another small key. Watch out for the Wallmaster, because it still lurks in the room. Jump down a hole in the floor to find a small room. Kill the two Blue Bubbles to open the door in the room and then go through it.
The Other Evil Hand
editYou will be in a familiar room (the large one to the northwest of the main room) but on a ledge. Be careful, because what ever you do, don't fall from the ledge!. Kill the Big Deku Baba and go in the door that is the furthest on the right side (if you check the Dungeon Map you'll see a chest inside). There will be another strange hand called a Floormaster in this room. Attack it with your sword but when it turns green it is invincible and will swoop after you, so hold up your shield. When you think you've killed it, it will split into three smaller Floormasters. Kill all the little Floormasters with Din's Fire and get the key from the chest that appears in the room. Do this quickly, because the mini-Floormasters will attempt to latch onto you and drain your magic power to regenerate themselves.
The Third Poe Sister, Amy
editLeave the room and go through the door to your right (the southern door at end of the ledge). You'll once again be in the room with the block puzzles but at a different ledge (kill the Blue Bubble with a shot from your Fairy Bow or ignore it). Jump down, then head to the greenish-blue block. Climb up the ladder in the middle of this area, then when you see the little rope barrier, walk over to it and shoot the golden eye to get a bundle of arrows. From there, go all the way up to the top of the corridors again and then shoot the silver eye above the door that leads through the corridor again to re-twist the hallway. Go through the twisted room, avoid the Wallmaster, jump across the platforms into the next room, and go down the stairs where Joelle was. Head through the mini-boss room, and then up the stairs where Beth was and unlock the door.
The Poison Puzzle
editYou will come out in another twisted room. There's a Wallmaster in here, so kill/avoid it and jump over to the platform on your right - it conveniently has a ladder you can climb if you don't make the jump. This will lead you to another corridor, although this one is not twisted...yet. Walk through the corridor carefully, because there is another enemy introduced here: the Green Bubble. It spins in a circle and tries to hit you if you get near it. Stun the two Green Bubbles with your Hookshot to eliminate their flames, and then kill them with an arrow and unlock the next door. Or, you can just shoot them with an arrow, even if they have their flame on.
In this room there are four revolving pillars jutting out of a poisonous pit and rotating around a central column with a torch on it. Look to the right and you will see a platform with a frozen eye switch above it. There are two ways to melt the ice: jump onto the platform and use Din's Fire, or you can hop on one of the pillars and attempt to shoot an arrow through the lit torch on the central column - the arrow will ignite and melt the ice if timed correctly. If you use Din's Fire there is absolutely no need to shoot the switch once it thaws - doing so actually reverses the twisting of the corridor, so unless you feel like wasting magic or making trick shots with the bow, avoid this. If you happen to fall while traversing this room, there's a ladder on the frozen eye platform you can climb to get back up, or you can also use the hookshot on the torch on the middle column.
Maze of Doom
editGo through the door and back into the twisted corridor to reach the twisted room. Drop down the hole in the floor to land in another weird room with a checkered floor. In this room the ceiling falls on the floor, but there are holes in the ceiling that you can safely stand underneath. You'll have to take advantage of these holes to make it across, but be careful because there are skulltulas around, and your shooting accuracy with the Hookshot and Fairy Bow is thrown off in this room. There is a chest with arrows halfway across the room if you want or need to restock while in this room. Reach the switch on the floor and hit it to enter the next room.
Amy's Puzzle
editHere there is a big painting of the Poe Sister Amy. Pay close attention to its details. Then, shoot it with an arrow and five blocks will fall on the floor. Push and pull them so they fit together and match the picture of the Poe Sister above. One of them is a piece of Beth's picture, darker than the rest. Ignore it, because you have only one minute before they return to where they were. The block in the north west corner doesn't need to move. Push the north east one into place right next to the other, push the south west block up into the other one to form a L shape, then pull the darker block away from the group and push the final block into place.
If you arrange the picture correctly then the third Poe Sister will emerge from it. This Poe Sister is Amy, the Poe Sister who snatched the green torch. Kill her just like you killed the other two Poe Sisters. The green torch will light both here and in the main room.
Leave the room and kill the Big Skulltula in the next one.
The Last Poe Sister, Meg
edit
Now in the main room again (but at a previously unreachable spot) you'll notice the fourth Poe Sister crying over the deaths of her sisters just below you. Drop down and approach her to begin combat.
Unlike the other Poes, you're in for a surprise; her name is Meg, the Poe Sister who snagged the purple torch. Because you killed her sisters, she wants revenge! She will make three copies of herself, so this can be tricky at times. The moment she and her clones appear, look for the one that briefly spins: that's the real one you need to destroy.
If you didn't see the correct Poe Sister (such as one of the two that appeared behind the camera), you need to quickly take them out with the bow. Turn towards the ones behind or entering the camera view, Z-Target, and fire the bow. Alternatively, you can use a charged spin-attack to kill the images, and quickly follow with an arrow. You may also use the hookshot.
After a few hits, she will be defeated; all the torches will light up, and the elevator will be reactivated.
The Final Puzzle
editThe elevator will come back up. Get on the elevator and go down. In this room, there are two barred passages on the blue sides. Look through them. Two giant sections of the wall stick out into the center of this room (they are sitting on the two red sections of the floor) and are pushable from either side (like giant levers). Go next to them and push until the room starts to shift, opening new passages. Go and look to see what new doors opened up.
Three switches are down here, hidden behind the walls. First, head to the western lever and push it southwards. Hit the first switch to raise the bars blocking the second. From there, continue to push the wall south until you reach the second switch, which will raise the cage blocking the third. Continue spinning the wall until you hit it open up the path to the Boss room. On the Boss Door is a gold lock with horns. The Boss Key will open it, so hopefully you already got it.
Boss: Phantom Ganon
edit
Enter the room and climb up the stairs on the right. You will find that there is nothing in this room. If you try to leave, the boss will make his entrance. The exit gets blocked off by iron bars, trapping you inside the room. You will see someone who appears to be Ganondorf. It is not the real deal, but it is the boss of the Forest Temple: "Evil Spirit from Beyond: Phantom Ganon."
Dangerous Paintings
editFor the first half of the battle, you will watch Phantom Ganon and his horse enter one of the paintings on the wall. After Ganon reaches the end of the painting, he will turn around and two of him will be coming towards you. Identify the positions of the two and then look for the more colorful Phantom Ganon. A small, purple portal will form in front of the real Phantom Ganon when he reaches the front of the painting to allow him to emerge from it. He is your target. With your Fairy Bow ready, shoot him when he comes out of the painting (while he's still white). If you aim for the decoy, it will turn around at the last second. If you miss your chance to hit Phantom Ganon and he emerges, he will shoot a ball of magic onto the floor with his scepter. If you look in the middle of the floor, on the edges of the blue, are six yellow arrows. These arrows show the direction of the magic beams emanating from the magic ball Phantom Ganon throws onto the floor. Stay clear of it. After you hit Phantom Ganon with three arrows, he will stop entering paintings and let his horse ride off. This is now the second part of the boss battle.
Magic Attacks
editWhen the fight starts, Phantom Ganon will begin floating around the room somewhat close to the ground shooting bright yellow magic bolts at you. You can block them easily enough with your shield, but this is purely defensive and won't advance the fight - Navi advises that you need to counter these attacks with one of your own. Z-Target Phantom Ganon and while you're locked on, swing your sword as one of the bolts approaches - if you time it correctly, the bolt will reflect back towards Phantom Ganon! While he's close to the ground it's best to dodge his attacks - the reflected bolts will ricochet away from Phantom Ganon. However, after a moment or two he will float higher into the air, pause momentarily and then fire a slower moving magic ball at you: this is the time to fight! Strike the ball as it approaches, and you'll begin a batting war between you two - each time someone hits the ball it speeds up. If you can survive about four or five volleys (tip: stand as far away from him as you can so you have more time to act) Phantom Ganon will inevitably mess up and the ball will hit him, stunning him and dropping him to the ground, opening himself up for your attack! If you have the Biggoron Sword switch to it as fast as possible, do a jumping attack and then strike him several times. The same strategy applies with the Master Sword, although it will take more strikes to finish him - either way, keep this up until you win.

Keep in mind that when he's almost defeated, Phantom Ganon may launch a sparkling white ball of magic at you in a furious charge - you'll have to use the Spin Attack to counter it. If you aren't fast enough to defend yourself, you'll lose 3 hearts! However, Phantom Ganon does not always use this attack. Just be prepared if he does, and use the Goron sword if necessary.
A glitch that works almost every time is, when you hit Phantom Gannon with his attack, if he lands at the gate that blocks your way out, you can continuously hit him until he is defeated as if a barrier prevents him from recovering.
When you defeat him, you will find out that the real Ganondorf was watching. He becomes frustrated with his creation and banishes it to "the gap between dimensions." Enter the blue light that appears to leave the Forest Temple. That is, after you grab the Heart Container, of course!
Aftermath
editSaria and the Forest Medallion
edit
After stepping into the blue light, you will be transported to the Chamber of the Sages again, the place where you met Rauru. Saria will emerge from a green platform in front of you like the yellow one Rauru was standing on. She reveals that she is the Sage of the Forest and her duty is to protect the Forest Temple, so she and Link cannot live in the same world. After speaking with her, she will give you the Forest Medallion , which contains her power. As you leave the Chamber of Sages, she will tell you she will always be your friend.
Even though Saria is now a sage, you may still talk to Saria with "Saria's Song" at any point in the game. Right now, she will tell you she didn't want to become a sage at first, but that she is glad to be helping you on your quest.
The Deku Tree's Sprout
editYou will find yourself in front of the Deku Tree. Link notices a root. It suddenly sprouts from the ground, revealing a large sprout with a smiling face, the Deku Tree Sprout. He reveals to him that Link is not a Kokiri, but a Hylian. This is why Link became older unlike the Kokiri. The Deku Tree Sprout reveals that Link was brought to the Deku Tree by his Hylian mother during a time of war before Hyrule was unified. The Deku Tree could sense that Link was the child of destiny, so he took him in and raised him as a child of the forest. As for his mother, she passed away from the injuries she took from the war. The Deku Tree Sprout tells you that you were always destined to leave the forest and to break the curses on the other temples. As for the Kokiri Forest, it has returned to normal and the Kokiri are back outside.
The Prelude of Light
editReturn to the Temple of Time. Sheik reveals that there will be a time where Link will need to return to the temple as quickly as possible, and so she will teach you the melody for when that time comes: The Prelude of Light.
The Prelude of Light
- Nintendo 64: C-up, C-right, C-up, C-right, C-left, C-up
- Nintendo GameCube: C-Stick (up), C-Stick (right), C-Stick (up), C-Stick (right), C-Stick (left), C-Stick (up)
- Wii Classic Controller: Right Stick (Up), Right Stick (right), Right Stick (up), Right Stick (right), Right Stick (left), Right Stick (up)
- Nintendo 3DS: A, Y, A, Y, X, A
Sheik will also tell you that you can return to the past by putting the Master Sword back in the Pedestal of Time. Sheik will disappear again, and the temple will suddenly be illuminated in light. You may now return to the past to complete any sidequests, although these may be performed when you head to the spirit temple.
Sidequests
edit- Kokiri Forest: On the back of the House of Twins, use the Hookshot to kill a Skulltula and claim its token.
- Lost Woods: As a child, plant a Magic Bean at the soil patch in the section of the Lost Woods where the Forest Stage is. As an adult, ride the plant to the nearby ledge at night and kill the Skulltula.
- Sacred Forest Meadow: Climb the lone ladder at the end of the maze, turn around, and look on the left wall for a Skulltula.
Quest for the Biggoron's Sword
editIf you have received Cojiro from Anju the Cuckoo lady in Kakariko Village, you can continue the item trading sequence in the forest. It is a long series of tradings, and it is best if you have Epona with you for some of the tasks. If you haven't received Cojiro, you can get him by waking up Talon with the pocket Cucco. Talon can be found if you go down the stairs leading away from the well in the house to the right.
- Odd Mushroom: Upon entering the Lost Woods, head to the left. You should find a strange looking man asleep. He is Grog. Awaken him using Cojiro. Apparently, he is the original owner of the bird. He will give you the mushroom to take to the potion lady in Kakariko.
- Odd Medicine: You have only three minutes to deliver the mushroom to the potion lady. If you have Epona, this task will be a whole lot easier. To get to the potion lady's abode, find the potion shop that relocated from the market. There is a back door on the left. Now enter the barn on your right. Give the mushroom to the lady.
NOTE: You cannot use warping melodies to help you. If you do, the time will automatically drop to 1 second.
- Poacher's Saw: Take the medicine back to the person who gave you the mushroom. He is gone. You will find Fado, a blonde Kokiri in his place. She claims that he is gone and that the medicine you carry belongs to the forest. After she demands it back, she will give the saw he left behind.
- Broken Sword: Unlike some of the other steps, the Kokiri girl does not tell you what to do with the Poacher's Saw. Take the Poacher's Saw to the Carpenter boss in Gerudo Valley. He will give you the broken sword.
- Eye Drop Prescription: Take the broken sword to the top of Death Mountain. Show it to Biggoron, and he will give you the eye drop prescription.
- Eyeball Frog: Next take the eye drop prescription to King Zora. He will give you the Eyeball Frog. (NOTE: If you have not gotten him unfrozen, you must unfreeze him with blue fire, from the Ice Cavern.)
- Eye Drops: Give the Eyeball Frog to the scientist at Lake Hylia. He should give you the Eye Drops.
- Biggoron's Sword: Finally, the last step, take the eye drops to Biggoron and give them to him. He will give you a claim check for a sword. If you play the Sun's Song and go ahead about 4 days, it will be finished.
Quiver Upgrade
editThe Shooting Gallery relocated from the market to Kakariko Village. The building lies between the Windmill and the House of Skulltula. The game still costs 20 rupees and you still have 15 shots. They are in the same positions as last time, but their appearances have been scrambled. If you win, you will receive a Bigger Quiver and be able to carry a maximum of 40 arrows.
Other Quests
editIf you're eager to do the dungeon in the Bottom of the Well after you get the Storm Song to play to the Windmill, this is the time to do it. Unfortunately, you can't get to the Spirit Temple without two things: Longshot and Eye of Truth. Your childhood missions will be complete if you got at least two items and cross the desert as an adult. You can warp between young and adult after you complete Forest Temple.
Fire Temple
Beneath the roaring flames of Death Mountain resides the Fire Temple. It is a symbol of strength and courage, fueled by a burning heart. Many old heroes are remembered in its wake.
The Fire Temple is the second major dungeon of the adult-Link portion of the game. It is located inside Death Mountain Crater, which can be accessed through Darunia's Chambers in Goron City. Due to the intense heat, Link can only enter the place while wearing a Goron Tunic. The Fire Temple consists of four floors filled mostly with burning lava. The major treasure is the Megaton Hammer and the boss is Volvagia, a dragon. The Fire Temple's Sage is Darunia and its warp song the is the Bolero of Fire.
Fire Temple #1
edit
Since you've traveled through time and changed into an adult, the cloud around Death Mountain has turned red and flared up. The sky near the mountain is blurred with smoke and ashes, and the summit is very violent and active. It's time to find out the source of its strange activity.
Make your way to Goron City. You should find that it is deserted, except for one small, rolling Goron. Use your bombs to stop him (you can do this anywhere, unlike the "Hot-Rodder" Goron seen as a child). The Goron tells you his name, and it's the same as Link's! He is Darunia's son. He explains that Ganondorf has captured all the Gorons and has imprisoned them in the Fire Temple. Darunia's son also reveals that his father is a descendant of an old Goron hero who killed Volvagia using a "Legendary Hammer." Darunia's son gives you a Goron Tunic to protect you from the intense heat of the temple and tells you of a secret passage to the temple from his father's room. Once you talk to him, he opens up the Goron Shop and Darunia's room.
Special note: You can do this in preparation as well. If you like to save time, do this first with the warp song then later on you can warp back instead of having to ride the horse and running all the way back to the Fire Temple without any interruptions.
The Frail Giant's Knife
edit Inside one of the several chambers blocked with rocks, on the same floor as Darunia's son, you'll find Medigoron, a very large Goron who has crafted the Giant's Knife that took him seven years. You can buy it for 200 Rupees, but it is very frail and after a few strikes it will shatter to 1/4 of the length and become the Giant's Knife (Broken). Because of this, you're allowed to buy replacements at the same price over and over, but it's really not worth it. The weapon causes more damage than the Master Sword, but since there's a permanent option, it's best to go for that if you want to handle more power. Biggoron, a Goron the size of a small mountain, can forge you the blade, but you need to complete a trading quest if you want him to be in prime condition to work.
Death Mountain Crater
editMove the statue centered on the wall in Darunia's room to reveal a passage to the Death Mountain Crater. After entering, look to your left and you should see a bridge with a broken section near you. Use your Hookshot on the wooden post above the working section of the bridge to get across. Walk a little further along the bridge and Sheik will appear at this time to teach you the Bolero of Fire, the melody that will lead you to the Fire Temple.
- The Bolero of Fire
- Nintendo 64: C-down, A, C-down, A, C-right, C-down, C-right, C-down
- GameCube: Z, A, Z, A, X, Z, X, Z
- Wii Class Controller: ZR, A, ZR, A, X, ZR, X, ZR
- Nintendo 3DS: R, L, R, L, Y, R, Y, R
Head down the bridge and turn left onto the path that leads into the side of the mountain. If you decide to drop all the way down the hole with the ladder you'll take some damage from the massive fall, so either climb from the top or jump down to the ladder from the opposite side. Turn around and you'll be facing the temple entrance.
The Fire Temple
editDarunia
editOnce you enter the temple, head forward and climb the stairs. Watch out for the Fire Keese as you run to the left and go through the unlocked door. You will see Darunia straight ahead. He tells you a short story about how Ganondorf locked up all the Gorons to feed to the legendary dragon Volvagia. He goes to seal the dragon even though he doesn't have the "Legendary Hammer" (or the Boss Key!).
Freeing the Gorons
editGoron #1
editAfter talking to Darunia, turn left and make your way across the three platforms - you'll land near a switch. Step on it to open the cell, then speak to the Goron - he will tell you the pillar in the ceiling of the main room must be manipulated in order for you to follow Darunia's path. When he finishes talking, open the chest to collect a Small Key. Jump back across the platforms the way you came in and go back to the main entrance room - now that you have a key you can go through the locked door to the east.
It's worth noting that every cell opens with a switch, and most of the cells contain chests with Small Keys. Also, be sure and to talk to the Gorons as you free them - each one will tell you about switches in the temple, destructible walls, fake doors, strange dancing enemies, and even reveal secrets in the temple.
Goron #2
editIn this next room, run straight forward across the bridge - there is a gap near the end, but if you keep running you'll have enough momentum to jump across. Be wary of the Fire Keese that lurk here - kill or avoid them. After crossing the bridge, turn right and cross the wooden plank. Run along the wall (you will have to step through the lava but don't worry, a brief encounter won't harm you), and go straight to the golden brick platform. There is a small brick area on the wall in the shape of a door - if you strike it with your sword you'll notice a slightly different sound instead of the usual clang. This sound is a cue to Bomb the wall - enter the opening to find another Goron. Talk to the Goron, then retrieve another Small Key from the chest.
Goron #3
editAs you leave the opening in the wall, retrace your steps to the right, and continue all the way to the other side of the chamber. Along the far wall will be another gold brick area. The door here is already uncovered, and a Time Block rests on the balcony above it. Go inside the door and follow the path to find another switch and another locked Goron. Free him, talk to him, get another key.
Two puzzles
editRetracing your steps again, head back to the end of the bridge with the locked door - unlock it, and as you enter the room you will notice a rather large fence in front of you. Hookshot just above the solid square-shaped opening - you will grab onto the fence (alternatively, and slightly more difficult, you can cross the plank and walk up to the fence on the other side). Climb to the top and kill some Keese from a distance with the Hookshot (there are two each to the right and left). Gingerly make your way to the right side, then hop down and push the large block off the edge into the geyser of lava erupting from below. Immediately jump down on top of the block (as you jump off, press backwards to stop your forward motion) because it will be propelled up to the second floor. Inside the small room, unlock the door and move on to the next large room.
You'll see a trapped Goron here, but ignore him for now because you can't do anything for him at this moment. Go left and climb the ledges with the moving fires on them - the fires are actually being produced by slow moving enemies called Torch Slugs, and you can kill them if they are giving you problems. It takes two hits to kill them - once to extinguish their flame, one more to finish them off (hit them once with your sword, wait for them to turn white to finish them off). Climb up to the top of the ledge and jump to the other ledge on the right. You will see a new type of switch, the crystal switch, but don't bother hitting it yet. Push the block on the ledge down and then jump down and pull it as far that it can go. Make your way around it and then jump onto it and then onto either the fence or the nearby platform. Climb the fence up one level - though you can't see it from where you are, there is a fire preventing you from climbing out of this room, so go to the edge right above the crystal switch. Take aim and hit it with the Hookshot, or drop a bomb down by it, then quickly climb up to the upper level and then scramble up the fence before time runs out. Enter the door at the top.
Gorons #4 and #5
editThere are two Gorons in this large room - unfortunately, there are also giant boulders rolling around the room to keep you at bay. First turn left (up, as the camera will turn) and stay along the outer wall until you reach an alcove with a door. Go through it to to find the first Goron. Free him, take the key, then exit the room and head back to where the boulders are. Keep going around the perimeter of this room and you will find the second Goron (look for the nearby switch!). Make sure to get the key! From the second Goron head straight out until you see the first break in the wall to the left - head diagonally through it, continuing to follow the wall, and where it turns up sharply you will find a locked door. Open it and exit the room.
Dungeon Map
editGo through the door and in the next room do not fall off the narrow ledge! If you do, you will fall back into the first room you unlocked to the east of the entrance to the temple. To your right is a barred door. Look for an eye switch and shoot it with an arrow to open the door. Go to the door carefully. Inside the room behind it is a chest with the Dungeon Map. Go back to the narrow walkway and enter the locked door. Cross the narrow beam to the other side. Once you step on the metal grate at the end of the beam fire starts forming behind you and forces you to go forward. Cross until you are at the other side (if the fire catches up to you, you can hop onto the columns with the hearts, located about halfway across, for safety), then enter the door.
Goron #6
editYou are now once again in the room with the rolling boulders, but now you are on top of one of the walls. Try not to fall, or you'll have to go around again. Jump to the platform straight ahead with a crack in the ground and a Torch Slug. Kill the Torch Slug, then stand on top of the crack. Navi will tell you she hears Goron voices below. Use a bomb and blow up the crack, then either jump down (you will lose one heart) or climb the fence and you will be in the room where you once saw a Goron but couldn't reach him. However, now you can free the Goron and get the key. Go back to where you just dropped down and climb back up.
Goron #7
editOnce you are at the top jump to the platform that has a switch. Avoid jumping when boulders are passing by because they can knock you back to the floor below. Step on the switch to open a Goron's cell. Go to the gate that just opened. Free the Goron and get the key. If you fall, the Goron will leave but the key will still be there.
Go back through the door that brought you to the upper level in this room. There is a door on the western, middle side of this room. Jump from the metal grates to the platform (it looks like its too high, but you can make it) and open the locked door. Hurry, because the fire will now form and sweep by from behind you. You'll now be in a small hallway; simply run through the door on the other side.
A hot maze
editBe careful in this room, it's a large maze. If you get too close to some places, walls of fire appear. You'll get used to it after a while. There are some fake doors in this room, so before trying to open a door use a bomb on the door if it looks odd (fake doors stand out from the wall, real doors are inset). Head to the right and go through the door to the northeast to grab the Compass. Then go back into the maze room. Carefully navigate this room to the locked door (the door exits northward) on the south side of the central area (stick to the left side and the outer wall to get around easily). Watch out for the statues/totem poles that spurt flames; some are timed, and some shoot out based on proximity like the flame walls. Go into the locked door and pass through the hallway, past the Goron for now and straight out the other door.
You are now on the other side of the maze room. There is a switch that will extinguish the fire at the end of the maze. Stepping on the switch will trigger a timed event that will let you exit through the door to the west. Scout out a path to the platform with constant flames, then head back to the switch and step on it. Run towards the door, and remember to be careful since fire walls are everywhere. This may take you a few tries to get the correct path down if you don't figure it out before hand. Once you get up the ledge at the end of the maze, don't go in the door right away. Use a bomb first because the real door is hidden by a fake one that will damage you if you open it. Head into the real door when you are able.
The Flare Dancer
editThe mini-boss will appear here. It is a Flare Dancer. The Flare Dancer is not difficult to defeat but it may be hard at times to fight.
When it is spinning around in one spot or running around the room, throw or place a bomb next to him or ahead of him (or you can target him and use the hook-shot). After it explodes, it will knock its body out of its fire clothes. Alternatively, stand on the platform in the middle of the room and shoot the Flare Dancer with your Hookshot whenever it spins in place. The small body will run around in circles after it loses its clothing. Chase it down and attack it with your sword or hookshot. The spin attack works best as it has more power than just your sword alone, but the timing may be difficult to get right.
The Flare Dancer will respawn its clothing from the fire in the center of the room, recovering health if it didn't receive enough damage. The color of the clothes represents the amount of damage it has received: red means undamaged, blue means moderately damaged, and green means its on the verge of dying. When it dies, hop onto the elevator in the middle of the room to reach the top floor.
The Megaton Hammer
edit
Once at the top, take the door and turn to your right. Climb the fence. Then throw a bomb at the crystal switch or hit with the Hookshot to trigger the switch to make the flames disappear briefly; climb up when you can and enter the next room. This next room is in the shape of an octagonal doughnut.
Climb up the steps to the left, but don't hit the switch. Use your bow to pick off the three Fire Keese located around the room. When you hit the switch, you'll have about 15 seconds to run along the tight path in the middle of the room to the top where the fires are and open the large treasure chest. The next part is tricky, and if you mess up you will have to spend a long time running back; because of this it's advised that you use Farore's Wind a little ways away from the switch. Hit the switch when ready, then run and jump onto the platform and quickly run up to the treasure chest and open it. You have to hurry or the fire will re-ignite. When running, it's possible to never have to slow down, but if you're not confident don't push yourself or you may fall off anyways. The main thing to remember is "do not fall down the hole!" If you do, you'll fall back to the narrow ledge, or worse, even further to the room you unlocked first! If you need to, use Farore's Wind in here to make getting here easier if you fall. When you get to the top, open the chest to get the Megaton Hammer.
This is the Legendary Hammer. It takes both hands to hold since it's so heavy, but it can smash things and send a shock wave radially across the floor. Go back down the stairs and look for a block with a tiki face on it. It's by the switch and the door you entered this room in; smash it with the Megaton Hammer and it will fall down. Drop down the hole and hit the statue with the hammer in this room to get rid of it (once strike per block). Enter the door behind it.
Watch out for the Fire Keese in this room. At the edge of the empty pool area there's a lone block that sticks up from the edge with one of those smiley faces on it; hit block with the hammer. This makes the floor turn into a stairway. Grab one of the small boxes behind you, then hop down the stairs and put it on the blue switch at the bottom of the staircase to unbar the door.
In this next room step onto and hammer the tiki block and it will drop down and become a block that leads to both the pillar you need to hit and a barred door. Don't hit the pillar yet. Instead, hop up to the barred door. There is a switch to open it, but it is rusted and won't budge. Hit the switch with the Megaton Hammer to press it and the door will unlock.
Goron #8
editIn this next room is a Time Block on a ledge on the other side of the room. Play the Song of Time while still across from the Time Block. It now serves as a platform in the gap between the two sides of the room. Jump down onto the blue block and then onto the other side of the room. Pound the rusted switch down with your hammer. This will open the gate that holds a Goron. Jump down to where the Goron is and go and talk to him. Get the key and then leave from the same way you came in this room (you should be able to get up by using the Time Block).
Back in the fire maze room, jump over the tiki stone you dropped and land on the roof of the temple-like structure in front of you. Hit the tiki block in the middle with the hammer. This is actually the pillar you needed to hit. You will fall down with the pillar and land in the middle of the lava pool between the 2 doors in the room where you met Darunia. Exit this room through the normal door so you are once again in the first room of the whole temple.
There is a statue to the right of the stairs when you are first walking into the temple. Use your Megaton Hammer to eliminate the statue. Enter the locked door. In this next room simply kill all the Fire Keese and Torch Slugs to unlock the next door. In this room, avoid the Like-Like and the tiles and run straight to the exit. The Like-Like will suck you in and take your shield and tunic. If it does, simply kill it and get your items back, but remember, do not leave the room or it will digest your items permanently; forcing you to buy new ones (280 Rupees in total).
Flare Dancer's Encore
editIn this next room is another Flare Dancer. This time, take your trusty Megaton Hammer and slam it right by the Flare Dancer to knock it from its clothing and then chase and strike it. Do this until it is defeated and explodes. A small chest will appear. There are bombs in the chest if you want them. Enter the next room.
Boss Key
editThere is another rusted switch in this room. Hit it with the hammer and free the last Goron and get the Boss Key from the intricate chest. Go back to the room where you met Darunia and jump straight over onto the pillar in the middle and then to the Boss Door. If you want, stock up on Fairies in the room. There are two Fairies in jars on a platform to the far right. Use your Hookshot to get there. There are also bombs you can stock up on. Open the boss door to enter into the final room. Notice that you need to have the red fire tunic on, to withstand the heat.
Boss: Volvagia
editIn this room, use the stone platform to jump onto the main platform in the middle - it has several lava holes scattered about it. The stone platform will then sink down in the lava, trapping you in the center. Suddenly, the middle hole of lava will erupt...bringing you face to face with none other than the Fire Temple boss.

The boss of the Fire Temple is: Subterranean Lava Dragon: Volvagia.
After the short scene with Volvagia flying around, he'll drop down through one of the pits in the ground. You'll then see a small burst of fire from one of the holes - this indicates which pit he's going to emerge from (for now). After the fire burst, he will stick his head out of the ground - this is the time to strike. Run up and hit him with the Megaton Hammer - this will stun him and allow you to strike him with your sword. If you jump attack with the Megaton Hammer while he is stunned it will do more damage than a jump attack with master sword. A jump attack Biggoron's sword does the same amount of damage as a jump attack with the Megaton Hammer. However, if you don't time it right and fail to stun him, he will blast you with fire breath or take a swing at you while you're still recovering from the hammer swing, so watch out. After he is damaged he will sink back in his hole. You'll again see another small burst of flame from one of the pits, but ignore it - you won't be able to hit him because this time he's going to come out, fly around and shoot fire at you. To avoid taking damage, simply walk slowly off the edge of the platform and hang there while he floats around. He'll then sink back into a pit and the process repeats itself. Look for the fire burst, stun with hammer, hit with sword, he goes back to ground. However, the next time he comes up to fly around he will drop boulders from the ceiling, so you will definitely want to hang off the side at this time to avoid any mishaps. You can fire arrows at him while he is flying to get him down faster.
Note: If you fall or get knocked into the lava for any reason during the boss fight, you can climb back up the sides of the center platform in order to escape the lava and resume the battle.
Once you've damaged him enough, he will deviate slightly from the above pattern - he'll try and trick you by blowing fire out of several pits before deciding to come up from another. However, as long as you stay far enough to the edge of the platform you should be able to keep all the holes in view and thus see which one he'll ultimately come out of. Also, he'll return to the hole a little quicker than before, but this shouldn't be a problem as long as you stay on top of him.
If you're going after him with just three hearts, you're going to want to beat him as efficiently as possible - this means only striking him with leap attacks with the Biggoron Sword (three hits and he's toast!), and definitely hanging off the edge when he begins dropping rocks.
After you defeat him he will fall back into a lava pit, fly out one last time then disintegrate into bones, falling apart to the ground. His head lands beside you and burns away, revealing a Heart Container. Get it, then enter the circle of light.
Another Medallion
edit
With Volvagia gone and the Gorons freed, the fiery cloud orbiting Death Mountain returns to normal in a giant eruption. As a result, the ashy skies near the mountain and in Kakariko Village clear up. You will be transported once more to the Chamber of the Sages where Darunia will appear and speak to you. He has become the Sage of Fire and the guardian of the Fire Temple. He gives you his thanks, then gives you the Fire Medallion which, contains his power. Now you and he are true brothers!
After this, you will be transported back to Death Mountain Crater. The bridge back to Goron City is still out so you will have to cross it with the Hookshot, or you can play one of the Ocarina songs to transport out.
Sidequests
editDouble your Magic Power
editWarp back to the spot as an adult - a plant will be waiting for you! Ride the plant to a piece of heart on a nearby mountain - the Heart Piece is on top where you can see it. From there jump back down to the warp point, hop back on the plant, and ride it until you come to a recessed alcove with another Heart Piece - jump in and grab it. To leave, walk off the edge - you're on a scalable wall. Climb it to the top and continue about your business.
Alternately, you can still get the second Heart Piece even without having planted a Magic Bean - after you enter from the top of the mountain (where Biggoron and the Fairy are) simply walk to the edge and climb down the wall to the alcove.
As you approach the entrance to back to Goron City, head left - you'll find a cave blocked by two red boulders. Crush them with the Megaton Hammer and enter the passage - you'll end up at a Great Fairy's Fountain. Play Zelda's Lullaby, and the Fairy of Wisdom inside will extend the size of your magic bar.
Water Temple Quest
editIce Cavern is the next place for you to go. But if you've done with that main quest, you can skip it without any trouble. So save yourself the trouble and teleport to where the Water Temple is.
- Death Mountain Trail: At night, go to the spot with the fence where you tossed a Bomb Flower down to unblock Dodongo Cavern, and look for a red rock. Destroy it with the Megaton Hammer to uncover a Skulltula.
- Death Mountain Trail: At night, head for the climbable wall near the summit of Death Mountain - along the final stretch there are three red boulders. The third one (closest to the base of the wall) conceals a Skulltula.
- Goron City: A Skulltula resides on the pedestal suspended above the center of Goron City (where the Spiritual Stone of Fire once rested). Carefully walk across the ropes until you can sight the Skulltula with the Hookshot, being careful not to hit the wooden platform instead. Do this at night.
- Death Mountain Crater: As a child, use the Bolero of Fire to warp to Death Mountain Crater and drop some Bottle Bugs on the nearby patch soil to force out a Skulltula (see details in the Heart Piece sidebar). Don't dawdle needlessly or you'll catch fire and die!
Ice Cavern
| A reader requests that more images be included in this page or book. Images are useful for presentation and explanation. Free images can be found at Wikimedia Commons and used here at Wikibooks. If you have created relevant images, you should consider donating them. Remove this template when suitable images have been added. Please continue to edit this book and add images, even after this message has been removed. Discuss this books particular needs on the discussion page. For questions, go to WB:PROJECTS. |
Long ago, when arctic winds whipped through Zora's Fountain, a temple of ice stood there. Over time, it melted into the lake. However, the cavernous hot springs of the fountain are starting to resemble another one...
An Arctic Wind
editNavi will mention that an arctic wind is blowing from Zora's Domain. That is your next destination. Head to Zora's River. When you are near the end of the path, it will begin to snow. When you get inside Zora's Domain, you will find that it has completely frozen over! The King and the shop entrance are frozen solid as well. When you head out to Zora's Fountain, you will find that Jabu-Jabu is no longer there, but a series of ice platforms leading to a cave. That cave is the Ice Cavern, your next dungeon. Be careful of the Octocroks and make your way towards the cavern.
Note: Before attempting this dungeon, make sure your bottles are empty before filling them with Blue Fire. You can find bottles throughout your quest before attempting this.
The Ice Cavern
editMake your way down the frozen path, being wary of icicles that may fall from the ceiling. When the room widens out into a large area with a frozen floor, you will encounter three frozen enemies called "Freezards". You may destroy them with the weapon of your choosing. They are able to freeze you. When this happens, tap your buttons to break free. Be careful of the Blade Trap circling the room. If you play the song of storms in the middle of the room, a fairy will appear restoring your full health.
Note: There is an invisible Freezard that follows wherever you walk in the room, keep that in mind as you make your way to the other side.
Silver Rupees
editHead north into the next hallway. Cut your way through the stalagmites and enter the next major room. A frozen, spinning scythe is located directly in the center of the room. When a blade comes towards you, duck using your shield. To progress, you will need to gather the Silver Rupees in the room. Three rupees are easy to find, but are also located in the scythe's path. There is another silver rupee behind three blue stalagmites in the corner (to the left as you first enter the room, there is also a gold skulltula above that rupee). The last rupee hangs above the room. To reach it, climb up the cliff in the back of the room and jump out to grab the rupee. The door at the top of the cliff will now unlock. Climb up and go through it.
Blue Fire
editContinue along the path until you enter a wider room. This room contains a new kind of Keese, the Ice Keese. Upon impact, they will freeze you. Even worse, they do not lose their freezing effect once they touch you. The best method of attack against Ice Keese is the bow and arrows. You can also use your hookshot once you target them.
Climb up onto the ledge near the front of the room. Move slowly along it and eliminate the Freezard at the end. Jump to the platform on the left, and jump to the next platform. It contains a pillar which houses an altar of Blue Fire. Blue fire can be used to melt the Red Ice that you've seen around Zora's Domain and thus far in the Ice Cavern. Store Blue Fire in a bottle.
Use the Blue Fire to unfreeze the large chest within the room. It contains the Dungeon Map. Return to the room with the scythe.
Look to the left and right from the cliff where you emerge from the Dungeon Map room. You should see two bits of ice that have an red tinge near their base. These are barriers that can be melted with Blue Fire. Melt the barrier on the left (west side) first, and go down the hall. You may want to get in the middle of the next room and run in a small circle a few times to get rid of falling icicles.
You should find yourself in a room containing another Blue Fire altar. Unfreeze the chest. It contains the Compass. Make your way back to the scythe room and look for the other "barrier" with a red-tinge base on the east side of the room. Melt the wall, then make your way down the hall and into the next major room.
Block Puzzle
editTo progress, you will need to collect all Silver Rupees while moving a sliding block in the correct direction to get them. Grab the block from its east side and push forward. Now, climb on top of it, and use it to reach the silver rupee on top of the tall stone block. Go to the south side of the block, and push it north. Get on top of it, and climb into the small alcove. Use your remaining bottle of Blue Fire to melt the Red Ice and take the Silver Rupee inside. Drop back down out of the alcove and push the ice block to the east or west and off the cliff to make it re-appear at the entrance to the room.
Now, grab the block from its north side and push it south. Get on the ice block and use it to reach the silver rupee on top of the rock. Grab onto the east side of the stone block and push it west. Get on top of the ice block, and grab the silver rupee on top of the stone. Jump back down and get on the south side of the ice block. Push it to the north. Grab the silver rupee from the stone that the ice block has to come rest on, and the door will open.
Hop on the ice block's east side and push it to the west, then get on its north side and push it south. Get on the ice block and jump over to the Blue Fire. Refill your bottles with Blue Fire. Drop back down to the ground, and push the block from its west side going east. Now, push it north going south. The block will run into the wall. Jump up onto the block, and jump diagonally to the doorway. Eliminate the Freezards along the way and melt the wall of Red Ice you encounter.
The Iron Boots
edit
Continue along the path and you should come to a large, decorative room. Here, you will fight the White Wolfos, a slightly larger version of a normal Wolfos. Defeat it the way you would a normal Wolfos. You can stun it with a Deku Nut when it drops guard and jump slash it. Once it is dead, a chest will generate. Retrieve the Iron Boots from it. They will allow you to walk underwater.
As soon as you obtain the Iron Boots, Sheik will appear before you. It is revealed that the Zora's have been sealed under the ice. The source of this great freeze is the monster in the Water Temple. Unless it is destroyed, the ice will never melt. Sheik managed to save Ruto though. She already went to the temple. Sheik then teaches you the melody that will lead you to the Water Temple, the Serenade of Water.
The Serenade of Water:
- Nintendo 64: A, C-down, C-right, C-right, C-left
- Nintendo GameCube: A, Z, X, X, Y
- Wii Classic Controller: A, ZR, X, X, Y
- Nintendo 3DS: L, R, Y, Y, X
There is a small square of water behind the chest you got the boots from. Equip your new boots and move along the underwater path. Be careful, if you stay underwater too long, you will drown. Enter the sliding door, and you will find yourself in the room with the spinning choppers. Simply take the hallway to the right after jumping off the cliff, and make your way out of the dungeon from there, but bottle up some Blue Fire before you leave.
The Zora Tunic
edit
Return to Zora's Domain and unfreeze King Zora with your bottle of Blue Fire. He will reward you with the Zora Tunic, a garment that will allow you to breathe underwater. It is also a good thing to keep a second bottle of Blue Fire with you so that you can unfreeze the Zora Shop entrance as well. You can buy a Zora Tunic here, but it costs 300 Rupees. If you already have the Zora Tunic, King Zora will give you a kiss instead.
Note: This is your chance to get the Biggoron Sword. You can attempt this after you unfreeze him with Blue Fire. Present him with the prescription and get ready to run and if you have Epona, ride to Lake Hylia.
Water Temple
Within the depths of Lake Hylia stands the Water Temple. Built by Zoras long ago, it honors spirits of water and the many creatures under their guidance.
With the power of your new song available, play the Serenade of Water to transport to Lake Hylia. Everything seems the same except for one thing: where's the lakewater? Go down to the bottom of the dried-up lake and there will be a small pool of water. Put on the Zora Tunic and sink into the water with the Iron Boots.
- The Crystal Lock
Underneath the water is an entrance leading to somewhere, but there is a metal gate blocking it. To open it up, take out the Hookshot and hit the crystal-shaped keystone above the entrance. This will dislodge the buoyant keystone and send it floating up to the surface of Lake Hylia. Since it was keeping the gate from rising, the entrance will open, uncovering the path into the next temple.
The Water Temple
editUnderneath Lake Hylia is the Water Temple. It is perplexing, tricky, and an all-around difficult place to navigate through. Many complex puzzles and dangers await you, so be prepared to act quickly in response to dangerous traps. You will also need the Dungeon Map and Compass to identify which rooms you've yet to visit and the hidden treasures they contain. Otherwise, it can be easy to get lost in this dungeon. You will need the Zora Tunic equipped at all times to breathe underwater, and be using the Iron Boots frequently to submerge into the temple.
To make things easier on yourself, you should have these with you: Bombs, plenty of Arrows, Din's Fire, and the Biggoron Sword. It is advisable to also have the Biggest Bomb Bag and at least the Big Quiver upgrade (obtained by getting a perfect score at the Kakariko Village Shooting Gallery).
As an additional note, make sure to collect the Gold Skulltula Tokens as soon as possible (the ideal times to do so are outlined in this walkthrough); backtracking through this dungeon is difficult and relentlessly tiresome.
Reunited with Ruto
editOnce you are in the temple, you'll have to take your Iron Boots off so you can surface and climb up to venture into the dungeon. You'll find yourself entering a large cavern filled with water and with a large shrine in the middle. This is the main room of the temple. Remember this, as the subsections of the temple all converge back to this room, which comprises three whole floors. The water level in the temple can either be high, medium, or low, and the level will open up access to certain floors while cutting off access to others. At the moment, it is at its highest level. There are also several Blue Tektites perched on the dry ledges in this room. Try to snipe them with your Fairy Bow before they have a chance to notice you and attempt to cross onto the water, because they will be able to float on the surface and attempt to chase you while you are swimming.
Climb up, then walk forward and fall in the water. Then, put the Iron Boots back on. Sink all the way to the bottom. Be wary of the unique enemies which traverse this floor. They are Spikes, metallic balls with sharp points jutting from their bodies. If the Spikes spot Link, they will roll towards the hero with intent to pierce him. No weapon can harm them in this armored form, but if they collide with your shield or plunk them with an attack from the Hookshot, they will retract their spikes and assume a vulnerable, rock-like form of a vulnerable rock for a few seconds before reverting to their armored form. Attacking them with Hookshot will allow you to keep a safe distance from the Spikes. You can also anticipate where they are by the metallic rattling sounds they make as they roll around, and when to hunt them by the snapping noises they make when they camouflage themselves as rocks. The Spikes will be in their rock forms by default unless disturbed and on the move. As long as you are far away enough away from them, they will not transform.
Walk northeast, until you see a passage into another area that has two torches on either of the entrance. Go in that area and follow the path. You'll find Princess Ruto at the end, who has matured into an adult. Talk to her, and you'll learn she was saved from being frozen, thanks to Sheik, and she's a bit upset about being ignored by you for seven years. However, she knows that there are three places in the temple that you can raise or lower the water. She tells you to follow her and she floats up. However, Ruto will be long gone by the time you reach the area she has entered.
Draining the Temple Dry
editSimply take off your Iron Boots and you will float up. When you reach the top, you notice that she isn't there. Get out of the water and ignore the symbol on the wall for now. Enter the next room and kill all of the Spike enemies in the next room to get the Dungeon Map. Then go back through the door and play Zelda's Lullaby in front of the symbol. It lowers the water level in the temple. Then drop all the way down the way you came up.
Turn around and you will see that the middle torch is lit but the other two aren't. Either use Din's Fire or shoot an arrow through the lit torch to light up all three torches. Enter the now unlocked door. There are several enemies called Shell Blades in this room, mollusks which are guarded by thick shells. If you approach them, they'll turn to face you, and when you get in attack range, their mouths will pop open, exposing their vulnerable interiors, which can be struck with your sword, arrows, or the Hookshot, though their shells can still deflect your attacks should you try to strike them from any spot besides directly in front of them. If you are too slow to react, the Shell Blades will seal their mouths and leap at you with their spiny backsides, and you'll need to defend yourself with your shield and try to attack once they settle down and you are able to make them open their jaws. Kill the Shell Blades inside and you will receive a Small Key from the chest that appears. Exit the room and go back to the main room. Use the Dungeon Map to note where you are, if necessary. Return to the main room and try not to get too close to large tower in the middle of the room, since it can trigger Blue Tektites to pounce down on you from above.
In the main room, look for a brown platform on sticking out from the west side of this floor. Stand on it, and you'll see a brown block which cordons off further access into this area of the dungeon. Push the brown block as far as it goes. The block should fall down an underwater chamber. Put on the Iron Boots and follow it down. Go to the end of the hallway you'll find and take off the Iron Boots when you reach a place you can resurface. In this room, hit the crystal switch and a geyser of water will shoot up from the ground. Jump on top of it to get to the other side. In this next room, there is a whirlpool of water. If you look in the corner that is furthest from the entrance, there is a dragon's tail on the right, underwater (to the left is the dragon head). Jump into the water with your regular boots. When the whirlpool reaches over the tail, put on the Iron Boots. Now, you will be underwater and on top of the statue. Look around to re-orient yourself, but don't hop off the statue. You will see a diamond in the dragon's head. Hit it with your Hookshot and a nearby gate will open. Then turn your view and hook shot onto the target. Then go into where the gate used to be and take off your Iron Boots. Float to the top and you will find a Small Key. Get the key and then go all the way back out to the main room. Use the hookshot at the end to get out of hole to get back to main room.
Half-Full, Half-Empty
editBack in the main room there is a large tower in the center of the room. At the bottom of the tower there is a locked door. Open it and enter the tower. Once you are in go straight to the wall, then turn around. Look up and there will be a target where you can Hookshot to. On this platform there is another Triforce symbol so play Zelda's Lullaby to raise the water. Notice how the block also floats up. Put on the iron boots and sink down to the bottom and under where the block used to be.
In this next room hit the diamond object and kill all the enemies inside. Once you kill them all another gate will open. Take off your boots and float up and get the small key in this room. Now return to the room where you raised the water.
Float all the way to the top and exit through the door. Now jump back down and put on your iron boots. Go to the room where you met Princess Ruto (the one with a torch on each side). Once again take off your iron boots and float up. Now that the water is only half risen so you can reach a new place. Place a bomb near the odd shaped wall and stand back. Get the small key and head back to the main room.
The Compass
editFloat up to the top of the main room and stand on the platform in the center. Look around for a hookshot target that has two pots at the entrance of a passageway (it's not a door that needs to be unlocked). Go into the passage and through the tunnel. Hookshot to the target on the wall and then hookshot to the target on the ceiling. You will find a chest that is covered with water. There is a switch in this room. Shoot your hookshot or an arrow at it and open the chest. You will receive the Compass. Now head back to the main room.
All Wet Again
editSwim around the tower until you find a locked door. Go into it. In this room, stand on the water jet, being wary of the blue tektite that jumps down. Shoot the crystal switch with an arrow to raise the water jet to the next floor. Go through the door and you are once again in the main room, but in a nook in the southwest corner. Here you find another Triforce tile in the wall; play Zelda's Lullaby and raise the water all the way to the top. You may find it helpful to place a Farore's Wind warp point here for later. Now jump down. Go East and head into the corridor, putting on your iron boots at the end to go underwater. There is a block here. Pull it as far as it goes. Then go back into the main hub and enter the locked door on the West side.
First, kill the two keese (there is one near where you enter and one near the exit) with the hookshot or arrows; avoid standing near the edge or you might get knocked off. This room can be very challenging, especially if the keese are not defeated before moving along the platforms in the middle. Go straight to the edge and look down. Jump onto the platform that is moving up and down. Take out your hookshot and be ready to shoot. Shoot across to one of the platforms that is moving downwards. Then immediately aim your hookshot and shoot upwards. Once you are on that platform once again aim your hookshot up and shoot to the next platform. The tricky part about this is that the platforms are moving down so you have to move quickly to avoid falling. Once you reach the top go through the locked door.
In this room there is a diamond in the center and several dragon head statues. The diamond in the center raises the water and the statues. Some of the statues have targets on them. Use the targets to get across the platforms. At any time in this room shoot an arrow to hit the diamond to raise or lower the statues and water. Once you are at the last platform, lower the water and step on the statue. Then raise the water and go up with the statue. Kill the like-like and then hookshot to the target on the ceiling to get to the other side of the spikes. Enter into the sub boss room.
Your Dark Side
edit- Injured?
If you are not at full health or do not have a potion ready, you may want to create a warp point at this location (if you have Farore's Wind) and teleport out of the dungeon.

Advance note: If you have the hammer, use it. Using it renders the enemy useless, meaning it does not attack you back at all. For a quick victory, equip the hammer before turning back and strike Dark Link with it until he is defeated. This is by far the easiest way to defeat him.
This room appears to be in a strange cloud of disorienting fog, almost as if you've wandered into a strange nether realm. Even stranger is the presence of a tall, gnarled tree in the middle of the room. It defies common sense for a tree to appear deep inside a temple otherwise devoid of plant life. As you pass by this tree, examine the door on the other side of the room. You'll see that it's locked, but there is no enemy in this room to fight... or so you may think. As you cross from one end of the room to the other, while your back is turned, an eerie, shadowy figure will emerge. His appearance will not be stopped even if you never take your eyes of the tree by walking backwards to the other end of the room. He shall stand ominously still, glaring at you with piercing red eyes. Turn around and face the tree. Dark Link, your evil doppelganger has appeared!
To start the battle, you must provoke Dark Link by hitting with a projectile attack or approaching the base of the tree where he waits for you. He is one of the most formidable enemies in the game, able to put up a greater fight than most because of his swift movements and damaging attacks. Navi's advice is simply, "Conquer yourself!" This is a hint at Dark Link's true nature. He is an evil reflection of Link. His health actually reflects how many hearts Link currently has, and you can judge how close he is to defeat by the tint of his shadowed body. As he grows weaker, he changes from pale gray coloration to a very opaque black. The Master Sword will deal damage equal to a single heart, so you can use that to gauge how many hits he can take.[1] You can use your sword against him, but Dark Link can easily block and counter almost every slice you make with his own shield and sword. In addition, if you swipe your sword in front of Dark Link, he may leap onto the blade, causing you to freeze for about a second, while he attempts a counterattack.
There are several ways to defeat him, as detailed below, but the easiest ways to beat him are with weapons he cannot use, such as the Biggoron Sword, Din's Fire, or the Megaton Hammer. Dark Link cannot defend against these items. Although the Hookshot can stun him, it is difficult to use effectively (if you miss, it leaves you vulnerable to attack). Dark Link has a very defensive fighting style, sometimes mimicking your actions. Every time Dark Link is wounded, he disappears and then reappears behind you. After he takes a lot of damage (or if he is injured near the edge of the room), he reappears further away.
- Using the Biggoron's Sword

Simply run away towards the camera, then turn around and simultaneously press Control Stick (Up) and B button to do a stabbing motion. Dark Link can't defend against this attack, so you'll hit him every time.
If you are using the Giant's Knife, remember that blocked attacks risk breaking the sword. If this happens, revert to one of the other tactics.
- Using Din's Fire
If you want to take the easy way out, simply spam Din's Fire over and over, because Dark Link can't block it. However, this can quickly deplete your magic meter, so have a Green Potion or a Blue Potion ready to drink, preferably the latter, as it will also restore you health and Dark Link is liable to whittle it down quite quickly if you aren't careful.
- Using the Master Sword: Timed attacks

Z-Target Dark Link, and hold your shield out. When he begins to attack, hit the B button (Jump Attack) as soon as he swings, or as soon as he strikes your shield - your chances are good to land a solid hit without exposing yourself. If he mimics the move, he'll end up behind you and facing away. Keep Z-Targeting on, but turn around quickly and do a regular swing on him.
- Using the Master Sword: Button mashing
As you can tell with Dark Link, he will mirror your every swing with one of his own. To exploit this, perform continuous vertical slashes towards him but off to the side. You should either be able to get behind him to make an attack that will hit or otherwise take damage and be able to squeeze in a hit of your own.
- Using the Megaton Hammer

See beginning of this section for advice regarding this weapon.
The copycat is not equipped with a Megaton hammer, just a Master sword, so you can also use the hammer on him, just swing it at him until you destroy him. While he takes damage from the hammer, he is still able to block its attacks.
- Attacking backwards
Face away from Dark Link, and use Z-Targeting to only look in one direction. Perform a backwards-right walk just as Dark link approaches behind you, and swing your sword to hit him just as you start your swing.
The Longshot
edit

When Dark Link is finally defeated, the illusion in the room will vanish, and you can head on to the next room. This room has a treasure chest inside. Open and you'll be rewarded with the Longshot. This is a Hookshot with twice the that can extend twice as far because of it double-length chain, making many more Hookshot targets reachable. It also makes a few Gold Skulltula Tokens in range to collect within the temple, as well as previously unobtainable ones in the overworld.
Treacherous Waters
editOnce you have the longshot, go behind the chest and you will see a blue block on the ground. Play the Song of Time to make it disappear. Jump into the water and swim through the small river. There are vortexes in water that suck you into the ground in a few areas. Use the iron boots to avoid the vortexes; you can avoid them without the iron boots however utilising them is the quickest and most effective way by far to pass the first three.
The first vortex is easy enough to get round; simply jump in with the iron boots equipped far in advance of the vortex and it won't suck you in. Continue along the path until you find the second vortex. To cross the second vortex you will need to go around the left side of it (facing downstream), following an underwater rock path. If you follow the path, this should be easy enough. After crossing the second vortex you will see the third vortex; just swim past it while keeping to the right (facing downstream) along the rockface. The fourth vortex is slightly more difficult to pass. At times it may seem there is no chance of escape, but keep pushing outwards with the control stick. The best strategy is to go round the right side of the vortex with the iron boots equipped, and push out until you get to the very edge. After you get to the edge you will be pulled back into the current, so timing is essential. As soon as you reach the edge, switch to the Kokiri boots and swim towards the island to the northeastern side of your view (it should have two pots on it). Climb onto the island by pushing the control stick (and thus, Link), against it. If you find yourself trapped in the fifth vortex, push against the current and try to escape it by moving towards the aforementioned island (keep close to the rockface).
From the island, you should be able to see a separate small square island attached to the rockface, between the fourth and fifth vortices. There is little margin for error here. Don the Kokori Boots and tap the B button repeatedly to swim towards the tiny island between the fourth and fifth vortices. You should not get sucked into these if you approach the small square island correctly and carefully, but if you do get absorbed into them, follow previous instructions for escaping the respective vortices. You can also use the longshot to pull yourself towards a target on the ceiling directly on top of the square island.
Look around for a golden eye (it will be set in a diamond shape, which should be on your right if you are facing the locked grate). Hit this with an arrow. IMPORTANT: Once you hit this, a timer will start. Immediately after hitting the golden eye with an arrow, turn to your left and jump to the newly unlocked platform, before the timer runs out. It is a short enough jump to make without the assistance of the longshot etc. Open the chest and retrieve its contents. If you do not reach the chest in time, simply repeat the steps outlined in this paragraph until you do.
Continue along the passageway beyond the key chest. At the end of the passageway, use your newly acquired Longshot to reach the platform to the left and then go through the door. Defeat the Tektite with your sword and use the longshot on the opposite target to cross the gap. Use the iron boots to pass through the waterlogged tunnels ahead of you into the main room. Use your iron boots to reach the Eastern room on the bottom floor (two torches in front) where you met Princess Ruto. Equip your Kokori boots and float to the top.
Once you have reached the top of the tunnel, play Zelda's Lullaby in front of the Triforce symbol to your right to lower the water all the way to the bottom. Jump down and go back to the main room.
Enter the exposed tower door in the middle on the bottom floor (beware, as you will be met with two spiked mine enemies and a Tektite, which it is advisable to defeat before progressing). Cross the two square platforms and turn around. You should see a target to your right. Use the longshot to get to it and play Zelda's Lullaby once again to the triforce on the wall in front of you; this will raise the water to mid-level.
Climb onto the newly raised platform. Use the Longshot to defeat the Gold Skulltula to the top left of your vision and collect the token, before jumping across the gap to leave the tower. Upon leaving the tower, be aware again of any roaming enemies (they often respawn on all levels of the main room, so be careful). A passage blocked by a gate should be on the opposite side to which you left the central tower. Find this passage and shoot an arrow into the golden eye below it. IMPORTANT: This will open the gate above it on a timer. You will need to quickly equip the longshot and use it to drag yourself to the target behind the now-opened gate. If you do not reach the target in time, you can shoot the eye to try again. Your Longshot is more than capable of grabbing the target. (In case you're playing the game on a computer, note that you can't aim properly with the longshot through the normal way. There is a solution though. Shoot the eye, then aim the longshot just below the target. Press the Z button to 'focus', then quickly press down to move your aim upwards. The cursor will slowly return to its former position, quickly shoot when it's over the target.)
Follow the passage to find a large red block. Push it as far as possible (it will fall into place). Turn right and get the key from the chest. Walk through the passage opposite and use the longshot on the above target to get out of the hole (it is best to stand in the centre of the end of the passage for this). Follow the passage to the very top floor of the main area.
Put on the iron boots and sink to the bottom and go through the passage at the northern part of the map. Walk down this hall and either Longshot to get up or remove the boots and float up. Swim up to and climb on the platform. Use your longshot to get to the door across the spikes. Enter the locked door.
Kill all six of the Tektites in this room with your arrows to make it easier. Use your iron boots and jump into the water. Walk across to the other side. Then take them off and climb onto the platform. Enter the door.
Before you jump down, kill all the Stingers in the room with your longshot. You will see that there is a switch in the water, it needs to have a block on top of it to stay "on" (this switch controls the water level). Jump to the platform that's on opposite side of the room as the switch and bomb the weird colored brick wall. Go in and you will find a huge block. Push it as far as it will go. Jump back to the switch side and bomb the cracked wall. Pull the block towards the switch. Go back to the other side and get behind the block. Push it until it falls on the switch. The water level will raise so swim over to the door that you can now access (the door with steps) and go through it.
Boss Key
editIn this room kill the enemies with arrows first. Then hit the switch and jump from water platform to water platform to reach the other side and go through the door.
In this room there is a boulder that keeps rolling by. Grab the Gold Skulltula on the wall. When the boulder passes, go in the direction that it came from. If you accidentally go in the direction that the boulder rolls, just jump into a vortex and it’ll take you back to the platform.
When you are in deep water, put on the iron boots and sink to the bottom. Go through this little tunnel passageway, kill the Shell Blade, rise up, go through the door and find the ornate treasure chest. Open the chest to get the Boss Key. If you need to capture some, there is a fairy in each of the pots in the back of the room. You can re-enter the room until you are finished filling your bottles. The fairies will respawn inside of the pots if you leave the room and re-enter. If you placed a Farore's Wind warp point at the plaque that raises the water level to the highest point earlier you can return to it now. If not, Go back to the place where the boulder was. This time go down the waterfall and find yourself back in the room with boulders, vortexes, and the six Blue Tektites. Head all the way back to the main room.
The water should be half risen right now. Head to the west side of the room to where you'll find a door that has a reddish-orange platform in front of it (the type that floats). You've been in this room before. Kill the Blue Tektite that falls from the top, then hit the diamond and go up with the water platform (you may have to ride the platform up for the enemy to move; sometimes the enemy gets stuck up there and never falls). Enter the door and play Zelda's Lullaby for the last time in the level to raise the water all the way to the top.
Float back to the top of the main room. On the top floor there is a dragon statue with a target that you have never been to. Earlier you weren't able to reach it because of the Hookshot, but now you can with the Longshot! Longshot over to the statue and enter the door (the pots here also have fairies if you need them).
This next room is tricky, and sometimes frustrating. The trick to this room is hugging the right wall with your regular boots and not stopping! Once the first blade bounces off the right wall, start walking while hugging the right wall. The easiest way to get through is by running up WITHOUT TURNING. Once you get through, you have reached the boss!
Boss: Morpha
edit

You'll notice the lair of the boss is filled with a strange, dark blue water. Navi senses danger and warns you that this isn't normal water. At the moment, you won't find the boss in the room. It will not attack unless you are close enough that it can inflict harm on you. To start the battle, jump onto one of the four platforms in the center of the pool.

A creature will slither out of the water and rise up behind you... The boss of this Temple... "Giant Aquatic Amoeba: MORPHA".
Morpha is the evil monster hoarding Lake Hylia's water, a frightening amoeba that can manipulate all water it touches. With this much water at its disposal, Morpha becomes a monstrosity in many more ways than one.
Attack Strategy
edit
- Morpha will use the water to attack you in any way it can. The way to kill this boss is to get close to the nucleus itself (the small pinkish creature) and hit it with your sword. To do this, Z-Target it and use your Longshot.
- The best strategy for defeating Morpha as quickly as possible is to stay off the islands and corner yourself around the perimeter of the room. Morpha's reach is limited so use this to your advantage! After you pull the nucleus from Morpha's water and slash it quickly grab it again with the longshot and slash it use this method and you should defeat it. This may be hard because the nucleus moves around pretty fast.
- Use your longshot and Z-Targeting to grab the "nucleus" and strike it with your sword (it will go down even faster if you use the Biggoron sword).
Dodging Morpha's Clutches
edit
Morpha will continually attempt to grab you with its tentacles and wear you out by violently thrashing Link around. If Morpha manages to take hold of you and fling you across the room, it can do tons of damage coupled with the spike wall, so be sure not to get hit. Avoid his tentacles and keep hitting him with your Longshot and then your sword.
When you've done enough damage, Morpha will grow more persistent and conjure up a second tentacle, trying to catch you off guard while it attacks on its own.
Keep pulling Morpha from the water and strike him down until he finally meets his end (it takes about 6 hits with the Biggoron Sword).
The most effective, yet risky strategy involves repeatedly grabbing Morpha with the Longshot, with rapid-fire shots to reel it in like a fish, cornering it to the wall so it can't get away, and then unleashing your fury on it for a cheap, but fast defeat.
Easy Way Out
edit
The easiest way for those low on hearts and/or supplies is to go to the center of the room. This will trigger Morpha's entrance. Once the scene ends, quickly run for one of the corners in the room. Morpha's tentacles cannot reach you here. While Morpha attempts to reach you, use the Longshot to grab the nucleus. Take your time; you're safe here. Once you have the nucleus, slash at it as much as possible.
Special Note: Don't try to handle the boss underwater! You don't have any sword attack and you only have a hookshot to pull it close to you. Stick to the surface by all means!
Well-Earned Victory
editWhen Morpha has been done in by your sword, the monster will swell up and explode. With nothing left to keep it bottled up, the water will drain back to Lake Hylia. With Morpha's defeat, take the Heart Container (it's down between two of the platforms) and leave.
The Fourth Medallion
edit
Once again you will be transported to the Chamber of the Sages as you step into the blue light. The Sage of Water is Ruto. She breaks off the engagement, given that you and she can no longer live in the same world now. She can sense your concern about Princess Zelda. She reveals that she is fine. She gives you the Water Medallion, which contains her strength.
Upon re-entering Lake Hylia, the storm stops, and the Lake refills with water. Sheik is there, observing the events. After you give Ruto's thanks to him, he disappears into the water.
Magical Morning Light
edit
Once Sheik is gone, go over and read the plaque by the tree. "When water fills the lake, shoot for the morning light." The lake has just refilled, and as luck would have it, it's morning right now. That sounds like a hint! Pull out your Fairy Bow and shoot the rising sun. As crazy as it sounds, this will pay off handsomely. You'll be treated with your first magical arrow, the Fire Arrows.

The Fire Arrow will drop from the sky and land on the island with the two pillars. This is a magical enchantment which you can equip to your Fairy Bow to imbue arrows with the power of fire and disperse flames when they hits their targets, at the cost of two magic points each time you ready a Fire Arrow.
However, if you don't get the arrow after firing one or two shots, it means you've missed your window of opportunity before the transition from morning to day and need to use the Sun's Song to go to night. Wait until daybreak and fire an arrow just as the rooster is crowing and the Sun is located horizontally between the pillars.
Sidequests
edit- Zora's Fountain: One lies on the farthest ice platform. You must jump onto several spinning ice platforms to reach it.
- Zora's Fountain: Once you've obtained the Iron Boots and the Zora Tunic, sink to the bottom of the lake to find a Heart Piece.
- Ice Cavern: It is frozen in the room where you found the Compass. A blue fire altar is present as well.
- Lake Hylia: As a child, plant a magic bean in the soil outside the laboratory. Return as an adult and ride the platform up to the roof, and climb the observatory to find this Heart Piece.
- Lakeside Laboratory: Once you obtain the Gold Scale, go to the laboratory, jump in the water and dive eight meters. You should be able to touch the bottom. Confirm this with the alchemist and he will give you a heart piece.
- Zora's River: As you enter Zora's Domain, venture up to where the bean seller used to be and cross the river. Walk down the pathway about 60 feet, and then look high up on the south wall. Take the Skulltula down with your hookshot. (nighttime only)
- Zora's River: As you approach the curve that leads to the entrance to Zora's Domain, use your hookshot to take down this Gold Skulltula, which hides high up on the outer wall. (nighttime only)
- Zora's Domain: Walk up to where King Zora's throne is, and then take a left and go down the hallway where the Zora Diving Game was. Approach the ledge, and look left. Use your hookshot to bring down this Gold Skulltula. (nighttime only)
- Lake Hylia: At night, use your Longshot (the upgrade in the Water Temple) to pull yourself to the top of the dead tree on the island with the warp pad. Up here lies a Gold Skulltula. Obtain the token by using your Longshot.
- Lakeside Laboratory: At night, inside the Lake Hylia lab is a pool the alchemist draws water from for experiments. At the bottom of the pool is a crate. Sink down into the pool with the Iron Boots and do a rolling attack to break the crate to expose the Gold Skulltula. Finish it off with your sword or hookshot and collect the token.
Quest for the Biggoron's Sword
editIf you want to, you can go ahead and finish the item-trading sequence and collect the Biggoron's Sword now. However, to finish this event, you will need to travel through Kakariko Village, which at this point in the game, you will need to go through a series of cut-scenes before continuing to Death Mountain Trail. If you wish to continue anyways, start where you left off, with the Poacher's Saw.
- Broken Goron's Sword: Head to Gerudo Valley. (The entrance to it, from the field, is just north of Lake Hylia.) To cross the broken bridge, aim your longshot at the wooden board with the black dot in the middle. It is just above the other end of the bridge. Once across, show the carpenter (the bald, screaming man) the saw, and he will give you the Broken Goron's Sword in return.
- Prescription: Your next destination is the summit of Death Mountain. (Where the first Great Fairy Fountain was.) There are two methods of getting there. The first is simply going there on foot, that means, going through Kakariko and dealing with the cut-scenes. The second is using the Bolero of Fire to warp to the Mountain Crater, go left (instead of to Darunia's room) and jump across where there is a red boulder. A ladder takes you up and out of the crater where Biggoron sits. Alternatively and slightly slower, after teleporting to the crater you can enter Goron City through Darunia's room. Simply go up and out of the main entrance, then hike over the top of the mountain like normal. It is recommended that you travel through Kakariko now, because soon you will need to travel though the village, but it will be a timed event (getting rid of the cutscenes now will be beneficial). When at the top of the mountain, walk in the opposite direction of the fairy fountain entrance. The Biggoron will show himself. Show him the Broken Sword. You will find that his eyesight has been disrupted by a recent eruption. He will then give you a prescription to take to King Zora.
- Eyeball Frog: Travel to Zora's Domain and show the prescription to King Zora. It is revealed that the ingredients to make Biggoron's medicine are present, but you will need to deliver them to scientist at Lake Hylia before they spoil. Make sure you defrost him with blue fire or he won't deliver the eyeball frog at all in order to finish this trade quest! Warning: When you use the Serenade of Water song to warp to Lake Hylia, the counter will reset at 00:01 seconds, so the only way to complete this is using Epona. The fastest way is to roll to Zora's River, and then jump into the river and swim to Hyrule Field. Then use Epona.
- World's Finest Eye Drops: You have three minutes to deliver the Eyeball Frog to the scientist at the Lakeside Laboratory in Lake Hylia. Use Epona if you have her. (Make sure you know how to jump gates with her. Accelerate straight towards the fence and she will automatically jump.) The scientist will make the eye-drops for you. (after mistaking them for his dinner!)
- Claim Check: You have four minutes to deliver the eye drops to Biggoron before they lose their effect. Once again, use Epona if you have her. While on the trail, do your best to avoid all the boulders and enemies. NOTE: It is possible to warp to the death mountain crater without fire tunic equipped. The game can only do 1 timer at a time, however you will have 1 second to give him the eye drops after exiting the crater. Once you give the eye drops to Biggoron, he will give you a claim check for the Biggoron's Sword.
Wait three days after receiving the check. Then, show it to him and the Biggoron's Sword will be yours. If you don't have the patience, if you have the "Sun Song", play it about 5 to 6 times. To really check, play the song and keep responding with your claim check. If Biggoron is not ready, he'll think your impatient! But if the ultimate swords ready, show your claim check and he'll give you the Biggoron's Sword.
The Gold Scale
edit
Head to the Fishing Pond and capture a 15 pound or heavier fish to receive the Golden Scale. It will allow you to dive nine meters underwater. It costs 20 rupees to fish and you can do so for as long as you like. The bigger fish tend to stay by the log in the center and by the poles sticking out.
Early start to the Spirit Temple
editIf you try to cross the quick sand, you can't. You need the longshot or the hover boots to get across it. If you use the hover boots, you'll stop just at the edge and run like crazy until you get across the sand river. This is the earliest point to go to Spirit Temple. If you acquire a warp song to the Desert Colossus, come back and do the first half of the temple to complete your childhood missions (unless you're playing the Master Quest version). It will save you a lot of heartache and not have to worry because you're free to choose how you go through the game.
References
edit
Bottom of the Well
The well of Kakariko Village is a very strange place. At first glance, it looks harmless, but evil beasts inside make it a land of doom.
In the past seven years, Ganondorf's dark aura has crept into places beyond imagine, rooting up many evils. Your quest is about to lead to one of those places.
Note: This scene won't be activated until you finish the first three temples (Forest, Fire and Water).
A Beast in the Well
editHead for Kakariko Village. Upon entering the town, Link finds it ablaze. Sheik is there, looking at the village well. Something of great evil is trying to get out, and Sheik warns Link to stay back from the well. Suddenly, the wooden frame above it gets thrown into the air!
An invisible force comes out of the well, picks up Sheik, throws him around in mid air, and finally tosses him to the ground a fair distance away. A dark slime-like mist rushes out of the well and across a building. It circles around the village before heading straight at Link who takes a defensive stance. Although the beast rushes into his shield, Link gets overtaken as the screen goes black and you hear him scream in agony.
-
 The village... it's on fire!
 -
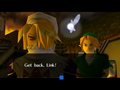 The well's deadly secret is emerging...
 -
 Sheik is helpless before an invisible evil.
 -
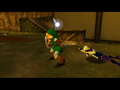 Link is soon in its path of chaos as well.


The Nocturne of Shadow
edit
Link regains consciousness with Sheik kneeling over him. Sheik explains the situation to Link: an evil that was sealed inside the well has escaped to the Shadow Temple in the Graveyard. Impa, Zelda's former attendant, leader of the Sheikahs, and Sage of the Shadow Temple, has gone to the temple to battle it.

Impa needs help to vanquish the monster, but entering the Shadow Temple is so dangerous, no one can get in except people with special abilities. All Sheik can do is teach Link the melody that will lead him to the temple, the Nocturne of Shadow.
The Nocturne of Shadow:
- Nintendo 64
C-left, C-right, C-right, A, C-left, C-right, C-down
- GameCube and Wii
Y, X, X, A, X, Y, Z
The Song of Storms
editBefore you enter the temple, you will need an item that will allow you to see invisible items, enemies and passages: the Lens of Truth. It lies at the bottom of the well. Unfortunately, the well is sealed off, so you will need to return to the past and retrieve the item as a child.

Enter the windmill that is directly in front of the well. Guru-Guru, the angry music man inside, claims that seven years ago, a child with an ocarina played a strange song that messed up the windmill.

Pull out your ocarina. The sight of it jogs his memory. The man will remember the song and teach it to you (it is the same melody playing in the background).
The Song of Storms:
- Nintendo 64
A, C-down, C-up, A, C-down, C-up
- GameCube
A, C-Stick (down), C-Stick (up), A, C-Stick (down), C-Stick (up)
- Wii Classic Controller
A, Right Stick (down), Right Stick (up), A, Right Stick (down), Right Stick (up)
Strange things will happen to the windmill, causing Guru-Guru to get angrier than ever. Apparently, you played the song in the past and caused trouble, but for what reason?
Note: If you already acquired this song after getting the hookshot from Dampe, you can skip this and just play the same song when you come back to the windmill as a kid.
The Bottom of the Well
edit
Head to the Temple of Time and return the Master Sword to it pedestal. Return to Kakariko Village (You can use the Nocturne of Shadow you just learned.) Enter the village windmill and play the Song of Storms. The song
will make something very startling happen. The crank will spin much faster and the music in the windmill will
get more frantic. Then, something even crazier will happen!

The windmill will drastically speed up and churn out all of the water in the well. You are now free to explore it, but beware.
Special note: You can do this after Forest Temple. This is the earliest point to do it. If you finish "The Bottom of the Well" prior to Shadow Temple, you can skip this and continue on your quest.
Deceptive Illusion
editCrawl through the tunnel at the well's entrance. Drop down the ledge with the ladder in front of you, then kill the Big Skulltula. You will see a skeleton lying against the left wall. If you Z-Target and use Navi, she'll tell you that the spirits are saying "Look for the eye of truth..."
Walk through the section of the wall between the skeleton and the mound of the dirt; it is not real. The Lens of Truth in this dungeon, when you get it, will allow you to see what is real and what is not.
Warning! If you happen to fall into one of the holes in the middle area between the fake wall and the Triforce symbol (the room with the Wallmaster), you'll end up in a room with acidic water, a re-dead, three silver rupees on the floor, and five pathways (the ones without torches are useless unless you need to stock up on supplies - one has grass, and the other has pots - the pathway with torches contains the Dungeon Map).
Climb up the ladders and grab the fourth and fifth silver rupees to unlock the door. Head through it to re-enter the main room and entrance to the dungeon. Thankfully, if you keep falling in the holes again, you won't have to get the silver rupees again.
Hidden Pitfalls
editGo across the pool of water in front of you (notice the crawl space at the bottom of the pool, on the right) and wait a bit. You'll hear the flapping of some sort of wings; unfortunately it's a giant Green Bubble patrolling the shallow trench that wraps around this room. If you watch the Green Bubble, its fire will extinguish once in a while; use this time to shoot it with a bullet from the Fairy Slingshot.
There are two ways to go from here:
- Go left or right (right is easier as the Green Bubble won't be coming straight at you) down the trench, and follow it around two corners. After the second corner, run halfway down the hall until you reach an area where there is a Triforce inscribed on the floor (the middle of the hallway, opposite the fake wall you entered from). Stand on the symbol and play Zelda's Lullaby. The water on this floor will stop flowing and drain.
- Alternatively, you may simply run straight into the wall directly ahead of the entrance. It's a fake wall, and will take you into the central room of the dungeon. Keep going straight (going around the big "X" in the middle of the room, as there is a pit underneath it). Keep going straight, being mindful of the Wallmaster lurking on the ceiling of the northern part of this room, and through the second false wall. You'll now be in front of the fountain with the Triforce symbol on the floor in front of it. Play Zelda's Lullaby to drain the water.
After draining the water, return to the pool of water you passed near the dungeon entrance (with the crawlspace). It is now an empty pit, so drop down into the pit and head through the crawlspace (there's a chest opposite the crawlspace with some bombs in it). Go forward slightly, kill the Big Skulltula, climb the wall, and then go through the door straight ahead.
Miniboss: The Dead Hand
editOn the map, you'll now be in the large room that's the farthest to the east on level B1. You'll see four white pillars located around the room; however they're quite peculiar. If you approach one, it will bend over and grab you! They aren't pillars, they are arms! After you are grabbed, a nasty monster will come out of the ground and try to eat you. This beast is the demented Dead Hand, the mini-boss of the well.
Tap buttons to breakaway from the hand you trapped yourself in. Ignore the hands but stay clear of them unless you need to call Dead Hand back again; they can't harm you, but they might hold you long enough for Dead Hand to. Note that the arms can be destroyed, but they don't drop anything or help defeat Dead Hand any quicker, although they may drop hearts which are useful if you are low on health. An alternative way to get Dead Hand above the ground again is by throwing bombs at the hands. If you hit one hand twice or three times with a bomb, Dead Hand will come.
Dead Hand's weakness is its face, so you have to wait for it to bend down to attack you before you can strike it (just stand in front of Dead Hand and wait for it to lower its head). It takes about 9 hits to the face to kill Dead Hand. After striking it about three times, Dead Hand will retreat into the ground and cause a shockwave-like effect made of dirt or some sort of energy; avoid this or defend to avoid taking damage.
Truth within the Eye
edit
Open the chest that Dead Hand left behind to obtain the Lens of Truth. Try looking through the Lens before you leave this room: behind the big chest, against the wall, will be another chest with a Huge Rupee (200)!.
You've done what you need to here, but there are still more places in the well to explore if you wish (there's also more treasure).
Optional: Small Keys, Skulltulas, Bombchus, and Other Treasures
editBombchus
editIn the main room, notice the mounds of dirt to either side of the false door which leads to the center room with the prison cells, locked doors, and Wallmaster. The mound on the left can be destroyed with a bomb to reveal a pit. This pit will NOT lead to the basement, and will instead lead to a small room with a chest containing Bombchus.
The Dungeon Map
editHead into the middle room and deliberately fall into one of the pits. In the basement, head into the path with the lit torches in front of it (bomb the boulders if necessary). Kill the re-dead by stunning it with suns song and striking with sword and grab the Dungeon Map from the chest.
The Compass
editThere are two ways to get to the chest with the Compass:
- From the fountain with the Triforce in front of it, head left (if facing the fountain) and follow the trench around the corner. Keep going until you see a “tunnel,” and hug the left wall of the tunnel (or use the Lens of Truth to see the fake wall there). You'll enter one of the jail cells of the central room, which contains a chest with the Compass.
- Enter the central room with the jail cells, get close to the edge of the pitfall, and backflip over the hole, into the jail cell.
Small Keys and Gold Skulltulas
editFor Key #1, Return to the main room and follow the trench to the left (west). Round the corner north, and halfway down the trench, look to your left to see an opening. Fall down into the pit with the small chest (which contains a single Recovery Heart), then climb up and into the farthest west room. The room is dark a purple, with six coffins. A Gibdo (a mumified re-dead) has opened his coffin and is walking around. Stun the Gibdo with the Sun's Song and kill it, then light the torch by the southwest coffin (“northwest” of the entrance, if you don't have the Compass – it's the one farthest from the door, on the left as you enter the room) to obtain the first small key; note that this coffin also contains two Keese, so be prepared. Light the other torches to open the other coffins if you wish, but they only contain monsters (one contains another Gibdo, and the others each contain two Keese). After grabbing the key, head back to the main entrance. Follow the trench to the far northeast of the Green Bubble's track to find a crawlspace. Head through it and then open the locked door.
In this room you'll see three Fire Keese and the Beamos. Do not move. There are four large hidden holes in the floor. Kill the three Fire Keese with the Fairy Slingshot or Boomerang, then throw a bomb at the Beamos. Now use the Lens of Truth to make your way to the door on the other side of the room (and, optionally, to the chest, which contains a Deku Shield, or a Blue Rupee if you still have it). Now head through the door on the opposite side of the room.
You'll be in the eastern cell block, with a Like-Like, Gold Skulltula #1, and small chest. Kill the Like-Like with your sword (stunning it with your boomerang before strking is tremendously helpful). Now claim Gold Skulltula #1 with your boomerang (and, optionally, the chest, which contains an Hylian Shield, or a Blue Rupee if you still have it).
Now return to the main entrance. Key #2 and Key #3 are both in small chests very near the main entrance (along the Green Bubble's track) behind fake walls. Use the Lens of Truth to find Key #2 to the left of the central room (northwest from the entrance) just before the corner. For Key #3, round the corner to the right (northeast) and look immediately to your left using the Lens of Truth.
Now that you have both keys, head into the central room to unlock both of the locked doors, both of which contain a Gold Skulltula for Gold Skulltula #2 and Gold Skulltula #3. The locked room to the left has a Deku Baba and three flying pots. The room on the right has four Keese and a giant pit with an invisible pathway (use the Lens of Truth to see the pathway along the right-hand side).
When you've had your fill of this dungeon, get ready for your next one; it's sure to give you chills.
The Path to Shadows
edit
Return to the Temple of Time and retrieve the Master Sword (make sure you have the Lens of Truth!), then play the Nocturne of Shadow and Warp to the Graveyard. You'll end up somewhere new: a ledge high above the graveyard beyond the Royal Family's Tomb. Head down the tunnel behind you.


You'll come to a large chamber with a spellcasting circle and unlit torches. At the end of this room is a large sealed door. Stand in the center platform and use Din's Fire to light all of the torches at once. The door will rise up and reveal the path forward.
You are now free to enter the Shadow Temple. However, once you enter this temple, your fears will be put to the test...
Special note: You can go through the Shadow Temple as a child but you'll be limited to the entrance. Better stick to being the adult for this dungeon.
Shadow Temple
Amongst the rot and filth of scum is the Shadow Temple. No one dares venture into it or speak of its accursed name, for it is a symbol of pure evil. The Sages themselves consider sending it into the underworld.
The Shadow Temple
edit
The Shadow Temple is a dark, unforgiving dungeon filled with some of the nastiest monsters in Hyrule. You'll need to be wary of your surroundings to escape this nightmare land alive.
Dark Trickery
editOnce you are inside, go forward and use the longshot to get past the gap. It looks like a dead end, but it isn't. Just put on the Lens of Truth, and go past the wall. In this room turn left and put on the Lens of Truth to reveal another fake wall. Go through this wall and open the door at the end of the corridor. You will enter a hallway that wraps around in a circle with eyes in the walls. Now keep to your right and follow the path around, entering the first fake door you find on the right hand side.
Enter the door and kill the one Re-Dead and two Keese in this room to get the Dungeon Map. Leave the room and head right again, entering through the next fake wall, which leads into another room identical to the one you were just in. At the end of this room is a fake wall with a door behind it. Enter the door to get to the next room containing the Deadhand.
Deadhand's Revenge
edit
In here, you'll fight Deadhand again. Fight him the same way you did before to kill him. However, Deadhand has taken further precaution against you and several more hands now stand in this room. On the plus side, the Lens of Truth will allow you to see a shadow on the ground to see where the monster is hiding. Use a bomb on the shadow to lure the monster out of the ground and away from his hands to strike him down.


Once you do, a chest will appear like before, only this one contains the Hover Boots. These boots have built-in hovering capabilities that allow you to walk across pits and reach inaccessible areas. However, the boots have no traction and only work for brief periods of time. Now leave and head back to the main room.
Descent into Darkness
editSkull of Truth
edit

In the main room there is a circle of skull torches around a bird statue. There is also a locked door that seems unreachable. It will open if you move the statue. It says to face its beak towards the Skull of Truth or descend into darkness. Put the Lens of Truth on and see the real skull. The rest are illusions. Now, push the statue until it is aligned with the correct skull to make the door open. If it isn't, run away, because the floor surrounding the statue is a trapdoor.
When you've pointed the statue at the right skull, they will all light up, and the door at the end of the chasm will open. Put on the Hover Boots and run straight as far as the boots will take you to get to the doorway. Go through it and down the passage, where you'll reach a Big Beamos. This one requires two bombs to destroy instead of one. Once you destroy it Navi will go green in the center of the room. Play the Song of Storms and a fairy will appear.
You may think you've run into a dead end, but don't be fooled; the Dungeon Map and the Lens of Truth reveal several hidden corridors. Go through the fake wall on the right and enter the next room.
Gibdos and the Compass
editThere is a new enemy here; a Gibdo. You've seen one in the well, but this is the first time you must truly battle them. They use bone-rattling shrieks like Re-Deads do, and only attack when they hear you getting too close to them, but their screeches inflict paralysis longer, and they suck away more life energy when they bind you. Get caught by one, and it will steal 1/2 a heart of your health a second rather than a fourth. Defeat the two Gibdos here to get the Compass.
- Three easy ways to defeat the two Gibdos
- Freeze them by playing the Sun's Song as soon as you enter the room.
- Two hits from Din's Fire will defeat them. They also tend to give you magic when they die, so your magic meter may be filled afterwards.
- One charged spin attack with Biggoron's Sword.
After you get the Compass, exit the room and walk straight across. Be careful because the the big Beamos will respawn.
Silver Rupees, Evil Reapers
editIn this room there are a bunch of Silver Rupees and a scythe trap. You'll have to keep ducking to avoid getting carved up. Stay on the outer regions of the scythe, because you'll still get hit if you duck right next to the reaper statues. Collect all of the Silver Rupees in here to move on. Use the Longshot and Hoverboots to reach the highest one in the far corner. Your reward is a Small Key, which can be found in the alcove on the right as you come in the room, having opened up. Return to the last room with the Beamos. Turn to your left and bomb the wall of bones. You'll find a locked door you can open.
Skulltula corridor
editIf you like spiders, then this next area of the dungeon is a thrill. Carefully go down the hallway and watch out for the numerous Big Skulltula. Your best bet is to hit each one with the Longshot and go on.
Eventually, you reach a corridor with falling guillotine blades. Keep a close eye on the blades and time your runs through them. Some are a little faster than others in the temple.
Keep going until you reach the end of the corridor. Here, the path opens up into a cavern with a bottomless pit. There are several hidden, moving, and blade-trapped platforms. There is a Wallmaster lurking about, so if it comes after you and it gets you, you'll end up back at the temple entrance. If you have Farore's Wind, it would be a good idea to create a warp point here.
Put on the Hover Boots and carefully make your way through the falling blades to the platform on the other side. A Red Bubble will hop out at you, but one Deku Nut will stun it. Try not to get into conflict with the Stalfos that will appear. If you defeat it Navi will indicate another spot to play the Song of Storms for a Fairy. Now, you can either progress onward, or seek out a Gold Skulltula.
Imprisoned Skulltula
editTurn to your left and put on the Lens of Truth. There are hidden platforms leading somewhere. Use your Hover Boots to get across the area. Enter the door you come to.
This room has a hidden scythe trap, Keese, and an annoying Like-Like. Kill all the enemies in here, and a small area will open up. Inside is a Gold Skulltula. Not just that, but two treasure chests. One you can see right away.
The first chest holds a Blue Rupee and the other holds a bundle of arrows. Use the Lens of Truth to unveil it. Lastly, you will find two floating hearts in the corner of the room. These are obtained by playing the Song of Time next to them. When you're done here, exit and go back to the platform with the Stalfos.
Opening Doors of Doom
editKill the Stalfos if you haven't already, and then look to the one side that you haven't been yet. There is a moving platform. Time yourself so that when it is at its lowest point, jump onto it. Jump from there as it rises onto the platform with the Silver Rupees, but run as far as you can to make it.Or you can turn right and jump onto the ledge there, then go left. There are two Spike Traps circling around a Beamos. All but one of the Silver Rupees are either in the path of the traps or near the Beamos. The last one is under the Beamos. Blow the Beamos up to get that one to open and then enter the next room.
Spikes, Spikes, and Monster Spikes
editThis is the giant spike trap room. Once you come in, a sign will mention a stone umbrella. You'll need it to get past these spikes, as a foolish effort to run under them will cost you one heart. Put on your Lens of Truth and look to your right. There is a stone block in the wall. Pull it out, and then push it towards the falling spikes. It will catch the spikes and let you pass under them unharmed. Once it is holding both of the spikes so they can't hit you, explore the second jail cell to find a Gold Skulltula.
Then, go around to the other side and pull the block as far as you can take it. It now serves as a bridge onto the spikes. Get on top of it and walk onto the top of the spikes it's by. Across the room on the roof of a jail cell is a switch. Use your Hover Boots to get there and press the switch. Although they are moving and slanted on top, you can walk across the top of the spikes. After the switch is pressed, a treasure chest will fall. Hook onto it with your Longshot and open it for a Small Key, then leave the room. There is another chest with a Blue Rupee on another cell roof, and some Recovery Hearts in the first jail cell, but they aren't really worth the effort.
Go back to the location of the Beamos and spike traps. You'll see a small strech of pathway branches to the left and stops at a guillotine. Put on your Lens of Truth and you will see a new platform. Get onto it after dodging the guillotine. The next platform is shifting across a string of chains. Carefully time crossing over to it and go and ride it over to the locked door.
Hidden Deathtraps
editThis room is very dangerous, although it doesn't look like it. Two ReDead are here, so play the Sun's Song and kill them. This will put their souls at rest, and a chest with a Blue Rupee inside will appear in return. Now, you will need to use the Lens of Truth, because columns of hidden spikes are littered throughout this room. If you wear the Hover boots you will automatically walk over them with out damage, but you can't just stand on them. There are also Silver Rupees you need in this room. Use the Lens of Truth to see hidden platforms and Hookshot targets to get the Silver Rupees without doing yourself any harm.
Destroy the Skull Pot
editEnter the door that opens in this room. Climb up the stairs in this next room and pick up a Bomb Flower growing at the top of the stairs. Throw it in the the flaming skull pot. When it explodes, the pot will explode as well, shooting out a small key inside. Get it and kill the Keese and Fire Keese in the room to open the door so you can get out of here and back to the last room. Use the Lens of Truth on the ceiling to see a Hookshot target. Latch onto the target to land on a ledge above and enter the locked door there.
Fight the Blowing Fans
edit- A Big Fairy and a Hint
The room you do not need to enter has two ReDead inside. First, play the Sun's Song and kill them. Second, go to the center of the room, play the song again to make a Big Fairy appear. Third, if you look at a skull portrait on the wall, Navi will fly up to it, and if you listen to her, she'll tell you what the portrait is saying.
This next room is a narrow corridor filled with danger. Big Skulltula constantly drop down from above in this room. Not only that, blowing fans threaten to send you flying. Use your Iron Boots to make it through the strong winds the fans are making, or wait for them to stop and use your Kokiri Boots to run through. Go past the first fan and the spike trap, and watch for Big Skulltula in the corridor as well. Now, you'll have to cross a pit with a fan on the other side.
Use either the Hover Boots or the Longshot on a wooden beam above the other side to get across. Then, you'll encounter more fans and Big Skulltula. When you get past them, you'll reach the end of the corridor, which will have a dropoff and a fan above. Jump down. Finally, you'll reach a part of the room with fans on both sides and one straight platform in the middle. Use your Iron Boots to get across. You don't need to enter the room ahead. There is a Fake Eye Switch at the end that will shoot fire at you. To make it stop, blind it with an arrow when it's open.
Don't Go Through The Door
editOnce you get to the other side of the platform, turn to the left and use the Lens of Truth. Look to the wall and you'll see a hidden doorway. Equip the Hover Boots and run to it when the fan behind you is blowing. The extra boost from the wind will allow you to get to the door. Unlock it and go in.
Gibdos Guarding the Key
editIn this room there is a pile of bones in the right-hand corner. As soon as you enter, bomb the bones. Then, use your Lens to find a treasure chest with a Small Key inside. Beyond you are two Gibdos and two Spike Traps. Play the Sun's Song and kill them, and they will leave behind a chest holding a Blue Rupee. Go past the traps and through the locked door.
A Ferry to the Other World
editYou are now in a room with a large ship. There is a block to your left. Pull it and push it along a small rut in the floor to a ladder on a nearby wall so you can reach it. There are vines behind where the block was originally covering that you can climb up to go into the cage. There are more vines that continue higher--do not go up these vines! There is nothing up there but a door that leads to the old room with the scythe (the one with the first set of Silver Rupees). Once you go inside, the block will reset so you cannot go back down the way you came. If this happens to you, go the lowest cage you can reach and cast Farore's Wind, then use it to warp back to the door you just came in, otherwise you'll have to go through the whole temple again! However it's better to just move the block into place by the ladder and then save to permanently open this shortcut.
- Gold Skulltula and Scarecrow
If you remember your scarecrow song, you can play that and the scarcrow will appear. Use your longshot to reach the scarecrow and pull yourself towards the gold Skulltula and two hearts. However, you can use the Longshot to reach it from the edge of the ship.
Once you've moved the block into place, climb up the ladder and jump onto the ship. Play Zelda's Lullaby on the Triforce symbol on the ship to make it start moving. Keep an eye on your map in the corner. The moment you get the ship moving, a Stalfos will drop down onto the ship. After a while, so will a second one. If you have it, use Din's Fire to kill them instantly or hang off of the edge of the ship and they will jump off as they try to move around you. Otherwise, fight them one by one. Whatever you do, don't jump into the murky water below, or you'll end up back at the start of the room.
Eventually the ship will go as far is it can. When it does, it will sink, and Navi will tell you to abandon ship. Jump off the ship and onto the nearby ledge. If you look back at the ship, you'll see it sink completely, meaning you're stuck here for now. Enter the door that is at the end of the ledge.
Maze of the Floormasters
editWhen you enter this room, you will need to use the Lens of Truth. The room is actually filled with hidden walls that form a maze. The Lens of Truth will reveal them. Be very alert while you go through the maze, because a horde of Floormasters patrol the floor. However, if you turn the Lens of Truth off, you can see where the Floormasters are and can even kill them through the wall!
The maze leads to three other doors besides the one you came from. You'd be smart to cast Farore's Wind here. This will mark the exit and get you out of trouble later. Go through the maze and use the Compass and Dungeon Map to find a door in the south corner of the room.
Floormaster Cloaked by Shadows
editIn this next room, the door will lock behind you. You've ventured into a frightening torture chamber where many poor souls were whipped. If you look around, no enemy can be seen in this room, or so it seems. Put on the Lens of Truth and you'll see a Floormaster. Don't take the lens off, or else it will disappear. Slash it to make it split into its smaller versions and kill them to make a chest with a small key inside appear. The doors will unlock, and you can move on.
- Tip: If you have Din's fire, use it as soon as you destroy the big Floormaster, that way it will kill all the babies before they have a chance to get big again.
Face Death For The Boss Key
editReturn to the maze and guide yourself to a door in the north corner of the room. Go in and you'll face this dungeon's ultimate deathtrap: two walls covered with spikes, and they're closing in to get you! It may seem like there isn't a way to destroy these walls, but there is. The walls are made of shoddy, rotting wood, and are very flammable.
Use Din's Fire to light the wood on fire and destroy the walls. However, you'll find two ReDead in the room's corners. Play the Sun's Song to stun them and then kill them. There are two chests in this room; the chest to the west holds a Blue Rupee, and the chest to the East contains the Boss Key.
Topple the Gargoyle
edit- Rupee Reward!
If you stick around in the west corner room of the maze after killing the Gold Skulltula inside, you can destroy the three skull pots spinning around with Bomb Flowers. Once all three are destroyed, a pile of Rupees will spill out! You just hit the jackpot!
Go out of this room and out of the maze room completely (through the door in the east corner, or warp back to it to save time) so that you're back at the ledge where the ship sank. If you look across the ledge, you'll see another ledge on the other side of a big pit. The only problem is, you can't reach it. Take out the Fairy Bow and look around. You'll find a gargoyle statue with Bomb Flowers under it. Shoot one with an arrow to make the rest explode, which will break the gargoyle statue and cause it to topple across the pit.
You now have a bridge to cross the pit. Make your way to the other ledge, and you'll find a locked door. However, you have a way of replenishing health if you must. There is another ruined gargoyle statue (you probably saw its head buried in the dirt earlier) with two Recovery Hearts. Use the Song of Time to reveal a time block and get them. Need more? Play the Scarecrow's Song here to get Pierre's assistance. Hook onto him and get the hearts here as well. Now, you are ready to open the locked door. Go inside and your journey through the shadows will near its end.
Find Your Way Through the Dark
editThis next room is the last one before the Boss room, and you can even see the door right ahead of you! The only problem is, it's the only thing you can see in this room, besides the door behind you. To fix this problem, use the Lens of Truth. Several small platforms will appear. Cross onto them with the Hover Boots to make it to the Boss door. Open this door and you'll be in a dark room littered with bones. There is also a hole in this room. Drop down to face the nightmarish Boss.
Boss: Bongo Bongo
edit
You will find yourself on a platform in the dark and see a hand come down and hit it, bouncing you up. Then another hand will appear and hit the platform. The hands will pound on the platform and then you'll find out that it is actually a giant bongo drum you are standing on. Then the giant dark monster from before will appear and will form into the body that the hands come from. This monster is the boss of the Shadow Temple, Phantom Shadow Beast: BONGO BONGO.
Showdown in the Shadows
editThis is a boss that can be dangerous. If you have a Fairy or Red Potion with you, they'll come in handy. If you have the Biggoron's Sword, things will be much easier. You fight Bongo Bongo on his giant bongo drum, which is a challenge. Wear the Hover Boots to avoid being bounced around too much by the beat of the drum. Be sure to be aware at the start of the battle and after you attack his eye, because he will turn his hands around then when he stays still he will attack you. First you will see his two hands, which will be beating on the drum constantly while the rest of him vanishes. His hands try to swat, punch, and grab you; so make sure you keep an eye on both hands so that one doesn't get you by surprise.
Try your best to not get knocked off the bongo, since there's a pool of sinister poison down below. If you get thrown off, climb up the side of the drum to get back up. You have to shoot both of the hands with arrows or the Longshot. This can be difficult because you're thrown up and down by the beating of the drum, so the best time to get them is when they try to hit you. Once you have shot both hands, activate the Lens of Truth and you will see Bongo Bongo's face. Z-target and hit his eye with an arrow or the Longshot. Be sure to do this fast, or else he'll try to ram you off the side. Then run up to him and hit him with your sword as many times as possible.
An alternate tactic is to get the Ice Arrows before facing Bongo Bongo and use them on one of his hands. The monster will be forced to smash his frozen hand free with the other one and its eye will be open while he does this, leaving it open to attack as well. Another method is to do a spin attack when he charges at you, this will hit the eye and stun him. Once you've given Bongo Bongo the boot, he will pound his drum one last time and melt into poison. Don't worry, the poison evaporates. Get the Heart Container and you can finally leave this scary temple of nightmares.
Impa's Message
edit
You will be transported to the Chamber of the Sages after stepping into the blue light. There you will be re-acquainted with Impa, who has become the Sage of Shadow. After a few compliments, she tells you that you will meet the princess again soon, and she will explain everything. She grants you the Shadow Medallion, which contains her power.
Sidequests
edit- Market: If you haven't already, go to the Treasure Box Shop in Hyrule (It is only open at night.) The game costs ten rupees. You go through each room guessing which of two chests has the key required to get you into the next room (You have a 1 out of 32 chance of winning.). Now, you can use the Lens of Truth to see through the chests and get to the piece of heart at the end with ease. A secret trick is to open all the chests on the right when you first play. They might all contain keys.
- Zora's River: Play the Song of Storms to the frogs on the log near the Water Tektites, and they'll give you a Heart Piece.
- Zora's River: Complete the bug-catching game with the musical frogs to earn a Heart Piece. See the minigame section for further details.
- Hyrule Castle (child): Enter the main Hyrule Castle area and make your way to the small moat. In the nearby corner is a lone tree. Stand beneath it and play the Song of Storms to reveal a grotto. Use Bombs to destroy the walls until you find a Skulltula. Note: This Gold Skulltula location can be abused to get an infinite number of Gold Skulltula Tokens. See Glitches for more details.
- Kakariko Village (adult): This Skulltula is on the roof of Impa's house. To get there, stand in front of the door of that house and Hookshot over to the roof of the House of Skulltula. Then, Hookshot onto the roof of Impa's house. This is easier with the Longshot, but it can be done without. (nighttime only)
- Shadow Temple: In the room with the scythe-trap, destroy all the enimies to open the area with the key in the chest. Above it, there is a Gold Skultulla.
- Shadow Temple: Amongst the cages in the giant spike trap room, one has a Gold Skulltula inside.
- Shadow Temple:In the ship room, before doing anything with the block, look up the cage platform. A Gold Skulltula and a couple of hearts are here. The Longshot will allow you access to them.
Another Hylian Shield!
editIf you do not have the Hylian Shield yet, you have an opportunity to get one. Inside the well is a room with a Fire Keese and Beamos. Go into the door behind them and there will be a Like-Like inside. Kill it to get Rupees, and open the chest to get a Hylian Shield.
Gerudo Fortress
Getting across the broken bridge
edit- Child link
It's not normally possible to enter the fortress as Child Link, but you can get through using a glitch. Continuing to the Spirit Temple requires memorizing a direct path and using other glitches.
You can get Epona and ride to Gerudo valley. Get her running at full speed, and jump across the bridge gap. However, it is much easier if you have the Longshot. Use the targets strung on rope over the bridge ends to pull yourself over. Once across, talk to the head carpenter outside the little white tent. He will tell you that the bridge was destroyed by the Gerudo. Inside the tent, you will find the Hyrule Field runner. He won't do much for you now, but once you finish later sections, he will present a rather difficult opportunity in the form of an (unbeatable) race to the Lost Woods.
Scattered outside the tent are several boulders. One of them is hiding a treasure chest with 50 rupees in it. Once you've blown up all the boulders and collected all the goodies, follow the trail and ride/walk into the Gerudo's Fortress.
- Note: You can't do this prior to Forest Temple. You're not going to cross the blinding desert without the Longshot and Eye of Truth. Come back later with those two items so you can survive the two tests to be able to reach the Spirit Temple. Owning a Hookshot / Longshot, plenty of arrows and the Biggoron Sword will be extremely handy to make short work of the Gerudo guards. Saving the 4 carpenters would then become an easier job to handle.
It is possible to complete Gerudo Fortress prior to the Forest Temple, though there is not much reason to do so, since it is far more difficult without the necessary equipment and gaining the Gerudo Card is unnecessary at this point.
Gerudo's Fortress
editBe careful as you approach this area. You will find several Gerudo women patrolling this area and standing guard. The Gerudo dressed in white do not move, but are also undefeatable. Do not approach them at this point. Later, they will be of use, but for now, avoid them. The Gerudo dressed in purple are patrolling around the area, and can be defeated. They can be shot with arrows, which will knock them out. You may also use the Longshot to freeze them temporarily. Although useful (and it doesn't waste an arrow), they won't stay frozen long. In this frozen state, you can use your sword to knock them out.
In the event that you are seen, you will be taken away to a cell. Fear not; there is an exit. If you look around the top of the room, you will find a window with a wooden shutter above it. The shutter is targetable by the Longshot. If you target the far edge of the shutter, you will drop back down to the ground level, where there are 4 Gerudos patrolling. Although this IS where you need to proceed, you risk being seen again. It is better to target the near edge of the shutter and drop on to the edge of the window. From this vantage point, you can freeze/shoot/avoid the patrolling Gerudos. Once you get an opportunity, drop down to the ground level (and roll to avoid taking damage). There is an entrance to the left; go in.
Once inside, you will find a rather large, empty room. There will also be a jail cell to the left, and you'll see a man inside. He'll beckon your attention. Speaking to him, you'll find that he was 1 of 4 carpenters that decided to come here for riches, fame, and glory. Unfortunately, the Gerudo women didn't take kindly to the men and imprisoned them.
After speaking to the imprisoned carpenter, you'll be attacked by a Gerudo woman with some serious sword skills. During this dungeon, you will be forced to fight four such women, each more powerful than the last. Don't get cornered! Allowing the woman to land a spinning jump attack will "defeat" you, and you will be placed back into your prison cell. The best strategy to use to defeat her would be to keep her constantly Z-targeted, use your shield, and keep your distance. If you do this, you can use the Longshot to freeze her temporarily, and slash at her while she's frozen. In order to keep the Biggoron's Sword equipped, switch back to the Longshot just before using the shield and you will put away the sword.
If you find that the spinning jump attack defeats you despite blocking with the shield, an alternative method is to Z-target the Gerudo fighter and continually strafe left or right in order to avoid any attacks. When the fighter attacks, run forward and thrust with the sword (ie forward and attack). You should manage one, maybe two, attacks before she regains her footing, then get out of the way and wait for another opportunity.
After you defeat her, she will drop a small key, which you can use to release the carpenter. He will thank you and leave. Thoroughly explore the Gerudo Fortress, and find the other carpenters. Note that one of them can only be access by jumping from one of the high roofs in the complex.
If you are attempting to complete the fortress prior to the Forest Temple, you will need to rely on the hookshot to escape your cell if you are caught. This is the only item useful enough to help you through the fortress at this stage in the game. Release the carpenters in linear order starting from the door just left from the cell where you are captured. After the third carpenter is released the last is the most difficult to reach.
Moving on from the room where you found the third carpenter, you will head up a ramp and outside to the platform with vines on one side. Head into the next room with two Gerudos patrolling below in a kitchen area with a large cauldron on your far right. Using the hookshot, you can maneuver yourself across the higher platforms on the left of the room by aiming at the wooden ceiling beams (aim for the 3rd then the 5th ahead of you). You will reach the farthest door undetected. Head through the door and drop down to your left (Link's right); there is the final door in an alcove.
Now this next part is tricky, and may require a few attempts to complete. Immediately get behind the crate and hold up your shield/crouch. A few seconds will pass and a Gerudo will come from your right down the hallway, then stop. Make sure you are pressed up against the crate; as soon as she stops climb onto the crate (this will not make her turn around) and Z-target her. As you quickly strafe right off of the crate then backwards down the hallway she will begin to turn around, but don't worry. If you were quick enough you will be far enough away to automatically un-target her, and she will not be able to see you. Quickly go right and you should be at the final cage. Defeat the Gerudo Fighter to get the key and complete the mission.
Using this method is challenging and ultimately pointless, but it is an option if you want it to be more of a stealth-based mission.
The Gerudo's Membership Card
editAfter you've freed all four of the carpenters, the Gerudo in charge of the fortress will pay you a visit. As a way of commending your skills getting past all the guards, she'll give you the Gerudo's Card, which makes you one of them. Now you can visit the fortress without being jailed every time. In addition, now that the carpenters are all freed, they will rebuild the bridge, making it much easier to get back into Gerudo's Fortress. You can now also challenge the Hyrule Field runner (in the tent) to a race.
After you get this, head over to the large gate near the entrance of the fortress and climb the ladder nearby to the top. The Gerudo at the top will open the gate to the Haunted Wasteland if you speak to her, but you'll have to pass two trials to cross the desert.
Spirit Temple
A place of treasures and worship, the Spirit Temple was built by the Gerudo to honor a great sand goddess. However, the Evil King Ganondorf has converted it into his hideout.
Crossing the Haunted Wasteland
editNow that you are able to enter the Haunted Wastleland, be very careful on how you go about crossing it. A sandstorm always blows about the wasteland, blurring everything. The River of Sand nearby will swallow you up if you even touch it, and you will be forced to an earlier location if you stray from the path. While the path is fixed from game to game, you should use the flags or other visual cues to cross the wasteland.
You will see a half-buried crate in the distance near several flags. Use the longshot to hook onto it and cross the River of Sand. You can also use your hover boots to cross. Now follow the flags. To your left is the path to the Carpet Merchant, who sells 10 Bombchus for 200 Rupees. You need the hover boots in order to reach him. Keep a close eye on the flags, because it is hard to see them in the sandstorm. If you become lost, use the Song of Storms, and look for the flags when the lightning strikes. You can also use the Sun's Song.
Once you reach a strange rock with steps and a plaque, walk up to the plaque and activate the Lens of Truth. a Poe will appear that will guide you to the entrance to Desert Colossus. It won't guide you back, though. Watch its movement carefully and follow it, because it moves frequently in several instances. Eventually a new enemy called a Leever will appear in groups that will attack. They can only travel in one direction which makes them easy to dodge.
When you finally reach multiple flags, you have reached the entrance to Desert Colossus.
Special note: The earliest time to do this is after Water Temple and Bottom of the Well. You can come back to the Shadow Temple after acquiring the warp song for Desert Colossus.
Desert Colossus
editThe sandstorm will finally subside and you'll be in the desert. if you wander around, you'll see a dried up oasis. Step up onto the rock nearby and play the Song of Storms to refill it. Then you'll find out it isn't an oasis; it's a Fairy Fountain! Collect them and heal from them if you wish. By the two other palm trees there is a crack in the wall, behind which is a Great Fairy, who will give you Nayru's Love. Desert Colossus is filled with Leevers and Guay, so watch your step. You'll see a large temple ahead, an owl perched above. Kaporea Gaebora, perhaps? Enter inside this place, which is more formally known as the Spirit Temple.
As you enter, two bewitched jars will fly at you. Don't get injured by them. You'll see two paths, one a crawlspace, the other blocked by a large grey block presently unmovable, two Armos, and two snake statues with inscriptions on them. The left one says that you must return with the pure heart of a child to enter the left path. The right one says you must acquire the temple's silver treasure to enter the right path. Since you can't do anything at the moment, leave the temple.
The Last Song
editAs Link walks outside into the desert, Sheik suddenly appears and teaches him the song that he can play to return to the desert as a child, the Requiem of Spirit. This is the last song you will learn in your quest.
The Requiem of Spirit:
- Nintendo 64: A, C-down, A, C-right, C-down, A
- Nintendo GameCube: A, Z, A, X, Z, A
- Wii Classic Controller: A, ZR, A, X, ZR, A
- Nintendo 3DS: L, R, L, Y, R, L
Just as soon as appearing, Sheik will disappear into the blowing sand, the strange owl following. Warp to the Temple of Time and return the Master Sword to its pedestal. Now, play the Requiem of Spirit to return to Desert Colossus.
Spirit Temple (Young Link)
editEnter the Spirit Temple again and walk up to the stairs. Turn to your left to see a Gerudo woman. She is Nabooru. She will have a small conversation about Ganondorf, then ask for your help (how you get her to talk to you, you'll have to find that out yourself). She overheard Ganondorf wants the Silver Gauntlets of the temple, but she wants to get them before he does, so she asks you to surprise Ganondorf and retrieve the gauntlets. She will move out of the way so that you can go through the crawlspace.
Special note: You can do this between after finishing Water Temple and Bottom of the Well prior to Shadow Temple. Do this now if you want to finish your childhood missions faster so you won't have to travel back and forth anymore.
Entrance to the Past
editThe first room is swarming with enemies. Two fire Keese will attack you. Kill them, then pass the spike trap. Stay close to the wall and Z-target the next two Keese. Afterwards you'll face an Armos. To kill it, stun it with your boomerang and then slash it with your sword. The Armos will explode after being killed, so be sure to keep your distance. After all the enemies are killed, both doors will open, but enter the door on the left. Enter into the next room.
Bridge the Gap
editHere you will encounter a Stalfos for the first time as a child. Killing it will be harder with the weaker weapons Link carries as a kid, so be careful. Nayru's Love may come in handy for this if you have it. After the Stalfos is gone, Kill the Green Bubble with the Fairy Slingshot. With both enemies gone, you can now focus on getting over to the other side of the room. There is a switch on the other side of the gap in the floor, but you can't hit it directly because a raised bridge blocks it. There are two ways two activate it. You can aim the slingshot between the grates in the bridge so a Deku Seed hits the switch, or rely on a technique you used in Jabu-Jabu's Belly and equip the boomerang, then throw it so that it goes around the bridge to hit the switch. Another method is to use a Bombchu and drop it into the pit, and if you aim it right will explode next to the switch. Once the switch is activated, the bridge will lower and take you to the next room.
An Extra Deku Shield
editThere is a small chest on the other side of the gap with an extra Deku Shield if you managed to forget to take it off and the Fire Keese burned it.
The Anubis
editThis room has an Anubis inside it. The Anubis is a mummy-like creature that floats and shoots fire balls at you when you get close enough. Ironically, fire is its weakness! This strange creature is also obsessed with symmetry. Rather than pursue you, it will float on the exact opposite part of the room as you, symmetrical of you basically. Run across the thin bridge, avoid the spike, and go around the Anubis. It will move away from you as you walk away from it. Move to the side of the room opposite of the locked door. The Anubis will then move in front of the door. Hit the crystal with you boomerang/slingshot and the Anubis will be enveloped with fire! When the Anubis dies, you are free to proceed to the next room. The alternative is to use Din's Fire.
Unlocking Danger
editIn the next room, several enemies are waiting to greet you, the most dangerous a Wallmaster. Watch out for it and the Keese. Collect the five silver rupees in the room, and a bridge will lower to the other side, but it will also release more Keese and Fire Keese. Light up the two torches and then get the small key from the treasure chest. Go through the door when you're done here.
You will be back in the first room. Crawl through the hole you haven't gone through yet, and unlock the door. In the next room, kill the Skullwaltulas and then climb the wall.
Bombchu Demolition
editTwo Lizalfos and Skullwaltula await you. Kill them all. Hit the diamond on the nearby ledge to make a chest drop down. Open it to get 10 Bombchu. Look around the room and you will see a boulder on one of the walls. Sunlight is trying to get through. Use a Bombchu to eliminate the boulder. Sun will shine through onto the sun switch in the middle of the room. Exit through the door that opens up.
The Main Room
editThis is the biggest room of the temple. You will do plenty of things here. There is a statue right in front of you. Push it until it falls and lands on the switch below. This will open a door. Drop down below and run over to the two torches near the spirit statue. Light them with Din's Fire or Fire Arrows to reveal a chest and open it to get the Dungeon Map. Climb back up to where you jumped from and go up the stairs and through the door.
Three Tricky Puzzles
editThis room has several traps and a few puzzles to solve before you can move on. Watch out for the Beamos enemies. You might want to get rid of them with bombs or bombchus before anything in this room. Get all of the silver rupees in this room to light up one of the torches and open the way back out. Then, use a Deku Stick to light up the rest of them to find a chest with a small key. There are three blocks in this room you can block the spike traps with to make this easier. Now, look around for a moment and you will see that light is shining into the room from a hole in the wall. Push the block with a sun switch on it under the sunlight. This will open another door. Then go through the door that is now shown and use your key to open it.
Mini-Boss: Iron Knuckle
editIn this room you will find an armored figure sitting on a throne. He appears to be asleep. However, if you attack it you will wake it up. This behemoth is the mini-boss: the Iron Knuckle. It is easy to take him down, but his attacks do massive amounts of damage, so avoid his axe. If you keep your distance you can avoid damage. If you obtained Nayru's Love, this is the perfect time to use it. Be very careful because Iron Knuckles' axe slashes do 8 whole hearts of damage (sometimes when it is on the peak of dying it will do 9 or 10 hearts of damage), which is crippling.
To defeat the Iron Knuckle, use a simple method of hit and run. Move up close to him and the monster will try to hit you with his axe. Back off and then hit him before he can get his axe ready to attack again. After you strike him several times, his chestplate will tumble off. Without it, he is vulnerable to the Slingshot, or you can charge at him and mash the sword button until he's dead. Either way, the added weight of the armor is gone, and the Iron Knuckle is going to charge after you. Do as you did before, and he will go down with a thud. If you're struggling, throw bombs and bombchu's his way, they are just as effective at killing him.
- Alternate method
To defeat any Iron Knuckle rather quickly, while it's not attacking, run up to it and slash it with your sword. Backflip out of the way and let it attack, and then hit it once more. Do this repeatedly. During the second stage, where some Iron Knuckles start to slowly charge at you, walk up to it and slash it before it gets near you, back away, let it charge again, and then slash it again. You don't have to wait for it to attack you.
- Second alternate method
Z-target the Iron Knuckle and stick to it on your left side while running in circles and attacking. The Iron Knuckle will attempt to follow you but can not attack you while it turns. Do not break the circle or the Iron Knuckle can attack you.
The Silver Gauntlets
edit
Go through the door that is now open and head outside. You'll find yourself on the right hand of the spirit statue outside of the temple. As soon as you emerge, you'll be greeted by Kaporea Gaebora for the last time. He commends your efforts of time-traveling and tells you about two witches hiding out in the temple. He then flies off. Over to the left is a chest. Open it to get the Silver Gauntlets. Unfortunately, they're too big, so you can't use them yet. You should go talk to Nabooru, but...
Nabooru's Capture
editRight after Link gets the gauntlets, he hears a scream from below. As he looks down, he sees Nabooru being subdued by black magic, caused by the two witches of the Spirit Temple. Nabooru warns Link to make his escape, and is captured by the witches, who return to the temple.
Now it is time to tackle the other half of this temple. Play the Prelude of Light to go back to the Temple of Time. Get the Master Sword and play the Requiem of Spirit to go back to the Spirit Temple. Now, you'll enter it as Adult Link.
Spirit Temple (Adult Link)
editEntrance to the Future
editNow that you have the Silver Gauntlets, you can move bigger objects. Go up the stairs, turn right and move the gray block. Push it until it falls into place. This room is similar to the room you entered as a child. Hit the switch that is in the middle of the ceiling to open one of the doors. Go through the door on the left first. Kill the Wolfos in this room, and then go and stand on the Triforce Symbol on the floor and play Zelda's Lullaby. A chest should appear on the other side. Longshot over to the chest and open it to get the Compass. Now head back a room. Enter the door on your right. Avoid the boulders that are rolling around and get the silver rupees in the small alcoves. Use the Hover Boots to get the one in the air.
The next room holds a small key. Kill the Like-Like to get it. Head back to the first room. Enter the locked door in the middle.
Kill the Like-Like and climb the wall nearby. Use the Lens of Truth and you will expose a Floormaster. Kill it. Push the cobra statue until it reflects light onto the third sun switch, which will open the door. The first two will drop treasure chests, one of which is a trap. Beware of the fourth, as it summons a Wallmaster. Go through the door.
Now, you are back in the big main room. Climb up the stairs and use the hover boots to jump to the huge statue's hand where you see a Triforce Symbol. Play Zelda's Lullaby to make a chest appear on the other hand. Longshot to it to get a small key. Go back to where you just entered this room and longshot to the target on the ceiling. Then climb the stairs and open the locked door.
- A Secret Shortcut!
There is a rusted switch near the left hand of the spirit statue. Play Zelda's Lullaby on the Triforce Symbol again and use the Longshot on the treasure chest that appears, and open it for a blue rupee, then hit it with the Megaton Hammer to make the door on the bottom floor between the two staircases open. Go through it and push the two large blocks. When you reach the end of the corridor, hit the second rusted switch with the Megaton Hammer and a platform will drop down, leading back to the first room. You can use this platform to skip to the main room anytime from here out.
Old Enemy Faces
editIn this room, kill all of the Anubis and the Beamos to move on. The Anubis can also be killed with the fire arrows or Din's Fire (if you have them). You can play the Song of Time in the far corner near the south east corner of the room and a block will appear. In the room ahead, there are four Armos statues and a switch in the middle that opens up the locked door to your right, but requires weight to do it. This can get tricky. Run over to the locked door and shoot an arrow at the statue in the upper-right corner and it should start moving around. Once it jumps onto the switch and unlocks the door, head into the next room while you have a chance. Alternatively, if you have the Ice Arrows, you can time it so that the frozen Armos stands on the switch, opening the door. Climb up the stairs to the next door. If you need to refill some of your energy, in the corridor there are two boxes containing hearts that can only be seen with the eye of truth, or on the map.
Iron Knuckle #2
editThis is the second time you'll fight an Iron Knuckle. However, with the stronger adult weapons you have, it should be easier to fight him. After defeating him, go through the passage behind his throne and you should be outside again, this time on the left hand of the giant spirit statue.
The Mirror Shield
edit
After opening the door to the right in the room with the four statues, continue on through the hallway and the next room until you're outside. A chest will drop in front of you. Open it and you'll receive the second treasure this temple holds, the Mirror Shield. It has a shiny, glimmering, surface, which can reflect beams of light. It is also much stronger than the Hylian Shield. Equip it, and then go back to the room with the four statues and the switch.
Bending Sunlight
editStand under the light that is shining onto the ground and use the Mirror Shield to reflect it onto the sun switch on the wall. A door should open. Enter through it and defeat the Like-Like to get a small key. Go back to the room where the Anubis were. Straight across from you is a locked door, so use the key you just got and open the door.
The Hard Way...
edit- ...or the Easy Way!
There is a secret shortcut in this room most people don't know about. After you kill the Beamos with bombs or bombchus, climb onto the pedestal one was on and look up at the ceiling. There is a platform up there with a Longshot target on it. Target it and if you aimed it correctly, you'll be pulled up there. (There are two Recovery Hearts up here if you need them.) Equip the Hover Boots and quickly run off the platform to the top of the booby-trapped wall. If you make it, you'll be through this room a LOT faster! Or to skip it altogether, stand next to the wall away from Beamos, pull yourself with the Longshot to the top of the booby-trapped and run past the remaining Beamos to the next room.
This room has a booby-trapped wall. First, kill the Beamos with bombs or bombchus and the Skullwaltula with the Longshot, then aim it as high as you can up the moving wall (if you stand on one of the Platforms where the Beamos were, you can reach the top). Longshot up and then climb the rest of the way. It gets tricky because the walls can knock you off, or lead you to the spikes on the sides. Once you're at the top, avoid the Beamos and move on.
The Boss Key
editIn this narrow room, there is a locked door. Play Zelda's Lullaby on the Triforce symbol to open the door. Kill all of the Torch Slugs first. The Megaton Hammer comes in handy for this. Upon closer investigation, this room is full of fake doors. The only one you need to destroy is in the upper-left corner in the room, so bomb it. With it gone, it will expose an eye switch. Shoot it with an arrow to make another ice platform appear next to the one near the ceiling. Right above the new ice platform is a Hookshot target. Longshot up there and then jump to the other ice platform, which has a switch on it. Press the switch to make the small fire go away, revealing the chest that has the Boss Key.
Mirror on the Wall
editExit the room and then climb the stairs to the nearby door. Right when you enter in this room, watch out for the flying pots. Look to your left and you will see a switch behind bars (in the 3DS version, it is down in the lower part of the room). Hit it with your sword by using your spin attack to open a door. You will encounter a Lizalfos. Kill it and head on forward. If you're low on bombs, shine the light in the room on the sun switch above to make a chest containing them appear. As you come to the next room, you will see a cobra statue. However, you will face a new enemy, White Bubbles. You can kill them as soon as they start spinning. Use a bomb to blow up the odd shaped part in the wall. Turn the cobra statue so that it shines its light into the room you just uncovered. This is the room where you just hit the switch but now you are on the other side. There is a cobra statue in here also, and another Lizalfos. Turn the light into the big room. Go back the way you came. Now, the huge mirror is shining light straight down onto the floor. Stand on the spot the where the light shines and use the Mirror Shield to reflect the light onto the sun switch on the wall. The platform will lower into the main room.
The Hidden Door
editYou are now facing the huge spirit statue's face. Light is still shining from the top, so use the Mirror Shield to reflect light onto the statue's face for a few seconds. Amazingly, doing just that crumbles the face on the statue! Now you can longshot to the head in the little opening. The passage will open, and you can unlock the boss chamber.
The Witches' Spell
editYou will encounter the two witches that imprisoned Nabooru in here, Kotake and Koume. They have no business with you and leave you with another Iron Knuckle, but this one looks different. Kill it the same way you killed the other ones. However, this Iron Knuckle is much stronger than the first two. Endure through its attacks and you will finally defeat it.
After being attacked frequently, the Iron Knuckle's armor and helmet will tumble off, revealing that it is Nabooru under the armor. She was cursed by the witches and now the curse is broken. However, they capture her for a second time.
Go through the door behind the throne to find the witches' secret hideout.
Boss: Twinrova
edit
Climb up the platform in this room and run to the middle of it. As soon as you do, Kotake and Koume will emerge from two portals, each transforming for battle. They are the dual bosses of the Spirit Temple; Sorceress Sisters: TWINROVA. These witches are masters of dark sorcery, and each is skilled in harnessing a different element! Kotake heralds in ice, while Koume harnesses fire. Defeating them is a little tricky. When Koume throws fire at you, bring out the Mirror Shield and try to deflect the fire so that it strikes Kotake, and vice versa. It's easiest to beat them if you don't Z-target while you block their attacks; in this way you can crouch and deflect the attack in the right direction. The best strategy is to stay in the middle where the small circle is, as you'll get a better view in that angle.

After realizing they need to put more effort in their attacks they will combine into Twinrova. Z-target the witch. She will throw fire or ice three times in a row. Use the Mirror Shield and it will absorb the blows. After it absorbs three attacks, they will come out in one blast, which you can unleash on Twinrova. She will fall to the ground, giving you a chance to strike her down!
Quickly switch to your hover boots and Biggoron Sword if you have them. Hover over to the island while she's down and swipe her as many times as possible with your sword (it should only take two times if using the Biggoron Sword). After taking excessive damage, Twinrova may mix up the order of her attacks. The Mirror Shield cannot absorb fire and ice all at once, so keep your distance when Twinrova switches her attacks, and be prepared to dodge if she keeps the hand holding the opposite element raised slightly longer. Most importantly, if you're fighting with the Biggoron Sword, put it away after she recovers from taking damage so you can absorb her fire/ice attack again with your mirror shield. Nayru’s Love may be good to have for this battle to use.
Heavenly Argument
editAfter being struck down repeatedly in battle, Twinrova will split back into Kotake and Koume. The two sisters plan to attack Link once more, but they've unknowingly died at Link's hands. Suddenly, a bright blue light casts itself around the sisters, and a golden halo appears over each of their heads. When they realize they're dead, they get into a comical argument over who lived longer, all while rising up into the heavens. As the light fades, they pledge revenge on Link for killing them.
After listening to the witches' argument, you can make off with the last Heart Container of the game and warp out of the Spirit Temple.
The Sixth Medallion
edit
After returning to the Chamber of Sages, you meet up with the last of the Six Sages, and who should appear but Nabooru. She is pleased that her newly acquired position as a Sage is perfect to get revenge on Ganondorf, but she is also saddened she couldn't repay you for your efforts in the past. In exchange, she hands over the Spirit Medallion to you.
The Final Showdown
editNow that Link's efforts to awaken all of the Six Sages are complete, Rauru comes before Link and tells him that the sages are ready to combat the evil powers of Ganondorf. He also mentions that someone is waiting for him in the Temple of Time...
Sidequests
editGerudo Training Ground: Ice Arrow
editThe Gerudo Training Ground is located in the southwest section of the fortress. Look for a stationary Gerudo, a gate, and a sign. It will cost you ten rupees to enter. In this pseudo-dungeon, you are searching for the "Gerudos' Hidden Treasure." Instead of using small keys to progress, you will collect as many as you can find and use them all at the end.
Special note: You will need to use any weapons or items that you collected in all dungeons prior to Ganon's Castle, including the Silver Gauntlet to push the block somewhere in the pseudo dungeon. Check your inventory to see if you have all the items you need to complete a room puzzle.
Solve each room dungeon to get the keys for the middle room maze. Including the room in which you do need the Silver Gauntlet to push the block to unlock the next room. The hardest is shooting four statue eyes with your arrows so make sure you practice until you get it right. Same with crossing the lava pits to collect silver rupees with the Hover Boots. If you manage to have all the keys, use it until you get to the chest in the middle to get the Ice Arrows. Sadly, Ganon's Castle doesn't require the use of that weapon at all, but it is a handy, albeit optional, weapon to have during the battle against the Shadow Temple boss.
Magical Spell: Nayru's Love
edit
Near the entrance to the Desert Colossus, you should see two palm trees on the right. Head to that area. You should see a crack in the wall. Bomb it and head inside the chamber that has opened up. It is a Great Fairy Fountain. Stand on the triforce symbol and play Zelda's Lullaby. The Great Fairy will grant you the Magical Spell Nayru's Love (12 MP). Upon activation, it will protect you from enemies for a limited time. However, no magic can be used while the spell is active.
Quiver Upgrade
editIn the northern part of Gerudos' Fortress, there is a Horseback Archery minigame. You must score 1500 points or over to receive a quiver upgrade (you must first score 1000 points to obtain the Piece of Heart). To achieve a score of 1500 or greater, shoot the jugs near the start, then hit bullseyes on the West-most target, then do the same when the horse turns around, and finally shoot more bulls-eyes at the end on the East target. After an impressive display of archery skills, the Gerudo woman will commend you for your performance with the Biggest Quiver, which holds a maximum of 50 arrows.
- Gerudo Fortress: On the roof of the left section of the Fortress is a chest containing a Heart Piece. You will need to Longshot to it from the prison.
- Gerudo Fortress: The prize for scoring at least 1000 points in the Horseback Archery game is a Heart Piece.
- Desert Colossus: As a child, warp here using the Requiem of Spirit and plant a Magic Bean in the soil. Return as an adult and ride the platform to the nearby Heart Piece.
- Gerudo Valley: At night, behind the carpenters' tent lies a Gold Skulltula on the rock wall. Use your longshot to obtain the token.
- Gerudo Valley: On the underside of the rock arch in front of the carpenters' tent lies another Gold Skulltula. Claim the token with your longshot.
- Gerudo Fortress: Go to the Horseback Archery Range. As you enter, take a left and walk all the way down to the target at the end. A Gold Skulltula is scuttling about on the front of the target. Use your Longshot to claim the token.
- Gerudo Fortress: Go to top of Gerudo's Fortress. A gap lies between you and a chest containing a heart piece. On the rock wall inside of this gap lies a Gold Skulltula. Claim the token with your hookshot.
- Haunted Wasteland: Cross the River of Sand and follow the flags up to the stone building where the Ghost Guide waits. Drop down into the basement of the building. On the wall in front of you lies a Gold Skulltula.
- Desert Colossus: Warp to the Desert Colossus as a child. Find the soft soil insert next to the entrance of the Spirit Temple and plant a bug in it. A Gold Skulltula will pop out of cover. Dispatch it with your sword to collect a token.
- Desert Colossus: At night, Warp to the Desert Colossus as an adult. Then move quickly to the flat rock near the dried-up Fairy Fountain pool. On back of the crown of palm tree near the dried-up pool lurks a Gold Skulltula. Finish off in between fighting off attacking bad guys.
- Desert Colossus: At night, and you need to have planted a magic bean here as a child to kill this Skulltula, warp to the Desert Colossus. Ride magic bean platform to stone arch near entrance of Spirit Temple. Hang on as it is quite a wild ride. You will have to jockey around to face the correct way to time your jump rightly from the bean platform to the arch. Dispatch critter with sword and collect an easy token.
Marathon
editOnce the bridge in Gerudo Valley is repaired, look for the running man inside the carpenters' tent (If you completed the mask trading sequence as a child, he is the one you gave the Bunny Hood to). He will challenge you to a race from here to the bridge in the Lost Woods. He will give you a head start but he will always beat you by one second. Your best time will be displayed on the "Records" sheet at your house in Kokiri Forest.
One Last Bottle
edit
If you have noticed the various Poes haunting Hyrule, there is a way you can earn a profit off them. As you enter the ruins of Hyrule Market, the guardhouse still remains intact. Once you go inside, instead of being greeted by the guard from the past, a cloaked spirit with a red eye sits on a bed in his place. He runs a Ghost Shop he refers to as the "only one in Hyrule," and collects many a different Poe soul. However, he craves Big Poe Souls more than the rest because of their value. If you can kill a Big Poe and bottle up its spirit, he'll pay 50 Rupees for each one you find (10 for the souls of normal Poes). After he receives ten of these spirits, he feels obliged to reward you for overstocking his shop with them, and gives you the fourth and final Empty Bottle in the game. It may seem like a measly trinket for all that hard work, but this spirit may have few things of value to give as a thank-you. However, having that bottle will be very helpful for your final task...
Ganon's Castle
| A reader requests that more images be included in this page or book. Images are useful for presentation and explanation. Free images can be found at Wikimedia Commons and used here at Wikibooks. If you have created relevant images, you should consider donating them. Remove this template when suitable images have been added. Please continue to edit this book and add images, even after this message has been removed. Discuss this books particular needs on the discussion page. For questions, go to WB:PROJECTS. |
In the course of seven years, Ganondorf obliterated Hyrule Castle, creating his own in its place. Its evil magic radiates throughout the land, spreading the influence of evil into the furthest corners of the fallen kingdom.
A Very Familiar Face
editUse the Prelude of Light to return to the Temple of Time for the last time. This time, as you enter, Sheik appears. However, this time, Sheik is not here to give Link a song. Instead Sheik reveals that when Ganondorf tried to steal the Triforce, his heart was imbalanced, and the Triforce split into three parts: The Triforce of Power, The Triforce of Wisdom, and The Triforce of Courage, and that the parts of the Triforce went to the three destined to receive them. Sheik says Ganondorf received the Triforce of Power, and Link received the Triforce of Courage. Sheik then suddenly reveals part of the Triforce; The Triforce of Wisdom. Using it he changes into: Zelda.
A Sacred Weapon
edit
Zelda reveals that she wanted to help you on your journey because it was her fault for causing everything to happen, and that she is the Seventh Sage, the one destined to become the leader of the Six Sages. Zelda then gives Link a gift, the Light Arrows, which can penetrate through darkness. She tells you that you and she will now finally defeat Ganondorf. However, suddenly the Temple of Time starts to rumble, and Ganondorf's voice can be heard, commending Zelda on her seven years of hiding. Zelda is encased in a crystal prison, and carted away. Ganondorf tells Link that if he wants to save Zelda, he'll have to come to his castle.
The Path to Ganon's Castle
editGo into the now desolate Hyrule Market and go up the path where Hyrule Castle used to be. You'll find Ganon's Castle is in its place, and it's completely unreachable! However, Rauru speaks to you telepathically and says the Six Sages will make a bridge for you using their powers. With the combined power of the six medallions you have obtained from each respective sage, a transparent magic bridge connecting to the castle appears, and now you can enter the castle.
It is best if you prepare for Ganon's Castle by purchasing two jars worth of blue potion (talk to the lady in the red barn behind the potion shop in Kakariko Village) for it restores both health and magic at once, and remember to also get fairies. Make sure you have empty bottles to put them in. Each filled jar of blue potion will cost you 100 rupees.
Ganon's Castle
editRemember to use light arrows to destroy barriers. |
The final dungeon of the game is imposing at first, but rather simple. A series of Temple-Themed challenges awaits you, along with a few new items. March straight through the ascending stairs and the two Beamos and enter the main hall. You'll see that there are six separate mini-dungeons that require disabling, to disable the large barrier in front of you. There is no specific order as to how to complete, however, you must obtain the Gold Gauntlets from the Shadow region before you can complete the Light region.
If you are low on health, fairies, or magic, simply back flip to the bottom of the tower, and directly below the entrance is a hidden alcove. Use the Lens of Truth if you can't find it, it's on the ground floor. If you enter, several fairies and Business Scrubs await. You can stock up here if need be. The recommended travel companions are two fairies, and two blue potions. You'll find that you'll want to be able to readily replenish magic later on.
Another method
editSpeaking of items, if you prefer another way of playing the mini-dungeons with minimum effort, here's a simple suggestion: Assuming you have all gold skulltulas, you need jars full of blue fires and then do these mini dungeons first. Do the Water Barrier first and then the Shadow Barrier that has the Gold Gauntlet that would allow you to get the extra heart defense. If you do those first, the rest of the mini-dungeons should be really easy. Once you finish the Water Barrier, you can go out and refill the jars with fairies so they can save you from dying.
From the entrance, go in the direction, starting with the Forest Barrier in that direction minus Water and Shadow Barrier.
The Forest Barrier
editMove a little bit forward and you'll hit a Wolfos. Easy battle, stab it up the back. Afterwards, light the four surrounding torches using Din's Fire (fire arrows work too, but you'll find that Din's Fire uses a lot less magic in the long run) and use a fire arrow to light the torch on top of the doorway in front of you. This will unlock the door. If it does not unlock, a torch has died out. As soon as all torches are lit at the same time, continue through the newly unlocked doorway.
This room, unfortunately, is a bit more complicated. Yes, it's another silver-rupee gathering fest. You'll notice several platforms, and a jump won't be enough to get you to first one. Hover boots? Not only that. Fans. So how do you get around? Well, start by playing the Song of Time to make a block materialize under the rupee on your left. From there, you can hover with the wind and then drop onto the other platform. Throw a bomb at the Beamos from here to kill it.
Wait until the fan in front of you stops spinning, then jump (or float) down onto the platform to the left of the exit door to find a switch which, when pressed, will make a pillar with a hookshot target appear from platform you came from. Use that target to get the silver rupee, then gather the remaining rupees. Keep in mind that the fans will blow you around if you use the hover boots carelessly. Use the Iron Boots to stay in one place if needed. Once you have collected all the silver rupees, the door at the end of the room will unlock; continue through it.
In this last room, you get to use the Light Arrows for the first time. Equip them and shoot one into the center of the Forest barrier (the sphere surrounded by the green forcefield). Saria will then destroy the barrier and she'll warp you back to the entrance that led to the barrier. This will happen each time you destroy a barrier. Head to the right once more to find the Water barrier.
NOTE: Saria's "hurry up" is not an indication of a timer etc. Don't worry about this; just take your time.
The Water Barrier
editFrom coming out of the Forest Barrier, turn right and walk down the steps where you will see the entrance to the Water Barrier. Enter through this door.
Kill the Freezards while avoiding falling icicles from the ceiling. DO NOT open the chest on the left (when looking at the door to continue); it will freeze you solid. Once they have been killed, break away the icy stalagmites in the center of the room surrounding the blue fire then bottle (the fire). Melt the red-colored ice over the door with the blue fire, then return to the fire and refill your bottle before proceeding through the newly accessible door. You'll need the blue fire for this next part.
Once you have passed through the door a timer will start with two minutes on it; you have entered an ice puzzle. Remember that on ice, one push of a block will send it skidding in that direction, so be careful. If you make a mistake, leave the room the way you came in and return; you'll find that both the position of the blocks and your timer have been reset.
To solve the puzzle, find the block furthest away from you and go round the left side of it. Push it into the rock sticking out of the floor. Go then round the back of it (after pushing it, this will be Link's left side) and shove it into the hole in the middle of the ice. Proceed to push the second block in the direction of the now filled hole (a rock will stop it). Go round the right side of the block, break the pot and push it towards the wall (the only way you can). Climb up the block, and then up off the block onto the ledge. Melt the red colored ice with your blue fire. Take out the Megaton Hammer and hit the switch. This will open the previously locked door at the end of the room. Go through it to find the Water Barrier. Do the same as you did with the Forest Barrier (that is to say, shoot a light arrow at the spherical object surrounded by the [in this case, blue] mist). Don't ignore the two pots either side of the doorway; these will probably contain a heart and some magic. Ignore the "hurry up" again, and watch the water barrier break down, thanks to Ruto.
Return to the little enclave below the entrance on the bottom floor of the main hallway to get your health recovered and rebottle a fairy (if you only came into the castle with one bottle and had to waste a fairy to bottle the blue fire, this is especially important). Try to ignore everything else in the room (using your shield if need be) and return to the main hallway.
The Spirit Barrier
editGo into the door marked by the orange medallion (on the left of the entrance). This is another rupee-collecting quest, unfortunately. Luckily, there are no pitfalls here, just spike traps.
First things first, blow up the Beamos. Once that's done, latch onto the target above where he used to be and get his rupee. Then to get the others, slide the statues around until you can collect them easily. If you feel the need, play the Sun's Song where the Beamos was to pick up a big fairy.
Kill the torch slugs, then look up at the bars. You'll notice a hole at the top. Turn around and hit the switch beside the door you came in from, causing a chest to fall. Open the chest to find twenty Bombchus, because you'll need to put one through that hole and hit the switch. If you have more, it helps. Afterwards, look up in the room with the suns and fire a Fire Arrow up into the webbing to expose light. Shine some light on the sun to the right of the doorway you just came through. Get the wrong one, and a Wallmaster will come to get you. Finish off this barrier and go back to where the Water barrier entrance is, continuing one more to the Shadow Barrier. (If you don't have the fire arrows go to the fire on the torch closest to the room and get in-between the torch and the diamond key and aim an arrow towards the webbing)
The Shadow Barrier
edit
This barrier gets irritating if you have to restart it. Rule #1: Do not fall. Ever. You will be as annoyed as if you hadn't pulled that first block in the Water Temple. Having said that, let's do this dungeon.
Shoot the torch on the right (it might be hard to see, but it's there) with a Fire Arrow. Alternatively, if you don't have Fire Arrows, you need to be fast - Longshot across to the torch and use Din's Fire, then quickly Longshot to the Like Like on the other side (The Longshot cursor disappears when you aim at the Like Like but this is just a trick, if you aim toward the top of the Like Like you will be able to Longshot across). When you do this, a series of platforms will appear. If the torch goes out, they'll disappear. Then run to cross to the main platform, and kill the Like Like if needed, but be careful not to hit it so that you won't make things hard on yourself. There's another torch by the door, so shoot it as well. This will cause another set of temporary platforms to appear, BUT you need to use your Lens of Truth to see the new path. Alternatively, use your Hover Boots with two well-timed attack rolls to cross to the next platform. Then head downwards using them to find another switch. A chest will drop and the platforms will remain in place. If there's enough time after hitting the switch, head back to the platform on the ice platforms. Otherwise, longshot to the chest that appeared. You'll find the ever-important Golden Gauntlets. They are twice as strong as the Silver Gauntlets and allow you to lift incredibly heavy objects. Then use the Lens of Truth, which will reveal the path to the torch to the exit, and another path to the exit itself. To open the door, use the Lens of Truth to the switch that is on the left side of the locked door, and use the megaton hammer to push in the switch. Destroy the barrier with the light arrows, and Impa will appear to get rid of the Shadow Barrier. Now, go and leave the castle to find the final Great Fairy's Fountain.
The Last Great Fairy
edit Leave the castle, cross the bridge, then turn left. You'll see a bunch of rocks and a stone pillar blocking at the end of the path. With the Golden gauntlets, you can toss it out of the way and reveal one final Fairy Fountain. In this fountain, play Zelda's Lullaby and the Great Fairy will enhance your life energy. You'll receive borders around your hearts, meaning that you now take half damage from any attack. Yes, a very nice reward for the last couple of bosses.
Once you're done out here, head back inside and head left, passing the pillar you see. Don't worry, you'll get it soon enough. Go past the pillar to the Fire Barrier.
The Fire Barrier
editBefore entering the room put on your Goron Tunic. If you got the feeling that the Shadow Barrier was annoying and the Forest Barrier was a pain, things get even harder. This one requires the use of the Hover Boots nearly all the time, so be careful where you step. You'll be collecting even more Silver Rupees, and facing a few traps ahead.
Head to the left to the rotating wheel of fire. Don't take your time here, get the rupee, and get back, the whole middle platform will sink (unless you have the Hover Boots on. The platform will NOT sink if you do). Grab the next rupee on the brown platform, this one starts to sink down as well. Now, see the big pillar? With the Golden Gauntlets, you can heave that aside to get the rupee under it. After you've done that, hookshot to the door and kill the Fire slug, then longshot to the platform behind you and to the right. What do you know? It's the pillar. Jump onto the pillar and onto the platform, then hurry back and longshot back to the exit (NOTE: It is nearly impossible to do this with the Hover Boots on, so de-equip them!). Destroy the Fire Barrier, and Darunia will get rid of the Fire Barrier. Then you can move on to the ridiculously easy Light Barrier.
The Light Barrier
editEasy to find. You passed it earlier. It's that big pillar! Lift it out of the way and head on through the door.
In the first room, pull out your lens and bow and kill all of the enemies who think that being invisible gives them an evolutionary advantage. Hit the chest in the middle, but no others, as they're mostly traps. If you go to the right middle chest and open it you will get arrows, the top left chest rupees, bottom left a heart. Continue to the next room, which is easy, Stand on the Triforce symbol and play Zelda's Lullaby, causing a chest containing the key to the door to fall. In the next room, Hookshot to the ceiling and survey your surroundings. Plan and time your path, as getting hit by boulders is not fun. There are some rupees in the middle and on the outside. Once you're done here, pat yourself on the back. No more silver rupees! Ever! The next room looks like a dead end, but put on your lens of truth and you'll see that you can walk through the wall. Just don't linger too long in that empty room or else a Wallmaster will be waiting for you. After dispelling the Light Barrier, you know what to do from here. Continue into Ganon's Tower.
Ganon's Tower
editThis is the final gambit that Ganon throws at you to delay your arrival. To move on, you must kill everything in your path, except those first Keese.
Dinalfos Attack
editThe first enemies of the tower are Dinalfos. These lizards are like Lizalfos, but have more strength in them. However, you're now well-equipped to take them.
Boss Key
editProceed further up the tower and you'll find your next challenge, two Stalfos. You must quickly kill both to move on. Normally, this would seem difficult, but if you picked up the Ice Arrows on your quest, it's very simple. Just wait for them to drop their guard and hit them with the arrows, then jump-slash them to kill them in one strike! Now with them gone, the fire trap in the room vanishes, revealing the chest with the Boss Key.
If you still want to continue to "beat" the full game (all the heart pieces, skulltullas, masks, etc.), save now! After completing Ganon's Tower, you cannot save and will lose all progress that was not saved previously.
Final Defense
editUp at the next section on the tower await two Iron Knuckles, the mini bosses of the castle. However, they aren't silver like the ones you faced in the Spirit Temple: they've been beefed up to suit a stronger defense. The weaker one has white armor, and the stronger one has black armor.
There are several ways to defeat them, like to unload all of your remaining bombchus on them, because they won't be very useful from here on out, or quickly hit-and-run them with either sword. As you get higher, you'll notice some creepy organ music. When you reach the room with nothing but a bunch of jars in it. Break it if you are low on health, arrows, magic, bombs and rupees. Go through the door on your right. You'll then be at the base of another staircase which will lead you to Ganondorf's Room and the very pinnacle of the tower.
This is a good save point. If you're playing again, it will assume you killed all enemies but the firebats and have the Boss Key ready to use.
Gathering of the Triforce
editAs Link comes face to face with Ganondorf, he sees him at the foot of a pipe organ, playing a song with a dark lull to its melody. Above him, Link sees Zelda, held captive in the crystal in which she was encased. As Ganondorf plays his dark song, The Triforces of Courage and Wisdom show their marks amongst Link and Zelda's hands. Soon, Link finds his body rejuvenated by the song's melody. Ganondorf, his desire achieved, suddenly stops playing the organ and speaks to his confronter. His song brought out the pieces of the Triforce and started to combine them. However, this goal is not finished. As Ganondorf flashes the Triforce of Power amongst Link and Zelda, he begins the final phase of his plan: slaying them!
Boss: Ganondorf
edit
Navi is held back by Ganondorf's evil aura so you cannot use Z-targeting during this battle. Make sure you have the hover boots on. Simply stand on any of the outer blocks in the corners and let Ganondorf shoot at you. Otherwise, he may send shockwaves through the floor and make it crumble, like at the start of the fight. If a shockwave does knock you off climb onto his platform and return his magic ball. When you're this close he can't block it, but it only works once each time you fall. If you remember the fight with Phantom Ganon, you'll know what to do. Use your sword or an empty bottle to deflect Ganondorf's magic back at him. After a few volleys, he'll get hit by his own magic and will be stunned. At this point hit him with a light arrow, then jump (or hover) onto the platform in the center and slash him to pieces. Don't use Nayru's Love to protect you though since you can't shoot the light arrows when being protected by the Love. Jump back to the squares and repeat. Sometimes (when he's low on health) he'll shoot a large blast of magic at you. You can deflect this one by using your fully charged spin attack, otherwise avoid it. While he is charging up the attack you can hit him with a light arrow which won't stun him but it will hurt him. It'll make pieces of the floor crumble away, making the battle trickier. You have a choice of either keeping the hover boots on or changing over to your regular boots in order to run faster to avoid the blast of magic. Either way, as you run from the bolts of magic, rolling at the last second helps you to avoid getting hit.
If you need health or magic drop down to the bottom area where the pots are. Hopefully you have some blue potion if you need it.
Alternately, you may not have to equip the hover boots. If you have the Biggoron's sword, equip it, and have the hookshot ready as well. After stunning Ganondorf, and firing the light arrow, line up a direct path with him. You can jump/hookshot yourself into Ganondorf, either way as soon as you land, you can jump slash him. Since one jump slash with the Biggoron's sword is the equivalent of four Master Sword strikes, this initial blow will speed up the process. Stabbing gives you quicker attack rates, and less lag time after the swing. Once you see him recover, hookshot the windows and fly away. When Ganondorf begins charging up his large sphere that can be reflected by using your fully charged spin attack or a more economical firing of a light arrow into his body. This will prevent the charge from ever happening. Five jump attacks with the Biggoron sword will kill him.
Eventually you'll kill Ganondorf. Unfortunately with his dying breath he tries to bring the castle down around him, intending to bury you alive!
Escaping the Castle
editNote: If you attempt to save your game at any of the stages from this point on, and proceed to die or quit after, it will not work. You will start at your last save point (before Ganondorf). In other words, you have to kill Ganondorf, escape from the castle, and kill Ganon without dying!
Follow Zelda down through the different levels of the castle to escape. Because of the havoc Ganondorf unleashed before his collapse, the top of the tower has crumbled, along with several halls, staircases, and the corridors that led you to the top of the tower, so now the only way out is through several barred passageways, which only Zelda can open. Be sure to stand right in front of each barred passageway in order to trigger Zelda to open them. Most of the time you can second-guess her and run on ahead. However, if you get hit by falling debris Zelda will gasp and remain where she is, so you'll need to go back for her.
At one point Zelda will be encircled with flames and two Stalfos appear. Destroy both of them quickly or they'll revive! The flames will then vanish and Zelda will release hearts. Go up to her and get them if you need them, then continue on your way.
Eventually you'll come down the stairs and reach a doorway with bright white light outside. Avoid the Re-dead before then. Go through and you're back outside. You'll now see the castle slowly crumble down into a pile of rubble.
Zelda is happy, thinking about how everything will get back to normal, when suddenly there comes a noise from the rubble. She sends you to investigate.
Walk over, and you'll be in for a final surprise...
Ganondorf will emerge from the rubble and use the Triforce of Power to transform into his super-form, Ganon. Ganon knocks the Master Sword out of Link's hands, leaving him without his most effective boss-killing weapon.
Final Boss: Ganon
edit

Again, save the game before proceeding, in case you haven't for a while. This is the final room, and you will not be able to save after this.
Ganon is the ultimate, power-crazed form of Ganondorf. He is armed with two swords that will deliver more damage than you'd ever wish to see! However, even though you're the target of his wrath, you can still take this colossal monster down.
This time you've got your trusty Z-targeting back. Strike Ganon between the eyes with the light arrows leaving him stunned. This makes his vulnerable tail drop down within reach. Quickly target it and rush in behind him to slash it to pieces. Nayru's Love may also be helpful for this fight. If you don't have the Biggoron Sword the Megaton Hammer will also work or Deku nut. If you need a magic refill just head to one of the crumbled walls and let Ganon strike at it, revealing the bottles. Also, if you're running low on arrows or magic, you can simply hit him once with a light arrow, then go around behind him to strike the tail. Another way to stun Ganon is by throwing Deku Nuts in front of him, followed once again by a quick strafe around his massive feet to hit his tail. Keep the Z-target on the tail and stay near the tail. He will try to turn around and hit you but just keep following the tail and hitting it. If you're interested in just using the Biggoron Sword, roll under him and attack his tail as many times as you can. After about 10 hits he will go down hard. His sword attacks will do 5 or 6 hearts of damage.
Once he's down rush over and get the Master Sword, and equip it, then go and hit him quickly before he gets up (the more blows the better). However if you are not fast enough he will get back up and you will have to do it all over again. Repeat the same basic process until he's down yet again. But if you're low on arrows and power, as Ganon is about to attack you, roll under his legs and attack the tail. Be aware this time you can't Z-target his tail and follow it because he turns around a lot faster. Use light arrows and it is still easy to go around and slash his tail. You can still roll under his legs and slash the tail.
This time however Zelda will hold him still with her powers and tell you to deliver the final blow. Simply walk up to him and slash, and it's all over.
Note: The fight would go on forever with the Biggoron Sword after you recover the Master Sword. Don't use the Biggoron Sword for the final part of the fight or you will end up using nearly everything in your inventory! Also, if you don't deliver the final blow, that will also allow the fight to go on.
Peace is Finally Restored
editNow that you have struck down Ganon, Zelda will call on the Six Sages, who seal Ganondorf into the void of the Evil Realm. Ganondorf vows once the seal on him is broken, and as long as he has the Triforce of Power, he will then exterminate Link and Zelda's descendants.
Zelda then shows her gratitude to Link and thanks him for restoring peace to Hyrule. She also apologizes for causing all of what has happened because she did not know as a child what the consequences would be. Then she asks something very surprising of Link; To lay the Master Sword to rest, closing the Door of Time and to give the Ocarina of Time to her so he can be brought back to his own time where he belongs, by using her powers as a Sage. She then tells Link that they will have to say good-bye once peace is restored to Hyrule because once the Master Sword shuts the Door of Time, the road between times will close as well. She then plays her own lullaby, which returns Link to his time, as well as his former self.
- Credits
The credit sequence begins, which shows peace returning to Hyrule, Zora's Domain thawing, the Deku Tree Sprout very happy, and the adult Epona running freely across Hyrule Field. As she does so, night time comes over. Then you'll see a celebration where the Gorons, Zoras, and even Koriki are together. Everyone from Hyrule Market, Kakriko Village, and the Lon Lon Ranch are here, too. The Gerudos are even there, dancing. The boss and his workers from Kakariko Village are getting along well now, and Ingo and Talon are friends now. (If you haven't noticed, they are replicas of Mario and Luigi.) Malon is happier then ever, and is humming like always. Even Biggoron from atop Death Mountain is there!
Meanwhile, King Zora and Mido are watching from afar, King Zora missing Ruto and Mido missing Saria, when lights start raining above them. They look up and see the glowing lights of five of the Six Sages flying by, Ruto and Saria flying right overhead, reassuring them they're all right.
Saria, Darunia, Princess Ruto, Impa, and Nabooru are happy to see peace once again. As for Rauru, the Sage of Light, nothing is depicted.
The warp back into time returns Link to his child form and the Master Sword to the Pedestal of Time. Navi flies out of the temple from a window, no longer accompanying Link, as he has mentally matured into an adult. Link takes one last look at the sword before leaving, and the bells of the temple sound off in harmony.
Link returns to Zelda once again, having defeated Ganondorf, both very pleased.
- The End
In the N64 version after all the credits, when you see the sepia-toned, freeze-framed "The End" screen, leave the game on. It will eventually start playing a song, either the Prelude of Light or the custom Scarecrow Song that you created, over and over in different instruments.
(Afterwards you may reset your console; You'll stay at "The End" screen Nothing is shown afterwards)
Congratulations! You've finally finished the whole game!
Consumables
These are collectible items that you can only receive once and never again, and pickups that appear out of broken pots, cut grass, and thrown rocks that you can collect over and over again. They range from currency to weapon ammo to items that help you navigate dungeons.
Recovery items
editAs you travel throughout Hyrule you'll expend magic and lose health. You'll need to search around for these items to heal yourself and restore your magic power.
 Recovery Heart
Restores your health by up to a full heart.
 Small Magic Jar
Recovers a small portion of the magic meter.
 Large Magic Jar
Recovers a large portion of the magic meter.
Rupees
editLike all Zelda games, Rupees are used as a currency within the game. You can acquire rupees from killing enemies, destroying objects, looking in chests, or playing mini-games, or sometimes during swimming in water, or sometimes out in the open.
| Type | Value |
|---|---|
| Green | 1 |
| Blue | 5 |
| Red | 20 |
| Purple | 50 |
| Huge | 200 |
| Orange | 200 |
| Silver | 5 |
Silver Rupees are used to solve puzzles and cannot be found outside of such puzzles.
While the Huge Rupee and the Orange Rupee are the same value, you'll receive the Huge Rupee from NPCs and you'll find the Orange Rupee in instances where you'll find rupees lying on the ground.
Ammunition
editYou'll find several weapons throughout your journey that require restocking. You can find these by destroying pots, grass, or rocks, but you can also just purchase many of these refills in shops around Hyrule.
- Deku Stick
Refills your Deku Stick count by 1.
- Deku Nut
Refills your Deku Nut count by 5.
 Deku Seeds
Refills your Fairy Slingshot ammunition by 5.
 Bombs
Bombs
Refills your Bomb count by 5.
 Arrows
Single Bundle: Refills your Fairy Bow ammunition by 5.
Double Bundle: Refills your Bow ammunition by 10.
Triple Bundle: Refills your Bow ammunition by 15.
Enemies
| A reader requests that more images be included in this page or book. Images are useful for presentation and explanation. Free images can be found at Wikimedia Commons and used here at Wikibooks. If you have created relevant images, you should consider donating them. Remove this template when suitable images have been added. Please continue to edit this book and add images, even after this message has been removed. Discuss this books particular needs on the discussion page. For questions, go to WB:PROJECTS. |
| |
A Wikibookian has nominated this page for cleanup. You can help make it better. Please review any relevant discussion. |
| A Wikibookian has nominated this page for cleanup. You can help make it better. Please review any relevant discussion. |
The following page lists all of the enemies that Link faces in his travels. They are listed according to the time period and location in which they are introduced.
Young Link
editGreat Deku Tree
edit| Enemy | HP | Damage dealt | Location first seen | Locations | Navi description | Notes |
|---|---|---|---|---|---|---|
| Deku Baba (withered) File:LoZ OoT enemy Deku Baba (withered).png |
1 | 1/2 Heart | Kokiri Village | Kokiri Village | Though it looks withered, it will hurt you if you touch it. | This plant poses little threat and can only move its head circularly to attack. If touched, it will cause damage. A single blow will kill it, leaving a Deku Stick if it is killed. In the Kokiri Village area, these plants are only found in the pathway leading to the Great Deku Tree. |
| Deku Baba File:LoZ OoT enemy Deku Baba.jpg |
2 | 1/2 Heart | Inside the Deku Tree | Inside the Deku Tree | Hit it when it lunges at you, and it will stand upright. cut it quickly to get a Deku Stick | A stationary plant that will bite you if you're not careful. Unlike the withered variety, this plant has a limited reach of attack. Killing it while it is not attacking will yield a Deku Nut, whereas attacking it in its extended position will stun it. Killing it in this stunned position will yield a Deku Stick. |
| Deku Scrub File:LoZ OoT enemy Deku Scrub.png |
2 | 1/2 Heart | Inside the Deku Tree | Inside the Deku Tree | It will hide in the grass if you get close to it. Bounce the nuts it spits back at it! | This creature pops up out of the ground and shoots Deku Nuts at you. Reflecting a Deku Nut back to the Deku Scrub will cause it to jump out of its hole. If left alone, it will eventually return to its hole. However, if it is caught, it will often offer information. |
| Skullwalltula File:LoZ OoT enemy Skullwalltula.png |
1 | 1/2 Heart | Inside the Deku Tree | Inside the Deku Tree | Be careful not to touch it! | This small spider-like creature resides on the walls. It will knock you off the walls as you climb if it touches you. When it is getting ready to attack you, it'll turn purple. |
| Skulltula File:LoZ OoT enemy Skulltula.png |
1 | 1/2 Heart | Inside the Deku Tree | Inside the Deku Tree | ?? | This Skulltula drops down suddenly, and makes a quick spin attack if you are too close. Attack it when its "soft belly" is exposed; hitting its hard shell only causes it to swing from side-to-side. |
| Big Skulltula File:LoZ OoT enemy Skulltula.png |
2 | 1/2 Heart | Inside the Deku Tree | Inside the Deku Tree | Its soft belly is its weak point! | Is a bigger version of the Skulltula. |
| Gold Skulltula File:OOT skulltula small.png |
2 | 1 Heart | Inside the Deku Tree | Inside the Deku Tree | ?? | Gold Skulltulas are a rare breed of Skulltula. They are basically collectibles. Shoot and kill them to get Gold Skulltula Tokens. There are 100 Gold Skulltulas in the game. Later on in the game, you can use these tokens to earn a series of prizes, such as the Adult's Wallet at 10 tokens, the Stone of Agony at 20, the Giant's Wallet at 30, some Bombchus at 40, a Piece of Heart at 50, and lastly, an infinite supply of Gold Rupees when you collect all 100. For more information on them, consult the Gold Skulltula Mini-Quest Section. |
| Gohma Larva File:LoZ OoT enemy Gohma Larva.pngFile:LoZ OoT enemy Gohma Larva art.png |
2 | 1/2 Heart | Inside the Deku Tree | Inside the Deku Tree | Look out when it gets ready to pounce! | This enemy attacks by hopping at you when its eye turns red. It usually takes two hits to kill. |
| Queen Gohma: Parasitic Armored Arachnid
|
10 | 1/2 Heart | Inside the Deku Tree | Inside the Deku Tree | ?? | The boss of the Deku Tree dungeon. This large enemy attacks directly with her two upper appendages or indirectly by releasing Gohma Larva eggs. If these eggs are not destroyed, they will hatch into Gohma Larva. Its weak point is its eye. Hit the eye with the slingshot or Deku nut to stun it and attack it with your sword repeatedly. Try to hit it in the eye while it is on the ceiling to prevent it from releasing larva and making it easier to slay. |
.png)
Hyrule Field
edit| Enemy | HP | Damage dealt | Location first seen | Locations | Navi description | Notes |
|---|---|---|---|---|---|---|
| Peahat File:LoZ OoT enemy Peahat.png |
6 | 1 heart | Hyrule Field | Hyrule Field | It's weak point is its roots! | This is a large, flying, spinning flower. As it spins, its roots will become visible. Attack these roots to defeat this enemy. This enemy does not attack at night. However, if struck at night, it releases Peahat Larva. |
| Peahat Larva File:LoZ OoT enemy Peahat Larva.png |
?? | ?? | Hyrule Field | Hyrule Field | ?? | This smaller version of the Peahat cannot be damaged by your sword. However, it can be blocked with your shield. Once tired or far away from the Peahat that spawned them, they will go away or will die if they plow into the ground. |
| Stalchild File:LoZ OoT enemy Stalchild.png |
2 | 1/4 | Hyrule Field | Hyrule Field | Don't be afraid of the Stalchild! Just attack it repeatedly! | This skeletal enemy erupts from the ground after night falls. A horizontal slice with your sword will remove its head. Upon doing this, it has a harder time finding you. A vertical slice does equal damage but does not remove the head. Its slow movement makes it easy to avoid or defeat. Defeating a series of them in a row causes a large Stalchild to appear that will drop a better rewarding item or Rupee when defeated. Stalchildren can't swim or stay out in the daytime. They will ignore you if you ignore them and run off from them. If you wear the bunny hood, they will not pop out. Just as well, they won't pop out if you remain on one of the dirt paths. |
Lon Lon Ranch
edit| Enemy | HP | Damage dealt | Location first seen | Locations | Navi description | Notes |
|---|---|---|---|---|---|---|
| Guay File:LoZ OoT enemy Guay.png |
?? | ?? | Lon Lon Ranch | Lon Lon Ranch | ?? | This black bird comes out at night, but you can see its shadow on the ground. Simply hit it with a weapon to destroy it. If enough Guay are killed, a large Guay will swoop down and attack. Killing it will make a Red Rupee appear. |
Kakariko Village Graveyard
edit| Enemy | HP | Damage dealt | Location first seen | Locations | Navi description | Notes |
|---|---|---|---|---|---|---|
| Poe File:LoZ OoT enemy Poe.jpg |
?? | ?? | Kakariko Village Graveyard | Kakariko Village Graveyard | ?? | This is a lantern wielding ghost that disappears when Z-targeted. If Z-targeting is held, however, it will reappear. After it's defeated, its essence can be captured in a bottle. Poes attack when their graves are disturbed or if you come up to their floating lanterns. The color of their eyes foretells how they will act. Green means they won't attempt to attack, yellow means you've angered them and they may attack, and red marks an incoming attack. They attack by wildly spinning their lanterns, even if they're visible. |
| The Composer Brothers: Flat and Sharp File:LoZ OoT enemy Poe.jpg |
?? | ?? | Kakariko Village Graveyard | Kakariko Village Graveyard | ?? | Two old composers who rest in their graves. Reading their graves will cause them to appear and attack you, but they can be disposed of just like normal Poes. When defeated, their spirits will be willing to talk to you, but can never be captured. |
Royal Family Tomb
edit| Enemy | HP | Damage dealt | Location first seen | Locations | Navi description | Notes
|
|---|---|---|---|---|---|---|
| Keese File:LoZ OoT enemy Keese.png |
1 | 1/2 heart | Royal Tomb | Royal Tomb | ?? | This is a black bat. Although weak, it will set itself alight if a fire is nearby, becoming a Fire Keese; if Blue Fire is around, it will become an Ice Keese. Although a quick sword-swipe will kill them, they are best dispatched with the Slingshot or the Boomerang. They usually nest in certain spots and don't move unless startled, which will trigger an attack. |
| ReDead File:LoZ OoT enemy ReDead.png |
?? | 1/4 heart per second | Royal Tomb | Royal Tomb | ?? | This is a restless undead creature. It moves slowly but has a paralyzing shriek. The Sun Song renders them inert for a moderate amount of time. These enemies are best avoided early in the game. Their attack consists of jumping onto Link's back and leeching life from him, taking away 1/4 of a heart per second. Rapidly tapping a button is the only means of escape. If one of their brethren dies, they go to where the body lies, ignoring Link. Some ReDeads may crouch, and those that do can't shriek until they get up. |
Death Mountain Trail
edit| Enemy | HP | Damage dealt | Location first seen | Locations | Navi description | Notes |
|---|---|---|---|---|---|---|
| Red Tektite File:LoZ OoT enemy Red Tektite.png |
?? | ?? | Death Mountain | Death Mountain | ?? | This four-legged crab-like creature can only attack or move with a small jump. |
Lost Woods
edit| Enemy | HP | Damage dealt | Location first seen | Locations | Navi description | Notes |
|---|---|---|---|---|---|---|
| Business Scrub File:LoZ OoT enemy Business Scrub.png |
?? | ?? | Lost Woods | Lost Woods | ?? | This enemy fires Deku Nuts at you. If you get too close, it will hide in the ground. However, it will offer to sell items to you when it is defeated. It does not run away after it has been hit. |
Sacred Forest Meadow
edit| Enemy | HP | Damage dealt | Location first seen | Locations | Navi description | Notes |
|---|---|---|---|---|---|---|
| Wolfos File:LoZ OoT enemy Wolfos.png |
?? | ?? | Lost Woods | Lost Woods | ?? | A wolf monster can block your attacks unless you time them correctly. Striking it in the back causes more damage. |
| Mad Scrub File:LoZ OoT enemy Mad Scrub.png |
?? | ?? | Lost Woods | Lost Woods | ?? | A scrub enemy that fires 3 Deku Nuts per attack. It does not sell anything or give information. |
Dodongo's Cavern
edit| Enemy | HP | Damage dealt | Location first seen | Locations | Navi description | Notes |
|---|---|---|---|---|---|---|
| Beamos File:LoZ OoT enemy Beamos.png |
?? | ?? | Dodongo's Cavern | Dodongo's Cavern | ?? | This enemy stands stationary, its head continually rotating 360 degrees. If it catches sight of you with its single eye, it will send out a beam of light to attack you. To destroy it, blow it up with a bomb. |
| Baby Dodongo File:LoZ OoT enemy Baby Dodongo.png |
?? | ?? | Dodongo's Cavern | Dodongo's Cavern | ?? | A baby dodongo appears from the ground and wriggles toward you. It attacks by jumping at you, and when defeated, it explodes like a bomb. |
| Lizalfos File:LoZ OoT enemy Lizalfos.png |
?? | ?? | Dodongo's Cavern | Dodongo's Cavern | ?? | This lizard-like humanoid fights with shield and sword. Wait for the opportunity to attack. It will run away when it has been nearly defeated. |
| Dodongo File:LoZ OoT enemy Dodongo.png |
?? | ?? | Dodongo's Cavern | Dodongo's Cavern | ?? | This creature breathes fire. Its tail is its vulnerable point. It creates a large explosion when it is defeated. |
| Armos File:LoZ OoT enemy Armos.png |
?? | ?? | Dodongo's Cavern | Dodongo's Cavern | ?? | This statue looks like other statues, but will attack when it is attacked. They can be killed with bombs or bomb-flowers. When these are encountered as Adult Link, Biggoron's Sword will also work. |
| Fire Keese File:LoZ OoT enemy Fire Keese.png |
?? | ?? | Dodongo's Cavern | Dodongo's Cavern | ?? | They fly around constantly and will swoop down attack you with their burning body. If your Deku Shield is equipped when it hits you, it will burn up. Fire Keese lose their burning ability after attacking and revert to normal Keese, but will re-ignite if a flame is nearby. |
| King Dodongo: Infernal Dinosaur File:LoZ OoT enemy King Dodongo: Infernal Dinosaur.png |
?? | ?? | Lon Lon Ranch | Lon Lon Ranch | ?? | The boss of Dodongo's Cavern. It can produce a fiery breath and roll around the edge of the room. It is vulnerable when it is preparing for its fiery attack. Tossing a bomb into its mouth stuns it. Slash it repeatedly until it curls up into a ball and rolls around. Make certain that you have the Hylian Shield equipped as it will protect you from the monster's rolling attack. If you employ the Deku Stick and jump slash the creature, it will perish very quickly. |
Zora's River
edit| Enemy | HP | Damage dealt | Location first seen | Locations | Navi description | Notes |
|---|---|---|---|---|---|---|
| Octorok File:LoZ OoT enemy Octorok.png |
?? | ?? | Zora's River | Zora's River, Forest Temple | ?? | An octopus enemy that lives in water. It attacks by firing rocks at you, which can be deflected with your shield. This creature will hide from you if you get too close. It can be killed by deflecting its rocks back at it, or by using the boomerang. |
| Blue Tektite File:LoZ OoT enemy Blue Tektite.png |
?? | ?? | Zora's River | Zora's River | ?? | This enemy is similar to the Red Tektite but is able to walk on water. Killing it with a Light Arrow makes it drop a Purple Rupee. |
Jabu-Jabu's Belly
edit| Enemy | HP | Damage dealt | Location first seen | Locations | Navi description | Notes |
|---|---|---|---|---|---|---|
| Biri File:LoZ OoT enemy Biri.png |
?? | ?? | Jabu-Jabu's Belly | Jabu-Jabu's Belly | ?? | A jellyfish-like creature that floats slowly through the air. It may be easy to avoid, but it shocks you with electricity if you do not use ranged attacks. The boomerang is the best weapon to use against it. The Fairy Slingshot is ineffective against it. A combination of Deku Nuts to bring them down and hits with the sword to kill them can be used. The magical sword-slash attack works, but the range and timing are of such critical importance that it's just easier to use the boomerang. It is also possible to kill biri by throwing Princess Ruto at them, but you will need to aim well. |
| Bari File:LoZ OoT enemy Bari.png |
?? | ?? | Jabu-Jabu's Belly | Jabu-Jabu's Belly | ?? | A tougher version of the Biri that splits into three Biri when defeated. It drops from the ceiling and causes more damage when it attacks. The Fairy Slingshot is ineffective against it, but the Boomerang works perfectly. |
| Shabom File:LoZ OoT enemy Shabom.png |
?? | ?? | Jabu-Jabu's Belly | Jabu-Jabu's Belly | ?? | A bubble that floats toward you in a somewhat random way. If it pops near you, it will send you flying backward and damage you. Use deku nuts, which will cause all nearby Shaboms to pop, or the boomerang for individuals. The Fairy Slingshot is ineffective against it. A jump slash with a Deku Stick provides adequate range to avoid its explosion upon its defeat. The magic slash is also effective. |
| Tailpasaran File:LoZ OoT enemy Tailpasaran.png |
?? | ?? | Jabu-Jabu's Belly | Jabu-Jabu's Belly | ?? | An armored enemy that shocks you if you slash it. Use Z-targeting and throw the boomerang at it or use the magic slash to defeat it.
|
| Stinger File:LoZ OoT enemy Stinger.png |
?? | ?? | Jabu-Jabu's Belly | Jabu-Jabu's Belly | ?? | An airborne enemy which attacks similarly like Guay and Keese. A jump slash or a hit from the Boomerang will defeat it. |
| Parasitic Tentacle File:LoZ OoT enemy Parasitic Tentacle.png |
?? | ?? | Jabu-Jabu's Belly | Jabu-Jabu's Belly | ?? | An appendage that retracts unless it thinks it can attack you. Draw it out by moving closer, and use Z-targeting so you can attack with the boomerang which will halt its attack. Its weak point is a narrow segment on its body. |
| Big Octo File:LoZ OoT enemy Big Octo.png |
?? | ?? | Jabu-Jabu's Belly | Jabu-Jabu's Belly | ?? | A mini-boss found in Jabu-Jabu's Belly. It moves in a circle and switches directions after being hit. To defeat this enemy, you will need to chase it until you can hit it with the Boomerang. Hitting the Big Octo in the back with the Boomerang stuns it and leaves it vulnerable to the Kokiri sword in the back. |
| Barinade
|
?? | ?? | Jabu-Jabu's Belly | Jabu-Jabu's Belly | ?? | The boss of Jabu-Jabu's Belly. Watch out for its electric beams that it constantly fires at you throughout the battle. In order to defeat it target the tentacles attached to the ceiling with the Boomerang first. Once they have been detached from the ceiling, attack the main body. It will begin to spin around attempting to run into you. Stun it with the boomerang and destroy the Jellyfish protecting its weak point to make attacking it easier. Stun it with the boomerang and attack it repeatedly. |
Adult Link
editHyrule Field
edit| Enemy | HP | Damage dealt | Location first seen | Locations | Navi description | Notes |
|---|---|---|---|---|---|---|
| Angry Poe File:LoZ OoT enemy Angry Poe.png |
?? | ?? | Hyrule Field | Hyrule Field | ?? | It is a tougher variant of the Poe. It will not go away, even if Link looks at it. It constantly circles around him and drops flames from its lantern. Din's Fire is very effective if you get cornered by one. |
| Octorok File:LoZ OoT enemy Octorok.png |
?? | ?? | Hyrule Field | Hyrule Field | ?? | A limited enemy that only appears when you ride Epona. They never attack, but they like to tease and scare lone travelers. Two arrows will slay one, but they do not stick around for very long. Ten Big Poes inhabit Hyrule Field and only appear in certain locations. You can collect their spirits and sell them to the keeper of the Ghost Shop to earn Rupees. When he has all ten spirits, you receive another Bottle. |
Kokiri Forest
edit| Enemy | HP | Damage dealt | Location first seen | Locations | Navi description | Notes |
|---|---|---|---|---|---|---|
| Big Deku Baba File:LoZ OoT enemy Big Deku Baba.png |
?? | ?? | Zora's River | Zora's River, Forest Temple | ?? | A huge stationary plant that bite anything that comes into range. Big Deku Babas are more powerful and more dangerous than their smaller counterparts. This plant still has a limited range of attack. Attacking it when it is extended will stun it. Killing it in this stunned position will yield a Deku Stick (although they are useless as an adult) while it will drop three Deku Nuts if it is not stunned. |
Lost Woods
edit| Enemy | HP | Damage dealt | Location first seen | Locations | Navi description | Notes |
|---|---|---|---|---|---|---|
| Skull Kid File:LoZ OoT enemy Skull Kid.png |
?? | ?? | Zora's River | Zora's River, Forest Temple | ?? | Kokiri that have been lost in the forest too long become Skull Kids. They are afraid of adults and will not approach them. Skull Kids will shoot projectiles at you. If you kill a Skull Kid, it will yield an Orange Rupee. |
Sacred Forest Meadow
edit| Enemy | HP | Damage dealt | Location first seen | Locations | Navi description | Notes |
|---|---|---|---|---|---|---|
| Moblin Guard File:LoZ OoT enemy Moblin Guard.png |
?? | ?? | Sacred Forest Meadow | Sacred Forest Meadow | ?? | Large goblin-like monsters that wear chainmail armor and wield long spears. If one sees you, it will charge at you full speed with its spear drawn. Getting hit launches you into a corner. Stay out of sight until one turns around before shooting your Hookshot at its lower back. One shot is all it will take. |
| Club Moblin File:LoZ OoT enemy Club Moblin.png |
?? | ?? | Sacred Forest Meadow | Sacred Forest Meadow | ?? | A gargantuan Moblin warrior clad in spiked armor that wields a colossal warhammer. It is only found in the narrow corridor connecting the Sacred Forest Meadow to the Forest Temple. It strikes the ground when you approach which generates shockwaves that will send you flying. Avoid the shockwaves and maneuver behind the Moblin; it is unable to turn around to hit you. Strike it with the Master Sword three times to defeat it. Bombchus can be used instead as a ranged attack. |
Forest Temple
edit| Enemy | HP | Damage dealt | Location first seen | Locations | Navi description | Notes |
|---|---|---|---|---|---|---|
| Blue Bubble File:LoZ OoT enemy Blue Bubble.png |
?? | ?? | Forest Temple | Forest Temple | ?? | A hovering skull surrounded by blue fire. Blue Bubbles attack by flying into you. To defeat them, use your Hookshot or let them collide with your shield when they are covered in fire,or shoot them with an arrow and strike the skull twice with your sword once it starts bouncing on the floor (this is easier if you Hook/Longshot it before hand, which immobilizes it). |
| Stalfos File:LoZ OoT enemy Stalfos.png |
?? | ?? | Forest Temple | Forest Temple | ?? | A large, armored skeleton that wields a sword and shield. Stalfos attack you at close range with its sword, or at mid-range by jump attacking. Stalfos have proficient blocking skills and are only vulnerable when they are about to attack or immediately after they land from a jump attack. Some Stalfos are capable of regeneration; if their bones remain in a pile once they have been defeated, move quickly to accomplish your objective in the room, or they will regenerate. Biggoron's Sword is the best way to defeat these enemies due to its higher attack power. |
| Wallmaster File:LoZ OoT enemy Wallmaster.png |
?? | ?? | ?? | A giant decomposing hand that hangs from the ceiling. Its shadow will encircle Link when he nears, and after a few seconds, it will drop down and grab Link, transporting him to the beginning of the dungeon. To avoid getting assaulted by one, continue moving (it begins hovering above you when you have stopped). To kill one easily (this is easier if you play with the sound on,) simply stay in place as the shadow grows around you and you hear a sucking sound. As soon as the sound stops and the shadow starts growing, move out of the way and attack it when it hits the floor. It drops a lot of Rupees when defeated. | ||
| Floormaster File:LoZ OoT enemy Floormaster.png |
?? | ?? | Forest Temple | Forest Temple | ?? | A giant decomposing hand that crawls on the floor. If you approach it, it turns green and flies towards you. Avoid its attack by blocking it with your shield, or else it will pick you up and send you to the beginning of the dungeon. When defeated, it splits into three smaller Floormasters. If any of the hands (and it is possible for more than one to do this at the same time) manage to latch onto you, it will suck a large amount of life away before regrowing into a large hand. Din's Fire is a preferred weapon against Floormasters: unleash Din's Fire, and cast it again to defeat the three tiny Floormasters that spawn. |
| The Poe Sisters: Joelle, Beth, and Amy File:LoZ OoT enemy The Poe Sisters: Joelle, Beth, and Amy.png |
?? | ?? | Forest Temple | Forest Temple | ?? | These three Poe sisters are included together because they have identical fighting styles. The Poe Sisters are floating Poes holding fiery lanterns, very similar to every other Poe in the game; unlike the other Poes, however, Z-targeting does not cause them to disappear. To defeat them, Z-target and wait with your shield up to deflect their attacks until they reappear; at this point, shoot them with arrows and repeat the process as necessary. |
| Green Bubble File:LoZ OoT enemy Green Bubble.png |
1 | ?? | Forest Temple | Forest Temple | ?? | A close relative to the Blue Bubble. It is covered in a green fire that damages you when you get too close. The fire that surrounds these skulls dissipates intermittently that leaves them vulnerable to attack. One sword slash is enough to dispatch them. |
| Meg File:LoZ OoT enemy Meg.png |
5 | ?? | Forest Temple | Forest Temple | ?? | Meg is the final Poe sister and the Mini-Boss of the Forest Temple. She separates into four identical clones of herself which encircle you. The real Meg spins around occasionally, usually right after she appears. Z-target her and shoot her with your Hookshot or arrows. If you hit the wrong ghost, it will disappear. Hitting the fakes three times will automatically inflict you with unavoidable damage. Do not fight in first-person view since you cannot see all of the ghosts at once. Meg is defeated after being shot by 5 arrows. |
| Phantom Ganon File:LoZ OoT enemy Phantom Ganon.png |
?? | ?? | ?? | An evil creation of Ganondorf and the boss of the Forest Temple. Phantom Ganon is a Ganondorf lookalike on an armored black steed. He wields a powerful trident that casts electric spells. This fight has two distinct parts. First, you must shoot Phantom Ganon three times with an arrow as he tries to exit a painting. To make things difficult, Phantom Ganon has his own phantom, riding through the paintings with him. The fake Phantom Ganon turns and heads back into its painting while the real one leaps out of the painting while casting lightning bolts at the Triforce emblem in the middle of the arena. To avoid being hit by the electrical blast, do not stand in the center of the arena, or on the small Triforces that surround it. The best place to stand is right between two of the small Triforce emblems on the floor, which ensures that you will be safe from the electricity. The easiest way to determine the real one is to look at both the paintings they are coming from and find the phantom that looks slightly brighter: the brighter of the two is the real Phantom Ganon. After being with 3 arrows, he descends from his horse and float above the arena. In the second phase of the battle you must return Phantom Ganon's energy ball attacks with your sword. You must time your strokes so deflect the ball of electricity before it hits you. Continuously Z-target him to keep your attacks aimed. Shorter distance attacks are more likely to hit him. When you hit him with one of his own spells, run toward him and attack him with your sword. After being hit four times, he will add a new attack: when you see him charge up his staff with a kaleidoscopic light, prepare to move fast. Phantom Ganon will hop on his staff and ride it like a broomstick. If you wait until he targets you and starts his swoop, you can sidestep him and avoid taking damage. Keep reflecting his balls of electricity and move in and strike him until he is defeated. Another way to defeat him is to wait until he gets close to the ground. Then hit him with your sword to stun him. After he falls to the ground hit him repetitively with your sword until he gets back up. |
Death Mountain Crater
edit- Red Bubble
Close relative of the Green and Blue Bubbles, the Red Bubble is found in fiery areas. Its attacks can even burn you. Extinguish the fire on its body to destroy it. Deku Nuts are the one thing that can stun them so you can attack them.
Fire Temple
edit
- Torch Slug
A slug with flames all over its body. If it's hit by one of Link's weapons, the fire on its body disappears. The hookshot will also stun it. It must be destroyed before it can re-ignite.
- Like-Like
The most disgusting thing you've ever seen, kind of like a slimey loofah: A tubey, worm-like enemy that sucks up Link's tunics and shields. It can be killed with arrows (which will keep it at a distance so it can't eat your gear) or a sword. It will give back the items it ate when you kill it. Just don't leave the room or you'll lose your gear and have to re-purchase it.
- Door Mimic
A deceiving enemy that poses as a door, but falls on you if you try to open it. It is distinguished by the fact that it sticks out from a wall. A bomb will eliminate one.
- Flare Dancer
The mini-boss of the dungeon. Only two exist. "Its flaming clothes must be extinguished before it can be damaged." Throw a bomb at it to get the middle to drop, then whack it with your sword. Another, possibly easier way is to use the hookshot on him when he still dances on the spot. This will drag him towards you and you can slash him with your sword. The Spin attack does a lot of damage. It will run away from you in a circle, but you can change direction to cut it off or use the hookshot to reel it back in. It will jump into the flames again a few more times when it gets away, and get faster each time. It also changes color for the amount of health it has. Red is around full, blue is middle, and green is when its almost dead.
- Subterranean Lava Dragon
- Volvagia
The boss of the Fire Temple. The dragon that was sealed away with the Megaton Hammer, and revived by Ganondorf. It can be defeated by hitting with the Megaton Hammer each time it pops out of a lava hole, then slashed with a sword. It eventually becomes unpredictable and will pop out randomly. It can also breathe fire and pummel you with rocks. To avoid being pelted with either attack, cling onto the edge of the platform during each attack. You can also shoot arrows at it when in air to get it to come back down faster.
Ice Cavern
edit
- Freezard
An enemy made entirely of ice. It has the power to freeze you with its cold breath. Din's Fire is very useful against it, but your sword works as well. Freezards pop out of the ground when they attack, which is distinguished by a sudden rise of fog, allowing you to predict where they'll appear.
- Bewitched Pot / Flying Jar
Pots that easily pose as harmless ones, but they fly at you when you get near them. They break once they hit the ground, or hit your shield if you block them. They may have something inside that could be of use to you.
- Ice Keese
Keese that have come into contact with Blue Fire become these. They have the power to freeze you for a while. Unlike Fire Keese, they don't lose their power after attacking. A long-range weapon like the Fairy Bow is good to use on them.
- White Wolfos
A large Wolfos with white fur and red eyes that has double the strength of a normal Wolfos. Its back is its weak point like a regular Wolfos. It will die quickly if you jump-slash it in its back enough times when you get the chance.
Water Temple
edit
- Spike
A metal ball with sharp spikes that rolls toward you. When hit with the Hookshot or your shield, it becomes a vulnerable rock you can attack from a distance.
- Shell Blade
A clam with teeth on its back. When you get near it, it will open its vulnerable mouth. Use the Hookshot or Fairy Bow on its mouth to kill it. Use your shield to avoid its teeth.
- Dark Link
A very formidable foe. This is a doppleganger version of Link. He blocks almost every sword attack, jumps onto Link at times to attack, and shifts his position whenever he gets hit. Because of this, the best weapon against him is the Megaton Hammer, since you (and therefore he) cannot block with this, and he cannot imitate it. You could also use Din's Fire, when Dark Link gets near you, but you'll want to bring at least 1 green potion. He takes many hits to defeat and can cause a lot of damage, so you'll probably want to have at least 1 fairy. The Hookshot also has a great usefulness on this mini-boss.
- Giant Aquatic Amoeba
- Morpha
The boss of the Water Temple. It is a pink nucleus that swims through the waters of Lake Hylia it stole. It can manipulate water and form it into a tentacle. It can cause damage to Link if a tentacle hits him, but the damage is much more lethal if it is actually able to grab Link and thrash him around. If you latch onto Morpha with the now-upgraded Longshot, you can pull it out of the water and to you to hit it. After a while, Morpha creates two tentacles at once to avoid.
Bottom of the Well
edit- Giant Green Bubble
A larger than normal Green Bubble that stalks the corridors of the well. It does not remain stationary like its normal kind and is harder to avoid. It is the only one you'll face.
- Gibdo
Gibdos are very similar to ReDead, since they shriek if they make eye contact with you and go to any Gibdos with them that die, but are wrapped in bandages and do not crouch like ReDead. Gibdos attack anyone who bothers them, and are a lot more unforgiving than ReDeads when they drain the life out of Link, taking away 1/2 of a heart per second. They freeze when you play the Sun's Song.
- Dead Hand
A twisted mini-boss that has several hands sticking out of the ground. If you get too close to one, it will grab you and hold on. If that happens, Dead Hand will reveal his body and close in to attack. You can get out of a hand's grip by moving the Control Stick, but killing a hand is pointless because another one soon takes its place. The only way to defeat Dead Hand is to wait for his head to bend down to attack and slash it quickly. Dead Hand can also burrow back into the ground and churn up dirt that can injure you if it hits you.
Shadow Temple
edit- Big Beamos
A slightly bigger Beamos that needs to be bombed twice in order to defeat. It can resist bomb explosions with its stronger armor.
- Fake Eye Switch
An eye switch that shoots fireballs at you when you approach it. One hit to its eye with an arrow will defeat it, but only when the eye is open.
- Phantom Shadow Beast
- Bongo Bongo
- An evil shadow spirit that hides his body in the shadows and attacks with his hands. You must first stun his hands, then use the Lens of Truth to see his body and quickly shoot him in the eye before he is vulnerable to sword attacks. You can also use Ice Arrow on hand to get it to smash his frozen hand free which will automatically get to where you can stun eye without him running into you.
Gerudo's Fortress
edit- Gerudo Guards
Spear-wielding Gerudo that will capture you if they see you. You can pick them off with arrows or stun them with the Longshot, but you can in fact also use close-combat weapons on them, such as the Biggoron's Sword. Once you get the Gerudo's Membership Card, they are no longer your enemies.
- Gerudo Prisoner Guards
Only four are encountered in the game. They are much more skilled than the other Gerudo Guards because they have one purpose: to make sure prisoners don't escape. They wield two scimitars and are trained to block several sword attacks. The deadliest move in their arsenal is their spin attack, which is used to knock out the toughest enemies and capture them. The easiest and quickest way to defeat them is to use Biggoron's Sword.
Gerudo Training Ground
edit
- Dinolfos
These beasts are Lizalfos that have evolved for battle. They take more hits to kill and cause more damage with their swords, and can be very elusive. An easy way to beat them is: Deku Nut, Jump Attack, Deku Nut, Jump Attack, repeat until dead. This works on Majora's Mask, as well.
Haunted Wasteland
edit
- Leevers
Small creatures that burrow out of the ground and attack in one direction. Most of the time, you'll be attacked by a group of Leevers, which makes it hard to escape them all. It's simple to just run past them, but if you want to make it to safety without getting hurt, use Nayru's Love.
- Purple Leever
If enough Leevers are killed, this bigger and more dangerous Leever comes out of the ground. Unlike other Leevers, it can change its direction to attack you. However, its body is slower and much more sluggish than normal Leevers because of its bigger size.
Spirit Temple (Young Link)
edit
- Anubis
A dog-like mummy that hovers around narrow space and shoots fire at you if you approach it. They move just as you do (if you move to the left, he will move to his left.) The only way to defeat it is to engulf it in flames. There is a puzzle in the room based on this, but Din's Fire or Fire Arrows will also work.
- Iron Knuckle (Silver)
A dangerous, armored behemoth mini-boss that wields a deadly axe. If you get clobbered by one, you'll take a lot of damage, so you might keep a Fairy or Red Potion with you. The best way to defeat it is with hit-and-run sword tactics to dodge its axe. Biggoron's sword is best because it's so powerful, which means you can take him out much more quickly. After several hits, the chest plate it wears will tumble off, and the Iron Knuckle will become more agile, but vulnerable to Deku Seeds or arrows. If you hide behind a pillar and let him smash it, hearts will fall out (Rupees if you have full health).
Spirit Temple (Adult Link)
edit- White Bubble
This is the fourth and final type of Bubble you'll encounter. It drags a small white flame with it as it moves, then stops to spin. As it spins, hit it with an arrow or the Longshot to make it vulnerable to your sword.
- Iron Knuckle (Nabooru)
This Iron Knuckle is the strongest one you'll face. It has a lot more health than normal and stronger armor than the rest. The axe it holds also proves more powerful. The only way to defeat it is with your sword, or bombs.
- Sorceress Sisters
- Kotake and Koume
These two witches are the bosses of the Spirit Temple. Kotake attacks you with ice, and Koume with fire. To defeat them, you must deflect the attack of one sister with your Mirror Shield and aim it at the other sister. Z-targeting is very helpful here. Use it to target the sister who's firing first, and then quickly target the other when she flies by to hit her. After a few hits, they will combine into Twinrova.
- Sorceress Sisters
- Twinrova
This is the form Kotake and Koume take when they combine into one. Twinrova holds two wands of fire and ice that you must avoid. To defeat her, you need to block three attacks of the same kind with the Mirror Shield, which will then be released as one big attack. Get close to Twinrova when this happens and aim the shield at her so she gets hit with her own attack. Then, you'll be able to use your sword on her.
Ganon's Castle
edit- Iron Knuckle (White)
There is only one you face, and it is part of the final defense of Ganon's Castle. It has a little more punch to its axe, and is paired up with the stronger Black Iron Knuckle.
- Iron Knuckle (Black)
This Iron Knuckle takes the place of the White Iron Knuckle in case it falls in battle. It has even more power to its axe, and is the only one you ever encounter as well.
- Great King of Evil
- Ganondorf
Ganondorf is the final boss of the game, and the most dangerous. To defeat the evil king, you must send back the magic attacks he sends at you which can destroy the non-metal platforms by swinging your sword until he is hit, then strike him with a Light Arrow. After that, you can strike him down with your sword. When Ganondorf is low on health, he'll use his ultimate magic attack on you, which you can stop with a Super Spin Attack, or just avoid it by using a Light Arrow on him before he fires the attack. The Biggoron's Sword is best for this, because it has a longer range when deflecting the magic attack and is more powerful than the Master Sword. If you're running low on health or magic, just drop down (rolling will stop you from getting hurt) and break some pots.
- Ganon
The final form of the final boss, Ganon, is a giant monster wielding two large swords. At the start of the battle, you lose the Master Sword, and you must use the Biggoron's Sword or Megaton Hammer instead. You can strike his head with a Light Arrow or Deku nut to stun him or run under him to reach his tail. You have to strike Ganon's tail until you have a chance to get the Master Sword. When you do, Ganon will move faster than before, but the strategy is the same. Even when you get the Master Sword back, though, it's faster (and uses fewer Light Arrows, and therefore conserves magic) to use the Biggoron's Sword; however, once Zelda has him held down, the final blow must be delivered by the Master Sword. If you run out of magic, lead Ganon to a pillar and go behind it to make him smash it to reveal bombs, hearts, arrows, magic jars, or faries. When Ganon is defeated, you'll be treated to the ending.
Glitches
| |
A Wikibookian has nominated this page for cleanup because: Standardize headers and alphabetize/group the glitches somehow You can help make it better. Please review any relevant discussion. |
| A Wikibookian has nominated this page for cleanup because: Standardize headers and alphabetize/group the glitches somehow You can help make it better. Please review any relevant discussion. |
Here you can find information relating to all of the tricks and glitches in The Legend of Zelda: Ocarina of Time.
Biggoron Sword early
edit- Does not work on 3DS.
- Only works for the N64 version 1.0 and 1.1.
After having thawed King Zora as an adult, you can hold down R during the text. If you do, King Zora will give you the eyeball frog instead of the Zora Tunic. After having done this, he will not give you the Zora Tunic unless you warp (the game will give you the prescription after you warp), then show him the prescription holding R again. Doing so will let you keep the prescription, but get the Zora Tunic as well, skipping everything before the prescription.
21+ hearts
edit- Versions verified: not N64, possibly 3DS. This may only work in older versions. If someone gets it to work, please verify your version of the game (both the console it is on, and the version number of the software and/or the serial number of the cartridge).
First, wait until it is just turning night, then go to the graveyard and have dampe dig a hole on the dirt spots on the ground. There is a 30% chance for you to get a heart piece, but you can get this heart piece as many times as you want! However, if you leave before getting the heart piece when it is on the ground, you can never get it again. Try pulling back the grave with flowers in front of it. Then go in and out of the graveyard over and over again. Have dampe dig up the dirt right by that grave, then pull the grave back again.
Use items as Ocarina
edit- Availability: Does not work on 3DS.
First, catch a bug or fish. Then do a backflip and while in midair, press the button for the bottle and for the item you want to use (recommended items: Deku Stick, boomerang.) DO NOT USE WITH DEKU NUTS, LENS OF TRUTH, OR ITEMS WITH 0 AMMO. This will replace them with the bottle. You can play the item like an ocarina including the special ability songs. (Warp songs, Saria's Song, ect.)
Unlimited Gold Skulltulas
editOnce you have bombs, the boomerang and The Song of Storms you have the possibility of reaching 100 or more Gold Skulltulas.
Warning: In some versions of the game, this glitch is difficult or impossible to do. For example: in the 3DS version, the game counts the Skull Token as having been collected as soon as the boomerang reaches it, not allowing Link enough time to reach the portal out, thus rendering the glitch entirely impossible. If you jump back into the hole after retrieving the Token, the Gold Skulltula will have been replaced by a regular Skulltula.
|left
Do the following as many times as you like:
- Go to Hyrule Castle as a child and avoid the guards. Go to the lone tree (near where you wake Talon).
- Play the Song Of Storms in the vicinity of the tree and a hole will appear; jump inside the hole to find a Gold Skulltula within one of the walls.
- Kill the Gold Skulltula, but do not yet get the coin.
- Select the coin it leaves behind with the Z targeting system.
- Position yourself close to the portal that takes you out of the hole.
- Use the boomerang; after the boomerang has caught the coin, back flip into the portal that brings you back up to the tree.
- If you have done this correctly you will find that your Gold Skulltula count has gone up, but if you return to the grotto in the hole you will find another Gold Skulltula there.
If you haven't done it correctly and you don't find another Gold Skulltula there, reset the game (without saving) and try it again. Otherwise, you won't be able to repeat this glitch.'
This glitch is still active for the Wii Virtual Console version, but not the 3DS version.
Master Sword as Young Link (3DS only)
editTo use the Master Sword as Young Link you must get the Kokiri Sword, but do not equip it! If you equip the Kokiri Sword, you cannot do this glitch unless you reset the game without saving. Get the Kokiri Sword and go out to the maze of fences that are right outside of the cave that you crawl through. L-Target the rock farthest from you, then repeatedly press B. Do this until you are holding the Master Sword backwards with both hands. The sword can deal damage, but Mido won't let you through to the Deku Tree, even if you have a shield. This glitch lasts until you save and quit, quit, or equip the Kokiri Sword.
More bottles
editThis glitch allows you to turn any unwanted items into a bottle! The Claim Check, after it has been used, is ideal for this. The Claim Check also happens to be right next to the other bottles in the inventory.
First equip a bottle and find something you can put in it (bugs, fish, fairies, water, and so forth). Press the appropriate C button to make Link swipe at it, then hit Start immediately after. Swap an item you do not want any longer (again, the Claim Check) onto the C button of the bottle in use.
Now hit Start again and Link will finish his swipe. If timed correctly, at the end of the grabbing animation he will be holding another bottle! The C button icon, for the button that was reassigned, will change to a bottle.
- Downsides
- Fairies caught in these fake bottles will not revive you when you are killed.
- The item you replace is gone forever, so it is definitely not advisable to even experiment on an important item, let alone save your game after one is replaced. There is no way to retrieve a replaced item, unless you use Gameshark codes, so be careful.
- The fake bottle will only work for Young Link or Adult Link, depending on who performed the trick (i.e. if you create the bottle while playing as Young Link, Adult Link will not be able to use the fake bottle and vice versa).
However, if you replace the deku nuts or deku sticks when they are not at maximum capacity you can get them back. Make sure you do not have a full number of these items when replacing them. To get the item back, simply buy or find more of that item.
Besides the obvious items, make sure that you don't ever make a bottle out of a bombchu.
- Different method for the 3DS version
This glitch is possible in the 3DS version, however, it requires a slightly different method than the original way:
- Set an empty bottle to a button (e.g. X.
- Set an item to be replaced (e.g. the claim check) to Y.
- Catch a bug or fish in the bottle (do not put the bottle away!).
- Perform a back flip (Down|Cpad{{plusA) and during the flip press the buttons that you set the items to (e.g. in this case, X and then Y) before you hit the ground and you will drop the fish/bug and the claim check is now a bottle.
This method also works in the N64 version, so you can use this if you're having trouble with the other way.
Note: if you do the 3DS version of this method with a pair of boots, the game will equip the boots and when you use the item it stays the same picture. When you unequip & equip it back it will work normally. Also, the items in the bottle stay inside permanently.
Use weapons on Epona
editTo use any weapon on Epona first lose the Master Sword. The easiest way to do this is by letting Ganon knock it out of your hands and then save and reset.
Once you've reloaded Link should have no sword at all and the green button should be empty. Play Epona's Song and ride Epona, then equip whatever C-button items you like and use them. Don't use the Hookshot/Longshot while doing this, though, as it messes with the clipping detection and you may end up being pulled through objects.
You can still get the Master Sword back though, simply re-equip it through the menu or go back in time.
Another method is during the battle with Ganon, after he knocks the sword out of your hands, simply do the 'play <insert item> as ocarina' trick, and warp away.
First-person Epona view (3DS only)
editPerform the Swordless Link glitch, and then the "Items on Epona" glitch with Din's Fire. The game will lag, and Link will fall off the horse and preform Din's Fire. As you can see, Link will not be on Epona and as he walks, Epona copies him. You can warp back with the A button and you can also go into first person view if you use Din's Fire a second time.
Fall through walls
editPark Epona where the left side is flat against a wall. When Link hops off he may fall through the wall. This will not always work.
Pass through things (cartridge only)
editThis glitch requires messing around with the cartridge itself, and thus will not work on the GameCube or Wii, there is a very slight chance that it may work in the Nintendo 3DS version, although it is highly unlikely, and is still not recommended. Performing this glitch also gives a chance of damaging the saved games, cartridge, or the N64 itself, and should be performed only after knowing and consenting to these risks.
When you come to something blocking your path (the Kokiri barring your way at the start of the game, for example) pull up slowly and gently on the left side of the cartridge. If done correctly the screen image will become messed up. If you move forward while like this you can pass through people and destructible objects. This allows you to complete certain portions of the game without ever getting the Kokiri Sword.
Similarly, it has been confirmed on the GameCube version that you can put a crate down next to you in Jabu Jabu's belly and your body will go right through it! But when you walk out of the crate you can't get back in it so repeat the process and enjoy a cool glitch. Note: this could make some items optional, since you can bypass puzzles/requirements with it.
Use the Lens of Truth without depleting magic
editPlay the Song of Storms, then use the Lens of Truth the moment you regain control. If done correctly the magic meter's border won't flash and no magic will be used.
Another method of doing this, is to equip and unequip the lens by quickly pressing the button its assigned to. this will give you the effect of the lens, without using magic. This glitch also works on the 3DS version.
Roll through spiked blocks
editCertain dungeons (such as the Ice Cavern) feature sliding spiked blocks. While rolling you can actually pass through them. (This is NOT a glitch. The is part of the roll attack's ability to avoid taking damage.)
Gerudo Fortress as Child Link
editNear Gerudo Fortress, there is a Cucco in front of the bridge. Grab it, and stand on the small wooden post supporting the bridge. Face the gate, and run forward; if done correctly, you should make an upward jump. Next, you will need to grab hold of the gate by releasing the Cucco at the right time.
Pass outer wall of Ganon's Castle
editRight after you get the rainbow bridge to appear, spanning the gap to Ganon's Castle, you can jump onto a ledge that's just off to the right as you head to the entrance of the castle. Once on the ledge, you can take out the Hookshot and turn towards one of the pillars that's connected to the wall just to the right of the entrance and fire the Hookshot so that it hits just near the top and just behind the outer wall and it will take you to the other side of the outer walls of Ganon's Castle.
Infinite Sword Glitch
editFind an item to interact with (or if none is available, light and drop a bomb.) Without Z-Targeting, hold r and press b. While making quick stabs, press a to interact with the object. If you are successful, you should still see a sheen on the weapon you are using either in the scene or as it's sheathed.
If you used the bomb, throw it quickly to avoid taking damage, then use Z-Target to perform a backflip; draw your sword during this flip. The game will treat your sword as attacking as long as you don't take damage and avoid sheathing or swinging your weapon.
In Ocarina of Time, Z-Targeting will behave unusually while the glitch is active; you will remain in Z-Target mode until the glitch ends, or if you switch into First-Person View. You can't jump off cliffs, either.
Bottom of the Well Early Glitch
editThis trick allows you to acquire the Lens of Truth early in the game. Get a Cucco in Kakariko Village, and go near the windmill where Guru-Guru is playing the Song of Storms. Stand on the steps and jump/hover with the Cucco to reach the rim of the well. Throw the Cucco to the other side of the rim. Quickly Z-target the Cucco and do a sword lunge. If you hit the Cucco, it will call other Cuccos to attack you. You should see yourself at the bottom of the water filled well. Then, when the Cuccos start to attack you, you are inside the well. Since it is filled with water, you will begin to float up. Quickly head for the entrance of the Bottom of the Well. If done correctly, you will fall to the floor and into the dungeon.
Hidden Nayru's Love
editWhen you have Nayru's Love active, you can play a warp song on your Ocarina to hide it. Play Scarecrow's Song to allow casting magic again, and play a non-warp song to restore the shield. When the shield is hidden, it will not protect link, but it's duration will be extended. It's most effective use is in defeating Dark Link; however, this requires exploiting a glitch to reach the Desert Colossus without the longshot.
Swimming Backwards
editAt Lake Hylia, as a child, you can swim backwards through the water. Stand on an island and Z-Target, just don't focus on anything. Go backwards until you land in the water. Keep holding Z, even when you fall in the water. While you are holding Z, you can swim backwards by moving the control stick backwards.
Underwater Glitch
editIf you explore the areas of the Water Temple from underwater and Z-Target an enemy in a narrow room from a corner, the view may go beyond the temple walls and reveal a pink texture from outside. Strangely enough, the muffled effect of sounds underwater and the water itself can disappear if you direct your view from the right angle.
Fishing Minigame glitches
editUse every item everywhere / broken camera (3DS only)
editIn order to execute this bug, you need an item that can be used within that area (e.g. a bottle or some footwear) and another item that doesn't work there. Now do the following:
- Place one of those two on X, the other one on Y.
- Close the item screen and reopen it
- Switch the X and Y items
- Close the items screen and keep on pressing the button that now has the item that is disabled in the area.
- If done correctly, you should have used the item, which is disabled at this time
You can further mess with the game, when using Farore's Wind in areas with a fixed camera (e.g. Market Town Plaza). Create a warp point using the method from above and warp to it once again (you can use a dungeon to warp to it). In certain places, you will have your regular camera instead of the fixed on in that location.
Known places this works are the Market Town Plaza (adult only), Back Alley, path to the Temple of Time and at the draw-bridge. The camera will be forced again when it normally switches to another angle (e.g. Back Alley, path to the Temple of Time).
Getting Epona without riding Epona or having Epona's Song (3DS only)
editStart the race against Ingo with your standard slow brownish horse and race until you are at the shack. Wait till the clock reads around 00:28 and continue your race. Ingo will never cross the finish line as he simply disappeared. With this method, you can win both races against Ingo without riding Epona.
Swordless Link (3DS version)
edit- Use the above method to create a warp point outside Ganons Castle, then fight Ganondorf and eventually Ganon until you lose your master sword in the final fight
- Then after you lose your sword, use the above method again to warp away from the battle, you will be missing your sword
- Have fun! as all glitches associated with the swordless link glitch still work (Items on Epona.etc.)
If you do a warp point inside Ganon's castle it will say "Oh no the thing you were going to deliver spoiled" or the game crashes.
Adult Link in Jabu-Jabu's belly (3DS version)
editAs Adult Link, go to Zora's Fountain. On the ice ramp where Jabu-Jabu used to be, there is a sharp corner in the ice: walk on the left side of this point going down the ramp without slipping into the water. You can do everything in this dungeon Young Link could, even walk into the light crystal at the end of the dungeon (boss room).
First-person View (3DS Version)
editTo perform this glitch, Use the weapons on Epona glitch. Then, use Dins Fire. When you fall off Epona, press the button the bow is assigned. You'll hear a strange sound. Use Dins Fire again. When the dome is complete, you'll see from link's point of view.
If you want to return to normal press A. You'll appear on Epona. By Doing this, the glitch will end.
Mega flip (3DS only)
editUsing this glitch Link can back flip twice as far. This can be used to leap large gaps that would normally not be possible.
To do a mega flip, go to the place that you want to jump and turn around (180°). Drop a bomb at Link's feet and wait for it to explode. Right when it explodes, perform a back flip (Down|Cpad{{plusA).
Miscellaneous glitches
editRandom just-for-fun glitches.
Fado looks down on you
editAs a child, go up the ramp around Saria's house and across the bridges to the blonde girl (FYI: her name is Fado) Go right at the ledge and talk to her. Link will fall off and the camera will show Fado looking down at Link.
Ignore Darunia
edit- Note: This must be the first time you meet Darunia.
Face away from Darunia. Use your boomerang, but before you catch it, play Saria's Song. While Darunia dances, Link will be "ignoring" him.
Hookshot dot
editTarget something (sign, enemy, etc.) and aim with your hookshot. Then backflip and use your shield to defend in midair. If performed correctly, the Hookshot dot will stay on the screen and wobble on the ground as Link walks. Note: Can be fixed by leaving the area.
Get Epona stuck and make Link invisible
edit- Versions tested: Wii.
Ride Epona to Gerudo Valley and cross the bridge. Ride Epona into the tent at an angle (this takes patience and time.) Keep doing it until Link enters the tent. (He won't be on Epona anymore.) Warp to Lake Hylia and there will only be Epona. She cannot leave the platform, so wait until she stops moving and get off. The camera will follow the motion as if Link is getting off. Link is now invisible and can take no damage. It will be difficult to pinpoint Link's location, but he usually is around the center of the screen. You cannot attack with your sword, but bombs will appear on the ground if you use one. Arrows and first-person view originate from under Epona. DO NOT USE THE HOOKSHOT/LONGSHOT!!! It will just continue off the screen and you will have to reset. If you leave, the glitch will be fixed, however, Epona is still stuck on the warp platform. Just leave and sing "Epona's Song" to fix that.
Get Navi stuck
edit- Versions tested: Wii.
Go to the Temple of Time. Go onto the middle step next to the three spiritual stones and walk onto the altar. Go in between the Goron's Ruby and Zora's Sapphire. Read the inscription, then play Saria's Song. Select "Talk to Saria." If done correctly, it will only show the first part then stop. You can then walk off the altar with Navi still floating there. The glitch will end if you leave, warp, or go to the past/future. Navi will turn green when you walk back up to the altar, and once you walk away from Navi the background grows dark.
Look through a cow
edit- Versions tested: Wii.
Walk straight up to a cow. Go forward until Link's face passes through the cow's. Go to first-person view. If done correctly, you should be able to see the "inside" of the cow.
In-place rolling
edit- Versions tested: Wii & 3DS.
Line up with any wall, then L/Z-target onto it, straight ahead. Then, hold forward on the analog stick and tap the A button. After hitting the wall, Link should roll in place. He can roll at least 1-4 times in a row. uncommonly referred to as 'The Spindash Glitch'.
Ocarina Songs
There are many songs that you can play on the Ocarina of Time. Some of these are needed to complete the game, but it is possible to play other songs as well.
Playing songs
edit
To play Ocarina songs, press the C button it is equipped to.
For the GameCube controller, you can use the C-Stick and/or X, Y, Z to select the items.
The Wii Classic Controller uses the Right Control Stick, X, Y, and/or ZL/ZR to select an item.
On the Nintendo 3DS, there is a button on the Touch Screen for using Ocarina.
Use the A button and the C buttons (N64) / C-Stick (GCN) / Right Stick (Classic Controller), L, Y, X, and R (3DS) to play notes.
Holding R (or Up on the D-Pad) makes the note sharp, and holding Z (L for GameCube and Wii releases and Down on the D-Pad for the 3DS release) makes the note flat. The left Control Stick gradually raises the note to its next higher note, and tilting Down on the Control Stick dips it to the next lower one. Tilting left and right on the control stick gives the note a vibrating effect.
Song list
editZelda's Lullaby
editUse any time you see the Triforce, the Royal Family Crest, or when you need to establish yourself as a messenger of the Royal Family. For example, when this song is played while standing on the Triforce-shaped crest in the Kakariko Graveyard, the Royal Tomb will open, allowing entry. Playing the tune in front of Darunia's room in Goron City will open the door into his room. Playing this song on the crest at the end of the Zora's River will reveal the entrance to Zora's Domain behind the waterfall. In Great Fairy Fountains, play them on the Triforce symbol and a Great Fairy will appear. If you break a sign and play this song, the sign will be restored. Playing this song near Gossip Stones (one-eyed statues) causes rejuvenating fairies to appear.
- Nintendo 64: C-left, C-up, C-right, C-left, C-up, C-right
- Nintendo GameCube: C-Stick (left), C-Stick (up), C-Stick (right), C-Stick (left), C-Stick (up), C-Stick (right)
- Wii Classic Controller: Right Stick (left), Right Stick (up), Right Stick (right), Right Stick (left), Right Stick (up), Right Stick (right)
- Nintendo 3DS: X, A, Y, X, A, Y
Epona's Song
editUse in Hyrule Field to call Epona to your side (does not work as Young Link). Also, playing the song near a cow will earn you a bottle full of free milk (assuming you have an empty bottle).
- Nintendo 64: C-up, C-left, C-right, C-up, C-left, C-right
- Nintendo GameCube: C-Stick (up), C-Stick (left), C-Stick (right), C-Stick (up), C-Stick (left), C-Stick (right)
- Wii Classic Controller: Right Stick (up), Right Stick (left), Right Stick (right), Right Stick (up), Right Stick (left), Right Stick (right)
- Nintendo 3DS: A, X, Y, A, X, Y
Saria's Song
editUse anywhere to talk to Saria. Saria will give you a hint as to where you should proceed next. For example, after obtaining the Goron Ruby from the Gorons, the only way of knowing to visit the Zoras for the Zora's Sapphire is to talk to Saria. Also used to cheer up the Goron Elder Darunia before entering the Dodongo's Cavern and to get Mido to let you through the Lost Woods as an adult.
- Nintendo 64: C-down, C-right, C-left, C-down, C-right, C-left
- Nintendo GameCube: Z, X, Y, Z, X, Y
- Wii Classic Controller: ZR, X, Y, ZR, X, Y
- Nintendo 3DS: R, Y, X, R, Y, X
Sun's Song
editAny time you can see the sky (ie., not in a dungeon), play this song to switch between day and night. After playing this song, the game will proceed from either 12:00 noon or 12:00 midnight. This song also freezes ReDeads, but only temporarily. This song can also summon a fairy if Navi turns green.
- Nintendo 64: C-right, C-down, C-up, C-right, C-down, C-up
- Nintendo GameCube: C-Stick (right), C-Stick (down), C-Stick (up), C-Stick (right), C-Stick (down), C-Stick (up)
- Wii Classic Controller: Right Stick (right), Right Stick (down), Right Stick (up), Right Stick (right), Right Stick (down), Right Stick (up)
- Nintendo 3DS: Y, R, A, Y, R, A
Song of Time
editFirst used to get into the Temple of Time. Can move blue blocks bearing the symbol from the Temple of Time. Also can summon a fairy if you play it in front of a Gossip Stone.
- Nintendo 64: C-right, A, C-down, C-right, A, C-down
- Nintendo GameCube: X, A, Z, X, A, Z
- Wii Classic Controller: X, A, ZR, X, A, ZR
- Nintendo 3DS: Y, L, R, Y, L, R
Song of Storms
editUse to make it temporarily rain and open secret grottos in certain areas. Can also summon a Red Fairy, to restore all of Link's health and Magic Power, if Navi turns green around an area.
- Nintendo 64: A, C-down, C-up, A, C-down, C-up
- Nintendo GameCube: A, C-Stick (down), C-Stick (up), A, C-Stick (down), C-Stick (up)
- Wii Classic Controller: A, Right Stick (down), Right Stick (up), A, Right Stick (down), Right Stick (up)
- Nintendo 3DS: L, R, A, L, R, A
Minuet of Forest
editUse to warp to the Forest Temple in the Sacred Forest Meadow.
- Nintendo 64: A, C-up, C-left, C-right, C-left, C-right
- Nintendo GameCube: A, C-Stick (up), C-Stick (left), C-Stick (right), C-Stick (left), C-Stick (right)
- Wii Classic Controller: A, Right Stick (up), Right Stick (left), Right Stick (right), Right Stick (left), Right Stick (right)
- Nintendo 3DS: L, A, X, Y, X, Y
Bolero of Fire
editUse to warp to the Fire Temple at the summit of Death Mountain.
- Nintendo 64: C-down, A, C-down, A, C-right, C-down, C-right, C-down
- Nintendo GameCube: Z, A, Z, A, X, Z, X, Z
- Wii Classic Controller: ZR, A, ZR, A, X, ZR, X, ZR
- Nintendo 3DS: R, L, R, L, Y, R, Y, R
Serenade of Water
editUse to warp to the Water Temple at Lake Hylia.
- Nintendo 64: A, C-down, C-right, C-right, C-left
- Nintendo GameCube: A, Z, X, X, Y
- Wii Classic Controller: A, ZR, X, X, Y
- Nintendo 3DS: L, R, Y, Y, X
Requiem of Spirit
editUse to warp to the Spirit Temple at the Desert Colossus.
- Nintendo 64: A, C-down, A, C-right, C-down, A
- Nintendo GameCube: A, Z, A, X, Z, A
- Wii Classic Controller: A, ZR, A, X, ZR, A
- Nintendo 3DS: L, R, L, Y, R, L
Nocturne of Shadow
editUse to warp to the Shadow Temple in the Kakariko Graveyard.
- Nintendo 64: C-left, C-right, C-right, A, C-left, C-right, C-down
- Nintendo GameCube: Y, X, X, A, Y, X, Z
- Wii Classic Controller: Y, X, X, A, Y, X, ZR
- Nintendo 3DS: X, Y, Y, L, X, Y, R
Prelude of Light
editUse to warp to the Temple of Time in Hyrule Castle Town.
- Nintendo 64: C-up, C-right, C-up, C-right, C-left, C-up
- Nintendo GameCube: C-Stick (up), C-Stick (right), C-Stick (up), C-Stick (right), C-Stick (left), C-Stick (up)
- Wii Classic Controller: Right Stick (up), Right Stick (right), Right Stick (up), Right Stick (right), Right Stick (left), Right Stick (up)
- Nintendo 3DS: A, Y, A, Y, X, A
Scarecrow's Song
editCauses a scarecrow to appear that can be helpful in your quest.
The notes of this song can be composed by you. Talk to the scarecrow at Lake Hylia and play a song eight notes long. This song can be changed at any time and it is the only song that will not be recorded with the others on the Quest Status screen.
Frog mini game
editAs a child, you can play songs to the frogs in Zora's river for rewards (such as two pieces of heart). Please see the Minigames page for more details.
Places
| This page may need to verify facts by citing reliable publications. You can help by adding references to reliable publications, or by correcting statements cited as fact. |
This is a list of fictional locations in the video game The Legend of Zelda: Ocarina of Time. Some of these are dungeons within the game and others are areas that are simply a region. They are listed in alphabetical order and can be navigated by lists below.
The locations are reached in this order (dungeons in bold) per the official Nintendo walkthrough:
Optional: Lon Lon Ranch, Fishing Pond, Gerudo Training Ground
Death Mountain
editThis immense mountain houses the city of the Goron race, as well as Dodongo's Cavern and the Fire Temple, which lies inside the very heart of the mountain itself, and a Great Fairy near the summit. It is located near Kakariko Village, a small town. Due to its instability, rocks and boulders are often rolling around the area. When Link attempts to brave Death Mountain's eruptions as a child, some rocks track Link as he runs and cannot be dodged. This is not the case seven years later. The area is rich in a plant called the Bomb Flower that the Gorons call their "special crop". The slopes of this Hyrulean landmark are infested with Red Tektites - a spider-like creature - and many Gold Skulltula prizes. Death Mountain is a frequently recurring area in the Zelda world. The first version of it appeared in the original The Legend of Zelda.
Desert Colossus
editLocated in western Hyrule, this is a desert area which arguably isn't as volatile as the Haunted Wasteland, and is home to an oasis, a giant statue of a Gerudo goddess, and the Spirit Temple, Ganondorf's headquarters. A Great Fairy fountain is also found hidden within a cracked wall. Leevers, dangerous cactus-like tunneling enemies, constantly roam the area in daylight. It is possible to complete the Desert Colossus before completing the Shadow Temple. (use the Longshot to get across the sand on the first section of the Haunted Wasteland!)
Gerudo Valley
editGerudo Valley is accessible from west Hyrule Field. The valley is divided by a large chasm; at the bottom of which is a river, which leads into Lake Hylia. If Link goes there as child, he can't get to the other side because of the Gerudo guard blocking his path. He can, however, grab hold of a Cucco and glide down to a small riverbed at the bottom of the canyon to find a Gerudo woman, a cow, and soil for planting magic beans. When Link is an adult, the bridge has been destroyed, and Link must use the longshot or Epona to get to the other side. Once Link rescues all the carpenters from Gerudo's Fortress, they will rebuild the bridge.
Goron City
editGoron City is located in a cave near the top of Death Mountain in the northeast corner of Hyrule. It can be accessed by climbing the Death Mountain Trail from Kakariko Village. Within the city itself, a series of boulders in one alcove can be shattered to create a pathway to a teleport to the Lost Woods in Kokiri Forest. Goron City is inhabited by the Gorons and ruled by their chief, Darunia. It contains a number of shops and a giant spinning vase. When a bomb is thrown correctly into the vase, rupees appear depending upon which face the vase stops on. In the center of Goron City is a platform suspended by ropes where the Goron Ruby was once displayed. When Link becomes an adult all the Gorons, except Darunia's son (who is named after the player) and the store clerk, have been captured by Ganondorf to be fed to Volvagia, the dragon boss of the Fire Temple. In Oracle of Ages and Oracle of Seasons, there are Goron Cities in Holodrum and Labrynna, and in Termina in Majora's Mask. Goron tribes are featured elsewhere as well, such as in Four Swords Adventures. Gorons are almost completely absent from The Wind Waker, and the game does not directly explain their absence; the only Gorons seen in the game are three traveling salesmen wearing hats that cover their faces (although these can be blown off with the Deku Leaf). The Gorons in Twilight Princess are significantly larger and more aggressive than their previous versions. They refuse Link entry to Death Mountain until he proves his worth by defeating their leader in a sumo wrestling match.
Haunted Wasteland
editThe Haunted Wasteland is located to the west of Gerudo Valley and only accessible through a gate kept by the Gerudo. The area is very dangerous and in order to cross it, Link must complete two challenges. The first is the 'River of Sand'. Link must use the longshot to get to the other side or risk being swallowed by the river. Alternatively, the Hover Boots can be used to walk across it. After the river, flag posts guide Link to a platform where the second challenge--the Spirit Guide--begins. There Link must equip the Lens of Truth and follow the Poe guide through the remainder of the desert. (Players who have memorized the route are able to cross without the Lens.) Failing to adhere to this path results in getting "lost", and Link returns to the entrance of the wasteland minus some health. On the other side is the Desert Colossus, a huge statue that houses the Spirit Temple. Besides the two challenges, the desert is also home to a carpet merchant who sells bombchus.
In a certain area of the wasteland, by straying from the Poe's path a bit, one can see what appears to be a pyramid structure. During the extensive hunt for the Triforce, this pyramid was one of many points of interest for the search. It soon became apparent, though, that this "pyramid" was actually just part of the level boundary, given the triangular shape because of occlusion by the dust in the air.
Hyrule Castle
editHyrule Castle and its surrounding area is the arguably most prominent and important place in the game, housing both the Temple of Time, a town, many of the game's plot twists, and the game's final bosses, Ganon and Ganondorf. Surrounded by a small village, drawbridge, and moat, it models the stereotypical monarchial or feudalistic castle. The king of Hyrule is never seen in the game, although Ganondorf is seen inside the castle at one point, apparently bribing or otherwise influencing the king to support his plans. Along with the poor castle defense and the subsequent sack of Hyrule Castle, the entire ruling body of Hyrule is generally made out to seem powerless against him. This is a common theme throughout the Zelda games, leaving room for Link to quest and make right that which the kingdom cannot.
Most of the castle is never seen or explored. The castle courtyard, including extensive gardens, are the only areas available to explore.
Castle Courtyard
editThe castle courtyard serves several purposes, both as introducing the characters of Princess Zelda and Impa, and as a staging point for embarking on the next series of quests. One curious feature of the courtyard is the paintings of several Nintendo characters, including Mario and Yoshi, as can be seen through one window. Using the Slingshot, hitting the Mario character successfully will earn Link a red rupee. Aiming towards the opposite window will result in a bomb thrown at Link.
The Beta Quest, a game mode unlockable through usage of a GameShark, reveals the complete Triforce hidden under the courtyard. This find, although not an answer to obtaining the Triforce sought by gamers, was an interesting twist to the players' understanding of the game's original intent to make the Triforce an obtainable item. It is now known, however, that this Triforce is simply the Triforce symbol that appears on the player's hand during the game.
Market
editThe market is located in northern Hyrule, below Hyrule Castle/Ganon's Tower on the map. The only 'essential' item attainable here is the Hylian Shield. This area features a main section and a few alley ways. Several buildings are accessible (as a child), including a bazaar, the Happy Mask Shop, several houses, and some games. The Happy Mask Shop contains masks up for trade, similar to the trade sequence in The Wind Waker. The masks (and other items) are obtainable as follows:
- Keaton Mask
- Skull Mask
- Spooky Mask
- Bunny Hood
- Mask of Truth
- Goron Mask
- Zora Mask
- Gerudo Mask
As an adult, what was once the lively, bubbly marketplace is now a desolate and dark ruin. The villagers are gone, and ReDead inhabit the place. Most buildings in the market are destroyed and cannot be entered when Link is an adult. This area uses a fixed 3D perspective.
Hyrule Field
editHyrule Field is the large expanse of grassland in the very center of Hyrule, surrounded by the many places of interest in the game. From Hyrule Field, it is possible to access most areas of the known kingdom. To the north of Hyrule Field is Hyrule Castle Town. It is surrounded by a moat and can be entered by a drawbridge, which closes at night. To the west lies Gerudo Valley, over which a long plank bridge extends towards Gerudo Fortress and the Haunted Wasteland. To the northeast is Kakariko Village and Death Mountain. To the east is Zora's Domain. To the southeast is Kokiri Forest and the Lost Woods. To the south is Lake Hylia. Zora's River flows around the perimeter of Hyrule Field. Aside from Lon Lon Ranch at its center, there is little else actually in the field. There are small stands of trees in the north corner across the river and near the entrance to Kokiri Forest. A series of trails lead from Zora's Domain to Lake Hylia along Zora's River, past Gerudo Valley and Hyrule Castle Town. Another trail lies to the east of Lon Lon Ranch and another perpendicular to that. At night, when Link is a child, Stalchildren will attack anyone wandering the field, and Peahats, which inhabit the western part of the field, will attack anyone wandering during the day. No enemies inhabit the field when Link is an adult other than the Poes that can be found at specific spots throughout the field. When riding Epona, Big Poes appear at these specific locations instead.
There is no equivalent to Hyrule Field in the other games in the series, except for Termina Field in Majora's Mask, South and North Hyrule Fields (in The Minish Cap), and the Hyrule Field in Twilight Princess. Instead, the general vicinities of grassland surrounding Hyrule Castle are usually unnamed.
Kakariko Village
editKakariko is a rather peaceful village when Link is a child, and even so at times as an adult. There are several things to do here, such as collect Anju's cuccos as a child for a prize bottle, and play a shooting game in a building as an adult. After the seven-year passing, the village is affected by the monster Bongo Bongo. Also, Link can use the help of a potion lady as part of the Biggoron Sword side quest. The Skulltula House is located in Kakariko Village.
Graveyard
editAdjacent to the village is the graveyard. When Link is a child, he finds that Dampé the Gravedigger runs the Heart-Pounding Gravedigging Tour in which Link can receive a Heart Piece. It is also possible to obtain the Hylian Shield from one of the tombs towards the front of the graveyard. As an adult, Dampé the gravekeeper is now dead, although can be found in his grave as a ghost. Link races him for the Hookshot, which is essential for getting into the Forest Temple. One inaccessible ledge leads to the Shadow Temple and can only be reached by the Nocturne of Shadow. As a child, Link enters the Royal Family's Tomb and learns the Sun's Song from a gravestone deep within.
House of Skulltula
editIn Kakariko Village, there is a house in which cursed humans, turned into Skulltulas, live. To break the curse of the family, one must collect a certain number of golden Skulltula tokens (from killing certain small gold Skulltulas, for which the token serves as some sort of carapace - thus they are called golden Skulltulas). As a reward, the human whose curse was broken will each in turn give the character a different specified item:
- Adult's Wallet (10 Skulltula Tokens)
- Stone of Agony (20 Skulltula Tokens)
- Giant's Wallet (30 Skulltula Tokens)
- Ten Bombchus (40 Skulltula Tokens)
- Heart Piece (50 Skulltula Tokens)
- Unlimited Gold Rupees (100 Skulltula Tokens)
? (Windmill)
editA somewhat large windmill exists in the southern part of Kakariko Village, known as ? in the game. A man (known as Guru-Guru in Majora's Mask) who plays an instrument lives in ?. He tells the character as an adult that someone played a song that sped up the windmill in the past. He teaches Link it as an adult seven years later. The character learns this song (Song of Storms) and can play it as a kid as the windmill man said happened (in an ontological paradox). ? is also the name of Dampe's grave as it is connected to the windmill.
Kokiri Forest
editKokiri Forest is a forest east of Hyrule Field accessed by a single entrance over a bridge through the Lost Woods. It is Link's homeland. Its inhabitants are the child-like Kokiri and their fairies overseen by the Great Deku Tree. Mido is the self-proclaimed Kokiri leader. Kokiri Forest contains six buildings: the houses of Link, Saria, Mido, the Twins, and the Know-It-All Brothers, and a shop. The forest has a training area and a stream running through it. To the east of Kokiri Forest lies the Lost Woods. In the early stages of the game, when Link is a child, Kokiri Forest is a peaceful place, but when he returns in the later stages as an adult, the place has become overrun with Deku Baba, and the Kokiri inhabitants only stay indoors. Once the Forest Temple stage has been completed and the Deku Sprout appears, the area returns to normal. In The Wind Waker, after the flood, Kokiri Forest is now the Forest Haven and the Forbidden Woods. It is now inhabited by Koroks.
Major items: Kokiri Sword, Deku Shield
Lake Hylia
editLake Hylia is located in southern Hyrule. The giant body of water can be accessed by climbing on top of a wall in southern Hyrule that leads there, following the river from Gerudo Valley, or by using Epona to jump over tall fences blocking the way to the lake. There are several noteworthy places therein: a laboratory, a fishing pond, a small area beneath a tombstone, and a major island with a lone tree, connected to the mainland by bridges. The Scarecrow's Song can be learned on the lake's furrowed shores. Ruins of ivory or granite columns akin to those found at Zora's Fountain and bearing the Zora's insignia protrude from the shore like a dock stretching towards the major island. There is an entrance at the base of the central island that leads to the Water Temple, and a portal within the submerged coastal ruins which links to the waters within Zora's Domain. When Link is a child in Ocarina of Time, the lake is completely filled, but as an adult the lake is mostly drained, although rain never ceases to fall near the Water Temple's entrance. Link must traverse the temple and defeat the evil Morpha who is sustaining the lake's curse; once this boss is defeated, Lake Hylia fills again with water.
Major items: Bottle (as a child), Fire Arrows (as an adult)
Fishing Pond
editThe Fishing Pond is a fairly small area adjacent to Lake Hylia where Link may fish. There are a few secrets, including a special lure called the Sinking Lure and the ability to catch the hat of the man tending to the pond. A session costs 20 rupees. Link can receive a Piece of Heart and other items for catching a record-size fish.
The Hylian Loach, a highly elusive eel-like creature, can be found here just before dawn and just before dusk. Usually weighing at around 30-35 pounds, it dwells on the bottom of the pond if it decides to make an appearance at all.
Major Items: Golden Scale
Lakeside Laboratory
editWithin the area of Lake Hylia there is a small laboratory in which an old scientist lives. He will measure how deep Link can dive and is a part of the Biggoron Sword side quest. Using the Golden Scale while diving in the tank here will yield a Piece of Heart.
Lon Lon Ranch
editLocated in the center of Hyrule, Lon Lon Ranch is a horse and cattle ranch originally owned and run by Talon. As a child, Link can learn Epona's Song from his daughter, Malon, which calls Epona over to him when played on the ocarina. This song is useful when Link wishes to ride her as an adult in Hyrule Field and other places. When Link is an adult, Ingo, the once spiteful farmhand under Talon's employ, has become a weak follower of Ganondorf, taken over the farm and kicked Talon out, who thereafter resides in Kakariko Village. The character must beat Ingo in two horse races (which costs 50 rupees per race if Link loses) in order to keep Epona for himself and win back the ranch. Freeing Talon from his doze in Kakariko requires the Pocket Cucco from the Cucco Woman, and kick-starts the Biggoron Sword Quest.
Lost Woods
editAdjacent to Kokiri Forest, the Lost Woods are a somewhat tricky area that must be carefully passed through, since most of the paths lead back out the entrance. When Link first goes through the Lost Woods, he can use the sound of Saria's Song to guide him to the end. This ends at the Sacred Forest Meadow, where Saria teaches Link Saria's Song as a child. Within the Lost Woods are pathways leading to both Goron City and Zora's River, as well as several mini-games. The Skull Mask can be sold to the lone Skull Kid here. The character's Deku Seed Bag can also be upgraded in a simple task of slingshot target-practice.
Sacred Forest Meadow
editThe Sacred Forest Meadow is the favorite haunt of Saria. It lies in the center of the Lost Woods and can be reached by following the sound of Saria's Song. The gate to the forest maze in this area is guarded by a Wolfos. The maze is infested with Deku Scrubs when Link is a child, and Moblins when Link is an adult. Beyond the maze Saria teaches Link Saria's Song (essential to entering Dodongo's Cavern) as a child. As an adult the Forest Temple can be reached here using the Hookshot.
Zora's Domain
editZora's Domain is located in the eastern part of Hyrule, behind the Sleepless Waterfall at the source of Zora's River. Since those who dwell there, the Zora, are a secluded race, only those knowing "Zelda's Lullaby," which is generally taught only to members of the Royal Family of Hyrule, are granted passage through the waterfall and into the domain. However, Zora's Domain can also be accessed via portals within Lake Hylia and the Lost Woods. The domain itself is a rock shelter grotto formed within the cliffside and does not contain much aside from a throne room, an inner waterfall and a small shop. King Zora is its ruler, and with his permission Link can enter Zora's Fountain beyond his throne where Lord Jabu-Jabu, the Zoras' revered fish deity, resides. Link can also play a diving game at the top of the inner waterfall where he can win a Silver Scale. When Link is a child, Zora's Domain is filled with water and thriving with Zoras, but when he returns as an adult, it is frozen over and largely abandoned—only King Zora and the shop merchant remain, trapped in unnatural red ice. The Ice Cavern is accessible through Zora's Fountain when Link is an adult.
Zora's Domain may be a remodeled version of the unnamed lake at the source of the river leading to Lake Hylia in A Link to the Past. Located at the base of Death Mountain in northeastern Hyrule, this lake is home to many river Zora including an extremely large Zora whose Zora's Flippers are readily for sale and from whom King Zora may be derived.
Zora's River
editZora's River is a river running from Zora's Fountain to Lake Hylia. It flows through Zora's Domain, Hyrule Field, Hyrule Castle Market and Gerudo Valley, before finally ending at Lake Hylia. The Magic Bean salesman sits near the downstream entrance of Zora's River when Link is a child.
Dungeons and Temples
editInside The Great Deku Tree
edit- Element Theme: Wood
- Item: Fairy Slingshot
- Boss: Parasitic Armored Arachnid: Queen Gohma
- Floor Range: 2B-3F
- Sacred Stone: Kokiri's Emerald
The Great Deku Tree, lies deep within the Kokiri Forest and is the wise guardian of the Kokiri people, their forest, and the Lost Woods. Its role was to protect the Hero of Time until he was needed. The tree was cursed by Ganondorf with a parasitic creature named Queen Gohma after the Deku Tree refused to give him the Kokiri's Emerald. This curse caused the Deku Tree to die slowly from the inside, and after completing the dungeon, the Deku Tree reveals to Link that he was doomed from the curse all along, then dies.
Dodongo's Cavern
edit- Element Theme: Fire | Lava
- Major Item: Bomb Bag (holds 20 bombs)
- Sub Boss: 2 Lizardolf (x2) wel
- Boss: Infernal Dinosaur: King Dodongo
- Floor Range: 1F-2F
- Sacred Stone: Goron's Ruby
Dodongo's Cavern is the main source of food – minerals and rocks – for Gorons. It is also home to Dodongos and other lizard-like beasts. Ganondorf sealed the entrance with a boulder and made the number of Dodongos increase and summoned up King Dodongo in an attempt to weaken the Gorons and overpower them, again, mainly to gain control of the Goron's Ruby.
Inside Lord Jabu-Jabu's Belly
edit- Element Theme: Inturnal | Water
- Major Item: Boomerang
- Sub-Boss: Bigocto
- Boss: Bio-electric Anemone: Barinade
- Floor Range: 1F-1B
- Sacred Stone: Zora's Sapphire
Lord Jabu-Jabu (jä'boo jä'boo) is the protector of the Zora and their Domain. Like the Deku Tree, Ganondorf cursed him with a parasitic infestation of electric jelly fish called Biri and Bari, poison bubbles called Shabom and rock spitting Octoroks in an attempt to acquire the Zora's Sapphire. The infestation also caused Jabu-Jabu to eat Princess Ruto who had the sapphire with her.
Ice Cavern
edit- Element Theme: Ice
- Major Item: Iron Boots
- Sub-Boss: White Wolfos
- Floor Range: 1F
The Ice Cavern is located off Zora's Fountain and accessible only as an adult by jumping across ice blocks. It is a minor dungeon that usually should be completed before attempting the Water Temple. The final boss is a White Wolfos and defeating him earns Link the Iron Boots and Link learns the Serenade of Water from Sheik. Also in the dungeon are a few endless supplies of blue fire which can be used to melt King Zora and the Zora Shop entrance.
Bottom of the Well
edit- Element Theme: Earth
- Major Item: Lens of Truth
- Sub-Boss: Dead Hand
- Floor Range: 2F
The Bottom of the Well is a minor dungeon that should be completed before attempting the Shadow Temple. It is located in the eastern part of Kakariko Village and is only accessible when Link is a child after he has learned the Song of Storms and drained the 'Well of Three Features (Dark! Narrow! Scary!)', as it is called. The Bottom of the Well is infested with ReDead, Gibdos, Wallmasters, and Like Likes. It is referred to as Kakariko Well in Nintendo's official Player's Guide. The Lens of Truth is gained here by defeating an enemy named Dead Hand. It being a prison to the Shadow Spirit found as an adult could mean it is also prison for other spirits, due to the sighting of several paintings of the dead that speak metaphorically, providing vague hints on dangers that lie up ahead.
Temple of Time
edit- Element Theme: Light
- Major Item: Master Sword
- Sub-Boss: None
- Boss: None
- Floor Range: 1F
- Light Sage: * Rauru
- Warp Song: Prelude of Light
The Temple of Time, located around Hyrule Castle, is the place in which the ancient relic known as the Master Sword lies. By collecting three spiritual stones and playing the Song of Time with the Ocarina of Time in front of the Altar of Time inside the temple, the Door of Time opens so the player can become an adult. It is also the entrance into the Sacred Realm, where the ancient Triforce lies. It is said that only the Hero of Time may enter the secret chambers of the temple and draw the Master Sword; as such, Ganondorf can only gain entrance to the Realm once Link performs this task. The Temple of Time is also the entrance to the Light Temple, one of the six temples of Hyrule that are linked to each other by mystical forces.
The Temple of Time is featured once again in The Legend of Zelda: Twilight Princess. The temple itself has gone into ruin and been forgotten by the time the events of Twilight Princess took place, but Link still visits it as a dungeon. In Twilight Princess, its position in Hyrule is heavily retconned, or possibly modified. Rather than appearing in the north, directly north-east of Castle Town, it appears in an uncharted area of the Ocarina of Time map-- being the Faron Woods in Twilight Princess.
When found, the Master Sword rests in the Pedestal of Time in a forest clearing surrounded by spring water and trees, similar to its location in A Link to the Past. Once the player has acquired the Master Sword, a door frame left in a broken wall can be entered, transporting Link into a non-ruined version of the temple. This implies that the player has actually travelled through time to the Temple of Time before it was forgotten and left in ruins. The interior architecture is also heavily retconned. There is no pedestal for the three Spiritual Stones, no pedestal for the Light Medallion, and not even a suitable Door of Time (being very significantly smaller). However, "Time Door" is written on the mysterious door in Twilight Princess's Hylian language.
The Master Sword's Pedestal of Time has also changed slightly, there is no Triforce marking, and the six medallion symbols do not circle around it. When the player strikes the Master Sword the Pedestal of Time in the "past" temple, it opens a magical walkway similar to the one that sages created for Link in Ocarina of Time to make it possible for him to walk to Ganon's Tower. Upon walking up the walkway, the player enters the Temple of Time dungeon, consisting of eight floors and having a magic wand called the Dominion Rod residing in it.
In The Legend of Zelda: Twilight Princess, it is likely that the gigantic tree on the south side of the Great Bridge of Hylia is the same tree on the island above Water Temple in Ocarina of Time, thus alluding to the possibility that the entrance to the Lanayru spirit shrine, which is directly under the island with the tree in Twilight Princess, may have once been the entrance to Ocarina of Time's Water Temple.
Light Temple
edit- Element Theme: Light | Air
- Major Item(s): Medallions
- Floor Range: 1F
The mystic place where the sages gather. it is the place where link collects his medallions after every temple. He also gets a medallion just for coming here. It was Said to be located in the sky or ether world.
Forest Temple
edit- Element Theme: Wood
- Major Item: Fairy Bow
- Sub-Boss: Poe Sisters (x4)
- Boss: Evil Spirit from Beyond: Phantom Ganon
- Floor Range: 2B-2F
- Forest Sage: Saria
- Warp Song: Minuet of Forest
The Forest Temple is supposed to be the first of five main temples through which the player must progress during the part of the game in which the main character, Link, is an adult. It is an ancient ruin dedicated to the Forest. It is located in the Sacred Forest Meadow within the Lost Woods and accessible only with the Hookshot since the entrance stairs have collapsed. The temple consists of two floors and two basement levels. There are two courtyards in the back. There are two hallways in the temple which can be "twisted," allowing Link to enter the rooms beyond at a different orientation. The major treasure of the Forest Temple is the Fairy Bow, which is gained after defeating three Stalfos. There are four sub-bosses, the "Poe Sisters" Joelle, Beth, Amy, and Meg (named after the four main characters of Louisa May Alcott's Little Women). Additionally, two sets of two and three Stalfos respectively can be considered "mini-bosses", because they play the sub-boss theme.
Fire Temple
edit- Element Theme: Fire | Lava
- Major Item: Megaton Hammer
- Sub-Boss: Flare Dancer
- Boss: Subterranean Lava Dragon: Volvagia
- Floor Range: 1F-5F
- Fire Sage: Darunia
- Warp Song: Bolero of Fire
The Fire Temple (based on the place of worship for Zoroastrians) is usually the second major dungeon that Link experiences as an adult. It is located inside Death Mountain Crater, which can be accessed through Darunia's chamber in Goron City. Due to the intense heat in the active crater, areas of the temple can only be entered while wearing a Goron Tunic, which protects its wearer from searing temperatures. The Fire Temple was built as two large, five-floor columns that are interconnected by a series of hallways on the first and third floors, and it is often sectioned into chambers and large mazes. The first floor of the temple is essentially a large lava pit, and is also where the boss's lair is found. It is suggested from its columnar structure and the location of its entrance that the temple extends into the twin peaks visible inside the crater, which could be a reference to Spectacle Rock. The vertical shafts in the center of these columns allow smoke to rise from the lava pits on the first floor up and out of the crater, and due to their height it is possible for Link to fall several stories down these shafts. In traversing the temple Link must climb to its higher floors to receive the weapon of the legendary Goron hero, the Megaton Hammer.
Another notable thing in the Fire Temple is the music theme. The original music contained chanting that sounded vaguely Islamic. Nintendo was forced to change this theme and replace the chants with groans taken from the background music of the Shadow Temple.[citation needed] Many fans prefer the old theme to the new one, however.[citation needed] The premium placed on the version 1.0 and 1.1 cartridges is in part because of this.
Water Temple
edit- Element Theme: Water
- Major Item: Longshot
- Sub-Boss: Dark Link
- Boss: Giant Aquatic Amoeba: Morpha
- Floor Range: 3F-1B
- Water Sage: Princess Ruto
- Warp Song: Serenade of Water
The Water Temple is usually the third major dungeon of the adult-Link portion of the game, and is where the Zoras pay homage to the water spirits. It is located beneath the waters of Lake Hylia at the base of the lake's largest island. The Water Temple is effectively a maze of chambers on four floors, some only accessible when the water of the temple is at a certain level. Part of the challenge of this temple is being able to raise and lower the water level effectively. The temple's main treasure is the Longshot. The Water Temple has been called the hardest temple in the game due to the water puzzles as well as overlooked doors and openings to new rooms. Some suggest that the difficulty has been decreased in the Master Quest version, but this is a subjective evaluation. The Water Temple was intended to be reached using the Iron Boots and the Zora Tunic, which allow you to sink to Lake Hylia's bottom to the temple entrance is, opening it with the Hookshot. The Zora Tunic, however, is not actually needed to enter and complete the temple, and only removes the time limit incurred by swimming underwater.
Shadow Temple
edit- Element Theme: Shadow | Earth
- Major Item: Hover Boots
- Sub-Boss: Dead Hand
- Boss: Phantom Shadow Beast: Bongo Bongo
- Floor Range: 1B-4B
- Shadow Sage: Impa
- Warp Song: Nocturne of Shadow
The Shadow Temple is intended to be the fourth major dungeon in the adult-Link portion of the game. The Shadow Temple is located on the ledge in the far east side of Kakariko Graveyard and can be accessed only by playing the "Nocturne of Shadow" and Din's Fire. Some believe that the Shadow Temple and The Bottom Of The Well are the same dungeon (since they both are only composed of basements, the designs are very similar, they both possess the same music, and they are both located in Kakariko Village). The Shadow Temple consists of four floors infested with ReDeads, Gibdos, Like Likes, and Dead Hand as well as the many paintings of the dead that give clues to the frightening darkness. The temple is described as a house of the dead. It includes many invisible enemies and false walls making a near-continuous use of the Lens of Truth necessary for many players, although more experienced ones are able to clear the dungeon without the item. The temple layout is unlike the others in that players find a key or solve a puzzle in one area and move on to the next with little backtracking. Many metaphors are used that are read usually from the paintings of the dead who obviously know the dungeon that make the clues strange each one means the following
- "The shadows will only yield to those who have the Eye of Truth..."; false walls etc. can be identified with the Lens of Truth for reason being the painting is false.
- "Make my beak face the truth... a descent into deep darkness"; make the beak face the real skull or possibly a trap will reveal an abyss.
- ... Sacred Feet... valley of the dead"; the Hover Boots are obviously the "Sacred Feet" and "valley of the dead" is unknown but most likely it's the abyss you must cross.
- "... trick of the ill"; flying jars are nearby.
- "... ferry to the other world..."; Most likely refers to the boss room. The room in which you face Bongo Bongo is completely dark, and contains a drum that moves constantly in the same direction, theoretically forever, probably meaning that you are temporarily transported into an flat, endless parallel universe.
Spirit Temple
edit- Element Theme: Sand
- Major Items: Silver Gauntlets, Mirror Shield
- Sub-Boss: Iron Knuckle (x3)
- Boss: Sorceress Sisters: Twinrova
- Floor Range: 1F-4F
- Spirit Sage: Nabooru
- Warp Song: Requiem of Spirit
The Spirit Temple is, according to the standard game progression, the fifth major dungeon of the adult Link portion of the game. The Spirit Temple lies within the Desert Colossus to the west of the Haunted Wastelands. The temple is divided into two portions - one accessible only when Link is a child and the other only when he is an adult. The child Link section consists mostly of puzzles along a linear climb to the top of the temple. Its boss is an Iron Knuckle and its defeat earns Link the Silver Gauntlets, which are required to access the adult Link section of the Temple. In the adult-Link portion, the temple is less linear and more action-based. Its major treasure is the Mirror Shield. According to the game, the Spirit Temple was built by all-female architects and masons from the Gerudo tribe of thieves. It is said to hold a vast amount of treasure and secrets, presumably in the form of picture writing that can be seen on its walls inside the game. It was once Ganondorf's hideout before invading the Sacred Realm. On an interesting note, a design above certain doors in the temple greatly resembles the final boss of Kirby 64.
Ganon's Castle
editElement Theme: All 6
- Major Item: Goldnen Gantlets
- Sub Bosses: Dinolfos (x2), Stalfos (x4), Iron Knuckles (x2)
- Boss: Great King of Evil: Ganondorf
- Floor Range: 2B-2F
- Sage: Ganondorf
- Warp Song: None
This castle is where Hyrule Castle once stood and was built when Ganondorf took over Hyrule. It appears only as Adult Link and contains six mini-dungeons which must be cleared to access the central tower. These dungeons are based upon six out of the seven sages, excluding Zelda: a Forest, Fire, Water, Shadow, Spirit, and Light dungeon. This is where the final battles of the game, the first between Link and Ganondorf and the second between Link and Ganon, occur.
Secrets
Rupee making tricks
editEasy to reach rupee locations
edit- Hyrule Castle's drawbridge (20 rupees during the day, and 80 when the gate closes at night)
As Young Link, travel to the drawbridge from the field in front of Hyrule Castle Town. Walk straight up the chain until your face appears to be in the wall then turn towards the middle and jump down. You'll get 20 rupees while you're falling and enter Hyrule Castle Town.
If you decide to wait until night or play the Sun's song, climb up and stand on either chain. After the drawbridge raises, walk across the narrow end of the upturned drawbridge to collect 80 rupees (four red ones).
- Kakariko Village (100 rupees)
Adult version: For more free money, go into the hole behind the potion shop in Kakariko Village. Catch a fish in a bottle, and then go back to where the very tall ladder is. Look for the begger in green clothes who will buy items assigned to C buttons, and sell him the fish. He will give you 100 rupees. You can do this as many times as you want. Kid version: Precisely the same as above, but now the begger will be at Castle Town Market.
- Hyrule Castle Town (30 rupees per minute)
When entering Hyrule Castle Town from Hyrule, you first see a road with one guard and one openable door. Inside that door is a house full with pots, and a guard that says his job is boring. You can break all of the pots here to find rupees. After you are finished, go outside and re-enter. All of the pots respawn. You can now gather rupees until your wallet is full.
200 rupees, in Kakariko Village, as a kid
editThis is easier to find if you have the Rumble Pak and Stone of Agony/Shard of Agony. Enter Kakariko Village, and run up to where the house of Skulltula is, walk up, and walk around the area. Feel the rumble? Bomb the spot where you feel the rumbling. A hole will appear. Fall down the hole. You will now see two ReDeads. Play the Sun's Song to freeze them. Then defeat them by slashing away at them with your sword. After you defeat both of them, a treasure chest will appear. Open the chest, and claim the 200 rupees inside.
200 rupees in Lost Woods as an adult
editWhen you have gotten the Poacher`s saw, in adult Link´s Trading Sequence, you can easily get 200 rupees. In the beginning, go 1 left and stand on the stump. Then quickly go and stab the Skull Kid with your sword. This is easier to do with the Biggoron Sword. When you have killed him he will drop an orange rupee! If you return and go back, the Skull Kid will still be there, allowing you to kill him again. You can kill him as many times as you want, without getting all of the Gold Skulltulas.
Unlimited Rupees trick #1
editOnce you get all 100 Gold Skulltula coins, simply return to the last family member to receive a gold rupee. You can just leave the house and go back in to get another.
Unlimited Rupees trick #2
editIn many areas in a hole leading underground you can find a fish, and under many rocks you can find bugs. Swing one of your bottles to capture these fish or bugs, then sell it to the man patting the ground wanting to buy things. He is located in Hyrule Castle Market as a kid, or Kakariko Village as an adult and buys a bug for 50 rupees and a fish for 100 rupees. You can find easy and close fish behind the Kakariko Potion Shop as an adult (by the blue potion lady's house) in the hole.
Bug catching and selling trick
editThis one is quite simple, You need 2 or more empty bottles, Go catch a bug and go to Hyrule Castle Market as Young Link or Kakariko Village as Adult Link. Go over to the guy that wants to buy the stuff in bottles. Do not give him the bug that you have caught. Instead release the bug a meter away from him and let it crawl, use all the empty bottles to catch the 3 bugs and sell him them until you have 1 bug left, then repeat for infinite rupees.
Giant enemies
editIf you repeatedly kill some types of enemy within a short period a giant version will appear. This applies most to the Stalchildren running rampant during the night on Hyrule Field, the Guay located at Lon Lon Ranch and the Leevers at Desert Colossus (in which case actually change colour from green to purple).
Dungeon Map
editWhen you get a dungeon map from a treasure chest, the item that Link holds displays the map for the first floor of Dodongo's Cavern.
Hidden Cave
editAs Adult Link, after getting the Silver Gauntlets, go to the Zora's Fountain near where you get Farore's Wind. Pick up the gray rock. There should be a hole. Go down it and use the Lens of Truth. Kill the Big Skulltullas and go to the end of the cave. Climb up the wall ladder to be outside of the map's perimeter to the opposite side of the entrance and there should be a gold skulltula on wall. Also, there is an open wall that you can look out of and see a view of Zora's Fountain and Zora River. Here you can jump off into the water. Don't try to use the Hover Boots to get to the little island thing next to Jabu-Jabu's Altar, as you will just land in the water.
Power Stab
editIf you hold down R and press B, Link will stab with his sword. However, the power of the stab varies depending on the attack you used immediately before the stab — if you jump-attacked with a Deku Stick then stabbed (without using any other sword attacks), that stab will have the power of the Deku Stick jump attack. This is useful for getting the power of the Deku Stick without wasting your Deku Sticks. This works with any sword attack, Deku Stick attacks, and the Megaton Hammer.
Never lose tunics and shields
editWhen a Like-Like is eating you, equip the Kokiri Tunic and Mirror Shield. Because neither can be purchased, nothing in the environment is able to destroy them, and so the Like-Like can't eat them.
Kokiri Forest rupee locations for quickly obtaining the Deku Shield
editAs young Link, when first starting out, this helps you to get the Deku Shield faster. Go into the Kokiri shop, go the empty space to the right, and walk behind it. There you'll get a blue rupee (5).
Jump across the stepping stones that lead to the Deku Tree. As you hop over the last one, it will give you a blue rupee (5). You can do this as many times as you like as long as you enter and exit a house after completing the jumps.
At the training ground, where you go to find the Kokiri sword, you'll see a gate in front of the Know-It-All Brothers' place. Turn left and there will be a sign. Destroy the sign and claim the blue rupee (5) that pops out.
Behind Mido's house (the one where the kid is trying to pick up rocks in front of) there is a blue rupee (5). Also, inside Mido's house there are four chests. Two of them contain blue rupees (5), one contains a green rupee (1), and one contains a recovery heart.
Inside of the area where you can claim the Kokiri Sword there are two blue rupees. The first is located immediately to your right next to a plant after leaving the entrance hole. The next rupee is located in a small nook around the path that the boulder follows. Facing the square path that the boulder follows take a right and then take another right. There should be a blue rupee in this small nook. It should be noted that this is also a good place to avoid the rolling boulder if it should catch up to you.
Lastly, there is a rupee that is located on a platform in the middle of Kokiri village. This is the most annoying rupee to get to but if you must have it then read onward. Find the house that is directly to the right of yours after leaving. There should be a kid who is feebly attempting to pull grass out of the ground. Climb the spiraling wooden walkway to reach the top. There should be three recovery hearts on top of this house. Take the bridge path connected to the roof to get a blue rupee. It should be on a platform with a girl with her hands behind her back.
Gossip Stones
editAttacking the Gossip Stones in various manners has a useful purpose outside of entertainment value: by playing Zelda's Lullaby or Song of Storms in front of one, a fairy will emerge. Bombing a Gossip Stone will cause it to flash blue and red and take off after a few seconds. Shooting one with various arrows causes it to spin, stretch up, and then widen before going back to normal, or simply vibrate. Hitting one with your Megaton Hammer will flatten it temporarily. Even comparatively boring attacks, such as with a sword or a hookshot, cause the stone to vibrate differently, depending on the weapon used.
Cucco Attack
editThis is a rather dangerous (though quite amusing) pursuit, so do not attempt it if your health is low — one hit from a cucco depletes a half heart container. If you are inclined to be attacked by an enormous horde of cuccos, attack one repeatedly until it calls up its buddies, and then run as rapidly as possible in the opposite direction (zig-zag as you run). Two of the better places to do this are at the entrance to Kakariko Village, where there is an easy escape route, or in Lon Lon Ranch, where you can attack them while riding Epona and be invincible to their attacks.
- Other weapons and ways to stop the attack
- The Megaton Hammer will initiate the cucco attack with one swing because it strikes targets multiple times.
- Zelda's Lullaby will make the cuccos stop attacking. This does not work on the 3DS version.
Sign Reconstruction
editIf you ever feel the need to take out your aggression on one of the larger wooden signs with a sword or bomb and subsequently realize that you actually wanted to read it, either leave the room or play Zelda's Lullaby and watch the sign put itself back together.
Crossover Crisis for 20 rupees
editThere is one crossover in this game: when you first meet Zelda in the castle. If you look in the last window on the right, you can see a picture of a certain famous red-clad plumber and some of his friends. Shoot the picture with the slingshot to get a red rupee. NOTE: For amusement, you can also use the slingshot on the window opposite. A guard will appear and reprimand you before throwing a bomb out of the window. In the 3DS version, though, a New Super Mario Bros. Wii theme appears instead.
Stabbing the Cursed Ones
editYou can actually attack the cursed family in the House of Skulltula just like you do with a regular skulltula. First, wait for one of the family members to drop down, then hit them in the front with your sword. While they're swinging back and forth, quickly run behind them and attack their backside. They will let out a high-pitched scream and be frozen. Eventually they will come to and return the favor, by attacking back, so it's wise to keep your distance.
Stone of Agony
editTo really find all the secrets around Hyrule, you'll need some help. Luckily, if you acquire 20 Gold Skulltulas you can go to the House of Skulltula in Kakariko village to get the reward, the Stone of Agony, from the person who has been most recently freed from the curse. The Stone of Agony is a rumble pack-shaped passive item that makes your controller vibrate when close to a hole in the ground. When close to one of these holes, you'll have to figure out the special way to open it (bombs, a certain song on the Ocarina, etc.).
If you don't have a rumble pack for the N64 or have the rumble feature turned off, the Stone of Agony will be of no use. Note that the rumble feature is stripped from the Wii version, leaving this quest item useless. However, in Ocarina of Time 3D, the Shard of Agony will flash on the left side of the top screen and make a "bong" sound if there is a hidden item nearby. It flashes more frequently if you get closer to the hidden area. The GameCube version will use the rumble feature exactly like the N64.
A Daytime Dog Companion
editIf you get a dog to follow you in Hyrule Market at night, you can play the Sun's Song and he'll still be right beside you in the daytime. However, if you run away and the dog goes offscreen, he'll vanish.
Wolfos Treasure Den
editAt the entrance to the Sacred Forest Meadow, if you have a Rumble Pak and the Stone of Agony, you may feel your controller vibrate. Drop a bomb near that spot, and a hole should open. Inside are two Wolfos. Defeat them, and you'll reveal a chest with a Purple Rupee.
Long Hovering
editYou can hover a much greater distance with the Hover Boots.Just put on the boots,and then roll out ,walk 2-3 steps and then roll again to hover a lot more out than usual(well,not that much more out,but if succeeded,you`ll be longer out).That comes in handy for a lot of things,like some Heart Pieces.
Holding Z and running backwards is the fastest movement.
A scarecrow melody at the end
edit- Misunderstood requirements
This is commonly believed to be Scarecrow's Song but is actually the song you play for the scarecrow in the back row as child instead.
At the end of the game you will be presented with a "The End" screen. If you have played a custom melody to Pierre in Lake Hylia as a child then you should wait on this screen for several minutes. Eventually the song you played to him will play using the ocarina sound. If you continue to wait after the first instance of the melody you'll hear it again, but played using a different instrument instead. This only works in N64 Version.
Hidden Gold Rupees
edit- Smash the brown rocks with megaton hammer in top cave where a Gold Skulltula is you will find a chest in corner on other side.
- Play the Song of Storms in circle of rocks outside Goron City a hole will open up go down to find chest.
Hidden Purple Rupees
edit- Bomb the rock wall up death mountain closer to Goron City and you will find chest.
- Go in Goron City to where Gold Skulltula in back of cave on top is and you will find 2 chests with Purple Rupees.
Shortcuts
Shortcut #1: Goron City to Lost Woods
editLight with lit deku stick or throw bomb flowers to bomb rocks and way will be revealed. (Tunnel on second floor in Goron city lost woods head right from entrance then left and then straight ahead.)
Shortcut #2: Zora's River to Lost Woods
editWin silver scale and pool of water with hole in connecting can now dive into. (Zora's River it is right of Zora's Domain entrance and Lost Woods it is from entrance right left right and then straight ahead.)
Shortcut #3: Zora's Domain to Lake Hylia
editWin Silver scale then can now dive into connecting hole. (Zora's Domain it is in water straight ahead after diving down waterfall and Lake Hylia it is in water straight ahead from scarecrows then turn around and look in wall.) Note: Only accessible as child since Zora's Domain frozen as adult.
Grottos
There are many open and hidden grottos located throughout Hyrule. Many of them contain helpful or valuable items.
Pink Fairy Fountains
editFairies are useful for restoring your health, and even reviving you when you lose all of your hearts and die. If you are low on health, or have a bottle to keep one for later, the following locations will be the best places to find a fairy quickly.
- Desert Colossus: Go to rock where dried up pool and palm trees are and play the Song of Storms and pool will fill up with water making fairies appear.
- Gerudo Fortress: Out the door where you rescued the first carpenter with another door to left play Song of Storms and hole will open drop in to find fairy fountain.
- Hyrule Field: Across stream to west smash boulder with the Megaton Hammer.
- Graveyard: Grave with flowers in the front down behind chest bomb wall and follow corridor.
- Scared Forest Meadow: Climb ladder at end of maze and drop into hole down another ladder and you will find the fairy fountain.
- Zora's River: Bomb boulder on highest place.
- Zora's Domain: On island in water play Song of Storms and drop in hole that appears to find a fairy fountain.
The Spirit Guide
The Spirit Guide is one of the three friendly Poes in The Legend of Zelda: Ocarina of Time. The others were the composers Sharp and Flat, although at first they attack Link. The Spirit Guide lives in the Haunted Wastelands, and can only be seen while using the Lens of Truth. It is the second trial in the desert, and leads Link to the Desert Colossus, although it actually seems to just go in circles.