RAC Attack - Oracle Cluster Database at Home/OS Installation
Prev: Hardware and Windows Preparation
Linux Install (e)
- Create VM
- Prep for OS Installation
- OS Installation
- Wrap-up OS Installation
- Create RAC Attack DVD
- Prep for Oracle
Next: Create Cluster
-
Click the Console tab. You might see a message saying that the Remote Console Plug-in is not
installed. If you see this message then click Install plug-in and follow the directions before
continuing. (Note: you may be asked to restart your computer during this process.)

-
When the plugin is installed, you should see a large “play” button in the center of the console. Click
on the play button to start the VM.

-
When you see the square boxes, click anywhere to open a console window.

-
A new window will now open - outside of your web browser. If you opened this window soon after starting the Virtual Machine, then you will see the boot screen of the Oracle Enterprise Linux installer.

At first, this new console window will ignore your keyboard and mouse. Click inside the new console window and it will begin accepting your keyboard and mouse.
Anytime your keyboard and mouse are stuck in the VMware Virtual Machine, you can press CTRL and ALT together to move them outside the VM.If you still see the boot screen then you may press enter to continue, or just wait for it to automatically continue.
-
Choose to SKIP the media test.

-
Choose NEXT when the first installer screen comes up.

-
Accept the default English language and choose Next.

-
Choose US English keyboard layout and click Next.

-
Select YES to initialize the drive.

-
Accept the default layout (with no encryption) and choose NEXT.
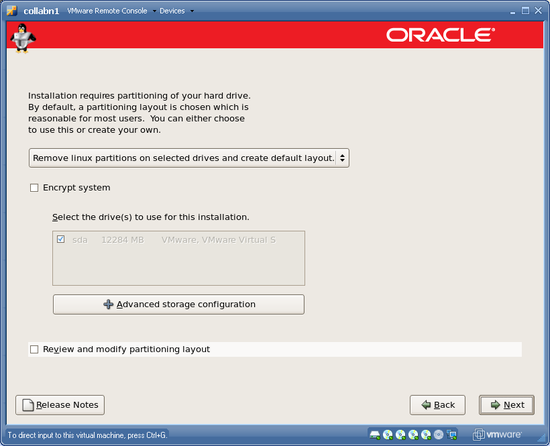
-
Choose YES to remove all partitions.

-
Set the hostname to collabn1.vm.ardentperf.com and leave DHCP enabled before choosing NEXT.

-
Choose the timezone where you are located! Let the system clock run on UTC though.

-
Set the root password to racattack

-
Choose Customize Now – but don't choose any "additional tasks". Then click NEXT.

-
Select only these package groups, then click NEXT to continue:
Category Selections Desktop Environments Gnome Desktop Environment Applications Editors
Graphical Internet
Text-based InternetDevelopment Development Libraries
Development ToolsServers Server Configuration Tools Base System Administration Tools
Base
System Tools
X Window SystemDo not choose Cluster Storage or Clustering.

-
Choose NEXT to start the installation.


-
Choose REBOOT when the installation is complete.

-
After the machine reboots – when you wee the Welcome screen – choose FORWARD.

-
ACCEPT the license and choose FORWARD.

-
DISABLE the firewall and choose FORWARD. Confirm by clicking YES.

-
DISABLE SELinux before choosing FORWARD. Confirm with YES.

-
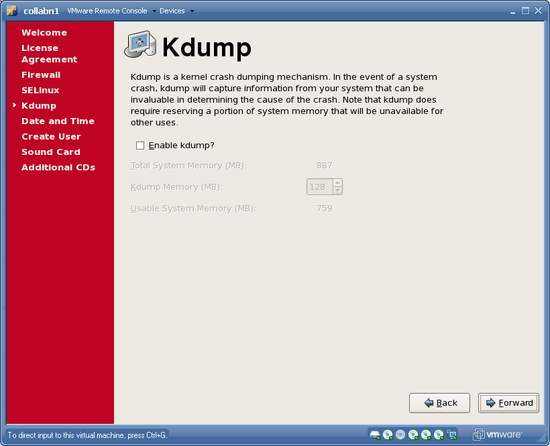
Leave Kdump disabled and choose FORWARD.
-
Leave the clock alone (with the wrong time) and click FORWARD.

-
Don't create a user; click FORWARD. Choose CONTINUE to confirm.

-
Choose FORWARD to skip sound card config.

-
Choose FINISH to close the installer. Click OK to reboot.

-
After reboot you will see a login screen.


