Guide to the Godot game engine/Print version
| This is the print version of Guide to the Godot game engine You won't see this message or any elements not part of the book's content when you print or preview this page. |
The current, editable version of this book is available in Wikibooks, the open-content textbooks collection, at
https://en.wikibooks.org/wiki/Guide_to_the_Godot_game_engine
This book will teach you about the free and open source Godot engine. Godot, like Unreal, Unity and other common game engines, has an active community. However, Godot is free, less demanding on operating systems, so you can use it on older hardware, and you can "export" your game to various systems, including mobile, in a single mouse click. It may be free, but it's not lacking in any way.
Godot was named after the play, Waiting for Godot, as it represents a never-ending wish to add more features, which would make it closer to a exhaustive product.
-
 A screenshot of Godot's user interface from version 3.1.
 -
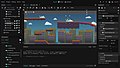 A screenshot of a 2D platformer in the editor.
 -
 A screenshot of a 3D project.
 -
 A test 4.0 mini-project
 -
 The GDScript workspace in an example game.


Introduction
editWhat even is Godot?
editGodot is, like explained above, an open-source game engine. The advantage of being open-source is Anybody can edit its source code! If it doesn't do quite what you need it to do, just crack it open and see what new tools you can make. If it's good enough, you can even submit the code to be part of the next official update! Another advantage is what you make (be it an app or a game or a plugin) is completely yours! No strings attached, no royalties, no limitation of license... Exactly how game development should be!
However, console-specific code cannot be compiled with open-source code. You need to pay somebody else who can compile it for you, and this can be costly. Then-again, most engines have the same issue. And several games made with this engine have been released onto a console.
In addition, Godot's API is not like most game engines, where you can find things like "entities" and "props". Everything is done with nodes, Godot's building blocks, which can be put together in many ways to get your entity or prop. Each node may also have a script. While highly flexible, it has some performance cost.

Godot has many nodes, but this book is not the place to list each and every one. That's what Godot's official class reference is for. This book will focus on what Godot is, help you achieve your goals and provide helpful links for those who want more info can go to.
What inspired me to start this book?
editI was shocked that Wikibooks had no Godot guides. It had guides for Ada, LolGraphics, C++, C#, HTML, JavaScript and more, but not one on either Godot or a game engine (not that I could find anyway).
Godot guides out there had very little I didn't know, and some were books that cost... money. Well, a wiki's belief is that all information should be free.
- Getting started
- Making it work
- Making it look good
- Advanced help
- Miscellaneous
What is a node?
editNodes are the building blocks of Godot. They can be combined into trillions of different combinations. There are many different types of nodes, like Camera2D and Sprite2D.
The 3 main node types
editEvery node goes under this one. It is the basic node that defines all others. See it as the parent and the grandparent of Godot and its nodes, and all the games that Godot has been used in. It stores common things like name and script. It can be used instead of CanvasItem or Spatial when making objects that store data, and are not needed to be shown on the screen or have a position.
CanvasItem
editUnlike Node, Canvas Items are positional, and implement draw code. They are used for all 2D objects, and have two main node types that inherit it:
Used for the GUI. It contains options like whether to ignore mouse input, receive it and let it pass to other UI, or receive it and stop it reaching other UI. They also allow margins and anchors, allowing a Control node to stay in a certain part of the screen or stretch when the window expands or shrinks.
These are used for 2D game elements, like Sprite2D and PhysicsObject2D. They are drawn on the canvas, which is drawn on top of the 3D view. Well, its actually the other way around. 3D is actually drawn in the background of the canvas, if there is an active Camera3D in the scene.
Used for 3D game elements. They store positional data, rotation, and scale. They do not draw onto the screen. For this, you need to use the VisualInstance node that inherits Spatial. You need an enabled Camera3D in the scene to actually see the 3D world.
Making custom nodes
editFirstly, you need to decide what it'll do. Is it some variant of Timer? Or is it a custom Button?
After you decided what it does, you must decide what Node it inherits. This is important. You don't want to use Control if you want a 3D button, or Spatial for a timer.
In my opinion, this is the recommended node for each type of object you want to make:
Node: Use for objects that won't be part of the GUI, 2D or 3D worlds. Existing examples are Timers, HttpRequests and CanvasLayer.
Node2D: Objects for games that are not used in the GUI. There are exceptions, but in general, don't mix up Node2D and Control too much.
Control: For GUI, like menus, HUDs and certain game elements that require anchors and margins.
Spatial: Used only for 3D.
For more on making nodes, please see Making nodes.
Inheritance
editEach node has several properties. Like Node with its name property, or Node2D with positional data. Every node that inherits it gains the properties of it. A brief example:
- Node: name, script, others
- Spatial: properties of Node; position; rotation; scale, others
- CanvasItem: properties of Node; visibility; others
- Node2D: properties of CanvasItem and of Node; position; rotation; scale; others
- Control: properties of CanvasItem and of Node; rect position, size and scale; rotation; others
- ColorRect: properties of Control, CanvasItem and Node; color
SceneTree
editGodot has building blocks, yes, but what's the glue that sticks it all together?
The SceneTree is the glue, and it's a strong glue. But it is also a flexible glue. It is an Object (which is the great-great grandfather/mother of all Godot "things").
The SceneTree is where everything happens. Nodes process in a certain order, draw on the screen, and more.

Throughout tutorials found in this book, I will mention add something as a child of something else. This means adding a node child of another node. A Button may be the child of a Container, which may be the child of a normal Control.
When making your game, each menu, every level, and every object are all scenes. You save them on the file system (or "fs" for short), and can then put those scenes within scenes. You could make an enemy scene, save it, then put it in your "level 1" scene as many times as you like. This is called instancing a scene.
Inheriting a scene can be considered the opposite to instancing. An inherited scene is like a copy of a scene, but with limited freedom to make modifications. This is useful to have a base enemy scene, then inherit it for each enemy you add, and make your modifications. This keeps your enemies consistent, and makes each file easier to understand. This is quite similar to inheriting a node, except that multiple nodes are inherited instead of making a new inherited script.
Do not confuse inheriting a scene with inheriting a node/script.
If, for example, on "Level 6", you have to fight a mutant version of a common enemy found throughout the game. You want to use it only once in the entire game, so is not worth inheriting the enemy scene and making a whole new file for an enemy used only once. Instead, while on level 6, right click on the enemy you want to modify in the Scene dock. Check the "editable children" box, and make your modifications. It is almost exactly the same as inheriting the scene, except that you are not making a new file.
If you decide that the mutant enemy would do well on other levels, or you use it more than once in a single level, left click on the enemy on the Scene dock and click "save branch as scene". This will save the node as a scene a with your modifications to be reused on any other level.

If you rename or move the node with editable children enabled, you will need to re-enable it or changes will be lost!
Changes will be lost also if you disable it manually and forget to enable it before closing the scene or editor.
Adding a node
editOkay, so now you know what you can do, how do you do any of it?
Lets create a simple scene. Open the Godot project manager. On the left is a list of buttons. Click New Project. A popup should appear. Press Browse under "Project Path:" and choose what folder to store your game. It's a good idea to have all your games in the same folder so they can be easily accessed. Once that is done, press "Create Folder", type something like "Godot test project", and click OK. Then click "Select Current Folder", and Create & Edit.
Now Godot should open. On the left, there should be a Scene dock with a few buttons on it. Click User Interface. Double click the bit that says "Control" and rename it to Test UI.

Now, press the white "+" icon in that dock, and a popup should appear. In the search bar, type Label. Double click the highlighted menu item for Label.
On the left, in the Inspector dock, look for the property Text. Type Hello world! (Make sure your Label is selected on the Scene dock). At the top of the screen is a Layout button. Click it. A drop down menu will appear with many options. Press Center. The "Hello world!" text appears at the center of the blue box in the 2D viewport (the large bit in the middle of the editor).

Now you know how to add a node, how do you delete them if you make a mistake? The fastest way is to undo (press "Control+z" on Windows). If the node is not recently created, instead left-click on it in the Scene dock. Click Delete Node(s). If you delete a node you didn't want to delete, just press undo. If you press undo too many times, you can redo ("Control+Shift+Z" on Windows).
Now save your scene with "Control+S". Don't change the file name. You can also save to a different scene with "Control+Shift+S".
Instancing and editable children
editTo save a node and its children as a separate scene file, left click on the node and click Save Branch as Scene. For this experiment, do so on your Label. The file name should be Label.tscn. Press "Save".

Find your Label scene but do not open it. Drag and drop it over your "Test UI" node in the Scene dock. At first it appears on the dock, but not on the viewport. This is because both Labels are on top of each-other. Click on your second Label in the Scene dock and click the move button at the top of the screen (or press w). Drag in any direction to see the new Label.
![]()
Open the Label.tscn scene and and add another Label as a child of the root node (which should also be a label). Change the text property to "Label number 2". Save the scene. Go back to the Test UI scene and notice how both the new and old labels overlap? Go back to the Label scene, select the second Label and move it down by clicking "Shift+Down arrow" 5 times. Save. Go to the other scene. Both Label scenes display correctly, not just one.

On the second label in your scene, left click and check Editable Children. Click the gray Label button (the child of the second Label), and change it's text property to "Edited child". The other Label and the Label.tscn scene were not changed, but one you changed was.
Right click on the Label with editable children and press Make Local. Now the modified label scene is no-longer linked, you can do some finer tweaking like renaming the child or deleting it. You can play around with your new scenes, or continue on.

What you have learned
edit- What nodes are in Godot and how to use each of the three basic ones.
- How to instance a scene into another, and how to save existing nodes into a new Scene.
- About node inheritance.
- How to start a new project.
Programming
editGodot has 3 main programming (or scripting) languages, and a bonus fourth one if you have a version of Godot with Mono compiled. However, you can get unofficial languages or even make your own!
GDScript (".gd" file extension) is Godot's main language. It is a custom language that works with Godot's "scene" system. It is also quite simple to use. The developers of Godot say that you could learn GDScript in under an hour.
Example "Hello world!" program:
func _ready() -> void:
    # This is a comment. It isn't shown in the game.
    print("Hello world!")
I recommend using GDScript if you've never used Godot before since it is the easiest to use and also sports an auto-completion, which is very useful. GDScript is the language that will be used throughout this book.

Fun fact: Godot's developers experimented with Python and Swift before deciding to make a custom scripting language that better fit Godot. As a result, the language is pretty similar to the two.
For more information, please see the GDScript chapter.
VisualScript
editVisualScript (".vs" file extension) is Godot's visual language that uses a user-friendly interface to make code. It lacks many features in GDScript, but can be used to create, for example, a conversation tree.

However, this language is discontinued for Godot 4.x[1], as only 0.5% of users actually used the language. It is still available in Godot 3.x, and may be added to Godot 4 as an extension at a later date.
GDExtension (NativeScript before Godot 4.x)
editGDExtension allows you to run c and c++ code without recompiling it with the engine. This allows you to create super-fast code for things that are very computationally expensive.
GDExtension in Godot 4.1+ is forwards compatible, meaning GDExtensions made for 4.2 will work in 4.3, but not vice versa. However, this is not a guarantee since in the future compatibility might break in order to fix a bug and add a critical feature.
Unlike engine modules, GDExtension doesn't require compiling the engine's source code. It gives you access to most of the API available to GDScript and C#, allowing you to code game logic with full control with performance. It's ideal if you need fast code you'd like to distribute as an add-on in the asset library.
GDExtension can also use other languages, you're not limited to c and c++. If you want to use other languages you will need to install community-made bindings. They can be found on the official documentation pages.
C#
editIf you have the mono version of Godot, you can write C# code. You can use it to make high-speed code to make modules or objects for your game. It can also be used to write tools.
Note: Godot itself is made with C++, and making direct modifications require you to recompile Godot's editor. Many Godot users have used this method to make custom Godot editors with custom tools.
How do I use these?
editGDScript, VisualScript and GDExtension (or NativeScript) can all be attached to a node, or used to create a custom one. In the mono build of Godot, C# can also be attached. C++ can only be used in Godot's existing engine. To do so, you will need to download a special version of Godot that has not been compiled into an application file.
To attach a script to a node, you first need a node to attach it too! Assuming you read the last chapter ("What is a node"), you can begin from the project you started last time.
Open Godot, and open your test project by double-clicking on it in the menu at the center of the screen. Open "Test UI.tscn" from the File System dock if it is not already open. Select your Test UI Control node. At the top of the Scene dock is a button that looks a little like paper with the edges of two sides rolled up. Press it.
Click the "Template" button and select "Empty" from the drop-down menu that appears. Press Create. Now a new screen should appear with a text edit area in the center of the screen, and the Test UI node should have that paper icon on it. You can click it whenever you want to reopen the script here. The script looks pretty boring right now:
extends Control
This is very important, however! The extends keyword (a very important piece of code, like pass) tells Godot that your script inherits the node type you place here. You may only attach a script to a node of that type, or a node that inherits that type.
Under extends Control, write the following code:
func _ready() -> void:
  print("Hello world!")
func tells Godot that you want to define a function. If you use Python a lot, you might think the print never gets called, as it is inside a function, which never get called automatically. The built-in function _ready() tells Godot to run the code when the node with the script is "ready", or that it has been fully loaded.
_init() runs before the node is ready. Use it to do self-contained pre-construction.
_process(delta) runs every frame as fast as possible. delta is an argument for the function. It represents the time in seconds since the last frame. The value rises as the game lags.
_physics_process(delta) is similar to _process, it runs every physics frame on a fixed time step, which is typically 60 frames per second.
_exit_tree() is ran when the node exits the scene (to become an orphan or when it is "freed", or deleted) or the game closes.
Now, for some more complex code. This program will record the time that has passed in seconds since the game ran and show it when it ends.
var time: float = 0 # Or just "var time = .0"

# The "-> void" is optional

func _process(delta):
  # This increments time
  time += delta

func _exit_tree():
  print("Time passed: ",time)
Now, lets update this to automatically close the game after a random amount of time.
Add this code before _process:
const MAX_TIME = 10

const MIN_TIME = 5
onready var time_to_quit=randi() % (MAX_TIME-MIN_TIME) + MIN_TIME + 1
This will create a variable and set it during the call to _ready automatically. time_to_quit is a random number between 5 and 10. Add this code in the _process function:
if time >= time_to_quit:
  # Quit after a random amount of time.
  get_tree().quit()
One problem... The number is never different. Why? Because you need to call randomize() first.
Change the declaration of time_to_quit to var time_to_quit and add this to the _ready function:
randomize()
time_to_quit = randi()% (MAX_TIME-MIN_TIME) + MIN_TIME + 1
The + 1 is necessary since randi()%X returns a random number between 0 and {{Gdscript/string|X-1)).
This creates a number between 0 and MAX_TIME subtracted by MIN_TIME subtracted by 1. Adding the MIN_TIME and an extra 1 gets the result you need, a random number between MIN_TIME and MAX_TIME..
The randomize() makes randi() give a different stream of random numbers. Randomizing is based on time, and should not be called every frame for performance reasons. Once per node, called during _ready call, is enough.
What you have learned
edit- The 3 (4 for Godot 3.x versions) types of currently supported script
- How to attach a script to a node
- How to record time with delta
- How to close a game
- How to make random numbers.
See also
edit
GDScript
editGDScript uses dynamic typing (Variable type can change and type is not inferred on creation) with optional static typing.
The GlobalScope is where all the more... Global... Methods and constants are. These include math functions like sin and cos. It also has random number generators, such as randi.
See Godot's documentation for more: https://docs.godotengine.org/en/latest/classes/class_@globalscope.html and: https://docs.godotengine.org/en/latest/classes/class_@gdscript.html
Do not confuse it for keywords.
- Keywords
Keywords in Godot are special words used for GDScript. Unfortunately, some of them are not recorded in Godot's class documentation in much detail.
await
editThe await keyword will wait for the passed signal to be emit.
print(1)
# Creates a 1 second timer
await get_tree().create_timer(1).timeout
print(2)
break
editThe break keyword ends a looping piece of code. Useful for "forever" loops:
var counter = 0

while true:
  counter += 1
  if counter == 15:
    break
This ends the loop after 15 runs of the code.
continue
editThe continue keyword is used inside loops. Similar to break, continue skips a single run at the loop. Like breaking it, but instead of ending the whole loop, it only skips the single iteration.
for num in range( 1,5 ):
  if num == 4:
    continue
  print( num )
The above runs 5 times. Num is 1, 2, 3, 4 then 5. If num is 4, it "continues" the loop. Otherwise it prints. So 4 is not printed, but 1, 2, 3 and 5 are.
const
editThe const keyword can be used in place of var to create a constant, a value that cannot change.
Unlike variables, constants can be used in static functions.
enum
editThe enum keyword is similar to making integer constants.
enum DrawMode ={
  PEN,
  FILL,
  ERASER,
  LINE,
  BOX,
  SHADING,
  CONTRAST,
  BLEND
}
The code above is a snippet of code from an image editor I once made in Godot. It shows the possible draw modes, like line and fill, as named ints for easier code debugging.
@export
editNot to be confused with exporting. The @export keyword is a very powerful keyword.
It allows editing the value in the Inspector dock, and it saves changes per-instance.
For a basic one, try @export var max_health:int.
You can even use templates and ranges:
# This allows a range of 0 to 100 with a step of 2
@export_range( 0, 100, 2 ) var number := 50

# This allows linking a file path
@export_file() var file_path :String

# This asks for a file path that ends with ".json" or ".md"
@export_file(".json", ".md" ) var specific_extension_file_path :String

# You can also try "String" with this one
@export_enum( Number1, Number2, Number3 ) var dropdown_menu_int := 0

# This creates a slider to change the float with a step of 0.0001
@export ( 0, 1, 0.0001 ) var float_with_range := 0.5
extends
editThe extends keyword tells Godot that a script inherits the properties of the given Object.
It must be at the very top of a script. Only tool can go before it.
for
editThe for keyword runs the indented block of code after it for every item from a given value.
for i in ["Hello", "I", "am", "human", 1, 2, 3]:
  print( i )
in
editOften used inside if statements. It evaluates as true if the value before it is inside the value after it. It can check:
- If a value is in an Array
- If a key is in a Dictionary
- If a string of text contains another string of text
- If an Object contains a property or constant of the same name
Among other things. "h" in "Hello" would be false. "Hello" does not have a lowercase "h" in it. If you want case insensitive search, call to_lower() on both values to convert every letter to lowercase (or to_upper() for uppercase - all capitals).
is
editOften used in if statements. It checks if the value before it is of the type after it.
print( "Hello" is String ) # True
print( 52434 is int ) # True
print( bool( "52434" ) is bool ) # True
print( load( "res://icon.png" ) is StreamTexture ) # True
print( load( "res://icon.png" ) is Texture ) # True
load
editOkay, load is technically described in global scope. However, it is very much defined as a keyword, so it would make no sense if it were not here.
It loads a file from your FileSystem when called. It takes a single argument: a file path.
File paths must be relative to your project folder or player save folder and not lead outside!
Valid examples:
load( "res://assets/weapons/sword.png" )
load( "res://entities/chicken_egg.tscn" )
load( "user://custom_entities/mutant_monster.tscn" )
res leads to your project folder. user leads to the player's save folder. This is typically %appdata%/roaming/godot/app_userdata/<project_name> unless the ProjectSetting Config/Use Custom User Dir and Config/Custom User Dir Name are set, in which case it's %appdata%/roaming/<ProjectSettings:Config/Custom User Dir Name>.
If you are using load to load files in runtime, you need to set
ProjectSettings.editor/export/convert_text_resources_to_binary to false, or the files might not load as expected in an exported build.master
editThe master keyword is part of a series 5 multiplayer keywords. It makes it so only the "master" calls a function if used.
remote master func take_damage( damage ):
  health -= damage
  rpc( "set_health", health )
You don't want to call this on a puppet to help prevent bugs.
@onready
editThe @onready keyword goes before the var keyword. It allows using a dynamic number that or getting a node using a nodepath, and is set before the _ready() function call.
@onready var sword_node = $hand/sword
pass
editThe pass keyword is used as a blank line of code. Use it after an "if" statement or "for" statement or after a function declaration to count as a "block of code" (to remove the error) without doing anything. This is called an "empty" if statement or a "stub function".
if true:
    pass
preload
editSee load. The file can be relative to the script that calls it or "res". The resource is loaded when the script is, preventing stalls during the running game. However, files must exist or there will be an error, and the path must be constant (i.e: not changeable).
res://game/game.gd:
preload( "entities/thing.tscn" )
or:
preload( "res://game/entities/thing.tscn" )
puppet
editThe puppet keyword is one of a series of 5 multiplayer keywords. Use it before "func" but after "remote". It makes a function only call to non-masters.
remote puppet func set_health( v ):
  health = v
You don't want to call this to the master to stop players cheating.
remote
editUse the remote keyword before the "func" keyword to allow a function to be called remotely by other peers in multiplayer when calling "rpc", "rpc_id", "rpc_unreliable" or "rpc_unreliable_id". Beware of cheating and security threats when doing this!
func hit( ):
  health -= 1
  rpc( "player_hit", health )

remote func player_hit( hp ):
  if get_tree().get_rpc_sender_id( ) != get_network_master( ):
    return # This means a player is trying to cheat
  health = hp
See puppet and master for more info. Use remotesync to call the function locally as well as via the network.
WARNING: Malicious hackers can use your game to retrieve or delete data, or players can cheat, if you do not add checks to stop them. Don't ever add remote to functions that delete or create files unless you know what you're doing.
remotesync
editSee remote. This keyword also calls a function locally instead of only calling them over the network. Good for telling other peers as well as the master that the character has jumped.
return
editThe return keyword is used to end the function. For functions that are called and "return" a value, the return keyword is where to go.
func get_some_value( ):
  return "some string"
It also ends the function call, so can be used in an if statements to skip the rest of the function. It does not require a return value, and by default returns null.
static
editUsually, to call an Object's function, you need an instance of it. If you use the static keyword before the "func" keyword, you'll be able to call it from a non-instance. However, you can only use other static functions or those in global scope. You cannot use member variables.
In the following example, Weapon is a custom Resource.
- Weapon.gd
extends Resource
class_name Weapon

export var damage = 5
const DAMAGE = 5

static func get_damage( ):
  # Cannot use an outside variable here
  return DAMAGE # Can use a constant though
Weapon.new( ).get_damage( ) becomes Weapon.get_damage( ), saving memory and CPU resources if you were to want to find a value.
@tool
editThe @tool keyword tells Godot that a script runs in the editor. These sorts of scripts are commonly referred too as tool scripts. It won't run if the script is only open in the Script edit screen. It must be attached to a node in the scene, or a node with the script must be in the editor.
It must always be placed before the extends keyword. It can be placed on the same line as the extends if you find it more convenient.
If you have a tool script, scripts that it inherits and scripts that inherit it won't run, unless they are also tool scripts. All nodes themselves run in the editor, but only if placed into it's interface with editor plugins.
See also: editor plugins (and the plugins chapter), very powerful things.
var
editThe var keyword creates a variable. They are automatically freed from memory when they leave the scope (an indented block of code unindents, for example.)
var global_varible := 1

func _ready():
  some_function(7)

func some_function(argument):
  print(argument)
  print(global_variable)
  var temporary_variable = 2
  print(temporary_variable)
  if true:
    var another_variable = 3
    print(another_variable)
    print(temporary_variable)
  print(another_variable) # Error: the identifier "another_variable" isn't declared in the current scope, since it is not declared in an lower indentation.
while
editThe while keyword runs the indented block of code after it until the if-statement after it is no-longer true. It won't run if it starts as false.
var i = 0
while i < 50:
  print(i)
  i += 1
- "if" statement
An "if" statement is a powerful piece of code. Every programming language has some kind of "if" statement. Valid examples are:
var variable = 5
if variable == 5:
  pass # True
if variable < 6:
  pass # True
if (variable != {{Gdscript/string|5}) == ({{Gdscript/keyword|not} variable == {{Gdscript/string|5}):
  pass # True (both values are false, and false == false)
if variable is int:
  pass # True
if range({{Gdscript/string|5}) in variable:
  pass # [0,1,2,3,4] is not in 5.
 print("variable is 5" if variable == 5 else "variable is not 5")
Other rules to follow:
You must use indentation for a new line. You may put a statement on the same line as "if", but only if it is one line long: if variable == 5:print("variable is 5").
You cannot use "else if" syntax, like can be used in JavaScript, instead use the "elif" keyword.
A "value1 if something else value2" is a fast way to change a single argument in a function based on another value. It could be used like this: print("I am "+(age+" years old.") if age > 1 else "not at school.") Otherwise, an "if" statement must have indented code after it. Even if it is just pass.
Conditions in brackets are checked first, making if draw_lines_inverted == ((5 == 5) == (3 != 4)): valid. If you do not use brackets, it reads the conditions left to right. So to check if value is a bool, then check if it is true (without risking an error if it is not a bool) use if value is bool and value == true:. If it is not a bool, the value is not checked to see if it is true.
not
editThe not keyword reverses the condition that is placed afterword.
As an alternative, you can use "!".
and
editThe and keyword checks if the values before and after it are both true.
or
editThe or keyword checks if a value before or after it is true.
null
editNull is the absence of value. Null can be inferred as a function's return value with -> void.
Never evaluates as true in if statements:
if null:
  pass # This never runs
This is the default value used in a variable if it has not been set. If a function that you made is supposed to returns something, but instead return null, be sure to check the output for errors, and double check the function is working properly.
bool
editA bool is a basic data type which may only have 2 values: true (positive, on or 1) and false (negative, off or 0). bool may be inferred as a function's return value with -> bool.
bools evaluate as true in an if statements if it is equal to true:
if true:
  pass # This runs
If converted to an integer (with int(bool)), it becomes 0 if it's false and 1 if true.
History
editBools were invented by George Boole. George was an English mathematician whose work is the result of a special programming system. This system may only have 2 values, true and false. It was called "Boolean logic" in his honor.
See the official documentation for more: https://docs.godotengine.org/en/stable/classes/class_bool.html
int
editAn int, or integer, is a whole number. int may be inferred as a function's return value with -> int.
ints evaluate as true in an if statements if not equal to 0:
if 1:
  pass # This runs
Operators
editInts are great for maths. They support the following operators:
Comparitive:
< Less than
> More than
== Equal to
Modifiers (use a number on both sides):
* Multiplication
/ Division
+ Addition
- Subtraction
% A type of divide. It sets a 64-bit integer to a limit of the second (randi()%5 is an integer 0 to 5)
^ To the power of
Dividing ints or floats by 0 is impossible! Attempting to do so will cause an error!
See maths is fun: dividing by zero.
Useful constants:
INF # Or "infinity". When printed, shows "1.#INF"
NAN # Or "not a number". When printed, shows "1.#QNAN"
Speaking of NaN, NaN is not equal to NaN (NAN == NAN is never true). Instead, use is_nan(variable) to see if it is NaN.
To check for infinity (INF is equal to INF, but INF is not equal to -INF), use is_inf(variable).
Ints can be separated with underscores, like 36_234_785 (which makes 36234785) to be easier to read.
See also
editSee the official documentation for more: https://docs.godotengine.org/en/stable/classes/class_int.html
float
editFloats, also known as floating-point numbers, are decimal numbers, like 1.7. float may be inferred as a function's return value with -> float.
floats evaluate as true in an if statements if not equal to 0.0:
if .1:
  pass # This runs
Operators
editFloats are great for maths. They support the following operators:
Comparative:
< Less than
> More than
== Equal to
Modifiers (use a number on both sides):
* Multiplication
/ Division
+ Addition
- Subtraction
Useful constants:
PI # 3.141593
To check if two numbers are approximately equal (I.e: less than 0.00001 difference), use is_equal_approx(num1, num2).
Floats can be separated with underscores to be easier to read, like ints.
See also
editSee the official documentation for more: https://docs.godotengine.org/en/stable/classes/class_float.html
String
editA versatile data type that can be any length. They are a string of characters. Hence the name "String". String may be inferred as a function's return value with -> String.
Strings evaluate as true in an if statements if not empty:
if "false":
  pass # This runs
See the official documentation for more: https://docs.godotengine.org/en/stable/classes/class_string.html
Array
editAn array is even more versatile than a String. It may be any length, and each value has a numerical index (of int). An Array may be inferred as a function's return value with -> Array.
In an if statement Arrays evaluate as false when empty:
if [false]:
  pass # This runs

if []:
  pass # This does not run
Arrays are passed by reference rather than value. See Dictionary.
See the official documentation for more: https://docs.godotengine.org/en/stable/classes/class_array.html]
Dictionary
editDictionarys are the most versatile data type in Godot, besides Objects themselves. Dictionary may be inferred as a function's return value with -> Dictionary.
Dictionarys evaluate as true in an if statements if not empty:
if {"team 1": 0, "team 2": 0}:
  pass # This runs
Every value is indexed with a value. You can use any data type or Object you wish. As the value or key. FuncRefs and Nodes also count, but remember to keep that same FuncRef or Node (instead of using a different FuncRef for the same function). Even another Dictionary or Array can be used as a key or value.
Dictionaries are passed as reference rather than value, meaning this is never true:
return {"red": Color.red} == {"red": Color.red} # False
Although this is:
var dictionary={"red": Color.red}
return dictionary == dictionary # True
This can be useful by saving the same Dictionary in multiple variables, then changing one of them changes them all. If you don't want this functionality, use dictionary.duplicate(true).
To compare them, use hash():
return hash({"red": Color.red}) == hash({"red": Color.red}) # True
Indexing
editTo get a value from a dictionary, you need to retrieve it with its index.
var points = {"Hannah": 5, "Paul": 8, "Tim": 3, "Bob": 0}
var username = "Bob"

func update_hud():
  $Label.text = "Score: " + String(points[username])
So "Bob" has no points. So the label says "Score: 0".
See the official documentation for more: https://docs.godotengine.org/en/stable/classes/class_dictionary.html
Vector2
editA vector is a value with multiple floats. Vector2 is used for 2D positioning among other things. They are indexed at the end with:
- ".x" or "[0]"
- ".y" or "[1]"
They are complex things, including many functions. Vector2 may be inferred as a function's return value with ->Vector2.
Vector2s evaluate as true in an if statements if at least one value is not equal to 0:
if Vector2(1, 0):
  pass # This runs
See the official documentation for more: https://docs.godotengine.org/en/stable/classes/class_vector2.html
Vector3
editA vector is a value with multiple floats. A Vector3 has 3 numbers and used for 3D positional and rotational data, among other things. They are indexed at the end with:
- ".x" or "[0]"
- ".y" or "[1]"
- ".z" or "[2]"
Vector3s are complex things, having many functions. Vector3 may be inferred as a function's return value with ->Vector3.
Vector3s evaluate as true in an if statements if at least one value is not equal to 0:
if Vector3(1, 0, 0):
  pass # This runs
See the official documentation for more: https://docs.godotengine.org/en/stable/classes/class_vector3.html
Color
editTechnically considered a vector, it contains 4 values:
- ".r" - the red channel (E.g: 0 is no red, 1 is full red)
- ".g"- the green channel
- ".b" - the blue channel
- ".a" - alpha (or transparency)
Color may be inferred as a function's return value with ->Color.
Colors evaluate as true in an "if" statements if not black with no transparency (Color(0, 0, 0, 1) is false):
 if Color(1, 1, 1):
    pass # This runs
If r, g and b are 1, the color is white. If they are 0, the color is black. Know your color wheel! No color or all the colors!
Now, this can be irritating sometimes. How do you quickly get basic colors like orange and yellow? Or common shades of red, green and blue? Color.orange is a simple way to do so.
All color constants:
aliceblue
|
antiquewhite
|
aqua
|
aquamarine
|
azure
|
beige
|
bisque
|
black
|
| blanchedalmond | blue | blueviolet | brown |
| burlywood | cadetblue | chartreuse | chocolate |
| coral | cornflower | cornsilk | crimson |
| cyan | darkblue | darkcyan | darkgoldenrod |
| darkgray | darkgreen | darkkhaki | darkmagenta |
| darkolivegreen | darkorange | darkorchid | darkred |
| darksalmon | darkseagreen | darkslateblue | darkslategray |
| darkturquoise | darkviolet | deeppink | deepskyblue |
| dodgerblue | firebrick | florawhite | forestgreen |
| fuchsia | gainsborow | ghostwhite | gold |
| goldenrod | gray | green | greenyellow |
| honeydew | hotpink | indianred | indigo |
| ivory | khaki | lavender | lavenderblush |
| lawngreen | lemonchiffon | lightblue | lightcoral |
| lightcyan | lightgoldenrod | lightgray | lightgreen |
| lightpink | lightsalmon | lightseagreen | lightskyblue |
| lightslategray | lightsteelblue | lightyellow | lime |
| limegreen | linen | magenta | maroon |
| mediumaquamarine | mediumblue | mediumorchid | mediumpurple |
| mediumseagreen | mediumslateblue | mediumspringgreen | mediumturquoise |
| mediumvioletred | midnightblue | mintcream | mistyrose |
| moccasin | navajowhite | navyblue | oldlace |
| olive | olivedrab | orange | orangered |
| orchid | palegoldenrod | palegreen | paleturquoise |
| palevioletred | papayawhip | peachpuff | peru |
| pink | plum | powderblue | purple |
| rebeccapurple | red | rosybrown | royalblue |
| saddlebrown | salmon | sandybrown | seagreen |
| seashell | sienna | silver | skyblue |
| slateblue | slategray | snow | springgreen |
| steelblue | tan | teal | thistle |
| tomato | transparent | turquoise | violet |
| webgray | webgreen | webmaroon | webpurple |
| wheat | white | whitesmoke | yellow |
| yellowgreen | dimgray |
See the official documentation for more: https://docs.godotengine.org/en/stable/classes/class_color.html
Basis
editA Basis contains a 3x3 matrix for 3D position, rotation and scale of 3D objects. Basis may be inferred as a function's return value with ->Basis.
Basiss evaluate as true in an if statements if at least one of its Vector3s would also evaluate as true:
 if Basis(Vector3(1, 0, 0), Vector3(0, 0, 0), Vector3(0, 0, 0)):
    pass # This runs
See also
editMatrices and transforms tutorial.
See the official documentation for more: https://docs.godotengine.org/en/stable/classes/class_basis.html
Transform2D
editA Transform2D is a 2x3 matrix used for 2D linear transformations. It can represent transformations such as translation, rotation or scaling. It consists of three Vector2 values: x, y and origin. Transform2D may be inferred as a function's return value with ->Transform2D.
Transform2Ds evaluate as true in an if statements if at least one value is not 0:
if Transform2D(1, 0, 0, 1, 0, 0):
  pass # This runs
See more: The matrices and transforms tutorial.
See the official documentation for more: https://docs.godotengine.org/en/stable/classes/class_transform2d.html
Transform
editA Transform is a 3x4 matrix used for 3D linear transformations. It can represent transformations such as translation, rotation or scaling. It consists of a Basis (first 3 Vector3s) and origin (last value). Transform may be inferred as a function's return value with ->Transform.
Transforms evaluate as true in an if statements if at least one value is not 0:
if Transform(1, 0, 0, 0, 1, 0, 0, 0, 1, 0, 0, 0):
  pass # This runs
See more: The matrices and transforms tutorial and the using Transforms tutorial.
See the official documentation for more: https://docs.godotengine.org/en/stable/classes/class_transform.html
Pool<type>Array
editFor detailed information, please see Array. PoolArrays are optimized versions of Array, but allow storing only one variant type. They also don't contain certain functions, like find().
PoolArrays are passed as value rather than reference:
var names = PoolStringArray(["Hannah", "Paul", "Bob"])
var reference_array = ["Hi"]

func _ready():
  var names_copy = names
  names_copy.append("Sam")
  prints(names, names_copy) # Only the second one was changed

  var reference_array_copy = reference_array
  reference_array_copy.append("human")
  prints(reference_array) # Both Arrays were changed here

  var copy2 = reference_array.duplicate()
  copy2.append("I am a robot")
  prints(reference_array, copy2) # They are now both different
As you can see, the PoolStringArray does not keep the same values across all references, but the Array does.
Allowed types for Pool<type>Arrays are: int, float, string, real (bytes), color, vector2, and vector3. They may only store data types that match the type mentioned in the name, and are more optimized in terms of memory.
So, you can add, rename, move and delete nodes in the editor. But how do you do it with code? This is such an important thing, yet it isn't obvious how to do it.
Basic manipulation
editThis is how to create a bullet, add it to the scene, and delete it after 10 seconds:
- player.gd
extends KinematicBody2D

func _physics_process(delta):
  if Input.is_action_just_pressed("shoot"):
    # Create bullet and add it as a child of its parent:
    var bullet=preload("res://bullet.tscn").instance()
    get_parent().add_child(bullet)
- bullet.gd
extends Area2D

var timer:=0.0
var dir = 1 # Right = 1, Left = -1

func _physics_process(delta):
  # Increase the timer
  timer+=delta
  if timer >= 10:
    # Ten seconds have passed - delete on next frame
    queue_free()
  position.x+=(5 * dir) *delta
queue_free(): Deletes a node on the next frame, or after the node's script has finished.
add_child(node: Node): Adds node as a child of the node that the add_child() was called on, providing node doesn't already have a parent.
Advanced control
editHow do you close your game? How do you pause/unpause your game (the correct way)?
# Remember: call "get_tree()" before calling any of these

# Quit the game/app
get_tree().quit()

# Pause
get_tree().paused=true # Or "false" to unpause
# Pausing stops "_physics_process()".
# It also stops "_process()" and "*_input()" if pause mode is not "pause_mode_process" for the node.
Making new nodes can be easy or hard, depending on the planned node. Some will just require this guide, some will benefit from being introduced with an entire plugin. This guide will assume the former.
Write this code:
tool
extends Node
class_name TestNode

export var message = "Hello world!" setget set_message

func _ready():
  print(message)

func set_message(value):
  if value and value is String:
    message = value
The setget tells the engine to run set_message whenever you try to change message. In this particular example, you cannot empty it. Because of the tool
The class_name tells the engine to add the script to the add node popup, add it to the auto-correction list and to allow you to instance it with TestNode.new().
Resources and importing
editIn Godot, a Resource is an object that stores data, like Translation and Texture. They are reference-counted, which means when they are no-longer used, they will automatically delete themselves, freeing memory.
Making resources
editTo make a resource, you need to first find something that will use it. Create a new scene with a Sprite2D. You can do this by pressing "Other Node" after making a new scene.
Select it and look for its Texture property. Click [empty] and press "New GradientTexture". Press the Gradient property (you may need to click on the GradientTexture) and press New Gradient from the drop-down menu. Click on this Gradient. Click the black rectangle. A blank area a little bit to the right will turn black. Click it and a popup that allows you to choose a color will appear. Choose a color. Do the same to the white rectangle. You can add more points and colours by pressing in-between any two of these rectangles. Congratulations! You made your first resource!
Games usually show art, not just square color gradients. For this, download an art program. Microsoft Paint will do for now if you use Windows, but it isn't so great when you want a transparent image (say, non-squares), so you might want a better program soon. I use Piskel. Alternatively, you could download the Godot plugin that adds an image editor. It can be found in the Asset Library (AssetLib) and enabled in Project->ProjectSettings->Plugins. I forgot the name of the image editor, however, so you might need to search around for it.
Make anything at all. A diamond, a person, a car, or just a square. Save it into your project's folder. Go back to Godot, find the file and drag it over to the Texture property of the Sprite2D in the Inspector. Congratulations! You just imported - and used - your first file!
So, wait, what did I just do?
editImporting files into your game is essential for game development. In Godot, you don't need to save the file or image into some kind of database to become usable. Just plop it down into your project's folder. Simple.
If you want to fine-tweak an imported file, do not use the Inspector! Changes made to imported resources in the Inspector won't save. Instead, double click your file, above the Scene dock is an Import tab. Press the Import tab button to show it. You will see a large or small menu depending on the file selected. For Texture (".png", ".svg", ".bmp" file extensions), you will see things like compression settings or process settings. Under Flags, uncheck Filter, then press Reimport. See any differences from your old image?
Filter makes your image look higher resolution than it actually is by making it blurry. Turning it off makes an image more pixelated.
Check Mipmaps if your image will be used in the 3D world, or show in many different sizes, to increase visual quality.
Fix Alpha Border makes your transparent images look normal when using filter or compression methods other than Lossless.
Svg Scale makes .svg files larger, scaled or higher resolution if you increase the number, with the opposite effect if you decrease the number.
What compression modes are available? And what do they do?
| Name | Quality loss | Loading time | Performance | Disk size |
|---|---|---|---|---|
| Lossless (default) | None | Slow | Average | Medium |
| Lossy | High | Slow | Average | Smallest |
| Video RAM | Medium to High | Fastest | Fastest | Small |
| Uncompressed | None | Medium | Average | Largest |
The compression format you use depends on many things. In general, use Video RAM for large textures or textures you don't see up close in-game and Lossless for small textures in 2D games.
Texture artifacts are common in higher quality loss. Make sure to check your texture after re-import that it looks the same or that the quality loss is unnoticeable.
Sometimes you intend to lower the quality to break up a texture that uses flat planes of color if you are a less than skilful artist. Those artifacts can break up solid blocks of color, making it easier to make decent game art. However, consider becoming more skilled at art, or getting an artist,since this is not foolproof.
Making your own resources
edit
You can make your own resource scripts. All they should do is hold information, they should not do any logic. For example, you can use resources to hold data for how an item works. It could store the name of the item, the image, etc. In Godot 4, it is much easier to separate different export variables in groups and drop-down menus.
In Godot 3.x, resources are mostly the same, but it is a bit more difficult to create organised groups like in Godot 4.
External links:
What you have learned
edit- What importing is in Godot.
- How to make a resource.
- How to change the settings for an imported file.
Signals and methods
editMany Godot users will say to you "signal up, call down" if you ask for tips with coding. Just what does this mean?
Signals
editSelect a node from the Scene dock. Press the "Node" tab next to the inspector. A list will appear. These are signals.
Create a new scene. Press User Interface. Save it as Signal test.tscn. Add two nodes: a Button and a Label, both as children of the Control. Use the Layout button to center the Button to the screen. Set the Text property to Press Me in the inspector.
Now add a script to the Control root node (the first one). Select the Button. Open the Node dock, and double click "button_up()". A popup will appear with your scene root (the Control node) selected. A text edit should say _on_Button_button_up. Press "Connect".
This will create the code
func _on_Button_button_up():
  pass # Replace with function body.
This function will be called when the signal button_up is emitted. Add the code print("You pressed me!") to the function. You may remove the pass # Replace with function body. if you wish.
Run the scene by pressing F6, and grant that button's wish!
You can make your own signals with signal <signal_name> <optional:(argument1: type, argument2: type, ect)> in GDScript. To emit it in a function: emit_signal(<"signal_name">, <argument1>,<argument2 ect.>).
Calling
editJust as important as signals, calling allows many things to happen. Add $Label.text = "You pressed me!" to the function. This is actually setting a variable, but it's still considered calling, as setting a variable uses a setter function. More on those in another chapter.
The $path is a short hand for the get_node(path) function. The Label is the path argument. This allows direct manipulation of the child node of that name.
These are called NodePaths. They work a bit like file paths, and this is a common example: $weapon/art.texture = preload("res://assets/weapons/upgraded_sword.png"), and can also be relative, like (called in res://game/player.gd) /weapons/upgraded_sword.tscn.
A global get_node looks like /root/game/player/weapon/art.
Signal up and call down
editIt means, if you are calling methods on another node, use signals for calling parents (to decrease code complexity) and use methods when calling children (to increase readability and freedom).
What you have learned
edit- How to get a child node.
- How to connect a signal.
- How to set a property of another node (With the ".". You can use it to call their functions too!)
Your first game
editCreating a blank project
editThe basics of making your very first game (that has nothing in it) are placed below:
- Open Godot. Press "New Project":
- Choose a name for the game:
- Press "Create Folder", then "Create & Edit":


First game tutorials
editThis book will not contain full game tutorials, as they have already written (and are more likely to be up-to-date). Instead, use the links below.
- Your first 3D game - Note: it's a good idea to make a 2D game first, as making use of the extra dimension makes it four times harder to make games.
Debugging
editThe debugger dock
editThe debugger dock is the default and best way to debug. If a red circle is shown next to it, there is an error to read. If there is a yellow circle, you have a new warning to read.
When you open it, you have several tabs:
Debugger
editThis is the tab opened when a script error occurs. It is not shown for a fatal error, instead the game just crashes. In this case, see below.
It shows the "stack frames". This is a stack of function calls, allowing you to find the source of the error. This is invaluable. To the right of the stack frames show all the variables the script can access, and what they are set to. Above that is a few buttons:
- Skip Breakpoints: stops the game being paused on breakpoints until this is repressed.
- Copy Error: copy the error to your clipboard.
- Step Into: runs the next expression. Enters indented blocks that it would enter anyway.
- Step Over: runs the next expression. Skips indented blocks.
- Break: pauses the game as if a breakpoint was used.
- Continue: resumes the game.
Errors
editAllows you to see every fatal and non-fatal error and warning that you encountered during the running game. There are a few buttons:
- Clear: empties this list.
- Expand All: expands every error to see more information.
- Collapse All: collapses every error to see less information.
Each error may be pressed to go to the script and line the error came from. Double click it to expand or collapse. You can also click the arrow to expand/collapse. Expanding it shows the error and the code stack.
Profiler
editThis allows you to record function call count and how much frame time is used. It is priceless when optimizing your game, and can be used for debugging too.
To begin, you must press start. On the right, a chart will generate. Higher up lines means that something takes up a large amount of the game's processing. They should be optimised at some point, as much as possible.
To check what is slowing the game down the most, click in the chart in the area with a high peak, and scroll down the left. You will see how many seconds each function call costs, and how many times it was called. If you want a percentage, click on the Mesure: value, and choose Frame %.
The Time: has two values:
- Inclusive: shows the frame time or percentage of all calls to a function
- Self: shows the single largest frame time or percentage during a single call.
Network Profiler
editThis allows you to see how much internet is being used by each node. Both how much used in sending, and how much used in reciving.
Monitors
editThis allows you to check performance in a graph. Most useful options to show are:
- Time:
- FPS: Frames per second.
- Process: The amount of time spent every idle frame.
- Physics Process: The amount of time spent in the physics frame.
- Memory:
- Static: How much memory is used for unchanging things.
- Dynamic: How much memory used is always changing or code being ran.
- Static Max: The maximum static memory reached.
- Dynamic Max: The maximum dynamic memory reached.
- Msg Buf Max: The memory used by output, including errors and warnings.
- Object
- Objects: The total number of Objects there are.
- Resources: The amount of Resources that exist.
- Nodes: The number of Nodes that exist.
- Orphan Nodes: The number of Nodes that are not inside the SceneTree. In general, this should always be zero. Try to use resources or an object if it is intentional. Otherwise you should free it if possible, by calling
free()on that node when you are finished with it.
Video RAM
editThis allows you to see how many images are using up memory, and which ones.
Misc
editThis allows you to see the Control node last activated before the game closed, and its node path.
Script debugging
editWith the script editor open, press the "Debug" button at the top. It is close to "File" and "Search".
You have a few options explained above: Step into, step over, break and continue.
You also have two other options:
- Keep Debugger Open: having a running game slows down the editor, so closing it is a must. But closing the game also closes the debugger. Check this option to keep it open when you close your game.
- Debug With External Editor: allows you to use another editor to debug with.
Debug options
editAt the very top of the screen, press the "Debug" button. It appears near "Scene" and "Project". You have the following options:
- Deploy with Remote Debug: when exporting, the resulting executable will attempt to connect with the computer to be debugged.
- Small Deploy with Network FS: exporting produces a minimal executable. The file system is provided over the internet.
- Visible Collision Shapes: whether or not to show collision shapes.
- Visible Navigation: whether or not navigation meshes and polygons are visible in the running game.
- Sync Scene Changes: if checked, changes to a scene is replicated to the running game.
- Sync Script Changes: if checked, changes to a script will cause it to be reloaded in the running game.
Debugging editor plugins
editThe best way to debug an editor plugin is to keep an eye on the output dock. If that doesn't help, adding temporary print() calls can help you to see what is called and the values of variables.
Catching fatal errors
editA fatal error is a crash that doesn't throw an error message. Its usually caused by an engine bug, and sometimes has nothing to do with your code. You can either try a different way of doing what the code was doing when it crashed, or report a bug report here. You may need to send a copy of the code that was running when it happened.
Note exactly what you were doing when it happened. Try to find out what code was running, and add breakpoints everywhere around that area. If it doesn't crash this time, remove the breakpoints again. If it still doesn't crash when playing, make certain you are doing exactly what you wrote down.
If you still can't reproduce the crash, assume it is not an issue you can fix, and is an editor bug. Consider sending a bug report. This may require giving a sample of the code used in the general area of where you think the issue is, and you may need to give the exact instructions of what you were doing. Consider also uploading any helpful log files.
Input
editIn every game, you are able to press a button or tap on the screen for something to happen. This is called reacting to input. There are two ways to do it: using input maps and manually.
Input map
editGo to your Project Settings at Project -> Project Settings... and click on the Input Map tab. You will get a list of input actions, like "ui_select". These are the default ones, and can be edited, but not removed.
You can - and should - make your own, however. After where it says "Action:", type a name for an action, like "shoot", or "move_forward". Press the "Add" button next to it. This will create your action.
You will notice that you have no input events associated with it. Press the "+" button next to your new action. You will see these options:
- Key: Allows you to link any keyboard button.
- Joy Button: Allows you to link a controller button.
- Joy Axis: Allows you to link a controller joy-stick movement.
- Mouse Button: Allows you to link a mouse button.
For touch screen and mouse movement, please see the manual input detection section mentioned below.
There are several ways to detect whether or not they are pressed, and the method you choose depends on what the action is for. The functions below return a boolean, unless otherwise stated, and should be put inside "if" or "while" statements.
| Function | What it's for |
|---|---|
| is_action_pressed | Actions that can be held down, like moving, or shooting an automatic weapon |
| is_action_just_pressed | Actions that only run the moment the button is pressed, and cannot run again until the action is released. |
| get_action_strength | Movement, and only for joy sticks (for precise control). Returns a float, 1 = full joy tilt or pressed and 0 = no tilt or not pressed. |
| is_action_just_released | Actions that run only when released (Button unpressed, for example) |
The above methods are all called on the Input singleton. They all accept a single String argument.
if Input.is_action_just_pressed("shoot"):
  pass # Add shooting code here
The String argument must be the name of an input action defined in the input map.
Manual input detection
editLet's say that you want to detect mouse movement or touch screen events, or that the input map won't work because you need input for a tool that you can't guarantee the user of the tool (or yourself) will create the input event.
This is when you need manual input detection. This is like using servers. Manual input detection is a low-level equivalent to the input map that is more complex but gives more power.
The below code moves a 2D sprite when you move your mouse, and ignores all other input.
extends Sprite2D

func _input(event):
  if event is InputEventMouseMotion:
    position += event.relative
The below code creates a simple button. _gui_input() is available only to Control derived nodes and runs if focused and you press a key, you pressed it with the mouse or the mouse moves over it.
extends Control
signal button_up
signal button_down

var pressed = false

func _gui_input(event):
  if event is InputEventMouseButton and event.button_index == BUTTON_LEFT:
    if event.pressed:
      get_tree().set_input_as_handled()
      emit_signal("button_down")
      pressed = true
    elif not event.pressed:
      if pressed:
        emit_signal("button_up")
      pressed = false
The get_tree().set_input_as_handled() makes sure other _gui_input() and _unhandled_input() are not called.
There are many input events. They are as follows:
- InputEventMouse:
- InputEventMouseButton: Emitted when you click a mouse button. Read with: button_index (BUTTON_* constants), pressed.
- InputEventMouseMotion: Emitted when you move the mouse. Read with: relative (how much the mouse moved since the last call to input), position (the mouse's new position relative to the top-left of the game window - or the node in "_gui_input" calls).
- InputEventKey: Emitted when you press a button on the keyboard. Read with: button_index (KEY_* constants), pressed, echo (if true, the button is being held down).
- InputEventScreen:
- InputEventScreenTouch: Emitted when you tap the screen. Read with: position (the position you tapped on the screen), pressed (if false, you are untapping the screen).
- InputEventScreenDrag: Emitted when you drag on the screen. Read with: position (new position), relative (how much the finger moved since the last input call), fingers.
- InputEventJoy:
- InputEventJoyButton: Emitted for controller button presses. Read with: pressed, button_index (JOY_* constants).
- InputEventJoyMotion: Emitted for moving the joy stick. Read with: position, relative.
See more: The InputEvent tutorial.
Input singleton
editSo reading input is very fun. However, there are a few more well used methods of input. Try to think about it before you read on. What are they?
There are more things besides when using the input singleton, and this section will explain in-depth on what can be achieved and how.
Motion controls
editMotion controls are in many popular games, particularly VR and/or AR games, to look around.
func _process():
  # Assume camera_pivot is a Spatial with a child Camera3D node.
  # The gyroscope only works when exported to Android.
  $camera_pivot.rotation += Input.get_gyroscope()
  # The accelerometer is only available when exported to mobile.
  # This makes you move the camera when you move the device (Not when you rotate it)
  $camera_pivot.rotation += Input.get_accelerometer()
This is only for "rotational" motion detecting.
Vibration
editMany popular games include vibration. You can call the below when the player is hit:
Input.vibrate_handheld(100)
Input.start_joy_vibration(0, .5, .4, 1.0)
This will vibrate a controller or mobile device for 1 second.
InputMap singleton
editThe InputMap allows creating input actions via code. This is good in games where the player can change their controls.
See here for the rundown of InputMap.
The following code creates a shoot action which corresponds to pressing the spacebar.
extends Node

func _ready():
  InputMap.add_action("shoot")
  InputMap.action_add_event("shoot", create_key_action(KEY_SPACE))

func create_key_action(key) -> InputEventKey:
  var input = InputEventKey.new()
  input.pressed = true
  input.scancode = key
  return input
It can be any input event, not just InputEventKey.
See the "faking" input section below for more information on creating InputEvents.
Other useful methods:
- load_from_globals(): Resets actions to those set in ProjectSettings.
- has_action(action: String): Returns true if the action exists.
- action_erase_events(action: String): Clears the action so there are no associated events.
- erase_action(action: String): Erases the action.
As always, this does not list them all. Just a few of them.
Audio input
editTo record audio, you need to do 2 things:
- Press "Audio" at the bottom of the screen, and press "New Bus". Rename it "Microphone" and click "Add Effect". Press "Record" in the dropdown menu that appears.
- Create a new AudioStreamPlayer node for your scene. Click on the Stream value in the Inspector. Choose New AudioStreamMicrophone from the dropdown menu that appears. Set the "Bus" property to "Microphone". Whenever you want to record audio in-game, just turn the "Playing" value to true.
Reading audio for stuff like voice recognition can be done, but it is not easy, and is outside the scope of this book (and outside the knowledge of the author).
"Faking" input
editSo, you decided that you want to change the InputMap at runtime? But how do you do that?
Godot has several powerful classes that make input detection easier and faking it possible.
See more: The InputEvent tutorial.
InputEventKey
editInputEventKey is for detecting keyboard button presses and releases.
The below code allows you to shoot with the A key:
extends Node

func shoot_with_a():
  var input = InputEventKey.new()
  input.pressed = true
  input.scancode = KEY_A
  InputMap.action_erase_events("shoot")
  InputMap.action_add_event("shoot", input)
The "Input.event_erase_actions" clears all actions for the event specified. In this case, the space-bar will no longer make you shoot.
Any key can be specified, though it may not be obvious how to do so.
| Constant | About |
|---|---|
| KEY_<letter> | Letter keys |
| KEY_<number> | Number keys |
| KEY_KP_MULTIPLY | The keypad * key |
| KEY_KP_DIVIDE | The keypad / key |
| KEY_KP_SUBTRACT | The keypad - key |
| KEY_KP_ADD | The keypad + key |
| KEY_KP_ENTER | The keypad Enter key |
| KEY_KP_PERIOD | The keypad . key |
| KEY_SPACE | The Space key |
| KEY_ENTER | The Enter key |
| KEY_PLUS | The + key |
| KEY_MINUS | The - key |
| KEY_EQUALS | The = key |
| KEY_QUESTION | The ? key |
| KEY_EXCLAIM | The ! key |
| KEY_QUOTEDBL | The " key |
| KEY_NUMBERSIGN | The # key |
| KEY_DOLLAR | The $ key |
| KEY_PERCENT | The % key |
| KEY_AMPERSAND | The & key |
| KEY_APOSTROPHE | The ' key |
| KEY_PARENLEFT | The ( key |
| KEY_PARENRIGHT | The ) key |
| KEY_AT | The @ key |
| KEY_COLON | The : key |
| KEY_SEMICOLON | The ; key |
| KEY_GREATER | The > key |
| KEY_LESS | The < key |
| KEY_BRACKETLEFT | The [ key |
| KEY_BRACKETRIGHT | The ] key |
| KEY_BACKSLASH | The \ key |
| KEY_ASCIICIRCUM | The ^ key |
| KEY_UNDERSCORE | The _ key |
| KEY_QUOTELEFT | The ` key |
| KEY_BRACELEFT | The { key |
| KEY_BRACERIGHT | The } key |
| KEY_BAR | The | key |
| KEY_ASCIITIDLE | The ~ key |
| KEY_STERLING | The £ key |
| KEY_CENT | The ¢ key |
| KEY_YEN | The ¥ key |
| KEY_COPYRIGHT | The © key |
| KEY_REGISTERED | The ® key |
| KEY_UP | The Up arrow key |
| KEY_DOWN | The Down arrow key |
| KEY_LEFT | The Left arrow key |
| KEY_RIGHT | The Right arrow key |
| KEY_TAB | The Tab key |
| KEY_BACKTAB | The Shift + Tab keys pressed together |
| KEY_ESCAPE | The Esc key |
| KEY_DELETE | The Delete key |
| KEY_INSERT | The Insert key |
| KEY_BACK | The Backspace key |
| KEY_SHIFT | The Shift key |
| KEY_ALT | The Alt key |
| KEY_CONTROL | The Ctrl key (Windows only) |
| KEY_META | The Meta key (Linux only) |
| KEY_F<number 1 to 12> | The F1 ect. keys on your keyboard |
| KEY_COMMA | The , key |
| KEY_PERIOD | The . key |
| KEY_ASTERISK | The * key |
| KEY_SLASH | The / key |
| KEY_HOME | The Home key |
| KEY_PAUSE | The Pause key |
| KEY_PRINT | The Print Screen key |
| KEY_CLEAR | The Clear key |
| KEY_END | The End key |
| KEY_SYSREQ | The system request key |
| KEY_PAGEUP | The Page Up key |
| KEY_PAGEDOWN | The Page Down key |
| KEY_NUMLOCK | The Num Lock key |
| KEY_SCROLLLOCK | The Scroll Lock key |
| KEY_CAPSLOCK | The Caps Lock key |
| KEY_MENU | The Context Menu key |
| KEY_HELP | The Help key |
| KEY_BACK | The Media Back key. Not to be confused with the back button on an Android device |
| KEY_FORWARD | The Media Forward key |
| KEY_STOP | The Media Stop key |
| KEY_MEDIAPLAY | The Media Play key |
If you want to detect if certain modifiers are also pressed, you have access to these variables:
- alt: Set to true if you must press "Alt" on your keyboard.
- ctrl: Set to true if you must press "Ctrl" on your keyboard (Windows only).
- meta: Set to true if you must press "Meta" on your keyboard (Linux only).
- command: Set to true if you must press "Ctrl" (on Windows) or "Meta" (on Linux) on your keyboard.
- shift: Set to true if you must press "shift" on your keyboard.
You may set more than one of these to true. This makes you need to press all the modifiers set.
If you want to detect releasing the key instead of pressing it, don't set "pressed" to true. If you are adding it to the InputMap, it will always be pressed if the keys for it are not, but only after they have been released for the first time. So how do you fix this then? Actually, it's quite simple!
Try Input.event_<press/release>("shoot"). It works nicely, but if you need it for calls to _input, you should instead use Input.parse_input_event(event).
InputEventMouse
editDetecting mouse input or faking it can be explained in two ways: mouse buttons and mouse motion.
See also: mouse and input coordinates tutorial.
InputEventMouseButton
editClicking your mouse is a common action to read, but not as common to fake. It is the simplest action to read and fake, though, needing only 2 values.
extends Node

func shoot_on_click():
  var input = InputEventMouseButton.new()
  input.pressed = true
  input.button_index = BUTTON_LEFT
  InputMap.action_erase_events("shoot")
  InputMap.action_add_event("shoot",input)
| Variable | Use |
|---|---|
| doubleclick | If true, the button was double-clicked.
|
| factor | The factor (or delta) of the event as a float. When used for high-precision scroll events, this indicates the scroll amount. Only supported on some platforms. If unsupported on the current platform, it may be 0.
|
| Constant | What it means |
|---|---|
| BUTTON_LEFT | Left click |
| BUTTON_RIGHT | Right click |
| BUTTON_MIDDLE | Scroll button pressed down |
| BUTTON_WHEEL_UP | Scroll wheel up. |
| BUTTON_WHEEL_DOWN | Scroll wheel down. |
InputEventMouseMotion
editFaking mouse motion can be harder, but sometimes very useful. If you actually want to move the mouse, instead use Input.set_mouse_position(<Vector2>). That will also generate a InputEventMouseMotion event to trigger.
| Variable | Use |
|---|---|
| position | The new mouse position, relative to the nodes viewport. If called in _gui_input, it is instead relative to the Control node.
|
| relative | The new position relative to the mouse position in the last call. |
| speed | The mouse speed in pixels per second |
By default, this event is only emitted once per frame rendered at most. If you need more precise input reporting, consider using Input.set_use_accumulated_input(false) to emit events as often as possible. If you need this to draw freehand lines, consider using Bresenham's line algorithm as well to avoid gaps when you move the mouse quickly.
InputEventScreenDrag
edit(Only available on mobile devices)
Reading and writing screen dragging is harder than InputEventMouseMotion, simply because you cannot force the user to move their finger via code. Okay, that's a lie. But to do that, you would need a degree in mind control or hypnotising, which is well outside the scope of this book!
| Variable | Use |
|---|---|
| position | The new position of the finger relative to the node's viewport. If used in _gui_input, it is relative to the Control node.
|
| relative | The finger's new position, relative to its old position. |
| speed | The drag speed in pixels per second. |
InputEventScreenTouch
edit(Only available on mobile devices)
This event is for tapping (or untapping) on the screen.
| Variable | Use |
|---|---|
| position | The finger's position relative to the node's viewport. If used in _gui_input, it is relative to the Control.
|
| pressed | If true, the user is putting their finger on the screen. Otherwise, they are taking their finger off the screen.
|
InputEventJoypadButton
editThis InputEvent is for detecting joy-con buttons (i.e: buttons on a controller, linked to a computer or a console).
| Variables | About |
|---|---|
| button_index | The button that is pressed. |
| If "true", the button is pressed. Otherwise the button is released. |
InputEventJoypadMotion
editThis event is for moving the Joy stick, one axis at a time. This InputEvent can be confusing.
| Variable | About |
|---|---|
| axis | A constant that has one of six values: JOY_AXIS_*, where "*" can be:
0: Left stick on the horizontal axis 1: Left stick on the vertical axis 2: Right stick on the horizontal axis 3: Right stick on the vertical axis 6: Left trigger analogue axis 7: Right trigger analogue axis The other four have no function yet, and are described as "generic game pad axises" and are just used as blank space. |
| axis_value | A number from -1.0 to 1.0. |
It is important to know that this InputEvent does not have a Vector2 value you can read from. The following script converts this InputEvent into a Vector3, x and y are for position, z is for the joystick being moved.
func convert_from_joypad_motion(event: InputEventJoypadMotion) -> Vector3:
  match event.axis:
    JOY_AXIS_0:# Left stick horizontal
      return Vector3(event.axis_value, 0, 0)
    JOY_AXIS_1:# Left stich vertical
      return Vector3(0, event.axis_value, 0)
    JOY_AXIS_2:# Right stick horizontal
      return Vector3(event.axis_value, 0, 1)
    JOY_AXIS_3:# Right stick vertical
      return Vector3(0, event.axis_value, 1)
  # An error occurred
  printerr("Invalid axis: %s in call to convert_from_joypad_motion" % [event.axis])
  print_stack() # To help with debugging, print the call stack.
  return Vector3(0, 0, 0)
Physics
editPhysics is used in many games, for many different things, such as falling, colliding into a wall, jumping, and so forth.
A StaticBody is a collision body that is not meant to move. While it can move, it should not be used for characters.
A static body may be scaled with no problems.
It is the fastest collision body type. It should be used for the environment and other non-movable things.
A RigidBody is an object that is affected by gravity. It usually is not used for characters as it is hard to control, but can be used in physics simulation games as it is quite accurate.
It cannot be scaled in any way!
A KinematicBody is a body that is intended to be given a script to move. It can also be used as a way to detect for hitting an object or surface.
Kinematic bodies work well for characters, but should not be used to simulate advanced physics.
An Area can be used to detect for other Areas, RigidBodies, or KinematicBodies. Upon overlap, a signal is emitted, and another is emitted when the object leaves.
If the camera/audio listener is inside the Area, it is possible to change the effects of sounds. E.g: to muffle car noises when jumping into water. You can do this by changing the "AudioBus" properties, and selecting a bus. You should make a "muffled" bus for this to work, and audio_bus_override must be set to true. (This is the overrided default audio bus, meaning the car noises must not use an audio bus. It will not layer the bus on top of others.).
In order for a collision object to collide with another, it needs one or more CollisionShape or ColisionPolygon children. CollisionShapes need an object defined to set their shape and size, and CollisionPolygons need multiple edges (at least 3) defined.
Collision mask and layers
editEach object can have masks and layers. If at least one mask is equal to the overlapping object's layer, the two objects will be considered to have collided. This can be used to make the player collide with the floor, walls and enemies, but not other players, or only the floor and walls.
Each layer can be given a name in Project Settings -> Layer Names -> 2d Physics and Project Settings -> Layer Names -> 3d Physics. This improves readability, and decreases the chance of bugs. Here's an example:
- Layer 1: World (walls, floors, bridges, ect)
- Layer 2: Player
- Layer 3: Enemies
- Layer 4: Projectiles
- Etc.
Soft world
editIf your 3D game uses SoftBody, you can simulate objects that deform when another object collides with it. Useful for capes and curtains. If not used, it is best to turn off Project Settings -> Physics -> 3d -> Active Soft World to increase performance.
Physics engines
edit- 3D
- GodotPhysics: Simple and functional. Incompatible with some collision shapes.
- Bullet: The deafult. Constantly checks for collision, missing fewer collisions, but having more performance cost. Use if your game has fast moving objects, like racecars or bullets.
- 2D
- GodotPhysics: The default. Simple and functional.
Saving and loading
editMost game engines allow you to save files. Godot is no different.
There are five methods to save files, and each method has at least 1 loading method.
Methods
editResources
editThese can be loaded with GDScript's built-in load() function. See creating resources for more.
- Pros
- Load and save built-into Godot
- Cons
- Hard to debug
Json
editCommonly used for sending data over the internet. It's easy to read and modify, so consider compressing or encrypting your save file to prevent cheats. This is especially important in multiplayer games. Alternatively, save player data in the cloud. This will require setting up a server.
- Pros
- Easy to debug
- Fast saving/loading times
- Cons
File
editFiles can be opened and parsed with the File object.
- Pros
- Easy to debug
- Easy to encrypt to prevent cheaters
- Cons
- Can be hard to parse
Xml
editXml is a simple file format, but hard to parse. See XMLParser.
- Pros
- Widely supported
- Cons
- Hard to parse
Scenes
editThis can be done by calling Node.pack(), which turns it and any child with owner set to it, which can be saved with ResourceSaver.save() and loaded with load().
- Pros
- Built into Godot, can be rather fast
- Cons
- Saves everything, difficult and time-consuming to select what to save
- Hard to debug
You can exclude a node by setting its owner to null. To include a property, make the property exported. If a node's oowner property to anything other than the node that pack() is called on, it will not be saved. Note that this property will have to be set to anything that is added to the scene by script, as they start with no owner.
Notes
edit- Prior to Godot 4.0, file sizes cannot be larger than 24Gib (gigabytes).
- A useful text file format is "csv" (comma separated values), where each value is comma (",") separated. Use
String.get_csv()to separate them.
Tips
edit- Really large files can take almost a whole minute to load. Consider splitting save files up into more than one, and only load each file when needed.
Animation
editAnimation methods
editWith an AnimationTree
editAnimation trees just play animation players, but they make it easier to animate properly, by controlling which animation occurs, based on a state machine, and they also make adding transition animations easier. So, it takes less work to go from a "sitting" animation to a "stand up from sitting" animation, to "walking" animation. However, they take a little while to set up.
With an AnimationPlayer
editAnimationPlayers allow you to control every frame, with fewer bugs than when animating directly from code, of the animation. They use "keyframes", which are points of the animation where a value is set. Some types can slowly transition to the next keyframe. Some are instantly set. You can also control whether they transition or just set. They are the fastest to set up, but the least versatile.
Tweens are started and manipulated with code, they just make it a bit simpler to do so, allowing you to animate a node's property over time, with ease-in and ease-out effects.
With code
editThe most versatile method, but the most difficult to get right. It takes trial and error to fix bugs, since code usually doesn't run in the editor.
With shaders
editWhile little more versatile as AnimationPlayers, are the fastest, as they run on the GPU. They can do many things, including animating water and clouds.
Animating movement
editWhen animating movement, first consider how the object or creature moves. Does it propel itself forward like a rolling jelly creature, or does it walk on two legs like a human. Wherever possible, look at references in real life to help you make you animation look more realistic.
Easing
editEasing is used to make an animation seem less static. Easing in means an animation starts slow, then speeds up. Easing out means an animation that starts at a faster rate, then slows down over time.
Spinning
editIn 3D, you can animate spinning by changing the rotation property. In 2D, it depend if you wanna make it spin around, or simulate rotating in the plane that doesn't exist in 2D. The latter is easier done by changing frames of a Sprite that uses a sprite sheet of a rotating object. Otherwise you can just use the rotation property in an AnimationPlayer or by code.
Animating the environment
editAnimating water
editSee your first 3D shader to make a terrain, then read your second 3D shader to turn it into animated water.
See also
edithttps://docs.godotengine.org/en/latest/tutorials/animation/index.html
Servers (singletons)
edit| This page or section is an undeveloped draft or outline. You can help to develop the work, or you can ask for assistance in the project room. |
Servers in Godot are for low-level engine manipulation, like changing the volume of sounds, creating collision objects and more. A "Server", in this sense, is a "singleton" (meaning it is loaded/created only once, and cannot be duplicated or instanced). For the sake of simplicity, on this page, any use of the word "singleton" refers to these servers.
Nodes are just "things" that make use of singleton and present the user high-level (easier) manipulation, which can only go so far.
These are the limitations of a node-based system:
- It's slower in runtime
- Godot's source code becomes slightly more complex
- It's harder to control them in different threads
- More memory is required.
Strengths of the node system are:
- It's simpler
- It's less likely to cause bugs in your game
- It's less confusing and more attractive - it draws users is with its simplicity
- It's faster to set up Node trees than call each singleton's functions for everything
Whether you use high-level, low-level or a combination of both is completely up to you and the game you are making.
Some games simply need the functionality of a singleton since nodes just don't offer the functionality you need, or making that functionality with nodes would be too difficult, time consuming, computationally expensive, or all three of those things.
Many server functions return or use RIDs (Resource ID). They must be kept stored in a variable to remain modifiable. In the case of Resource types, like textures, you must store the resource as a variable as well, or both it and its corresponding RID will be erased.
For more information on usage, see the docs.
VisualServer
editNOTE: Godot's API for everything visual will change in Godot 4
The VisualServer creates a 2D "canvas" and a 3D "scenario", which can be given objects, both 2D and 3D, to draw. They will not draw unless you use a Viewport node.
Use VisualServer.canvas_item_set_parent(<Item RID>, get_canvas()) to add an item to the main canvas. You can create a canvas to use its RID with var canvas=VisualServer.canvas_create(). You can attach a canvas to a Viewport with VisualServer.canvas_item_set_parent(<canvas RID>, <Viewport RID>), providing it is not already attached to one.
For 3D, use VisualServer.scenario_create() for a new scenario, Spatial.get_world().scenario for the existing scenario and VisualServer.instance_set_scenario(<Item RID>, <Scenario RID>) for adding an object/light to a scenario.
CanvasItems and VisualInstance nodes contain methods that allow drawing directly. In 2D, you can draw circles and rectangles, as well as textures and text. Using VisualInstance, you can draw meshes into 3D.
Helpful simple methods:
# Set the textures of the black borders when using stretch_mode ProjectSettings
VisualServer.black_bars_set_images(left, top, right, bottom)

# Force the screen to update immediately
VisualServer.force_draw()
# Attach a new Viewport and disable the root
func _ready():
  get_viewport().set_attach_to_screen_rect(Rect2()) # Sets the rect to zero size
  # To get <Viewport RID>, call get_rid() on the chosen Viewport Node
  VisualServer.set_attach_to_screen_rect(<Viewport RID>, Rect2(0, 0, 600, 600)) # You can also use other sizes and offsets
# The reason you must disable the root Viewport is because it is drawn last,
# or in other words,  drawn over the others. As it has no transparent pixels
# in the default settings, it would override every pixel on the screen.

# Detach a Viewport from the screen
VisualServer.viewport_detach(<Viewport RID>)
Example of drawing a texture with 25 width and height:
extends Node2D

var texture = preload("res://assets/weapons/sword.png")
func _ready():
  var sprite = VisualServer.canvas_item_create()
  VisualServer.canvas_item_add_texture_rect(Rect2(0, 0, 25, 25), texture.get_rid())
  VisualServer.canvas_item_set_parent(sprite, get_canvas())
AudioServer
editThe AudioServer is used for low-level audio access. It can also record and playback recorded audio. This is useful when implementing voice-chat in games.
The AudioServer does not use RIDs.

PhysicsServer
editThe server for 3D physics.
Physics servers are for creating areas and bodies, but do not place them on the scene tree.
The below code creates a wall that is 5 units high, half a unit thick, and 4 units wide and adds it the the physics space.
extends Spacial

func _ready():
  var wall = PhysicsServer.body_create(0)
  var shape = PhysicsServer.shape_create(PhysicsServer.SHAPE_BOX)
  PhysicsServer.shape_set_data(shape, Vector3(0.5, 5, 4))
  PhysicsServer.body_add_shape(body, shape)
  PhysicsServer.body_set_space(body, get_world().space)
Physics2DServer
editThe 2D version of PhysicsServer. It is used in exactly the same way, but some values may need to be adjusted, like Vector3s to Vector2s.
ARVRServer
editThe ARVRServer, or the XRServer, is the heart of Godot's advanced XR solution, and handles all the processing.
See also: XR Godot tutorials.
CameraServer
editThe CameraServer is not used to keep track of Camera nodes like it sounds. It is a server to use external cameras. Like the camera at the back of your phone. It can take pictures, but is mostly used in AR.
This server doesn't use RIDs.
Platform specific
editWhen gaming was young, games were rarely designed for multiple systems at once. When that started, people had to check every screen resolution worked. When phones started coming in many different shapes and sizes, this soon became impractical, and even impossible for most of us. Godot has a way to combat this, of course. But screen size is not your only problem.
Stretching the screen
editGo to ProjectSettings, and find Display -> Window. Go to the bottom of the area on the right, and under "Stretch", there are 3 settings: Mode, Aspect and Shrink.
| Mode | About |
|---|---|
| disabled | Deafult. Does not stretch the screen. |
| 2d | Only works on 2D, ignores 3D. Streches the 2D world. |
| viewport | Always works. Stretches the picture. |
| Value | About |
|---|---|
| ignore | Simply stretches or shrinks the screen. |
| keep | The image scales, but the aspect ratio never changes. May create black bars around the edge of the screen. |
| keep_width | Height changes freely, width stays same size as the image scales. Aspect ratio never changes. |
| keep_height | Width changes freely, height stays same size as the image scales. Aspect ratio never changes. |
| expand | Scales image to show at minimum of the camera size. May reveal more of the game world vertically if the window is shrank horizontally and vice versa. |
As the Shrink value gets bigger, the screen resolution goes down.
The ProjectSetting Rendering -> Quality -> Dynamic Fonts -> Use Oversampling only works when using "Keep Height"/"Keep Width"/"Expand" aspect ratios, and does not work with the "Viewport" Stretch mode. |
Encryption
editMultiplayer
editUI skinning
editUI skinning allows you to turn a game's UI (user interface) to something more fancy than the default. The deafult styling for buttons and panels is an ugly shade of gray. But you can change it as far as complex textures as backgrounds. Whether you go that far or not depends on the game, your time, and your artistic skills.
Basic skinning with themes
edit
To do this, let's first create a Theme. You will need to create a new resource using the file system. Search for Theme.
After saving it, a dock will open which allows you to preview the theme. Looks pretty dull, right?
Lets make buttons look nice first. Click Edit theme, and select Add Class Items. Do not confuse with Add Class Item.
Type Button in the popup, under "type". Then press Add All.
In the Inspector, you will see a property category called "Button". Expand it. Expand the sub-categories "colors" and "styles". Set the style for "normal" to a new StyleBoxFlat. Some of the more common things you can change are:
- Background color
- Corner radius (the higher the value, the bigger the curve)
- Border width and Border color
- Shadow
- Content margin (a margin between the border and the content within)
- Expand Margin (a margin to expand the style outside the Button's bounding-box, without increasing its size - you can only interact with a button by clicking the area inside the bounding box itself)
Have fun changing styles as much as you like! Remember to choose a single styling theme, like retro, or ski-fi, that suits your game.
You can change much more than just buttons. But only skin the UI elements that are needed, not every single Control-derived node.
After you are done, go to Project->ProjectSettings->Gui->Theme and set the custom value to the path to the newly created theme. Save, and then play your main menu scene.
Fancy skinning with themes
editInstead of using StyleBoxeFlat, use StyleBoxeTexture. This allows using images instead of styled boxes. You can also set the icons for certain Control node elements, like the "increment" and "decrement" buttons in number edits and the "clear" button for text edits.
Custom UI events
editSome games show fancy effects when clicking on buttons, like fading menus out. Here are some suggestions:
- When clicking on a button that changes the scene, consider fading the screen out for a fraction of a second before changing the scene, then fading the new scene in. The whole process should take less than a tenth of a second, or less. It should be subtle and quick, or you risk boring the player as the ui "loads", which could in theory happen instantly. Here is a code example:
extends Control
# main_menu.gd

func _on_play_button_up():
  # screen_blocker should be a hidden Control node placed on top all the other UI elements
  $screen_blocker.show() # This stops you clicking any more buttons and causing weird stuff afterwards
  for _i in range(20):
    modulate.a -= .2
    yield(get_tree().create_timer(.002), "timeout")
  get_tree().change_scene("Target scene here")
- The opposite to this (to fade in a new menu) can be done with an AnimationPlayer set to "autoplay", or initiated in the
_ready()function.
- The opposite to this (to fade in a new menu) can be done with an AnimationPlayer set to "autoplay", or initiated in the
- When disabling a button, consider setting its
mouse_modetoMOUSE_MODE_IGNORE, for stylistic purposes. Not doing so layers the "disabled" style and the "clicked" style on top of each other when clicking it, which doesn't look that good. Remember to set themouse_modetoMOUSE_MODE_STOPwhen you enable the button again.
Exporting
editHave you made an epic game that you want to share with your friends or sell online? You could give away the Godot editor along with your game's files, but that is (a) impractical and (b) allows others to peek into your hard work, and maybe even claim it as their own.
The solution to both of these problems? Exporting.
Getting an export template
editWhen you export your game, you export every file in your game to an application file, also known as an executable. But in order to do this, you need an export template. These can be downloaded on Godot's download page. You want them for all platforms you intend to sell your game on. Supported templates are:
- Windows Desktop
- Linux/X11
- Mac OSX
- Html5
- UWP (Universal Windows Platform)
- IOS
- Android
Once downloaded, the templates must be put in your Godot appdata folder in the Godot/templates/<CURRENT VERSION>/ dir. An easy way to do this is go to the "Editor" dropdown menu at the top of the screen and click "Open Editor Data/Settings Folder".
Another way to download them is to go to Editor -> Manage Export Templates... and click "Download" under the "Current Version" section.
You can then create export presets. Go to Project -> Export... and a popup will appear.
Press "Add..." and choose a platform your game will run on. You may choose any value for the settings on the left on the "Options" tab.
Options
editYou should pick a name for "Product name". This should be the name of your game.
If present, "Company Name", "File Version", "File Version" and "File Description" should be set. Sometimes the names are changed based on the platform, most notably hand-held devices.
You can also set an image for your game's icon, shown as the image next to the file's name on your file explorer or on your handheld device's menus.
Android has quite a lot of "permissions". You must enable the ones your game uses, like "Camera" if you use a camera (e.g: for AR) or "Internet" if your game is multiplayer. If in doubt, enable them one at a time, if it doesn't help, disable it and enable the next. Repeat until the game works as expected. (Try not to feel tempted to enable them all, as some players would stop playing the game immediately if they see 500 permission requests for completly unrelated things, such as access to location in a simple game.)
Resources
editGo on the "Resources" tab, and under the "Filters to export non-resource files/folders", you may use regex patterns. Here are some common examples:
- To allow all files that end in ".json", use
*.json - To allow all files inside a "docs" folder, use
docs/* - To allow all files/folders that begin with "doc", use
*/doc* - To allow a specific file called "versions.txt" inside the main folder, use
versions.txt
The text box below that one is for excluding things that fit the include filters or are normally excluded. For example, to avoid exporting any folder called "exclude_export", use *exclude_export/*. Uses the same rule as "Filters to export non-resource files/folders".
Both of these "filters" may be comma separated to define more than one pattern.
Features
editThe "features" tab is a list of features that can be checked with OS.has_feature(). (It doesn't define "release" or "debug" here, that is done automatically based on the options you chose.)
Script
editGo onto the "Script" tab. The 3 script modes are:
- Text: code is saved as plain text that anybody can read
- Compiled: code is compressed, to be smaller and harder to read
- Encrypted: code is encrypted to become almost impossible to read. Recommended for retail games where the code is not free or open-source, and when you want to prevent cheating.
Plugins
editPlugins are powerful things, allowing you to change Godot's functionality without recompiling the engine.
You can also download plugins (among other things) from the Asset Library ("AssetLib").
Plugins are powerful. People have made image editors, spritesheet makers, height-map terrains and fog. With the right knowledge and skills, along with the right resources, you can make almost anything. And this guide will help with that.
First, let's start simple. To make a plugin, you need to create a script that extends EditorPlugin.
1. Go to the Script tab. Press "File", "New Script..." and a popup will appear.
2. Change "Inherits" to "EditorPlugin". Press the folder next to "Path". Create an "addons" folder (lowercase "a") in the "res" dir. If the folder already exists, just open it. Create a new folder. Call it "My plugin". Set the script name to "main.gd". Press "Open" and "Create".
3. Put tool
func _ready():
  print("Hello!")
4. Open a text file editor, and write this text:
[plugin]
name="My first plugin"
description="This is my first plugin!"
author="Your name"
version="0.0.1"
script="main.gd"
5. Save the file as "plugin.cfg" in the same folder as "main.gd".
6. Go to "ProjectSettings", open the "Plugins" tab and search for your plugin. If it is not there, press "Update". Check the box next to "Enable".
7. Check the "Output" dock. You should see "Hello!" printed on it.
Making your first plugin
editSo now you know how to make a simple plugin, how can you make a helpful one?
Guide to the Godot game engine/Plugins/Making your first plugin/The idea Guide to the Godot game engine/Plugins/Making your first plugin/The idea/Conversation tree 1 Guide to the Godot game engine/Plugins/Making your first plugin/The idea/Conversation tree 2 Guide to the Godot game engine/Plugins/Making your first plugin/The idea/Conversation tree 3
Bottom panels
editA bottom panel is a button at the bottom of the screen that shows a dock when clicked. Examples are Output, Debugger and Audio.
First, to create a bottom panel, you need to make a UI for it:
- Create a scene and choose
User Interface, and rename the root Control node tobottom_panel. - Save it inside your plugin folder, in the same place as the plugin script, under the name "bottom_panel.tscn".
- Select your Control, press
Layoutfrom the top of the screen, and pressFull Rectfrom the drop down menu that appears. - With the Control still selected, expand
Rectin the Inspector and changemin_size.yto 50 (or some larger value) to ensure your UI appears with a non zero size. - Add a VBoxContainer as a child of the bottom panel. Set its layout to
Full Rect. - Add a Label, and give it text suitable to what the UI does.
- Add a Panel as a child of the VBoxContainer.
- Make sure the Panel is selected, and go to
Size Flagson the inspector, and checkexpandfor both horizontal and vertical. - Create the main UI as a child of the VBoxContainer.
You may wish to put the top Label in a HBoxContainer (which is in the VBoxContainer) if you want to also put buttons on the top.
You also may want to use containers more than you would for a game. You may often want to stretch or shrink the bottom panel to be larger or smaller than the default small size. Setting a min_size.x to 200 - 250 will also stop you from shrinking it too much and making the main screen invisible while the panel is open.
Now, open your plugin's main script, and type the following code:
expands Control

var bp: Control
var bp_button: ToolButton

func _enter_tree():
  # Put any load logic here, including adding new project settings
  bp = preload("bottom_panel.tscn").instance()
  bp_button = add_control_to_bottom_panel(bp, "Dock name")

func _exit_tree():
  # Put exit tree logic here, including any saving
  remove_control_from_bottom_panel(bp)
  bp.queue_free()
You may hide or show the button whenever you need too, by using bp_button.
Dock
editA dock is a side panel. Examples are Inspector and Scene.
First, to create a bottom panel, you need to make a UI for it:
- Create a scene and choose
User Interface, and rename the root Control node todock. - Save it inside your plugin folder, in the same place as the plugin script, under the name "dock.tscn".
- Select your Control, press
Layoutfrom the top of the screen, and pressFull Rectfrom the drop down menu that appears. - With the Control still selected, expand
Rectin the Inspector and changemin_size.xto 60 (or some larger value) to ensure your UI appears with a non zero size. - Create the main UI as a child of the VBoxContainer.
Now, open your plugin's main script, and type the following code:
expands Control

var dock: Control

func _enter_tree():
  # Put any load logic here, including adding new project settings
  dock = preload("dock.tscn").instance()

func _exit_tree():
  # Put exit tree logic here, including any saving
  remove_control_from_bottom_panel(dock)
  dock.queue_free()
Guide to the Godot game engine/Plugins/Making your first plugin/Menus
Guide to the Godot game engine/Plugins/Making your first plugin/Gizmos
Guide to the Godot game engine/Plugins/Making your first plugin/Settings
Guide to the Godot game engine/Plugins/Making resources
Guide to the Godot game engine/Plugins/Importers
Guide to the Godot game engine/Plugins/Text editors
Authors and contributors
editThis list is updated automatically by AuthorsAndContributorsBot. Please do not update it manually.
- L10nM4st3r (discuss · contribs · count · logs · block log · rfp · rights [change])
- Mbrickn (discuss · contribs · count · logs · block log · rfp · rights [change])
- Mrjulesd (discuss · contribs · count · logs · block log · rfps · rights [change])
- Atcovi (discuss · contribs · count · logs · block log · rfps · rights [change])
- Darklilac (discuss · contribs · count · logs · block log · rfp · rights [change])
- Slava Ukraini Heroyam Slava 123 (discuss · contribs · count · logs · block log · rfp · rights [change])
- Xania (discuss · contribs · count · logs · block log · rfps · rights [change])
- 1234qwer1234qwer4 (discuss · contribs · count · logs · block log · rfp · rights [change])
- Daev (discuss · contribs · count · logs · block log · rfp · rights [change])
- Jellysandwich0 (discuss · contribs · count · logs · block log · rfp · rights [change])
- Kaltenmeyer (discuss · contribs · count · logs · block log · rfp · rights [change])
- SHB2000 (discuss · contribs · count · logs · block log · rfps · rights [change])
Helpful links
editOther Wikibooks
editOfficial websites
edit- Godot's official website: https://godotengine.org
- Godot's official unstable (latest) documentation: https://docs.godotengine.org/en/latest
- Godot's official stable documentation: https://docs.godotengine.org/en/stable
- Godot's official forum: https://forum.godotengine.org/
Third Party websites
edit- Kids Can Code - Godot recipes: https://kidscancode.org/godot_recipes