Simulation with AnyLogic/Agent-Based Modeling/Step 2. Creating agents
Step 2. Creating Agents
The first thing you do when creating agent-based model is create agents. Agent is the basic building block of the agent-based model. Agent-based model consists of multiple agents and their environment. Every agent is given a set of rules according to which it interacts with other agents; this interaction then generates the overall system behavior. In this model agents are people.
To create agents in AnyLogic, you define the agent’s internal structure using the active object class, and then create the required number of class instances, each one representing the individual agent.
![]() Create new active object class for an agent
Create new active object class for an agent
- In the Project view, right-click the model item, and choose New|Active Object Class… from the popup menu.

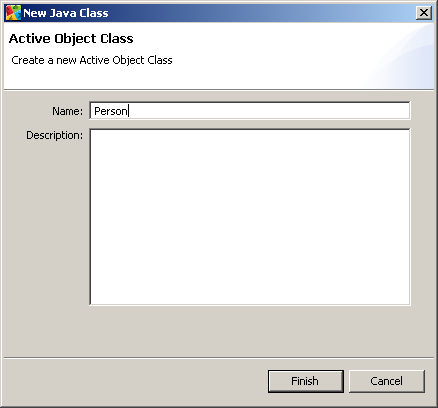
- The New Active Object Class dialog box is displayed.
- Specify the name of the new active object class. Type Person in the Name field.

- Click Finish. The
Personclass diagram is opened automatically. - Once you have created some new element, it becomes selected and its properties are displayed in the Properties view. You can adjust element properties here as your model requires. Please note that Properties view is context-sensitive view and it displays the properties of the currently selected element of the model. To adjust properties at a later time, first select the element (by clicking on the element in the graphical editor or in the Project view) and then modify the properties you want.
- On the General page of the Properties view, select the Agent check box. This makes this active object class an agent.

You have successfully created the class that will define the agent’s internal structure. Now it’s a time to add agents into the model. To place agents into the model environment, you should encapsulate the object that models agent (Person) into the class that models environment (Main).
![]() Place agents into the environment
Place agents into the environment
- Open the Main class diagram by double-clicking the Main item in the Project view.
- Drag the Person class from the Project view onto the diagram of the Main class.

- On the General page of the Properties view, type the object’s Name:
people. - Specify the number of agents you want to have in your model. In the Replication edit box, specify the number of objects:
1000. The specified number of class instances will be automatically created, each one representing the individual agent.
We have created the required number of agents. Now we will model the adoption of the product influenced by advertisement.


