Modern Photography/Printable version
| This is the print version of Modern Photography You won't see this message or any elements not part of the book's content when you print or preview this page. |
The current, editable version of this book is available in Wikibooks, the open-content textbooks collection, at
https://en.wikibooks.org/wiki/Modern_Photography
Introduction
Overview
edit
Photography is the process of using light to record an image onto a medium, such as paper or a computer display. It is thought that the ancient Romans possibly made contact prints of objects on paper that was coated with a mush of flower petals or grass or teas, then exposing this to the sun[citation needed]. No evidence exists of this process because the image fades and disappears over time. It was the early photographers Joseph Nicéphore Niépce in the 1820s, and Louis Daguerre and William Henry Fox Talbot in the 1830s and 40s who figured out how to fix the image onto a surface like metal plate or paper with a chemical solution so it wouldn't fade.
You can try this yourself by placing an opaque object, such as a leaf, flower, or some grass, onto a sheet of paper that has been painted with tea or coffee, lemon or orange juice. These are placed into a glass picture frame, then positioned in a sunny window towards the sun for a few minutes, hours, days, weeks, or months, depending on your emulsion sensitivity. When the exposure-development is done, take the paper and object out of the frame to see the result, your first photo! This ordinary process is what causes the fading of objects placed in sunny windows for months or years at a time. With photography, we control the sensitivity of the film, the time of exposure, the quality of development, and focus the image using a lens in a camera.
In traditional photography classes, these are called photograms, using a darkroom with black-and-white chemicals, and exposing black-and-white enlarging paper using room light or an enlarger lamp. Modern computer users can use a digital camera and computer to make a print onto paper at home or use a digital photo lab. An "alternative photographic technique", is to make large negatives using inkjet printers with special transparent media (for overhead projectors). Sandwiched underneath a glass "contact printing frame" with printing out paper, exposed and developed using sunlight for a few minutes, then removed to be washed and fixed with ordinary photographic fixer. This Printing Out Paper (POP) is still manufactured today.
Life vs photography
editMany artists use photographs as reference material. But it is the opinion of most art teachers that, when one has the opportunity to use an actual object as the model for a work of art ("working from life"), to do so is vastly preferable to using a photograph.
Why is this? Simply because no matter how detailed or accurate the photo is, it can never contain all the information that is in the actual object.
A photograph can only show us what one photographer saw, from one angle, under one lighting condition, at one moment in time. A photograph can only capture a single moment in time and cannot replicate the full sensory experience of an object in real life. Also a photograph of an object is not three-dimensional; it does not include the tactile sense of that object's weight or texture; it omits interesting details such as the sound the object makes when tapped, or its scent or taste; and, most importantly from a visual artist's perspective, the photographed object cannot be handled and turned about, taken into another room and examined under different lighting conditions, or dissected for further study.
The opportunity to completely examine an object is extremely valuable to the artist. Though the findings obtained through examination of the object may not seem to appear in the content of the artwork (for example, the artist may carefully examine a very red apple and still paint it in black ink), the knowledge gained from examination of the object will produce a richness in the artwork which would be lacking had the artist not examined the object.
Finally, even if the actual object cannot be moved, handled or taken apart, the opportunity to view it from several different angles will improve the artist's understanding of the object's construction.
The camera
Origins of the camera
editSomeone's god allegedly said...
edit
"Let there be light!" Most philosophies, religious or otherwise, offer some sort of creation story. Many of these involve light, which for humans, with our highly evolved eyesight, has always been of fundamental importance. People have tried to capture what they have seen for millennia, first with their hands, and then with more advanced technology. Both the traditional arts of painting and sculpture and the modern arts of still and motion photography arose as a result of this drive. The main difference is in the tools, and the primary tool of photography is the camera.
Raw vision
editFrom an evolutionary standpoint, let us suggest for a moment that our first cameras were our eyes. Our evolutionary ancestors used information from their eye-cameras to avoid predators (big scary sabre-toothed tigers) or to find food (colorful fruit falling from trees, for instance). Our brains, by many measures the most sophisticated on the Earth today, spent millions of years evolving extremely well to efficiently process sophisticated images to detect both movement and objects of interest within a still frame. Back in those days, imagery was all about danger, food, and other serious business: the stuff of life that keeps you standing ... or gets you eaten. Incidentally, scientists now know, that when we are born our brains only see random sensory input, they don't have a presupposition that these-nerve-endings-over-here are to do with vision, and those-nerve-endings-over-there are to do with touch. It's all just random input, and in fact in recent years multiple adults have re-trained their brains to receive balance or sight from their tongues.[1]
Primordial aesthetics
edit
Though there was probably very little art in those early times, our aesthetic senses had long since begun to evolve from innate responses to natural stimuli such as commanding views (safety), darkness (danger), light (warmth), and so on. These associations would carry forward in to art as we began to discover ways to record our perceptions of the world: in physical art such as cave paintings, through our sophisticated and relatively unique command of language, and through social modes of communication such as dance and ritual.
Sitting still and going far
editStill later, yet far before true cameras appeared, humans used these powers of observation to realise the fundamental principles of light. They knew, for example, that observation of the movement of shadows cast by standing objects over time could be reliably predicted and even associated with the time of day: if you stood at the end of the valley when the shadows had grown long, then you had better run back to the cave or face the evening hunt of the local tigers! This led, as humans began slowly to ponder such mysteries to good effect, to various sorts of technological innovations: chiefly chronological and architectural, but also mathematic, for the line of a shadow is pure and its relationship to the source intrinsic.
Imperfect representation
editWhen copying something, or the image of something, it's usually impossible to do so accurately. This is true fundamentally for the process of depicting our three-dimensional world (four if you count time!) on any two dimensional artwork: including approximately two dimensional cave walls, modern photographs, and early pictures. There are many reasons for this, but perspective is an important factor: our brains cannot perceive depth and therefore anything approaching realism on a flat piece of paper unless given other clues. The first such clue was size, or perspective.

The Grotte Chauvet cave in France includes some of the world's earliest known cave painting, estimated at about 32,000 years old.[2] It is unclear whether these paintings specifically included the device of relative scale, however much of the global body of neolithic art did, ie. the artists sized objects and characters hierarchically according to their spiritual or thematic importance, not their distance from the viewer.[3] It could be argued that theirs was a symbolic perspective, rather than a physical one.

The second such clue was overlapping to suggest relative depth. This was certainly well in use by around the beginning of the common era, with global examples plentiful, for instance in early ancient Egyptian art and Chinese Han Dynasty tombs.
_-_right_hand_screen.jpg)

The third such clue was tone. It took humans a great deal of time to comprehend fully the expressiveness of tone for the illusion of depth. Given the relative tonal limitations of naturally occurring rock outcrops and other early media such as pottery, it is perhaps not surprising to realise that the exploration of tone perhaps naturally almost co-incided with the development of that most powerful of mediums: paper! Paper appeared in China at least as early as the early second century BC.[4] According to textual evidence, by the fifth century some of the earliest artwork exploring tones - the layered ink work of the Chinese 山水画 or "mountain and water painting" - had already developed to prominence.
Probably at the same time as the above developments, investigation in to visual perspective began, for instance around the fifth century BC in Greece where the philosophers Anaxagoras and Democritus worked out geometric theories of perspective. Euclid's Optics, a mathematical treatment of perspective, soon followed in around 300 BC.
Then man said...
edit
"Let there be lenses!" Eventually, a distant ancestor of ours had the bright[5] idea of ending all this enjoyable evolutionary fun by discovering naturally occurring crystals that were capable of acting as lenses. Modern evidence of ancient lenses is partial, with some direct finds and some extremely fine workmanship that is held as evidence of lens-work.

In the former category, as recently as the last few years, concepts of ancient navigation in the north Atlantic are being reevaluated following the discovery of formerly near-mythical convex-lens sunstones made from a transparent calcite crystal known as 'Iceland spar' that allowed sailors to determine the direction of the sun even on very cloudy days, and after nightfall in northern latitudes. While the 16th century shipwreck it was found on is fairly late, it is thought to have been an established device by this era, having been referenced in 12th century literature as existing at least as early as the 10th century. The story is compounded by the Visby lenses, a collection of lens-shaped manufactured objects made of rock crystal (quartz) found in several Viking graves on the island of Gotland, Sweden, and dating from the 11th or 12th century. But that's nothing! An 1858 excavation at Niniveh in Babylon also unearthed an ancient Assyrian lens, now known as the Nimrud lens or Layard lens, dating from 750–710 BC, now held in the British Museum and thought to be the oldest in the world.

In the latter category, extremely fine workmanship of a kind considered unattainable with the naked eye (less than 0.1mm) qualifies a 1.3mm wide ivory carving from Abydos, Egypt, recently discovered by German archaeologist Gunter Dreyer that dates from 3300 BC. Other later but still early objects such as the Isopata gold ring from Crete, dated 15th century BC and with workmanship below 0.5mm and approaching 0.1mm and a jasper carving from second century Rome with 0.1-0.2mm details challenge alternate explanation.
Later, a friendly Italian fellow known as Giambattista Della Porta said let there be lenses on cameras! .. or words roughly to that effect. (He was in fact a failed dramatist with a flair for science, blessed with proximity to Venice, a major contemporary center of glass work, who also produced written works on refraction - the bending of light that is the primary science behind basic lens design.)
The coming of the Camera obscura
edit
The lensless camera, camera obscura or pinhole camera, is essentially an opaque box or room with a hole in it. The first surviving mention of some of the principles behind the camera obscura belongs to 墨子 (Mozi; 470-390 BCE), a Chinese philosopher and the founder of Mohism. Mozi correctly asserted that the image in a camera obscura is flipped upside down because light travels in straight lines from its source. His disciples developed this into a minor theory of optics.
In the western world, the camera has been in use in principle since the Renaissance. It was known as the camera obscura, Latin for 'dark chamber', and consisted of a darkened room with a pinhole in the wall facing the subject, which would be outside the room. An inverted image would fall on the opposite wall, which would then be traced manually.
Cameras
editWhat is a camera?
editAt its most basic, a camera is a system for projecting light onto a surface, typically but not exclusively for the purposes of recording the image. This broadest definition includes microsocopes, camera obscura, digital cameras, video cameras (previously known as cine cameras), cell phone cameras and other such devices that are related to conventional cameras but do not necessarily include all of the same features.
Various dictionaries offer a surprising variety of generic but dated definitions for 'camera', most of which predate digital cameras and exclude both lensless devices (pinhole cameras) and video cameras. Here are some examples:
- Collins English Dictionary (United Kingdom; 2012): an optical device consisting of a lens system set in a light-proof construction inside which a light-sensitive film or plate can be positioned[6]
- Macquarie Dictionary (Australia; 2014): a photographic apparatus in which a sensitive plate or film is exposed, the image being formed by means of a lens.[7]
- Merriam-Webster (United States; 2016): a device that consists of a lightproof chamber with an aperture fitted with a lens and a shutter through which the image of an object is projected onto a surface for recording (as on film) or for translation into electrical impulses (as for television broadcast)[8]
The three basic components of a camera are:
- A device to record the image, which is generally either traditional film or a digital sensor, but can also be various alternative forms of chemical recording surface, glass plates, or similar flat surfaces with the objective of recording an image.
- A lens that focuses light onto the recording device, and
- A dark box, or the camera proper, which keeps other light from interfering with the image being recorded.
These three elements may take various forms as required by the type of photography being performed. For instance, the pinhole camera may have a simple opening instead of a lens, and the dark box may in fact be a complex system of flexible, light-tight bellows or a tiny space behind the lens within a cell phone. Also, these basic elements are often accompanied by other equipment, such as shutters and adjustable apertures to control the amount of light entering the camera, viewfinders to aid in selecting and composing the image, as well as lens shades, carrying straps, tripods, etc., that help in creating images with specified characteristic for particular purposes.
Some examples of cameras
editLet's look at some examples.
- In a pinhole camera, one of the simplest types of cameras that it is possible to make, the direction of the image is controlled simply by punching a small hole in the camera box which functions to project an inverted image of the subject on to the surface (eg. recording device) inside.
- In a view camera, the image is generally captured through a lens (though pinholes can be used) attached to the front of a flexible system of frames and bellows that allows for extensive control of focus and perspective.
- In a mobile phone camera, a lens is typically fixed in to the device by the manufacturer and emphasis is placed on obtaining maximum utility in a broad range of common personal photographic scenarios, automatic operation, a user-friendly interface, and ease of sharing.
- In the case of a modern SLR (single lens reflex) or DSLR (digital SLR) camera, the image is almost always a captured through a glass lens, using a precise shutter to control the length of exposure.
| Pinhole Camera | View Camera | Mobile Phone | SLR/DSLR | |
|---|---|---|---|---|
| Lens | Pinhole | High-quality lens | Single general-purpose lens | High-quality lens |
| Shutter type | None/optional | Lens-mounted (usually between or behind the lens) | Electronic | Focal-plane |
| Aperture control | None | Precise mechanical | Precise electronic | Precise mechanical or electronic |
| Body | Fixed box (typically) | Simple/flexible | Incorporated into phone body | Metal/composite material, usually ergonomic |
| Recording device | Any | Commercial film or digital sensor (typically) | Digital sensor | Film or digital sensor |
Today, when we discuss cameras we are almost always discussing modern cameras, those incorporating an opaque camera body, precise shutter speed and aperture control, and a proper lens.[9]
Camera Controls
editFive basic controls
editAs the purpose of a camera is to project light onto a surface that will record an image, most cameras have the same basic controls and these controls affect how the image is recorded. These five basic controls are:
- Location and orientation of the camera: The most basic variables you can alter, and perhaps the most important. While distance from some subjects may sometimes be an asset (wildlife, covert photography, capturing natural expressions during event photography), often getting in close to a human social distance offers the most engaging angles. Similarly, shots from far above or below can lend incredibly different feelings to the subject, and suggest different reactions to the viewer. Generally, shots from far above may inspire feelings of safety or distance from the subject, encouraging the subject to be considered in a more distant or philosophical mindset by the viewer. Shots from below may make the subject appear large and dominating, exaggerating its presence.
- Focus: All but the simplest cameras allow the photographer to select the distance at which the image is the sharpest, or its "focus". This can take various forms, from manually turning a ring on a lens to bring the image into focus, to simply pointing to an object on a mobile phone's screen to select the corresponding distance automatically. In conjunction with the aperture setting below determines which objects in the final image will be sharp, and which blurry.
- Shutter speed ("how long the image is exposed for"): The amount of time that light will be allowed to pass through the lens during the exposure (ie. between the beginning and the end of the photograph). The longer the shutter is open, the brighter an image will become, however the image will also be more sensitive to motion blur as a result of movement in the camera or the subject it is capturing. Sports or action photography therefore depends upon fast shutter speeds (ie. shorter exposures), whereas careful and slow photography of relatively dark or still subjects (mountains, stars in the sky, etc.) generally depends upon slower shutter speeds.
- Aperture ("how big the hole is"): The size of the (usually roughly circular) opening behind the lens. A larger aperture (or opening) will allow more light to pass through the lens than a smaller one. A larger opening will create a brighter image, but the depth of focus (or "depth of field") becomes shallower, allowing fewer objects to remain sharp in the image. Correspondingly, small openings allow subjects within a greater range of distances from the camera to be crisply delineated, but allow less light in and therefore require longer shutter speeds for proper exposure. Many photographers use this to great artistic advantage by either bringing the image into crisp focus or just the opposite, focusing on a single element and letting the rest of the image blur out so as not to distract the viewer's attention. Apertures are measured in 'f-stops', which are written f/number. Note that these numbers are 'backwards': since they are fractions of the lens focal length, noted as "f", smaller numbers such as f/0.95) mean bigger openings and more light entering the camera, whereas larger numbers (such as f/6.3) mean smaller openings and less light.[10]
- Sensitivity ("how fast the image is recorded") (often when expressed casually, ISO, which actually refers to the ISO 5800 standards documents originally published for film speed by the International Organization for Standardization): In any event, the sensitivity of the film or digital sensor to light. In traditional film cameras, you had to swap film to change this factor because it was a property of the type of film being used. In modern digital cameras, the ISO rating describes film-speed equivalency and is almost always possible to change in the camera, either manually or automatically. The scale is arithmetic, which means that a film with a rating of ISO 800, for example, will be eight times more sensitive to light than one of ISO 100. A higher ISO is useful in low light environments, however increasing the ISO will affect the quality of the image: in film the images become grainy, and in digital the image becomes noisier, with more undesirable speckles. Some of these noise articles can be removed after the fact, however, and low light performance is an area in which digital sensors have been making rapid improvements in recent years.
Changing any of the settings will affect how the image looks and will be discussed further later. For now let's briefly examine some additional controls available to photographers, then look at different cameras and where these controls can be found.
Additional controls
editIn addition to the basic controls of shutter speed, aperture and sensitivity, some cameras provide or may be fitted with additional controls, including:
- Lens and zoom selection: Many cameras allow you to change lenses to achieve different optical effects, predominantly related to depth of field, minimum focal distance, what percentage of a scene will be captured within the frame, available light (faster lenses provide mode light) and whether or not zoom is possible to adjust without changing lenses again.
- Tilt/shift or lens/image plane alignment. Built in to some types of cameras, particularly old analog view cameras, but available as aftermarket lens features even on modern DSLR camera systems, such controls enable the photographer to carefully manage which portions of a subject remain in focus and distort or correct their perspective optically, prior to recording of the image.
- Lighting: Many cameras have built-in or optional 'flash' lighting. In addition, some cameras allow external lights to be connected by wire or wireless. Careful control of the lighting in a scene is most often made in studio photography, such as portraiture, still life and commercial product and advertising photography.
- Optical filters have long been used by photographers to achieve additional control of their images. There are many types available:
- Polarization (control of light wave orientation and therefore reduction of overall light entering the camera; these are further divided in to circular and linear polarization filters - the former are more expensive and are designed to allow modern camera metering and auto-focus systems to continue to function normally)
- Wavelength (for instance infra-red or ultra-violet wavelength filters may block these specific wavelengths, and individual colour filters may for example block blues, reds or greens. There are also warmth filters that enhance or reduce a broad range of colors over a greater breadth of the visible spectrum simultaneously, for example with the objective of countering the unnatural colour effects of certain types of artificial lights such as fluorescent bulbs.)
- Neutral density (blocking all wavelengths of light equally but only partially, in order to effect slower exposures of the same scene, for example to accentuate motion blur in moving subjects such as running water. These may be complete or graduated, ie. blocking more light on one side of the image than another, often in a clean gradient.)
- Blur, softening or diffusion (reducing focus from certain portions of an image, often to create a dream-like effect)
- Diopter, close-up or macro (allows a given lens to focus closer to a subject than it is usually capable)
- Bokeh (apply specific geometric shapes to the brightest portions of the bokeh - or highly unfocused image regions)
- Novelty (the classic example are star filters, which alter highly directional lights - also known as point lights - to obtain a cheesy, starry, visual effect; another example are also multivision filters which can provide multiple copies of the subject within the frame. Such filters are generally remnants of the analog era and are now being replaced by software post-processing.)
- Compound imaging modes are modes in which multiple exposures may be combined in to a single image. There are two main types of compound imaging:
- Multiple exposure is a classic analog-era technique in which two or more exposures are made to the same piece of film, often resulting in a dream-like tangle of tones or surreal combinations of subjects.
- High Dynamic Range (HDR) images may be produced in the digital-era by either manual or automated exposure bracketing, a process in which multiple exposures are taken of the same subject with different shutter speeds. These higher and lower exposures are then combined in to a single image, enhancing the effective dynamic range of the image (ie. capturing a broader range of shadow and highlight detail than would otherwise be possible). Some cameras have this feature built-in, others allow the automation of capture but leave the combination of the multiple resulting images to computer-based post-processing.
- Digital-only controls' are those which are artifacts of the era of digital photography.
- Effects are pre-built options on digital cameras allowing for certain types of post-processing within the camera itself. While these may be set before taking an image, much like the basic controls, they are in fact generally only applied by the camera in software after the image has already been captured, and thus are not true image-taking controls.
- Color depth is the amount of information to be stored for each individual pixel (square) of a digital image. It may be expressed in two ways, either:
- For each color-channel (red, green and blue), or 'bits per channel'. This is the standard means of description in the photographic world.
- In terms of the total 'bits per pixel' (combining all colour channels), which is a common means of description in the computer imaging world.
- For example, an 8 bit color depth per channel image would have 24 bits per pixel, a 16 bit color depth per channel image would have 48 bits per pixel, and so on. Modern digital image sensors provide at least 16 or 24 bits per channel, though 8 bits per channel is still adequate quality for many purposes and is very common online.
- Resolution is the amount of pixels (square, component points within an image) to store when taking a photograph. Higher resolution generally creates a higher quality image, though poor lenses, motion or subject blur, long exposures or a constrained publishing resolution may all provide good reasons to reduce resolution at the time of capture. Reducing resolution increases camera image storage speed (increasing the number of images per second that may be stored, for example in burst mode photography of action such as sporting events) as well as overall storage space requirements, image transmission times, etc. It is generally expressed in pixels as width x height, though some cameras provide a simplified set of options based on the conventions "RAW, LARGE, MEDIUM, SMALL" and many support the dual storage of both RAW and processed raster files (usually JPEG) of a selected size.
Types of cameras
editThe following terms have been historically used to describe various types of still cameras. These terms are not entirely exclusive (for example, you can have a Single lens reflex or twin lens reflex pinhole studio camera), nor are they necessarily the only terms around. They are included here for reference purposes.
By primary use
editConsumer/Prosumer
editConsumer cameras are mass produced, mass market cameras designed for a broad range of common use by the general public. Once a significantly distinct form of camera from professional cameras, the combination of the popularization of digital camera technology and the rise of the 'prosumer' (ie. high end consumer) concept has tended to erode the distinction between professional and consumer cameras. In reality, many modern consumer/prosumer cameras are essentially capable of professional output.
Professional
editProfessional camera systems are essentially those not positioned for consumer use. This category includes expensive or specialist cameras utilized for artistic, industrial, or studio uses.
Industrial
editIndustrial cameras are those engineered for repeat utilization, generally as a part of a larger, automated, electronic system. This may include applications such as manufacturing quality control, satellite telescopes, microscopy, or surveillance. In general, industrial applications place a greater emphasis on reliability and a reduced emphasis on breadth of application. They may require extensive knowledge of physics, observed processes or optics to initially configure. They tend to be relatively expensive.
Studio
editStudio cameras are those optimized for non-mobile applications. Once a relatively separate category of camera, today most studios utilize professional SLR cameras from major manufacturers which may incorporate connections to studio lighting (eg. flash rigs, reflectors) and positioning equipment (eg. tripods), so this term is perhaps falling out of use.
By lens type
editPinhole
edit
The pinhole camera is relatively rare today, but is enjoying a resurgence of casual interest due to its simplicity. It is one of the simplest camera designs possible and has three major components: a light-proof box, a light sensitive material (such as a traditional analog film, or a digital sensor) and opposite the material a hole that light passes through carrying the external image. There is no lens; the aperture is created by punching a small hole opposite where the film is mounted and is very small; and the 'shutter' in more advanced cameras is emulated manually by uncovering and covering the opening. Despite its simplicity, it still has many enthusiasts because of the unique pictures it creates and the imaginative ways of turning ordinary objects into pinhole cameras.
Analog pinhole cameras are very easy to make from scratch for exposing traditional film: the principle is identical to the pioneering camera obscura experiment. Typically, a prefabricated, light-sealed container like a biscuit tin or a match-box can be used. Most digital cameras with changeable lenses can be converted in to pinhole cameras by replacing the lens with a sheet of opaque material with a hole punched in it.
Note that a method exists for calculating the optimum pinhole size: too small or too large and the image will lack definition.
Fixed lens
editThese include most "point-and-shoot" cameras. While the lens on these cameras is not removeable, the focus is often adjustable, whether manually or automatically. These cameras are generally not considered high quality equipment, though several outliers, such as the Rollei 35 are prized for their high-grade optics.
Interchangeable lens
editMost cameras for professional or advanced amateur use today have the ability to change lenses, depending on the photographer's need. The need for this is largely mooted by the advent of zoom lenses with adjustable focal lengths, but more advanced applications may still require the use of a specialized lens.
By focal method
editFocus is fundamental to photography, a fact that has determined the development of the different broad types of camera. Focus is dependent upon a number of relationships, distance of the subject from the camera being the most important.
No focus
editSome cameras do not offer the photographer any means to adjust focus. These cameras would typically be of the following types:
- Very simple (lensless), such as pinhole cameras
- Very early, simple or less sophisticated amateur cameras, from the early development of modern photography
- Non-interchangeable, simple, fixed prime lens special purpose cameras (for example, certain early analog spy cameras or those designed to be operated from aerial balloons)
Today these cameras are usually made to simplify construction and lower costs, especially for applications where the subject-to-camera distance is likely to remain constant, such as fixed security cameras or in some technical applications. For general photography applications they are of only passing interest, though a number of artists have worked with them to great effect.
Fully manual focus
editMany field or view cameras (the sorts of things you see people taking photographs under blankets with in early 20th century or late 19th century movies, and their spiritual successors) provide no automated means for focusing, instead relying on the photographer to manually adjust the focal ring on the lens based upon comparing an estimate distance to numbers marked or engraved there for that purpose. Eventually, separate devices for estimating subject distance became available, known as rangefinders.
Rangefinder cameras
edit
Prior to the widespread development of electronic autofocus systems, the dominant focusing technique of the late 20th century was the analog rangefinder, sometimes shortened to RF. In the most common configuration of such a system, the photographer manually aligns two images within a viewport. Once the images are aligned, the camera is said to be in focus, and a subject distance may be displayed or derived. Earlier and cheaper systems including the initial, portable, off-camera systems required the photographer to manually transfer the resulting distance to the configuration of the focus ring on their camera, which would be marked with various distances in feet or meters. Later systems, such as those still produced by companies such as the German manufacturer Leica Camera AG, couple the results to the focusing mechanism of the camera and are known as coupled rangefinder cameras.
Historically, the major advantages of the rangefinder designs are for certain applications. Since there is no moving mirror, as used in SLRs, there is no momentary blackout of the subject being photographed. The camera is therefore often quieter, particularly with leaf shutters, and usually smaller and less obtrusive. These qualities make rangefinders more attractive for theater photography, some portrait photography, candid and street photography, and any application where an SLR is too large or obtrusive. The absence of a mirror allows the rear element of lenses to project deep into the camera body, making high-quality wide-angle lenses easier to design. However, it is important to note that these advantages are now shared by many types of digital cameras and cellphones, which usually do not require manual focus or exposure: for example, 'silent mode' on the Sony α7R II.[11]
Autofocus (AF)
editThe majority of camera systems today provide some means of electronic autofocus (AF), though there are still other camera types produced. Electronic autofocus systems are very complex and can provide unrivaled support for certain photographic situations, for example:
- Action telephoto photography with occasional intermediate obstructions
- Normally moving subjects such as sports people running or walking
- Highly erratically moving subjects, such as darting animals or insects
Autofocus systems are based upon various technologies, a current example of which is 'phase-difference', presently in use (2016) by high-end Canon DSLRs such as the 50.4 Megapixel Canon 5DS.
By method of optical projection
editTwin lens reflex
editThe exact origins of the twin lens reflex (TLR) camera are obscure. Double-lens cameras were around from about 1870, when someone realised that having a second viewing lens alongside the taking lens meant that one could focus without having to keep swapping a ground glass screen for the plate afterwards, reducing the time delay in actually taking the shot.
Where the TLR came into its own was with the idea of using a reflex mirror to allow viewing from above, thus allowing the camera to be held much more steadily if handheld. The same principle of course applied to the single lens reflex, but early SLRs caused delays and inconvenience through the need to move the mirror out of the focal plane to allow light to the plate behind it. When this process was automated, the movement of the mirror could cause shake in the camera and blur the shot.
One of the earliest documented TLRs was made by the firm of R & J Beck of Cornhill, London in 1880 for Mr G M Whipple, a scientist and Superintendent of the Royal Observatory at Kew. It seems the design concept was his - to build a mirror reflex camera for cloud photography. The aim was to have a camera with lenses pointing upwards, but also to be able to compose the picture whilst looking horizontally. It seems this camera also used geared linking to synchronise the lenses, thus having many of the features of later mass-marketed TLRs .
There were a number of other types of TLR marketed between about 1890 and 1910, but these were gradually overtaken as more effective SLRs became available and cured the problem of parallax which bedevilled the TLR. The ability to see and compose the subject exactly in the taking lens outweighed the disadvantage of the moving mirror as SLR mechanisms improved.
Single lens reflex
edit
As already discussed, focus is fundamental to photography, both in terms of what is and what is not in focus. A rangefinder camera, which allows one to determine the focusing distance, determines what should be in focus, but without actually demonstrating the degree. The TLR (Twin-Lens Reflex camera) goes one step further, by using a second viewing lens.
However, it is the SLR (Single Lens Reflex camera) that solves the problem fully. In this type of camera a mirror intercepts the light that passes through the lens and projects it onto a ground glass screen where it forms an erect (upright) but mirrored image. Now the photographer is truly viewing through the lens and able to accurately determine both the focus and depth of field. When the photograph is ready to be taken the mirror is retracted allowing the light to pass directly to the film, when the shutter is opened. The earliest models required the mirror to be retracted manually (this disappeared with the Speed Reflex in the mid-1920s), did not have the familiar prism of today, and demanded the viewer to inspect the image through a leather tlunnel to the ground glass screen. Another common feature of SLRs necessitated by their construction was the need for the light to pass through the lens to the reflex mirror unhindered. This lead to the focal plane shutter, where the mechanism is placed just in front of the film.
This is how most people perceive the SLR with the distinctive prism housing on top that first appeared on a Contax camera in 1948.

The prism serves to reflect and flip the mirrored image from the ground glass screen to the viewfinder, resulting in an erect and true image which is bright and often magnified by the viewfinder optics. The use of 35mm film allows these cameras to be relatively compact which removed one of the SLRs drawbacks. With the shutter positioned just ahead of the film within the camera's body, it is possible to change lenses without exposing the film, making the design very flexible. The principal shortcoming is that the focal plane shutter uses a variable gap to vary the shutter speed and that only a longish exposure time will synchronise with flash.
View camera
editThe view camera is of either a monorail design or what is called a flat bed or field camera. The flat bed being an older design and dating back to the middle of the 19th century. In both designs a flexible bellows separates the lens and film. The lens is affixed to a front standard and the film positioned in the rear standard. Both front and rear standards can move horizontally along the rail of a monorail or on tracks in the bed in the case of the flatbed design. In most designs the front and rear standards are equipped to pivot in both the x and y axis independent of each other. These are called "swings" and "tilts". There is usually some allowance for the rise and fall of both front and rear standards along the vertical plane. All of these movements allows for great flexibility in the control of the image.
Notes
edit- ↑ See w:The_Brain_That_Changes_Itself, a great book on these recent developments in science.
- ↑ The Australian aboriginal people, whose culture still exists, have paintings made 60,000 and 40,000 years ago.
- ↑ Stated differently, they did not use foreshortening.
- ↑ Physical fragments dated 179-41 BC have been recovered.
- ↑ No pun intended.
- ↑ camera. Collins English Dictionary - Complete & Unabridged 2012 Digital Edition.
- ↑ camera. Macquarie Dictionary, Macmillan Publishers Group Australia, 2014.
- ↑ camera. Merriam-Webster Dictionary, 2016.
- ↑ Even plastic lenses in toy cameras, cheap webcams or mobile phones are superior to lens-less pinhole cameras in terms of the focus and overall quality they can produce.
- ↑ Lenses, which are a swappable component on many cameras, are generally described using their minimum f/ rating (ie. the maximum amount of light which they permit). Lenses with small numbers (such as f/1.0) are described as fast, whereas lenses with big numbers (such as f/6.3) are described as slow.
- ↑ Alpha Dog: Hands on with Sony A7R-II. DPReview.com, 2015.
Camera body
The camera body contains all necessary components to facilitate the production of an image.
Point-and-shoot Camera
edit
A point-and-shoot camera contains all necessary components to produce an image.
Even a “professional” photographer may use a P&S camera: If you are primarily shooting on film, it is still a good idea to have a compact digital camera with you. If you find a great location, but notice the scene requires different weather, season [regarding vegetation], or light [regarding time of day], you can use this camera to record this idea for a photo without wasting any film (and possibly also time). This is, of course, only feasible if the location can still be revisited at that point in time. While you may also just take a note on a notepad this does not convey as much information as a photo does; you cannot evaluate whether a trip to a particular destination is really worthwhile. A P&S camera does not weigh too much and still gives you more options (especially in comparison to typical cell phone cameras).
Nevertheless, P&S cameras have been primarily superseded by cell phone cameras.
System Camera
edit.jpg)
A system camera is a system of replaceable compatible camera components. Replaceable or additional components may be:
- usually, the lens, but also
- the viewfinder,
- the screen,
- an extra battery pack,
- a motor for film transport,
- the sensor, or
- the back of the body (e. g. for writing data onto the film).
Replacing those components does not require any special skills or tools.
The advantages of system cameras are:
- You can adapt the camera to suit best the given situation. You may choose a very bright lens for available-light photography, or mount a motor for film transport when shooting fast sports scenes, without forcing you to have your most expensive lens in your backpack or carrying a bulky motor when it is not needed.
The disadvantages are:
- They are more expensive.
- You need to think more about choosing adequate equipment.
Lenses
-
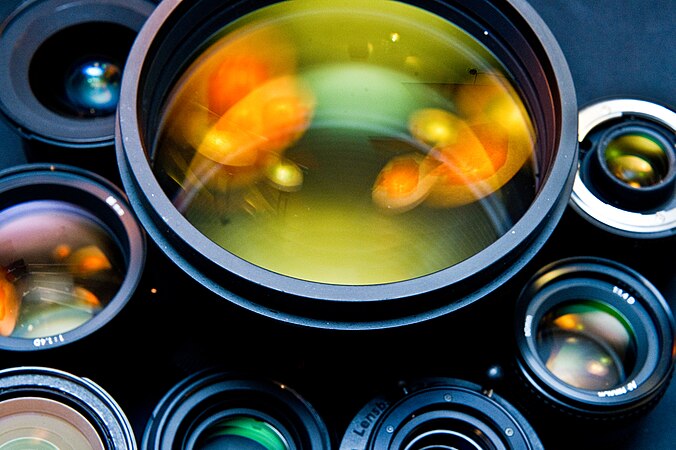 Lenses are a critical component of modern cameras.

There are many types of photographic lenses, the most common categories of which are outlined below. (For a more technical treatment of the subject you may wish to refer to Optics.)
Construction
editThe camera lens controls how much of the shooting scene is visible. A lens comprises a number of lens elements, a mechanism for controlling focus, an aperture diaphragm, a separate mechanism for controlling focal length (on zoom lenses only), all within a light-proof barrel. The lens may receive filter attachments for special purposes.
Lens elements
editLens elements are the individual pieces of glass that bend light in a controlled manner. Each element serves a purpose, whether it be converging or diverging incoming light, adjusting focus, or reducing errors.
Each additional lens element slightly reduces the total amount and clarity of light transmitted.
Focal length
edit
The camera lens directly controls how much of the scene is visible—the field of view—while the shooter chooses the location and direction of the shot.
The field of view correlates to the focal length of the lens—the distance between where the lens is focused (at infinity) and the "optical center". The focal length (f) is given in millimeters (e.g. f=50mm). A larger focal length produces a narrow field of view, while a shorter focal length produces a wider angle.
The relation between focal length and image sensor size determines whether the lens will produce a wider or narrower field of view. An 18mm lens may be considered wide angle on a full-frame DSLR, but may produce a narrow field of view on a subcompact camera.
Focus
editA lens allows the user to focus on a specific part of the scene. The camera body may provide autofocus for automatically setting focus on a target within the scene. Focus can be manually controlled by the shooter, or automatically controlled by the camera, selected by an M/A switch on the lens and/or the camera body.
By design, a camera lens most sharply focuses along a "focal plane"—a region of space parallel to the film or image sensor. (This design is challenged by tilt/shift lenses.) The length from the optical center to the focal plane is the "focal distance". On better lenses, there are markings for focal distance on the barrel. Focal distance is not bound to focal length—focal distance occurs in front of the lens' optical center, and focal length behind.
The range of focus often starts a specific distance away from the lens (as little as a few inches for wide angle lenses, to whole feet for telephoto lenses), progresses slowly at close range, then greatly accelerates to "infinity"—the setting at which distant objects will be in perfect focus. Some lenses allow for slight adjustment beyond infinity for purposes of reducing depth of field at distance.
Aperture
edit
The lens directly controls aperture, one of the three main exposure controls. (Sensitivity is controlled by the image sensor, and shutter speed is controlled by the camera body. The shooter may also have control over how much light is present in the scene.)
The aperture is a hole in the lens "diaphragm" or "iris", centered along the optical axis and of a specific diameter. Several aperture "blades" are opened or closed as needed to admit more or less light through the lens. The number and shape of the blades can sometimes be seen in off-focus highlights, with pleasing shapes termed as "bokeh".
The size of the aperture is given as a fraction of the focal length (e.g. f/4.0). For a lens of 50mm focal length, f/4.0 is an aperture of 12.5mm; for 200mm, f/4.0 is 50mm. For calculating exposure, this ratio—better known as an "f-number" or "f-stop"—is more important than the absolute size, because for any focal length the same ratio admits the same amount of light from the scene. f-numbers grow by a geometric scale based on the square root of 2, as illumination varies with area (a two-dimensional value), but diameter is a single-dimension value. While divisions were originally set to a whole stop—a factor of 1/2—modern cameras allow setting aperture in half- or third-stops.
A wider maximum aperture—occasionally referred to as the "speed" of the lens—requires more expensive design and higher-quality lens elements. Telephoto lenses nay be seen with a max aperture of f/2.0. Normal and wide-angle lenses may approach f/1.0. While lenses faster than f/1.0 are possible, optical and design constraints may result in less-favorable images.
On strictly mechanical lenses, the user sets aperture by rotating an adjustment ring on the lens. While the shutter is released, a lever in the camera body pushes against a lever in the lens mount, causing the diaphragm blades to close at the chosen aperture setting. Lenses that offer electronic operation will pass control to the camera body, by means of a second lever.
Depth of field
edit.jpg)
Adjusting the aperture controls how much off-angle light may enter the camera. This has a side effect of controlling how much of the scene before and behind the focal plane is in focus—this is called depth of field. The amount of depth of field is determined by the absolute size of the aperture, with a smaller aperture resulting in wider depth of field, and a wider aperture giving shallower depth of field. Because telephoto lenses generally have a larger absolute aperture, they often produce thin depth of field. Wide angle lenses may allow for depth of field to reach infinity.
Depth of field is proportional to focal distance. Focusing closer will reduce depth of field. With the same aperture size, focusing farther away greatly increases depth of field. Depth of field can extend to infinity without necessarily focusing at infinity. Some lenses have barrel markings indicating depth of field at a given aperture.
While composing the shot, the lens will hold aperture wide open, allowing the scene to be clearly viewed. Some camera models allow the shooter to preview depth of field; holding down the "DoF preview" button temporarily sets the aperture while keeping the viewfinder active (instead of exposing the sensor).
Depth of field is also indirectly affected by the image format. Larger format require lenses with longer focal lengths to achieve usable field of view. Smaller formats can take advantage of very short focal lengths, and obtain greater magnification from longer focal lengths, but generally have a smaller range of available apertures. Thus, a smartphone or compact camera is less able to capture shallow depth of field than a full-frame camera.
Lens mount
editEnthusiast and professional cameras often offer a range of interchangeable lenses. The lens mount allows a lens to be securely attached to a camera and connected to mechanical and/or electronic controls. The lens mount thus determines what lenses are compatible for use with a certain camera body.
When the camera is not in use, the lens mount cover should be attached to protect the mounting surfaces and the inner chamber of the camera. Though it is often the strongest part of a camera, the lens mount can still be vulnerable to damage from drops, or from excessive force against an attached lens.
Attachments
editLens hood
editA lens hood gives some protection to the front of the lens. The hood also shields against light entering the lens from outside the field of view, and potentially causing glare.
Filters
editBy means of a filter mount on the front of the lens, various filters may be attached for special purposes.
- UV/Clear
- A clear filter that may also filter out ultraviolet light. The film or sensor may capture ultraviolet light as if it were visible light, causing haze in the image.
- While the additional glass may increase the potential for image defects, the filter can also protect against accidental drops and collisions. The shattering glass absorbs energy that might otherwise damage the much more expensive lens or camera body.
- Polarizer
- A filter that limits the transmission of light to a specific plane of polarization, the angle of which is adjusted by the user. This can increase contrast and reduce the intensity of reflections (which tend to polarize incoming light). The filter may also interact with polarized objects such as digital screens and sunglasses. Digital cameras may require a "circular polarizer" (CP) in order to preserve the use of autoexposure and autofocus sensors.
- Neutral density (ND)
- A filter that reduces incoming light by a specific amount. This can serve as a backup means of controlling exposure, especially when a longer shutter speed is desired. The filter is neutral, not favoring any specific color over any other. This class of filters is often available in different densities, given as the number of stops that exposure is reduced. Neutral density filters may be required for lenses that do not contain an adjustable aperture.
- Some ND filters may be "split", with two different regions of density, or "graduated" with a gradient of increasing density. Some ND filters may be composed of two polarizing filters, and can be adjusted in strength by changing the angle of rotation between them.
- Color
- Permanently colored filters that can be used for adjusting white balance, adding a weak or strong color cast, or controlling shots taken on monochrome film.
- Close focus
- Magnifying lenses that can be attached to a lens to allow for focusing at a closer distance than originally designed. These are typically less expensive than a dedicated close focus lens.
- Special effect
- Filters can create special effects such as patterned highlights or soft focus.
Though filters can often be stacked upon each other, it is unwise to attach more than one or two, as this may cause vignetting. Wide-angle lenses may require a special mount for a wider filter to prevent vignetting.
Couplers and adapters
editVarious attachments alter how the lens performs:
- Coupler
- In place of a macro lens, a coupler joins two lenses together at their filter mounts. The magnification provided by the coupled lenses is measured by dividing the focal length of the camera-mounted lens by that of the coupled lens. The camera retains control over the normally-mounted lens, and autofocus if available. Transmission is reduced by the sum of glass in both lenses.
- Extension tube/ring
- Provides close focus ability by increasing the distance between the lens and the image plane, at a cost to exposure and the ability to focus at infinity. The effective reduction in aperture also collapses depth of field. Extensions do not otherwise affect transmission since there is no additional glass. Better extensions preserve connections to focus and aperture.
- Adapter
- Allows mounting of lenses designed for other lens mounts.
Quality
editLenses come in a variety of build quality, with more expensive lenses typically offering better performance and more durable construction.
At additional cost, some lens elements are made of exotic materials such as borosilicate or fluorite, or with non-spherical geometry that require specialized production. These serve to reduce or eliminate defects caused by conventional optical glasses.
When adjusting focus, the focal length may shift slightly, even on a prime/fixed lens where focal length is expected to remain constant.
Lenses may either use less-expensive "external focusing" with parts visibly projecting from the barrel, or "internal focusing" where barrel length remains unchanged and heavier attachments can be mounted.
Some less-expensive zoom lenses suffer from inconsistent speed when adjusting focal length. For instance, a 70–210mm f/4–5.6 lens may offer f/4 at 70mm, but drops down to f/5.6 at 210mm.
To achieve faster speed, it may be necessary to increase the barrel diameter, requiring larger lens elements and sturdier build.
Phenomena
editLenses do not perfectly transmit light. They may capture certain effects that are not present in the scene:
- Bloom: Glow around intense light sources or reflections.
- Flare: Shapes appearing elsewhere in the image due to intense lighting in the visible scene
- Haze: Reduction in contrast, sometimes due to fogging of the lens, excess heat, or ultraviolet light. Haze may also be caused by the breakdown of optical cement in between adjoining lens elements, requiring expensive repair.
- Leak: Light entering the camera through defects in construction, or improper lens mounting.
- Smudges: Blemishes caused by fingerprints and stains on the front or rear surface, scratches to same.
The design and choice of lens elements may also introduce various errors:
- Distortion: Imperfections in the grinding of a lens, as well as deviations due to spherical lens geometry.
- Chromatic aberration: The splitting of colors, same as observed on an optical prism.
- Internal reflection: Undesired bounding of light across multiple surfaces, often due to insufficient coating.
- Vignetting: Reduced transmission at the edge of the field of view, causing corners of the image to be darkened. These may also be caused by obstructing filters.
Lenses by focal length
editNormal
editA so-called normal lens bends light roughly the same way our eyes do, thus providing an image with the proper proportions. It has a focal length close to the diagonal measurement of the image frame. That is, with a standard 35mm format full frame camera, the image on the film or digital image sensor measures 24x36mm. The diagonal measures 43mm (sqrt(362+242)). The closest lens most manufacturers produce is the 50mm lens. Cameras with formats other than 35mm have 'normal' lenses with different focal lengths — longer for larger formats, and shorter for smaller formats.
- 35mm - 50mm (eg. Nikon Nikkor 50mm f/1.4, Canon EF 50mm f/1.4, Pentax smc P-FA 50mm f/1.4, Minolta AF 50mm f/1.4, et al)
- 645 - 75mm (eg. Pentax smcp-FA 645 75mm F2.8, et al)
- 6x7 - 105mm (eg. Pentax smcp 67 105mm F2.4, et al)
- APS-C - 30mm (eg. Sigma 30mm f/1.4)
You can compare lens focal lengths across various film formats using this external chart.
Wide-angle
edit
Wide-angle lenses have a larger field of view than normal lenses. In other words, they capture more of the scene in front of the camera by capturing more of the periphery. However, as the size of the film or sensor in the camera is still the same, the wider scene appears on the film or sensor as being slightly distorted: the bigger scene is "squeezed" onto the same area of film or sensor, so the typical effect is that each object is smaller (and therefore looks farther away) because the image now "includes" more objects. With each object smaller, the typical effect is that objects seem farther away. What you see in the passenger side wing mirrors in cars is the same. Those mirrors give a wide-angle effect and allows you to see more of the scene behind the car by making each object smaller, hence the common warning printed there: "Objects in mirror are closer than they appear."
There are various wide-angle lenses, measured by the focal length. The "normal" lens for a 35mm camera is about 50mm focal length, and a wide angle lens has a shorter focal length, such as 35mm or 28mm. The shorter the focal length, the greater the perspective distortion. At the extreme end, there are wide-angle lenses with a focal length of 10mm or so using a "fish eye" projection: up to a 180 degree field of vision can be captured. However, the final photograph looks highly distorted and looks like a photograph of the scene as if reflected on a silvered ball. It may be that the name of this type of lens comes from what one imagines a fish sees under water, or that the image is distorted around a central point much like what a fish eye looks like.
Long-focus
edit
A long focus lens is any fixed focal length lens that is longer than a normal lens (focal length is longer than the diagonal measure of the film or sensor). This includes the common sub-type, the telephoto lens, which uses special optics to compress the length of the lens.
These lenses bring the subject in by magnifying the subject and isolating it in the viewfinder. Lenses of this type are very useful for sports and wildlife photography for their ability to isolate a subject. However, these lenses have a drawback in that they typically are poor for low light use. Most long-focus lenses have a maximum aperture of only f/4, thus not permitting much light to reach the film and causing the use of slow shutter speeds to get correct exposure. In doing so, the photographer runs the risk of blurring the image due to his or her own movement.
One thing to bear in mind, try not to handhold your camera while using a shutter speed lower than that of the focal length of the lens being employed. This will help to assure sharper images. Using a sturdy tripod and a remote release will help a lot in low light photography.
Focal length range
editFixed/Prime
editA fixed lens or prime lens) is designed for a single focal length, and has one focal length descriptor (e.g. 55mm). Fixed lenses can be less expensive than zoom lenses, with simple construction allowing for reduced cost and size. Fixed lenses may also be constructed with higher-quality materials and improved capability, such as a wider aperture or near-elimination of distortion.
Zoom
editZoom lenses are multi-focal length lenses. Zoom lenses cover a range of focal lengths (e.g. 35–105mm), and are continually adjustable within this range. The difference between the widest and narrowest focal length may sometimes be given as a multiple (e.g. 3× zoom), especially on consumer cameras.
Zoom lenses may either have separate control rings for focus and focal length, or may combine the two with a single control sleeve. Zoom lenses may be confined to a small range of focal lengths, or may be capable of wide angle and telephoto shooting in a single package. The latter may be termed a "superzoom" when the focal range is 10× or greater.
One disadvantage of zoom lenses is that the focal complexity and number of lens elements required to achieve a range of focal lengths is much greater than for prime lenses. Again, each lens element slightly reduces transmission and clarity.
Another disadvantage of zoom lenses is that the maximum aperture of the lens is usually lower, since the same aperture must accommodate the full range of focal lengths. This makes inexpensive zoom lenses hard to use in low-light conditions without a flash. Some lenses may have a varying maximum aperture along the focal range due to design constraints.
Lenses of special capability
editMacro and close focus
editA macro lens allows a subject to be captured onto film at 1× magnification or greater. This meaning is challenged by digital photography that allows sensors to be made ever smaller, and image files to be zoomed at will.
While a regular lens can be converted for macrophotography by means of extension tubes, bellows, or reversing rings, macro lenses offer better optical properties and integration with on-camera controls.
Macro lenses are often confused with close-focus lenses that allow photographs of subjects much closer than standard lenses allow.
Again, regular lenses may be converted to close-focus duty with a close-up filter, but a purpose-built lens may prove favorable.
Tilt/Shift (TS)
edit
Also known as Perspective-control (PC) lenses, these lenses allow the correction of image geometry. This is most useful when the film plane is not parallel to the surface of a subject, and the subject would otherwise be rendered with converging lines (lines parallel in reality are rendered converging). The classic example is when the camera is tilted upwards to photograph a building. The effect of converging lines is often unwanted and can be avoided by using a perspective control (PC) lens. It provides a function that is usually only available in view cameras: the lens can be shifted out of the optical axis (in the above example: upwards) and thus the recording media can be positioned parallel to the subject (the camera points orthogonally towards the building) and the subject is rendered undistorted.
Shift lenses are mechanically and optically more complex than ordinary lenses, don't provide autofocus and are comparatively expensive. They are often wide angle lenses and in this case frequently used in architecture photography. Longer lenses are often used in product or advertising type studio photography.
Catadioptric
edit
A catadioptric, or mirror lens, makes use of mirrors to reflect light back and forth though the glass elements with the second convex mirror element acting as a negative lens, further extending the light cone. The result is a dramatic decrease in the length of a lens whilst still maintaining a larger focal length. Mirror lenses create tell-tale doughnut-shaped highlights when a light is located in an area of the photograph that is out of focus, as the center is obscured by the mirror elements. No such holes appear on the subject or the scene as a whole, since the light rays otherwise converge in the same manner as regular lenses.
Soft-focus
editA lens that renders the image a little softer (i.e. less sharp). This is sometimes used in portrait photography to conceal minor defects in the skin of the person. To suit this purpose soft focus lenses usually have focal lengths around 80-100mm (for 35mm cameras) most popular for portrait work.
Unlike soft-focus filters that disrupt light transmission, soft-focus lenses are optically constructed to achieve blurring around the edges and very short depth of field.
Fisheye
edit
The term fisheye was coined in 1906 by American physicist and inventor Robert W. Wood based on how a fish would see an ultra-wide hemispherical view from beneath the water (a phenomenon known as Snell's window). Their first practical use was in the 1920s for use in meteorology to study cloud formation giving them the name "whole-sky lenses". The angle of view of a fisheye lens is usually between 100 and 180 degrees while the focal lengths depend on the film format they are designed for. As it is impossible to preserve linear geometry at such wide angles, fisheye images often capture curved geometry and exaggerated forms.
Mass-produced fisheye lenses for photography first appeared in the early 1960s and are generally used for their unique, distorted appearance. For the popular 35 mm film format, typical focal lengths of fisheye lenses are between 8 mm and 10 mm for circular images, and 15–16 mm for full-frame images. For digital cameras using smaller electronic imagers such as 1/4" and 1/3" format CCD or CMOS sensors, the focal length of "miniature" fisheye lenses can be as short as 1 to 2mm.
Light
As the raw medium behind photography, it is important to understand the basic properties of light.
Types of light
editBy direction
editSometimes light is describes by its relative direction. Note that while the terms below describe the extremes of this property of light, in reality there is a constant progression from ambient to directional.
Ambient light
editAmbient or 'all around' light, is good natural light which lights everything from many directions. It is the sort of "cloudy day view" you get of subjects with no clear shadows. Ambient light from the sun is greatest at midday on clear days, and may be bright enough to fully obscure any visible effect of artificial directional lights.
Diffuse light
editDiffuse light is light which comes from multiple directions (ambient light is a subtype of diffuse light). A good example of a diffuse light would be the lights used by portrait photographers that bounce either constant light or flashes from a broadly curved surface in order to scatter it in a range of directions. Diffuse light provides excellent detail resolution and prevents hard shadows.
Directional light
editDirectional light is that which comes from one direction and therefore casts shadows. The terms 'point light' or 'spot light' are sometimes used interchangeably, but usually only with reference to artificial direction light such as that from lamps. Very early and late in the day are good for the natural provision of directional light, however at this time the light will also be softer (see below). The angle of your camera versus the angle of the light can play a huge difference in defining the quality of the tones in your image.
By origin
editNatural light
editSunlight, at an effective temperature of 5,780 kelvins, is composed of nearly thermal-spectrum radiation that is slightly more than half infrared. At midday, sunlight provides an irradiance of just over 1 kilowatt per square meter at sea level. Of this energy, 527 watts is infrared radiation, 445 watts is visible light, and 32 watts is ultraviolet radiation.
Early in the morning and late in the evening, natural light will be softer (not as bright, cast fuzzier shadows, be more diffuse) than at midday, when it is considered to be harsh (very bright, casting extreme shadows, being highly directional).
Understanding and working successfully with a range of natural lighting conditions is a key skill for photographers, and is particularly important for event photographers such as sports and wedding photographers, journalists, etc. as well as nature photographers who do not wish to artificially light their subjects and detract from their natural appearance.
Artificial light
editToday we can reliably produce light of any character with artificial lighting equipment. Once upon a time it was possible to characterize artificial light, but today this is not possible due to the broad range of devices available. We will explore the developments in artificial lighting in the Light and photography section, below.
By harshness/hardness
editHarsh/hard light
editLight which is hard or harsh is that which is bright and directional (non-diffuse). It casts very strong shadows and emphasizes the form and, at some angles on some surfaces, texture of a subject. The classic example of harsh/hard light is the midday sun on a clear day.
Soft light
editThe opposite of harsh or hard light is soft light. Soft light is that which is less bright and less directional (more diffuse). It casts softer shadows and emphasizes the detail of a subject, without emphasizing texture. A classic example of soft light is the glow of a lava lamp or a digital display screen.
By wavelength
editInfrared
edit
Infrared (IR) is invisible radiant energy, electromagnetic radiation with longer wavelengths than those of visible light, extending from the nominal red edge of the visible spectrum at 700 nanometers (frequency 430 THz) to 1 mm (300 GHz), although people can see infrared up to at least 1050 nm in experiments. Most of the thermal radiation emitted by objects near room temperature is infrared.
The infrared spectrum is often divided in to Near Infrared (NIR), Short-wavelength infrared (SWIR), Mid-wavelength infrared (MWIR), Long-wavelength infrared (LWIR) and Far Infrared (FIR). NIR and SWIR is sometimes called "reflected infrared", whereas MWIR and LWIR is sometimes referred to as "thermal infrared". Due to the nature of the blackbody radiation curves, typical "hot" objects, such as exhaust pipes, often appear brighter in the MW compared to the same object viewed in the LW.
Infrared is used in night vision equipment when there is insufficient visible light to see.[21] Night vision devices operate through a process involving the conversion of ambient light photons into electrons that are then amplified by a chemical and electrical process and then converted back into visible light.[21] Infrared light sources can be used to augment the available ambient light for conversion by night vision devices, increasing in-the-dark visibility without actually using a visible light source.
The use of infrared light and night vision devices should not be confused with thermal imaging, which creates images based on differences in surface temperature by detecting infrared radiation (heat) that emanates from objects and their surrounding environment, and can be used to remotely determine the temperature of objects if the emissivity is known. This is termed thermography, or in the case of very hot objects in the NIR or visible it is termed pyrometry. Thermography (thermal imaging) is mainly used in military and industrial applications but the technology is reaching the public market in the form of infrared cameras on cars due to the massively reduced production costs.
Thermographic cameras detect radiation in the infrared range of the electromagnetic spectrum (roughly 900–14,000 nanometers or 0.9–14 μm) and produce images of that radiation. Since infrared radiation is emitted by all objects based on their temperatures, according to the black body radiation law, thermography makes it possible to "see" one's environment with or without visible illumination. The amount of radiation emitted by an object increases with temperature, therefore thermography allows one to see variations in temperature (hence the name).
On the surface of Earth, at far lower temperatures than the surface of the Sun, almost all thermal radiation consists of infrared in various wavelengths. Of these natural thermal radiation processes only lightning and natural fires are hot enough to produce much visible energy, and fires produce far more infrared than visible-light energy.
Ultra-violet
editVisible
edit
Visible light is usually approximately divided by colour. A rainbow is a natural display of the visible light spectrum, caused by light passing through water droplets in the air. Prior to visible light in the table below is ultra-violet light. After visible light is infra-red light.
 | |||
|---|---|---|---|
| Color | Wavelength | Frequency | |
| violet | 380–450 nm | 668–789 THz | |
| blue | 450–495 nm | 606–668 THz | |
| green | 495–570 nm | 526–606 THz | |
| yellow | 570–590 nm | 508–526 THz | |
| orange | 590–620 nm | 484–508 THz | |
| red | 620–750 nm | 400–484 THz | |
Basic optics
editReflection
editReflection is the process by which light bounces off a subject. In this case, the angle of incidence (the angle at which is approaches a flat subject) is said to be equal to the angle of reflection (the angle at which is leaves a flat subject). Note that few surfaces are perfect reflectors, in reality reflected light will approximate the angle of incidence in its angle of reflection only, due to surface imperfections in the reflective medium. Thus, reflected light is typically more diffuse (less directional) than light before reflection.

Refraction
editRefraction is the change in direction of propagation of a wave (in the case of photography, light) due to a change in its transmission medium. In photography, we of course require a semi-transparent (not opaque) medium, ie. one which permits light to flow through it. The medium also requires a density greater than air. The most common refractive mediums used in photography are water and glass or other crystalline solids. Objects half-within one medium and half-within another will appear bent, like a pencil placed in a glass of water, or a swimmer in a pool.

Transparency and translucency
editAn object is said to be transparent when it allows light to pass through without scattering it to the point where an image cannot be made out. For example, a glass window is normally transparent. An object is said to be translucent when it allows light to pass through but scatters it to the point where no image can be made out. For example, an opaque glass window, or a thick glass brick. The opposite of transparency (permitting light to pass through and form an image on the other side) is opacity. An object with complete opacity is one you can't see through at all. Such an object is said to be opaque. An example of an opaque object is a plank of wood.

Measurement of light
editLight and photography
editNow that we have some understanding of the general nature of light, let's look more specifically at how it is worked with during photography.
Available light photography
editPhotographs taken using the light already available in a scene are known as available light photographs. Available light photographs promise the most natural and honest representation of a scene from the perspectives of overall scene balance, colour reproduction, tonal depth and texture visibility. However, some scenes are simply too dark for a good photograph, others are pretty flat and boring, and occasionally we want to add drama or simply experiment.
In the early days of photography, photographic medium were not as sensitive as the digital sensors available today, so exposing a good photograph in anything less than broad daylight tended to require a very long exposure time (many seconds, even minutes) and thus caused issues due to movement (even minute movement such as breathing during portraiture) and so became highly problematic. Today we are lucky that we do not have such issues, and can generally obtain good results with available light in most conditions.
Artificial light photography
editPhotographs using artificial light are most often known as flash photography, where a momentary light source is used such as the classic camera-attached (or built-in) directional flash unit, though there are other types of artificially lit photographs. Turning on the light in a room also counts as artificial light photography, as does setting up a non-camera connected lighting system that a provides continuous rather than momentary source of additional light.
The first artificial light sources for photography were burning magnesium based flash lamps developed in the mid 19th century.

Flash as fill light
editInstead of relying solely upon artificial or natural light, it is usually the case that a flash is used to augment available light to achieve a different, more useful result. The classic example is fill light, whereupon a subject standing in front of a light source such as a window or sunset that would cause relative silhouetting to occur (loss of color depth, brightness and detail) may be 're-lit' and thus saved from appearing as a dark lump of nothing. However, the tonal depth of a flash-filled subject will rarely equate to that of natural light.

Triggering systems
editFlashes are often rigged to trigger either when another flash is triggered (sometimes described as a slave/master configuration), when the camera shutter is depressed, or on a separate trigger system based upon light, sound, or some other form of sensor.
Format
The format of an image is said to be the size of the recording medium or its digital output.
Format as aspect ratio
editEssentially all cameras have a rectangular (or square) frame, the shape of which is expressed in terms of the 'aspect ratio', or width divided by height.

Typically aspect ratios vary from 1:1 for square-format cameras to 16:9 for some mobile phones, and as much as 4:1 for panoramic cameras. For most cameras, this is a set quantity, although many modern cameras allow the photographer to set the aspect ratio by cropping the image in camera.
Common aspect ratios
editFor example, the most common still image photography format in the world is 35mm, which was the dominant film size at the close of the analog film era. It is still produced today, but more importantly its aspect ratio has been inherited by digital camera image sensor formats. The 35mm format is actually, somewhat confusingly, 36mm in width by 24mm in height. The aspect ratio of this format (dividing by twelve to obtain the simplest whole-number ratio) is therefore said to be 3:2. Many common formats (APS family of formats, for example) are equal to or closely approximate this aspect ratio.
A notable exception to the 3:2 still image format aspect ratio is the Four Thirds System, with an aspect ratio of 4:3 as seen in some compact digital cameras.
From analog to digital
edit
In the analog era, it was common to express formats in terms of the physical size of the recording medium, for example 4×3 inches. These days it is more common to express the format in terms of the accepted short form for the standardized sensor size. For example '35mm' or 'APS-C'.
In terms of composition, these format names are arguably more usefully expressed in terms of aspect ratio, ie. 'the shape of the frame', such as 3:2 or 4:3.
In terms of the resolution available for post-processing digital images, the format alone cannot tell us, we must look at the sensor. Sensor sizes are expressed in terms of pixels, eg. 8688×5792 pixels. It is not possible to determine the pixel count from the sensor format, and vice versa, though there is some relation: larger sensor sizes tend to have larger pixel counts. Because large modern pixel numbers can be hard to remember, the industry has standardized on megapixels, or the number of total pixels divided by 1,000,000 (one million). For example, the Canon 5DS has a resolution of 8688×5792 pixels, which is equal to 50,320,896 pixels in total, or roughly 50.3 megapixels.
Film processing
Processing
Comparison to digital
editIt is the person behind the lens who takes a good photo, not the camera. Regardless of your choice, the best gear or a certain capture method will not produce any good pictures if it was not for the artistic capabilities of the photographer. The following considerations guides your artistic choice for or against a certain capture method for individual situations.
Workflow
editThe most obvious difference is the mere workflow in taking pictures and processing them, but also before you even start.
- Since about the 2010s digital cameras are regularly equipped with a small LCD giving you the opportunity to review a (scaled-down) picture right after it has been taken. Using film, however, you cannot assess the exposure’s quality. Maybe you have underexposed or overexposed the shot. Maybe a person you photographed blinked right in that moment.
- Some photographers actually appreciate this fact, because you have to carefully think about the photo, instead of doing an iterative, “amateurish” trial and error approach.
- Other photographers see themselves stymied by the fact of not having any immediate feedback. This may be due to a lack of experience, because you can produce pictures with either capture method just as fast.
- Frequently external factors like the situation, the setting, or the photographed subject will dictate your choice. If you think you are producing too many rejects, too few “good” pictures with your digital camera, you might benefit to artificially slow down your workflow by switching to an analog camera, maybe even just for a while, you know.
Technical
editSome people like to justify their choice with technical facts. While it is important to know technical limitations, in most circumstances it makes no difference.
- When you use film, you start off with a “fresh sensor” over and over again. A digital camera, on the other hand, has a sensor built-in and while using it it heats up, thus altering its characteristics. When advancing the film a dust particle may be gone for the next exposure, but a dust particle on a digital sensor stays there affecting all pictures you take. Cleaning a digital sensor needs careful caution.
- Photographic film displays a loss of effective sensitivity at long exposure times (about longer than one second) and super short exposure times (when you have to use a special high-speed camera).
- Copying analog materials always entails a loss of information, whereas digital materials can be copied without any loss in information. Although this difference is hardly noticeable, technically it is measurable.
Cultural
edit- As of the 2020s it has not yet been determined that digital media can be stored indefinitely. By the 21st century it was already pretty difficult to read digital media produced just 50 years earlier, if not impossible. Data formats change, hardware breaks down, or simply the magnetic polarization of bits decayed too much in quality. Modern photographic film, on the other hand, can be stored for at least hundreds of years. It is pretty much guaranteed that humans will be able to project light through it in the far future.
- Regular consumer PCs became powerful enough to allow everyone to retouch their photos. In consequence, digital photos are considered to be easier to manipulate. While it is also possible to manipulate analog pictures the general public may consider non-digital works more “truthful”.
- Just emotionally it can make a difference to you whether you can (and have to) physically touch your photos.
Types of film
editNegative
editSlide
editReversal
editFormat
edit- 35mm
- Below 35mm
- Medium- and large- format
- Instant
Sensitivity
edit- Grain size and sensitivity
Conventional processing
editAlternative processing
editThe enlarger
edit
Digital processing
The image sensor of a digital camera replaces traditional analog film as the camera's recording medium.
The sensor is often a permanent part of the camera, paired with an image processor that generates digital image data from captured input. The model of camera body chosen determines what sensor and processor are installed.
Comparison to film
editAdvantages
edit- Lower operating cost
- Less expensive to operate, with no continuing costs for film purchase and development.
- Essentially unlimited storage options
- Widespread availability of cost-effective, light and portable digital storage today.
- Color shooting
- Almost always color, rather than some being in color, and others being black and white.
- Versatility
- More versatile shooting, allowing the photographer to change settings between every shot without physically ejecting and replacing a roll of film.
- Greater sensitivity range
- Far more sensitive than commercially available film, with ISO ratings of 12800 not uncommon (at the close of the 20th century it was generally hard to find ISO 800 film across much of the world, ISO 400 being the highest typically acquirable sensitivity, sometimes only ISO 200).
Disadvantages
edit- Burn-out
- There is a very strong tendency for bright areas such as sun-lit clouds to 'burn out' and become a solid block of perfect white, resulting in a loss of detail.
- Lower dynamic range
- The difference between the darkest shade before black and the brightest shade before white that can be recorded within a scene is known as the dynamic range. Film generally surpasses digital image sensors in this regard, though sensors are rapidly improving.
- Susceptible to dust and damage
- As the sensor is not changed between shots, dust particles may be visible across an entire batch of shots. Damage to individual pixels—whether from manufacturing defects, physical trauma, or overexposure—is permanent.
- Require power and storage
- While film can be operated manually and records each image, image sensors require a source of power, and a storage location for captured images.
Format
editSensors come in a wide range of formats—the physical size of the sensor—from 4mm sensors used in smartphones to 8″×10″ sensors for large-format cameras. Camera models based on 35mm designs often come in either a "full frame" format of 36×24mm, or a "cropped frame" format of roughly 24×16mm. Compact cameras may have formats stated in confusing fractions such as 1/2.5″, all of which are much smaller than "full frame". Because the sensor is often a permanent feature of the camera, this limits the availability of other features such as the image processor and interchangeable lenses.
Like film, the sensor format directly affects the size of lenses that can be used with it, and the resulting field of view. Cameras can be miniaturized by pairing a small sensor with a lens of a small focal length, yet can still produce wide angle or telephoto shots. The larger lenses available for larger sensors offer advantages in fidelity, color rendition, range of focal lengths, and reduction of various distortions, but often at greater cost and weight. The lenses available for use on a camera are determined entirely by the lens mount on the camera body, not by the type of image sensor.
Photosites and pixels
edit
The sensor is divided into millions of photosites, each one responsible for capturing light from the scene. Photosites are analogous to film grains, with larger ones offering increased sensitivity and dynamic range, at a cost of having fewer of them. Smaller photosites allow for more detailed images, but with increased image noise and vulnerability to damage. Unlike film grains, photosites are arranged in a rectangular grid.
The size of each photosite is consistent, and correlates with how sharp any detail in the image can be, and depth of field created by the lens. Light focused from the lens needs only be as large as one photosite in order to be sharply rendered.
The image processor translates the sensor values into the pixels (picture elements) that form a digital image. A camera's pixel count is usually determined by the number of photosites. While it may seem logical for each photosite to directly register values for each pixel, this is not necessarily the case for all cameras.
Pixel count alone is not indicative of image quality—cheap cameras may have fewer photosites than pixels, sensor format does not correlate to size or count of photosites or pixels, and smaller format sensors have disadvantages stated above. Despite this, manufacturers often state a pixel count in lieu of a sensor size or photosite count, and only professional models might state the size of the photosites.
Auxiliary sensors
editThe image sensor may contain sensors for other purposes.
Exposure sensors calculate how much light is present in the scene. They help determine settings for programmed/automatic exposure, or inform the shooter whether manual exposure settings will result in the desired image.
Focus sensors help determine whether the lens is properly focused on the subject. The shooter may be able to choose from different focus targets to allow the subject to be placed in different parts of the scene.
On DSLR cameras, the image sensor is blocked by the viewfinder mirror until the shot is taken. The auxiliary sensors will usually be placed elsewhere on the camera body, with a second mirror diverting light from the scene.
On mirrorless cameras, and DSLR cameras used in "Live preview" mode, the image sensor is exposed, and so the auxiliary sensors may be integrated into the iamge sensor. Less sophisticated cameras may use the actual image data, which reduces costs but lacks the utility of dedicated sensors.
Controls
editUnlike film, the image sensor can be configured for different shooting situations.
The image sensor directly controls sensitivity, one of the three main exposure controls. (Shutter speed is controlled by the camera body, and aperture is controlled by the lens. The shooter may also have control over how much light is present in the scene.) Sensitivity, often given as an "ISO number", relates how much light must be captured before it is considered fully exposed. Sensitivity has an indirect relation with image noise—unwanted variations in color. Higher sensitivity (corresponding with a higher ISO number) allows for quicker exposure but risks increased noise; lower sensitivity requires more time but reduces noise captured.
The sensor can also adjust white balance along a wide range of "color temperature" along an amber–blue axis, as opposed to film typically offered only in either "daylight" or "incandescent". Various light sources can have strong color casts. Human vision compensates for these casts, while sensors must either interpret the scene or receive human input. Mismatched white balance may cause, for example, a shaded subject to appear blue due to light from the sky, or a candle-lit subject to appear amber. The sensor may also adjust for "tint" along a magenta–green axis. Fluorescent lighting can occasionally be strongly tinted green.
Some camera models offer special shooting modes:
- Burst shooting allows a quick sequence of still images to be captured.
- Bracketing allows exposure settings to be quickly changed during a burst, and allow for the creation of high dynamic range images.
- Video modes allow for the capture of video instead of still images.
- Bulb shooting allows for the sensor to be exposed for long periods of time (multiple seconds to multiple hours). The sensor must be protected from overexposure for bulb shots taken in daylight.
Image mode and color space
editImage sensors generally capture three channels of color—red, green, and blue—matching what human eyes are capable of seeing. Invisible wavelengths such as infrared and ultraviolet are typically filtered out to prevent the sensor from misinterpreting them as visible light. Monochrome images can be computed from 3-channel input by the image processor or image editing software. Some specialty cameras may capture a fourth color channel for additional color fidelity, a single channel for reduced cost, or a single channel with increased precision.
Currently available image processors generate 8–16 bits of color depth—the number of steps in between a completely dark pixel and a completely exposed one. As most monitors and popular image formats are limited to 8 bits per channel (24-bit color, sometimes erroneously called 32-bit color), many cameras offer JPEG compression, a widely-used file format that allows the photograph to be immediately shared.
Advanced cameras will generally offer more bitdepth, which gives an advantage in editing precision and dynamic range. Such cameras can produce a raw format image—the raw, unaltered data as captured from the sensor. As raw format is often unique to a specific image processor model, the user will need to install a "codec" that allows their computer operating system to interpret the data, and suitable image editing software that is capable of working with larger bitdepth and exporting more common file formats.
To ensure colors are consistent across all sorts of viewing devices, a color profile is assigned to each image. This will often be the sRGB color space, widely used by monitors and operating systems. Alternative color spaces can describe a wider range of color than can actually be viewed on a monitor, but which still carry advantages in color rendition for the professional photographer.
Output
editAs mentioned before, image processors can output either JPEG or raw format images, and some professional models can output both.
The images must either be transferred to storage media such as a memory card or drive; or to a separate storage device via USB, an Ethernet wired network connection, or a wireless network connection such as Wi-Fi or Bluetooth. Otherwise, the camera may refuse to capture an image, or may simply purge the image after another shot is taken.
Exposure controls
Photography is the act of writing with light. A light-sensitive surface is exposed to light coming from the scene through the camera lens. As modern methods allow for this to be done in ever-smaller fractions of a second or over multiple days, we must control exposure—how much light enters the camera.
In order to get a perfectly-exposed image (one that has all of the desired levels of gray from pure dark to pure white) a photographer must balance and coordinate three settings—aperture, shutter speed, and sensitivity—against the scene to be shot.
Concepts
editLevel, tone, value
editThese terms are used interchangeably to describe how light or dark a region of a picture may be. For printed images, the lightest tone available is usually that of the bare paper on which the print is made, and less often a specific white pigment used in some printing methods; the darkest tone results from being fully saturated with black ink/pigment/dye/toner. For images viewed on a screen, the lightest tone occurs at full illumination, and the darkest tone with emitted light being completely obscured, or no light being emitted.
We aim to keep all visible details within the range of tones we can reproduce in print or screen—dynamic range. This range is *much* smaller than the range of tones we encounter in the real world—from full sunlight to complete darkness. Our eyes adjust to changing lighting conditions, instantly and involuntarily. Meanwhile, our cameras must measure more carefully, and determine what exposure settings to apply in response. However, cameras can still operate in conditions that humans would find blinding or too dark, and images can be processed in a way that exceeds the dynamic range normally available.
Contrast
editContrast is the overall difference between light and dark areas. Human vision is more sensitive to changes in brightness than changes in color. So it is that contrast in an image provides clarity through high-contrast edges, and impact through contrast between regions of an image. Images with low contrast can appear dull and uninteresting, or may even be difficult to comprehend. Extreme contrast—where most of the tones are pure white or black—is generally avoided for many images, but can prove very striking, and is also the primary aim of written text.
Key
editKey is the predominance of tones in a scene, with "high key" referring to bright tones, and "low key" for dim tones. By necessity, a shot taken in broad daylight will often be high-key, while a shot taken in moonlight will be low-key. The subject may yet be properly exposed with a full range of tone, even though the remainder of the scene is crushed or muddied.
High key can lend a feeling of cleanliness (such as for product photos or architecture) or discomforting sterility (plain white walls of an institution). Low key can emphasize intimacy (a figure in a darkened bedroom) or terror (a forest at night, creatures hiding in shadows). Both can also evoke feelings of isolation or loneliness from a lack of visible surroundings.
This is a different concept from a "key light", the primary light used to illuminate a subject. "High key" here instead means a key light placed above the subject, and "low key" for light from below.
Stops
editA stop is a difference of double a lower value, and one-half a higher value. Stops are used because illumination and vision are dependent on this geometric scale. The perceived difference in light between one and two lamps appears greater than the difference between eleven and twelve of the same, but would appear the same as the difference between one hundred and two hundred.
Stops are often used when speaking of aperture, as the term originates from the literal stops that secure the aperture ring along its adjustable range. However, stops can also describe the differences between shutter speed and sensitivity values all the same. Camera controls are typically available in thirds of a stop.
Exposure value
editExposure value is an alternate system of quantifying a scene using a logarithmic scale. Instead of large numbers and fractions, exposure values are given in whole numbers that grow or decrease by one with each stop. This can make calculations easier as one needs only add or subtract, instead of the multiplication or division needed for dealing with stops on a linear scale.
Overexposure and underexposure
editOverexposure occurs when too much light is captured for the chosen exposure settings, and underexposure when too little. These are often undesirable when contrast is severely reduced.
Minor exposure problems can be corrected during processing, especially with standard negative film as it is exposed a second time to produce a print. Still, the lowered dynamic range from the original shot may result in a lower quality image.
A digital image processor may simply render over- and underexposed areas as pure white or black—clipping to the maximum or minimum available values. Detail cannot be recovered from clipped areas. Because the sensor is often a permanent part of the camera, it may be damaged by extreme overexposure. Care should be taken to avoid shooting direct sunlight or bright sources of light such as encountered with welding or lasers.
Shooter controls
editBefore the camera even comes into play, the shooter has an important role in deciding what will be shot in the first place, and adjusting how much light is in the scene.
Composition
editNatural lighting comes from the sun, which casts very strong light in one direction. Natural lighting also comes from materials illuminated by the sun. This includes the sky, terrain, buildings, and large objects like trees. Light reflected off of these sources is generally diffuse and comes from multiple directions.
Weather and time of day play major roles in using natural lighting. It is not uncommon for shoots to be planned for a specific time of day or year, or to be cancelled due to undesirable conditions.
Artificial lighting is created by humans for visibility and public safety. This is much less intense than natural lighting. It may even appear in the shooting scene without severely disrupting exposure.
Indoor scenes can be challenging to expose properly because the light level is much lower than outdoors, and daylight from outside can easily overpower. Without adjustment, shots taken indoors may require such long shutter speeds or high sensitivity that the resulting image is undesirable.
Staging
editThe lighting within a scene may be manipulated by the shooter with various tools. Some shots may require use of a studio, a space where the photographer may more easily control shooting conditions.
Devices such as on-camera flash, studio lamps, and strobes provide additional light for the photographer. Lighting can also be redirected from elsewhere by using reflecting screens. Care should be taken to avoid including these devices in the shot.
Light can be removed from a scene by the use of flags and panels to block light, by closing doors and curtains while indoors, and other obstructions. Screens and scrims may be applied to lighting to reduce their effect on the scene, or applied outside windows to allow outdoor objects to be exposed along with the indoors.
Properties of light such as diffusion and color can be altered with various materials.
Camera controls
editThree primary exposure controls are located on the camera. Aperture is controlled by the iris diaphragm inside the camera lens. Shutter speed is controlled by the shutter curtain inside the camera body. Sensitivity is a property of the speed of film chosen, or the digital image sensor used.
Aperture
editThe aperture is a hole in the camera lens through which light is transmitted from outside the camera. Changing the size of the aperture allows more or less light through as needed. The aperture size also has an effect on depth of field—how much of the scene before and behind the focal plane is in focus. There may also be minor side effects depending on the quality of the lens.
Shutter speed
editShutter speed is the length of time for which the shutter is released, permitting light from the lens to reach the sensor. It is measured in seconds, or fractions thereof. Shutter speed has a direct effect on motion blur captured in the image, whether through the motion of subjects or of the camera itself.
Though normally controlled by a timer, long shutter speeds may be achieved through a "bulb" setting. With long shutter speeds, it may be necessary to use neutral density filters to prevent overexposure during the day. The camera should also be stabilized with a tripod or setting it on a sturdy surface. Very long shots, such as with astrophotography, may even require a tracking mount that counteracts the rotation of the Earth.
Sensitivity
editSensitivity or speed—often given as an "ISO number"—is the rate at which the film or sensor is able to capture or react to light. By changing the sensitivity, the same amount of light can produce different tones in the captured image. Each successive grade (double the number) requires half as much light to be captured for the same resulting tone.
Film
editFilm manufacturers achieve varying degrees of sensitivity by altering the grain size of the light-sensitive crystals embedded in the film. Slower films will have smaller grain than faster films. The grain size affects how the film captures fine detail, and how smoothly it can reproduce gradual changes of color.
Film speeds are generally obtainable from ISO 100 (slow) to ISO 3200 (really fast). In order for the camera to properly calculate exposure, the matching film speed should be set on the camera body's sensitivity control.
Digital
editFor digital sensors, sensitivity has an indirect relation with image noise—unwanted variations in color. Higher sensitivity (corresponding with a higher ISO number) allows for quicker exposure but risks increased noise; lower sensitivity requires more time but reduces noise captured. Digital cameras may provide a wider range of sensitivity, from ISO 50 to ISO 12800.
Changing the camera body's sensitivity control changes how the image processor translates the sensor readings, simulating a change in sensitivity. Depending on the quality of the image processor, there may be subtle changes in contrast and color rendition as sensitivity is adjusted.
Metering
editThe proper exposure settings for the scene to be shot can be determined by 'metering—using a light meter that instantly reports the level of light. The readings may simply inform the shooter while using manual exposure, or they may be used by the camera's autoexposure system to automatically set exposure controls.
Manual exposure
editWith manual exposure, the exposure controls are set by hand. These cannot be changed by the camera, even if the shot is sure to result in over- or underexposure.
Through-the-lens
editThe camera body often contains a built-in reflected light meter that measures the amount of light entering the camera through the lens (TTL). The suggested exposure settings are usually indicated in the viewfinder.
To better ensure a proper reading, a calibration card may be positioned in view. An 18% gray card provides a neutral, middle gray tone.
External metering
editAn incident light meter may be used to measure the actual amount of light present in a scene. The user holds the meter where the primary subject is positioned. These often have a white hemisphere that allows light to be collected from all directions. The meter reports what exposure settings should be used, and allow for locking of certain controls. Some can measure flash lighting by reporting the peak value detected.
There are devices that allow a smartphone to be used as a light meter, with an accompanying app to report settings.
Rules of thumb
editApproximate settings can be figured by easy-to-memorize rules:
- Sunny 16—On a sunny day, set aperture to f/16, and shutter speed to the reciprocal of sensitivity. If sensitivity is ISO 100, then shutter speed is 1/100. The aperture can be adjusted for different conditions, such as overcast clouds or shooting in full shade.
- Looney 11—When shooting the surface of the moon at night, set aperture to f/11, and shutter speed to the reciprocal of sensitivity.
Automatic exposure
editThe camera body can use automatic exposure controls using the TTL meter and a programmed shooting mode.
Because scenes vary, the camera offers some basic metering modes:
- Spot metering
- Measures a small field, typically centered with the lens. Spot metering is recommended for use with a calibration card.
- Center-weighted metering
- Measures a larger field to account for areas with high contrast. The reading will split the difference between the brightest and darkest areas.
- Matrix/evaluative metering
- The entire scene is analyzed in sections, with priority given to focused areas. Some camera models may compare readings against a database in order to pick settings.
- Average metering
- All available light in a scene is simply averaged, yielding a crude but quick result.
Exposure compensation
editLight meters assume that the subject will be exposed to a middle tone. This may not be the case if you are shooting in excessively bright scenes (snow, sand), or if your subject is strongly colored (dark skin or paint). The meter reading can nonetheless be used by setting exposure compensation that adds or subtracts stops.
On a film camera, the sensitivity control may be used for exposure compensation, by setting it a certain number of stops away from the actual film speed. Setting to a lower speed will increase exposure; setting to a higher speed will reduce exposure. This allows for using the shutter speed and aperture controls as intended.
On a digital camera, there is a dedicated exposure compensation control (+/–). The camera will adjust exposure controls depending on what shooting mode is chosen. Camera customization may allow more than one control to be adjusted to ensure a shot can be taken. In other cases, the camera may refuse to shoot and alert the user that its limits have been reached.
Conception
There are many reasons to make an image, but fundamentally we almost always make an image to record something.
- Natural image: A real subject, in its existing environment, with existing lighting. This is the most common situation.
- Conceived image: An idea, which we would like to create by setting up a subject, creating appropriate lighting, and by using various other techniques, including filters, perspective control and post-processing, to name a few.
- Some combination of these two extremes.
When we conceive a photograph, we could be said to use our understanding of the possibilities available in photography to formulate a goal — something we'd like to achieve with the final image. This section explores techniques and concerns during image conception that fall across this full range of scenarios.
The notion of conception
editWhen we talk about conception, we imply something beyond the merely pragmatic, we imply something fundamentally born of the mind. Various dictionaries dance around the definition, but all seem to suggest something relatively fundamental in human thought: a beginning, an idea, an abstract concept still divorced from the ties of physical reality. In English and most western languages, this notion derives from Latin conceptio ("a comprehending, a collection, composition, an expression, also becoming pregnant"). Let's look at some modern attempts at definition:
- The forming or devising of a plan or idea. A plan or intention. Ability to imagine; understanding. — The Oxford Dictionary
- The state of being conceived; the beginning. The power or faculty of apprehending of forming an idea in the mind. An image, idea, or notion formed in the mind; a concept, plan or design. — English Wiktionary
- A sketch of something not actually existing. origination; beginning. A notion; idea; concept. Fertilization. A design; plan. The act or power of forming notions, ideas, or concepts. — Dictionary.com
But where does the idea come from? To conceive seems fundamental to being human.
Perhaps due to this very human character of conception, in common use within the field of the arts it is today skewed toward the artistic rather than the mundane. Visual artists of all media may commonly talk of the conception of a piece, ie. where the idea came from. It is decidedly less common to discuss the conception of a shot that came from an industrial photography process, eg. automated photography on a production line. In such a case the production line was that conceived, as were perhaps arguably the technical parameters of the particular line-component incorporating photography (much less individual shots). The images, however, were not. We can probably therefore derive the understanding that shot conception is a process considered to be fundamentally human: it's a unique act, it's an aesthetic act, it's a personal act.
Philosophical approaches to conception
editThere are different modes of artistic conception, which boil down to differences in philosophy. Whilst the following breakdown is not a universally acknowledged set of terms for these approaches, it should help to illustrate the point. The mainstream, traditional perception of the art world is that the less spontaneous a work — ie. the later in these sections it appears — the more value it has as 'high art'. (Though it pays not to be overly troubled by others' perceptions of our work, unless the goal is to please others rather than create work that will satisfy us.)
Spontaneous or naive
editSometimes we may use the camera like a small child approaches an object, a pen, or a music instrument: as a tool without specific comprehension of the probable results, just to see what happens. Adults or people particularly experienced with a camera can find this hard to achieve, but we all begin this way, more or less. This is considered to be a very 'pure' approach, less intellectual, more visceral, a raw aesthetic. There is nothing wrong with this approach, in fact it can often catch raw and moving images from uncommon subjects and perspectives, simply by ignoring established aesthetics.
Explorative or opportunistic
editBuilding on the less formally conceived spontaneous or naive philosophy, explorative or opportunistic philosophies of conception are those in which, with some understanding of the camera, we grasp toward images of a certain nature, though without absolute preconception or rigid formalism about achieving a particular outcome, and with an acceptance and openness toward aesthetic and artistic consideration of results obtained falling somewhere about the goal as perhaps being final outputs in their own right.
Goal-oriented
editGoal-oriented philosophy of conception is that in which we have an image in our mind that we wish to achieve, and all thought is focused on the 'realization' of that goal. The goal could be as mundane as 'to record this object' or as complex as 'to create a sense of upward motion in a cow being abducted from long grass by alien spacecraft against the night sky showing a particular constellation of stars in the upper-left and wintery mountains at rear'. This is probably considered by many to be the philosophy of conception under which the vast majority of art is produced. However, it could also be said to be more than a little artificial: taken to its extreme, it is a philosophy of 'immaculate conception', perhaps in part a philosophical holdover from Italianate/Renaissance Catholicism and prior to that Roman/Greek sculpture as a western artistic ideal, suggesting some kind of perfect idea, perfect subject and perfect execution. The reality is that we rarely ever achieve exactly what we set out to achieve (if we even remember what we were aiming at when we are done), and our ideas and goal can easily change along the way.
Relative to other visual arts, photography has been particularly well tarred with the goal-oriented philosophy of conception, as in the earliest era of analog photography, a goal-oriented philosophy of conception was required to achieve any results at all. This is because of a few factors:
- Overall investment in every shot: the camera itself, film, chemicals, time, models if present, transportation overheads for bulky equipment, etc.
- Length of exposures, which were typically multiple seconds at a minimum, greatly constricting options for spontaneity.
- Immediacy. When painting a scene, the artist spends a huge amount of time to produce one image. When photographing a scene, we can take tens of images, evaluate them, select one or two we like, print them out and frame them before the painter's second layer of paint has dried. (In fact, when photography appeared it was initially abused by some as a devilish usurper of the high art of painting!) The photography world responded, at least in part, by emphasizing the philosophical depth of goal-oriented conception that led to a given image.
Academic
editBeyond the goal-oriented philosophy of conception lies something still more obtuse, an academic philosophy of conception. Rarely carried off successfully, this is the sort of thing that gives birth to ten page essays on single color prints, or a series of photographs of slightly different angles of a nail being hammered into a woman's shoe. Loved by some, despised by many, it arguably represents a more abstract approach and a more holistic view of the image as part of a broader act of communication within society.
Iterative versus immaculate conception
editAn iterative process is one in which repetition is used to evolve the output. An immaculate process is one in which something occurs once and is considered to be perfect and complete. As outlined above, traditionally conception has been considered to be an immaculate process, a sudden event similar to turning on a light bulb, being hit with a falling apple or a Zen-master's cane. While many cater to the dominant artistic audience and pretend to have immaculately conceived images, the reality is probably that many, many iterative images are taken by the majority of photographers and the most of them simply discarded. A certain French photographer famously quipped that if he knew what made a photograph work, every single shot would be perfect! In the vast majority of cases, it's simply unrealistic to expect to achieve what you want on the first attempt.
Composition

Composition is simply the arrangement of elements within an image. It could further be said that composition is, beyond the raw selection of subject or subjects, one of the key tools that the photographer has in crafting an image. Composition has been the subject of extensive thought long before the invention of photography, with Renaissance artist and architect Leon Battista Alberti credited with the earliest surviving text on the subject, Della Pittura (On Painting). American photographer Alfred Stieglitz was one of the most influential practitioners to consider composition extensively, with the arrangement of lines in his Steerage focusing his attention much more than the human aspect of the image.[1]
Basics
editComposition considers the way the image is likely to be perceived. The placement of lines and shapes should be considered in terms of their expression (dynamic, static, monumental, etc.), balance, symmetry and the way they lead the viewer's eye around the image.
Lines and shapes
editLines, along with shapes, are some of the most basic compositional elements in photography. They can establish the mood of the photograph and used well can lead a viewer's eye around an image. As a general rule, diagonal lines and curves create a sense of motion, while horizontal lines tend to feel static or restful. Verticals, in turn, add strength and monumentality. Shapes are fields of generally uniform tone or color. They can add "weight" to certain areas of a photograph, and interact with other shapes and lines to create balance or dynamism. They can also act as centers of focus, especially aided by lines leading into or away from them.
Color and tone
editColor and tone are basic considerations in photography. They can make a shape strong or weak, can make it appear to come forward or recede into the background. Two shapes of different colors will appear to have completely different weights within the image. Likewise, a small but strongly colored element can easily offset the impact of a much larger but weaker one, either achieving balance or striking a discordant note.
Symmetry and balance
editSymmetry, the placement of similar elements on opposite sides of a real or imagined axis, plays an important part in photographic composition. While it's usually an element that adds balance by equalizing the weights of a picture's various elements it can also add dynamism, depending on the placement and number of axes of symmetry. A diagonal axis can result in a dynamic composition despite almost complete symmetry of the basic elements.
People
editBecause all of us are people and we are conditioned to react to other people, a lot of the above considerations can be radically thrown off by the addition of human elements into the picture. For instance, an eye within the frame will draw most viewers' attention much more strongly than another item of equal size and shape. A human figure will likewise tend to become the center of focus despite being of relatively insignificant size compared to other elements. This is not something even the most abstract thinker can overlook.
Popular guidelines
editThere are plenty of composition guides for photographers, both in print and online, none can compare with the influence of Kodak's seminal "Guidelines for Better Photographic Composition". Often derided for having spawned millions of "correct" but boring and unambitious photographs, the booklet does give a useful outline of the very basics of photographic composition that can be used by creative photographers as a jumping-off point.
Simplicity
editKodak's first "rule" of composition is to not overload the image with extraneous information. It's better to focus on the main subject than to lose it among a lot of surrounding objects or people.
Rule of Thirds
edit
The much-abused and often-ridiculed rule of thirds is a simple guideline creating dynamism while keeping a measure of order in an image. It states that the most effective place for the main subject is at the intersection of lines dividing the image into thirds vertically and horizontally (see example).
Lines
editImages tend to lead a viewer's eye around an image, and that's why it is important to pay attention to them when composing a photograph. As a general rule, diagonal lines crate dynamism, horizontal ones calm, vertical ones a feeling of monumentality or power. Curves can also add dynamism and add interest to an image.
Balance
editIn its guide, Kodak advocates creating balance within an image by arranging the main subjects in a way that doesn't look "lopsided", while refraining from putting them in the middle by using the rule of thirds above.
Framing
editKodak further advises readers to use foreground elements to "frame" images, to provide interest and context.
Avoiding mergers
editSometimes background or foreground elements interfere with the main subject, such as a background tree "growing out" of someone's head. Often with SLR cameras, in which focusing takes place with a fully open aperture and therefore very shallow depth of field, this is hard to avoid, since objects that during framing are out of focus end up much clearer in the final image.
Limitations
editFormat
editComposition operates within the selected format limitations of the camera and recording medium, so an awareness of their basic properties is generally required. Format is generally expressed as a ratio based upon width by height in some measure, e.g. 4x3 inches, 1920x1080 pixels, 36x24mm or 8688x5792 pixels. The important thing is the shape of the frame, not the units it is measured in. Many cameras allow you to alter this format within the camera, for example by changing the film type or altering a setting within a digital camera. It is always possible to crop (cut) a photograph down to a smaller format (permitting for some loss of quality), though it never possible to retroactively step outside of the bounds of the format at the time of capture. Composition is about fitting all the elements within that frame.
Lens and aperture
editMany lenses are sharper in the center than at the edge, particularly when used under wide-open apertures. This is due to the optical properties of the lens, and may be a concern during composition. For example, if you have chosen to shoot at an aperture that results in a loss of clarity to the edge of your image, and the most important subject is placed there, then you will be very seriously influencing the overall aesthetic of the resulting image.
Modes of composition
editIn more considered modes of conception, such as studio photography, complete control may be given to the photographer to experiment with different composition options. In more spontaneous photography, such as event photography, the photographer may have very little time to achieve a composition for capturing a moment. In the former cases composition may be approached formally and in conjunction with other shot parameters such as camera position and perspective, aperture, shutter speed, lens, lens zoom, lighting, and recording medium sensitivity. In the latter cases, the photographer may already have an eye squinting through the viewfinder, and only a fraction of a second to re-frame the subject in order to capture some important moment.
Common criticisms
editThe most widely criticized choices for composition are the following, though it is important to emphasize that they all have their place and can be effective and justified decisions at times, they are usually the most common failings within early amateur photography.
Bullseyeing
editMoving the main subject off center takes a wee bit of forethought but it's well worth the effort. Most photography and videography follow the classic "golden mean" which divides the "frame", viewfinder or monitor, approximately into thirds vertically and horizontally (think tic-tac-toe grid). Main subjects and points of interest are best placed at or near the intersection of the lines. In scenics, place horizon either above or below but not through center.
Too far
editAllowing too much in the view, such as legs and feet in portraits or group shots makes your subject too far away and small while including more distracting background. A famous quote states: If your pictures aren't good enough, you're not close enough! Think about composing from the hips up, or better waist up. Most people hold their camera horizontally and almost never think to turn it vertically. The general rule of taking portraits of one person (or pet) vertically and two or more horizontally, along with the idea of "filling the frame" as professional photographers know it, will help achieve more intimate, powerful photos.
Distracting backgrounds
editUsing the portrait setting on point and shoot cameras or, on SLR's, using the larger apertures (the smaller numbers) allows the background to go out of focus and hold interest in your main subject. Also watch for poles, trees, etc. coming out of your subject's head or torso.
Lack of depth
editThe most common method is to include foreground such as close, aesthetically pleasing rocks or flowers “anchoring” the photo. Tip: Eliminate flat subjects and "see" like your camera by closing or covering one eye. This should help you watch for clues and angles that suggest depth and counter flat lighting and busy subjects that meld into a confusing mess.
References
edit- ↑ Stieglitz, Alfred (1942). "How The Steerage Happened". Twice a Year (8–9): 175–178.
Capture
The moment of capture is the moment in which the life of an image begins.
What are we thinking of at that moment? What is it fundamentally about?
- It is opportunity; an option given to use, to take or discard at will;
- It is commitment; that by which we may be criticized and judged, that by which we criticize and judge ourselves, that of which we may be afraid.
- It is sharing, an act of communication; that which is no longer within us, viewed by us alone in time and space, through a viewfinder or otherwise, but will be possible to share with others.
- It is record; something which has been taken, preserved and ascribed value, it is evidence: evidence that something existed at a time and place, and therefore something potentially powerful that prohibits denial of experience, denial of an aspect of reality. In this sense too, it may be political.
- It is judgement; the ascribing of value or worth to a time and place, an object, an aesthetic, a worldview, a perspective, an act, an idea.
- It is unique; in most cases never to be repeated, and certainly never to be repeated in exactly the same way.
- It is performance; perhaps pre-empted by motion: jostling or moving for position, kneeling, reaching, squinting, or concentrating... perhaps emphasized by shutter-sound, bright flashes of light, a murmur, or a subsequent rustling toward a new position for a subsequent image.
It is all of these things, and yet it can happen in a fraction of a second.
Modes of capture
edit- Classic shutter button.
- Remote triggering, wireless or wired
- Human-driven
- Sensor-driven
- Light-sensors for lightning
- Motion sensors for wildlife
Technical concerns
editAffecting your environment
editAnnouncing your presence with noise, flash and motion ...
Camera-specific considerations
editMemory .. for storage and temporary buffering ...
Digital image formats
Digital image formats are an important part of modern photography. Regardless of whether you are shooting in digital or analog, it's highly likely that any successful image will eventually be published digitally. In addition, virtually all modern printing now relies upon digital inputs, which means that printing a book or poster-scale reproduction of an analog photograph will necessitate digitization before printing can proceed. When shooting digital, however, our camera stores the image in a digital format from the moment of capture, so our photographs are tied to digital image formats from their very inception. Let's take a closer look at what that means for our images.
Fundamentals
editThere are two types of digital images: bitmap (also known as raster) and vector.
Bitmap images are those in which the image is divided in to tiny squares (known as pixels), each of which has color information associated. You cannot 'zoom in' past the available data in a bitmap image, they are thus said to be of a limited or fixed resolution.
By contrast, vector images are those in which mathematical formulae are stored to define the shapes within an image. Vector images can be zoomed infinitely, are are thus not bound to a particular resolution.
Note that it is possible to convert a bitmap image to a vector image with some accuracy and contortion, this process is sometimes known as 'tracing'. Inversely, it is easy to convert a vector image to a bitmap image at a particular resolution, this process is known as rendering or rasterizing.
Because bitmap images match the sensor mechanism in most photographic equipment and are extremely widely used, bitmap images are almost always the appropriate choice for the storage of photographs, and will be assumed throughout the rest of this document.
Quality vs. Quantity
edit- Resolution
- Raw vs. JPEG
- Lossy vs. non-lossy
Color depth
edit- Examples from black and white through simple GIF to HDRI
Metadata
edit- GPS
- Rights
- Timestamp
- Camera and lens information
- Colorspace
- Print resolution
- Other examples
Portability
edit- Platform considerations
- Commercial versus open source software
Long term accessibility
edit- Archival concerns
Storage media
In the digital photography age, there are essentially two broad categories of storage media: physical (being storage on a piece of electronic hardware in your personal possession) and remote (being storage elsewhere, such as by a third party). In turn, physical storage can be divided in to flash, optical and magnetic-based storage technologies. Remote storage is also often known as cloud storage, though the two are not necessarily interchangeable terms.
In the earlier period of analog photography, and for those who still practice it, photographs tend to be stored on either a film (negative) or 'developed' as prints (positive). There were also alternative methods utilizing glass plates and other kinds of physical objects as the medium for storage, though these methods are now largely considered historical curiosities rather than realistic modern approaches.
Overview
editThe following table compares the general properties of conventional, local, physical storage with that of remote/cloud storage.
| Physical | Remote/Cloud | |
|---|---|---|
| Disaster resistance | Poor | Strong |
| Theft resistance | Poor | Strong |
| Longevity | Good | Good |
| Ease of duplication | OK | Easy |
| Cost | Low | High |
| Cost mode | Single outlay | Ongoing |
| Read speed | High | Low |
| Write speed | High | Low |
| Backups | Manual | Automatic |
| Accessibility | Local | Internet |
Storage technologies
editPhysical
editOverview
editThe following table compares the general properties of flash, optical and magnetic storage technology.
| Magnetic | Optical | Flash | |
|---|---|---|---|
| Developed | ~1970s+ | ~1980s-1990s | 1990s+ |
| Density | High | Low | Medium |
| Write speed | Instant | Slow | Instant |
| Rewritable? | Yes | Rarely | Limited |
| Read speed | High | OK | Very high |
| Cost | Low | Low | Low |
| Max size | Large | Small | Medium |
| Devices | Computers | Few | Cameras/computers |
| Failure mode | Catastrophic | Catastrophic | Gradual |
| Environment | Cool/dry | Cool/dry | Many |
| Moisture resistance | Low | Low | High |
| Scratch resistance | High | Low | High |
| Impact resistance | Low | Medium | High |
Magnetic storage
editThis is the older standard in computer storage. It is based upon a rotating disc with magnetic read and write heads. Data is stored on to the disc at a specific platter, cylinder and sector. Drives tend to fail catastrophically, but this is made up for by their low cost, relative longevity if not in use, and high market availability. Magnetic storage remains the go-to solution for very high data volumes such as very large photographic or video archives.
Optical storage
editOptical storage was ushered in to popular consciousness with the CD-ROM technology of the early 1990s. At the time, a single CD could hold about 700MB, which was then considered a large volume of data. Today, we have DVDs which can hold ten times that amount, though for the practical reasons of write speed (manual process, careful setup, uninterrupted operation, need for surrounding physical processes) and limited longevity (most home-burned CD or DVD media does not last for more than a few decades without careful planning) the technology is being largely supplanted by the same magnetic storage it originally successfully competed with. Popular in the 1990s and 2000s as a distribution medium for software and video products, it has now been largely replaced in this regard by online distribution.
Flash storage
editFlash storage popularly emerged on the market approximately around the end of the 1990s, offering relatively high data density in a small form factor, and due to its lack of moving parts very strong performance under operating environments considered harsh or dangerous to other storage technologies. In addition, read speeds (random or sequential) are very high, and write speeds (random especially, but also sequential) are generally acceptable. Today there are a range of competing form factors for portable flash storage media, such as CF, SD and MMC. In general, high end modern SLR cameras use CF (Compact Flash) cards for their superior write performance, which is critical when high resolution (50 megapixel and above) raw frames need to be written to the media in rapid succession, such as during an event, sport or nature photographer's action-oriented "burst shooting" scenario. Not all cards are equivalent, however, with different types of cards available to match consumer preferences in terms of price and performance. In general, the most critical factor for photographers to consider is write speed. The popularization of flash storage resulted in its translation back to the desktop computing market, where it is known as SSD (solid state disk) technology.
Remote/cloud
editRemote storage is storage that is located away from your premises, for example on one or more servers on the internet. The great benefit of remote storage is disaster and theft resistance: if your home, office, or place of business is burgled, burns down in a fire, collapses in an earthquake, or is consumed by rising oceans, you will not lose your photographs and other data. The drawbacks of remote storage tend to be cost, the need for a high speed internet connection, and the need for ongoing payment to and trust in the remote storage provider. Cloud storage is a term that became popularized in the second decade of the 21st century and refers to remote storage on vague, third-party operated infrastructure in a storage as a service model. The benefit of such a model tends to be that you pay only for what you use, and pricing is highly competitive versus setting up dedicated infrastructure, though long term costs can be high.
Editing
Editing is the process of selecting and/or modifying captured images to obtain a final output. In the preface to The Photograph Collector's Guide (1979), Alan Shestack summarized:
| “ | Even the best photographers do not produce masterpieces every time they click the shutter; they edit their own work mercilessly, discarding unsuccessful negatives or selecting primarily effective details for enlargement. This process of selection gives shape and meaning to the photographer's work every bit as does the initial camera work. In other words, for the photographer, editing is an expression of aesthetic judgement. | ” |
Modifications
editCropping
editThe simplest of all modifications is cropping, that means removing (rectangular) parts of the image at any border. There are multiple reasons to crop an image:
- You may want to create a certain aspect ratio, one that is considered more aesthetic, balanced, or to isolate picture elements even more, creating farther distance.
- You can also eliminate disrupting elements: Imagine, you accidentally included a short part of a twig’s distant end, but the tree itself is otherwise not visible. This is usually disturbing: “What is this? Where does this come from? Where is the tree?” By cropping the image you guide the recipient’s focus to more relevant subjects.
Rotation
editRecipients may feel a faint sense of unease if an image is just slightly crooked. It is expected that vertical lines as regards to life experience also appear vertical in the picture. Correspondingly, horizontals in the scene are expected to appear horizontal, too, parallel to the upper and lower borders of the image. Therefore, take care of the camera’s orientation already during its composition. It is best to either maintain proper orientation or go noticeable off so it is not regarded as an “unintentional flaw”. Sometimes, e. g. to purport a snapshot character, you may want to break this “rule” nonetheless.
-
 Here, the photographer deliberately held the camera not aligned to the horizon. This adds sort of an extra “dramatic effect”.

Reflection
editHorizontal mirroring
editPeople, especially if they grew up learning to read left-to-right scripts, “read” an image in the direction of their primary scripts they are exposed to. You can use this fact to your advantage. This will not work, though, if the image contains any hints about this type of manipulation, for example scripts or vehicles driving on the “wrong” side.
Colorization
editRetroactively adding color to images is called colorization. Using a solid color for mapping gray tones is not called colorization. Only if there is another color beside the monotone brightness shades, colorization takes place.
In the 1925 USSR movie Battleship Potemkin the red flag was manually handtinted red in the otherwise black-and-white film.
External consideration
editEditing your photos may raise some ethical concerns. In the context of documentary/press photography any alterations (except inevitable to produce a viewable image) are considered bad style. The problem, though, already starts at capturing the scene, because the photographer’s perception and choice to take a specific picture are very subjective.
Photo manipulations have been used for propaganda or other political reasons.

Obvious manipulations, however, are generally accepted (even in the context of politics) as they do not try to deceive the recipient, but the manipulation is regarded as a means of expression causing the viewer to wonder about some issue or other. Nevertheless, there are some schools of photography that reject any manipulations (other than “in camera” effects).
Printing
Printing is the process of placing a finished image on to paper or other media.
| “ | The negative is the score, the print is the performance. | ” |
—Ansel Adams | ||
Analog era
editTraditionally, printing referred to the creation of a positive photographic print from a negative film or photographic plate, however today it generally refers to digital printing processes. In the late days of the analog era it was said of printing:
| “ | To many photographers the making of rich prints with as few imperfections as possible is equal in importance to exposing the original negative. They explore tonal qualities to the fullest. Other photographers are concerned more with the image and not so much with the print. The success of a photograph is based upon many ingredients, not solely on excellent craftsmanship. | ” |
—Lee D. Witkin, The Photograph Collector's Guide (1979), Alan Shestack | ||
| “ | There is nothing in photography I hate more than printing. | ” |
—W. Eugene Smith | ||
| “ | I'm too full of new ideas for darkroom play. | ” |
—Jerry N. Uelsmann | ||
Digital era
editToday's digital printing processes take much of the drudgery and poisonous substance exposure out of printing photographs.
Printing processes
Abration tone
editAlbumen Prints
editA process using egg whites, salt and silver nitrate. Popular in the mid to late 1800s.
Anthotype
editA process of making an emulsion from crushing light sensitive flower petals and vegetables.
Argyrotypes
editBromoils
editChrysotypes
editPhotographic images printed in pure gold. Both develop out and print out processes exist.
Develop Out
Robert Hunt described a develop-out chrysotype process in his book, A Manual of Photography, in the 1840s. The germane extract can be read at this link: http://bookdome.com/arts/Manual-Photography/Section-II-Chrysotype.html.
Hunt's essential formula is the exposure of paper coated with ammonium ferric citrate until an extremely faint image appears. The paper is then washed in a solution of gold chloride he describes as "about the colour of sherry wine."
Terry King much more recently announced the Chyrsotype Rex process. Mr. King has kept the formula proprietary, but it appears to be similar to Mr. Hunt's, possibly substituting ferric oxalate for the ammonium ferric citrate and requiring an 8% solution of gold chloride. King's website is http://www.hands-on-pictures.com.
Print Out
In 2012 Richard Eugene Puckett announced the Texas Chrysotype process. Puckett adds a small volume of ascorbic acid (vitamin C) to ammonium ferric oxalate to create a solution of ammonium ferric-ferrous oxalate. His formula specifies a 10% solution of gold chloride be mixed with the ammonium ferric-ferrous oxalate at a usual ratio of 3 parts ammonium ferric-ferrous oxalate to 4 parts gold. The image prints out fully on dry paper and requires no humidification or development. Recommended papers are Arches Platine, Clearprint 1000H vellum, and any number of hot-pressed water color papers heavily sized with 3% arrowroot starch.
The Texas Chrysotype is not only the first dry print-out process for gold, but it is the first that yields gray-scale pictorial images rendering 9 to 11 or more stops with extremely fine to fine grain. Puckett has published several chryostype videos on youtube, including his presentation at the 2013 Alternative Photographic International Symposium in Santa Fe, New Mexico. His website is http://www.texaschrysotype.com.
Copper photogravure
editCyanotypes
editA process using Potassium Ferricyanide and Ferric Ammonium Citrate that results in a blue coloured print.
Chemigram
editPaint with chemicals before,during,after exposure,development,fixation and toning [1]
![[1]](http://www.dashdot.nl/blog/wp-content/gallery/alternatieve-foto-afdruk/lumenprint.jpg)
Daguerreotype
editDigital Printing Process
editGelatin Silverprints
editGum Bichromates
editGumoils
editKallitypes
editLithographs
editLithprints
editLiquid Emulsion
editLumen print process
editPOPtechnique invented bij Talbot around 1830. Development and exposure through sunlight with exposures ranging from half an hour to two weeks eaxample:[2]
![[2]](http://www.dashdot.nl/blog/wp-content/gallery/lumen/alternatieve%20fotografie%20(10).jpg)
Mordançage process
editOleobroms process
editOilprint process
editPalladium
editResinotype process
editPhoto Intaglio process
editPlatinum
editPhotosynthesis
editPrinting on leaves through sunlight. Place a negative on a leaf and let it develop in sunlight for one week [3]
![[3]](http://www.dashdot.nl/blog/wp-content/gallery/fotosynthese/photosynthese-2.jpg)
Polaroid Emulstion Lifts
editThe emulsion lift is a Polaroid print that is soaked in hot water until the emulsion layer comes off the back of the Polaroid, the image is then transferred to a new surface.
Polaroid image transfer process
editThe Polaroid development process is interrupted. Then the Polaroid's dyes are transferred to another surface. The desired image is taken with Polaroid film and after the 1st 12 seconds or so the emulsion is removed from the paper backing. Durning this time 100 lb or 90 lb watercolor paper has been soaked in water. Then the emulsion and the watercolor paper are joined together. You roll with a brayer 10 times in one direction and then 10 times in the opposite direction to make sure that you do not get air bubbles. When finished remove the emulsion and you will have the imaged transferred to the paper. Let dry. [4]
![[4]](http://www.dashdot.nl/blog/wp-content/gallery/sx-70-en-transfers/polaroid.jpg)
Polaroid SX70 manipulation
editafter exposure and eject of the time zero film manipulate the film with toothpicks and burnishing items. Push the film emulsion around. Can be done approx. 15 minutes after the photo was ejectedfrom the camera [5]
![[5]](http://www.dashdot.nl/blog/wp-content/gallery/sx-70-en-transfers/sx70.jpg)
Polaroid interrupted development
editAFter taking a photo cut open the filmsachet and insert liquids. [6]
![[6]](http://www.dashdot.nl/blog/wp-content/gallery/sx-70-en-transfers/polaroid%20(3).jpg)
Polymer Gravure (aka Solarplate process)
editRhodiotype
editPhotographic images printed in rhodium. Only a dry print out process, announced by Richard Eugene Puckett in 2016, exists.
Saltprints
editThe process of coating paper with salt and silver nitrate. similar to Albumen printing.
Satista prints
editResinotype process
editTemperaprint process
editVandyke process
editWetplate collodion process
editWoodbury process or Woodburytype
editTin type process
editZiatypes
edit
Online publishing
Online publishing
editDifferences to print media
editTypically, online images are smaller and therefore less detail-oriented than printed images. Their purpose is often to illustrate text, draw attention or identify a subject in a general manner, rather than to provide a detailed image for long term visual exploration by the audience, as in a traditional large format gallery print.
Things to keep in mind when shooting for online publishing are therefore the desired output size, which will usually be small, and the purpose of the image(s) within the overall communication.
For example, if you were shooting a subject for Wikipedia, you would want a very clear shot of the subject, unobstructed if possible, to suit the documentary nature of the medium. Because Wikipedia articles are rarely dominated by images, you would want to fill the whole frame with the subject. If you are able to stage the subject and choose a time and/or manipulate lighting conditions, such concerns would also affect your choices.
By contrast, if you were shooting for a highly visual site, such as a portfolio, nature destination or photography-focused website, then you would very likely have different concerns.
In all cases, however, you are less likely to be publishing in very high resolution, and very unlikely to be presenting images alone, with no or minimal context, where the image itself is the subject, as in the traditional gallery print format. In addition, in almost every case, publishing online means publishing in the RGB colorspace, which is the native colorspace of almost every modern camera. Therefore, you are quite unlikely to need to worry about colorspace conversions.
Finally, as with publishing in any medium, you frequently have a unique set of constraints given by the online environment, chiefly space (for example, how many megabytes your image may be at a maximum), maximum resolution (how many pixels wide by how many pixels high, at a maximum) and time (online publishing tends to be very immediate, with short deadlines).
Processes
editResizing
editDue to the limited resolution imposed by finite bandwidth and mobile devices, the output of most cameras needs to be downscaled (downsized, resized, reduced, squashed, etc.). While many applications will allow the resizing of images, few allow you to customize the result. When reducing the size of an image, it is generally necessary to apply a filter such as Photoshop's Unsharp Mask (USM) to regain the visibility of certain details in the newly reduced resolution. Typically, if a website, browser or online publishing platform resizes an image in an automated fashion, it will not do as good a job as a human eye with a sharpening tool such as a USM filter. In the browser case, it is even worse, because different audiences on different devices with different resize algorithms will get different results! Therefore, if at all possible, it is best to resize your images to the precise resolution of the publishing location in a manual fashion, ahead of time.
Common errors
editDPI
editDots per inch (DPI) is a print-world measure. While some people can usefully use the term with reference to digital media (for example typography professionals considering the utility of various highly technical font procedures against various classes of viewing device) the rest of us should simply avoid thinking in terms of or using the term dots per inch (DPI) whatsoever with reference to online publishing. (This goes for allied terms such as pixels per inch (PPI) as well.) This is because screens, though historically frequently asserted to have a 'standard' pixel density of 72 or 96 dots per inch, in fact vary stupendously, from as low as 72 to over 600, as well as varying from huge wall-screens (75") to pocket screens (mobile phones and electronic watches). Save yourself the hassle of all this variety, and think in pixels!
Online Publishing Platforms
editThis section outlines some of the major online publishing platforms that you may wish to explore with your images.
Blogs
editBlogs are private, traditionally timeline-oriented publishing platforms that allow you to combine multiple media types in to a coherent 'article'-like format. Blogs can be a great way of getting your content online and are particularly well suited to particular types of communications, such as travelogues and photojournalism. Most blogging platforms also allow the organization of articles by keywords, categories or automatically extracted 'tag clouds' (component phrases) in addition to time, which can make discovery and retrieval easier. Some of the biggest blog hosts, such as blogspot, are however banned in certain countries (such as China) due to their presumed or real historical association with anti-government expression, so be sure to ensure that your selected platform operates smoothly in your target area before launching in to an international photojournalism or travel photography project!
Instagram is the undisputed king of social media photography sharing. Unfortunately, however, the very vibrant community has been seriously impacted by commercial posting, and it can be hard to develop meaningful audience relationships. The instagram team is apparently (early 2016) working on this problem, but for the moment expect to put a lot of time in and get just a little time out. One of the best features of the platform is its subscription feature: if you meet a prospective client or friend, they can 'follow' you and will automatically be notified of all future images you post. This can be a great way to work on a word-of-mouth client base and to highlight ongoing work.
Image hosts
editImage hosts are very simple websites that tend to be single-image centric, though some now allow associating multiple images together in some fashion. They tend to be useful when you don't have a website or web presence of any other type, a single high resolution image must be shared, and/or the frequency of sharing is highly sporadic.
Photography communities
editThere are various, generally web forum based photography communities online. These may range from being camera manufacturer specific, to style-specific, to geographically delimited, to completely open. Many communities have rules regarding what can and cannot be posted; be sure to check the rules before participating.
Wikimedia Commons
editWikimedia Commons is the media store underlying the Wikimedia projects, such as Wikipedia. These web properties collectively receive billions of pageviews per day, and can be an excellent platform to get your work seen. If you are a particularly good photographer, Wikimedia sometimes even has sponsorships available to assist defraying your expenses.
Interpretation
Interpretation is the process of making sense of an image in various ways.
The interpretation of photographs can be as enigmatic as any other field of visual arts, and is based not only on the photograph itself but the condition of the image, the origin of the image, its social, geographical and temporal context, its mode of presentation and accompanying information.
Images themselves can range from the pure abstract or highly generic through to globally unique and recognizable subjects, like the Eiffel Tower, to mundane manufactured items, starry skies and people. Obviously, different techniques must be used to assist in the interpretation of this broad range of photographs.
When interpreting an image we might frequently seek to:
- Date the image: This may be achieved by a combination of subject (fashions, famous buildings, people or events), technology (print or negative size and quality, properties of the material, etc.).
- Value the image: ...
- Further our understanding of the image itself: ...
- Further our understanding the artist, society or time from which the image came: ...
Types of interpretation
editTechnical
editTechnical interpretation is the analysis of an image to determine fixed qualities such as age, equipment, technology, materials and processes used. Very often technical interpretation will be
Image-based
editAn image-based or non-contextual interpretation is one that is primarily based upon the content of the image itself.
Aesthetic
edit...
Further reading
edit- The Morals of Vision: Susan Sontag’s ‘On Photography’ Revisited (Part 1), Darren Campion, 13 June 2017.
- The Morals of Vision: Susan Sontag’s ‘On Photography’ Revisited (Part 2), Darren Campion, 20 June 2017.
Critique
Awakening from a Dream: Body Narration in the Sense of Micro-politics
Yang Xiaoyan
It was over ten years ago in Beijing that I first crossed paths with Liu Zheng and listened to him talk about photography. He struck me as an extremely conscientious and sincere young man, a human being who was almost too harsh on himself. Liu Zheng talked about the quality of photography, the responsibilities of photographers and the cruelty of the lens. His methods of persuasion were soothing and convincing, engaging in discussion, but ultimately nailing down conclusions with little room for doubt or debate. His gaze fixed on you, words clearly spoken and eloquently organized, Liu Zheng cast a spell on his audience, under which they felt compelled to listen attentively and reply earnestly.
I learned that it was back then Liu Zheng engaged himself in his controversial “Fellow Countryman” series, which was quite a sensation. At that time, documentary photography had become the trophy of most younger experimental photographers. It had become so faddish that one's status as a photographer would be questioned if one didn’t include the topic in a conversation or have some work of the sort in one's portfolio.
Liu Zheng and I never had in-depth discussion that covered the subject, but it is possible that when we first met, I fell for the habit of labeling him a “documentary” photographer. My direct impression was that through his lens, Liu Zheng tried to express a full set of visual concepts and a macro-existence of a reality that was Chinese. Liu Zheng hoped to create a presentation of a powerful, significant world of independence. Just like the German photographer Sander, Liu Zheng wanted to make a profile of a nation.
But in time, I realized this interpretation was flawed. First of all, throughout Fellow Countryman, Liu Zheng featured people with strangely distinguished facial structures. After carefully studying their visages, I realized that Liu Zheng had his own unique feeling towards images. And this dictated him in his choice of models. It had nothing to do with the commonly understood idea of “Documentary Photography”. Liu Zheng wouldn’t find satisfaction in responses stirred by ordinary images; neither would he linger on the shallowness of novelty. He was digging for the deeply hidden universal in all the irregular, irrelevant and irreplaceable images. Please pay attention to the word universal here. I need to emphasize here that in Liu Zheng’s decision-making, universal doesn’t even exist. This is a concept too fake and too posed. Universal exists on a hosting body. The details have been molded over and over again by the repeating course of history. Once embodied into different bodies of flesh, these details radiate awe-inspiring composure and style.
In his search for this composure and style, Liu Zheng even zoomed in on those drawing their last breaths. Their flesh carried the syndromes of naturalism and chanted grief over losing its grip on life. He also examined bodies that were once exuberant and lively, but interrupted brutally by ugly accidents; corpses swollen and decomposed; the specimen of a deformed fetus. He never shunned away from inevitable cruelty when he was challenged to look. Instead, he wanted the concept of vision to return to the state of being challenged to look. To him, this is the true nature of vision.
Liu Zheng’s lens stayed on the dead body of a young female: every trace of life drained. Still and silent, a naked body with all the aesthetics traits lay in the morgue. The delicate shadows of the image froze the rapid changes the body of the deceased was going through. Underneath the skin, there was an overly severe interrogation of watching. When my eyes fixed on this photo, I came to understand what Liu Zheng strived to achieve here. I sensed his inner tension, a stress of life that could not be calmed or comforted, and a magical power released from the tension and stress. I can imagine how Liu Zheng held his breath in his practice of the responsibilities of the onlookers. Throughout the process, he never lost his sincerity and conscientiousness most vision workers did not have. Through his lens, he stared at the image of his choice before depressing the shutter release, then he must have closed his eyes and dealt with the muted waves crashing from the darkness of his heart. After all this, he led the waves into his lonely dark room and allowed them to flow into the dark red narrow spaces.
At some point, Liu Zheng went through a transition. He no longer continued adding to Fellow Countryman. The superficial explanation was this task had been “finished”. In actuality, he had discovered a new concept.
To those who never understood him, his transition seemed to be so rapid that it was even a bit unbelievable. At this stage, Liu Zheng was not merely looking for objects. He was creating and manipulating them to visualize long-standing concepts. He set off to replicate classic Chinese legends and folklore that no one had previously imagined visualizing. Through adequate regrouping and reshuffling of visions, he wanted to transform these tales into black humor-motiffed scenes that took place in the visions of daily life.
The “Pan Si Cave” series was an important work of this practice and marked a starting point. Eerily and aimlessly, the nudity of seven vulgar women demonstrated the absurdity-filled metaphors of classic literature. When this story existed only in written form, spread around as an anecdote in literature, nobody had savored the true meaning of the sense of vision. Once it was put into practice by Liu Zheng, it inspired a lot of irresponsible versions of replica. My curiosity was aroused. When some replica had reached more resonant fame than Liu Zheng's works, I gained a more conscious knowledge of his practice. Liu Zheng works with the determination of no return. This is reflected in his indifference towards replica derived from his works. He has more important things to worry about. Then some meaningful works were listed as part of his art creation. It was a series of revolution themed works, such as Nan Jing Massacre, the Revolutionist, the Five Brave Warriors of Mt. Lang Ya, the Milk of the People, etc.
This series of works stated that Liu Zheng was no longer a photographer. His works had the piercing power into history. He transformed the once magnificent tragedies into ambiguous, mentally labyrinth-styled comedy.
After that, he came to a stop. It seemed that he was hibernating, waiting for an awakening.
To me, he was brewing another visual riot.
Now, this riot has become reality. Liu Zheng has named it “Awakening from a Dream”: elegant, traditional and poetic. In my humble opinion, the fundamental meaning of this riot is a desperate march towards the ultimate truth. Attempts to overthrow the present world of vision are made. To me, this desperate marching on of Liu Zheng is a brand new experiment on the narration of the body in the sense of micro-politics. It becomes even more so when he is facing the iron-clad regulation concerning the flesh. The marching is not just desperate. It is becoming an unprecedented soul agitating sound: clear, bright and shrill.
For over 30 years, the realm of vision has been trying out ways to establish a narration of the body. Invigorated by the essence of aesthetics, arts, spiritualism and vision, it seeks high and low for a legitimate presentation of the flesh which has been banned constantly. Pitiful, the more legal the presentation of the narration of body gets, the more vanished the true flesh become in the celebration and the noise of the art of vision. I think the aesthetics of flesh has murdered the narration of flesh. The aesthetics of flesh, in the most widely known sense, it’s to zoom out from the microcosmic to the macrocosmic. In the process, the focus is lost. Strictly speaking, the aesthetics of flesh is anti revolutionary practice. It fears all the acute social issues that are involved. To empower the flesh to become a powerful narration of the body, we need to put the flesh into a spacious political environment. Whatever is pretentious and staged are to be get rid of. The core of our daily action of staring should be honesty, intelligence and even abandonment. Furthermore, the order of the body needs to be restructured into an open, direct, microcosmically meaningful order.
I understand the audacious hardship Liu Zheng endures for his works. In the narration of the body, the difficulties don’t lay in the exquisite techniques or the rich layers of the shadows and lines. These two loom tremendous challenge on the photographers. But the most difficult part is to find suitable objects to portray. A sufficient communication is needed before encouraging your objects to respond accordingly to the requirements of the body narration. You need to bear it in mind that Liu Zheng’s body narration, despite its huge amount of work, fails to win the favor and fondness of either elite society or the common crowds. In this sense, Liu Zheng considers his latest practice “awakening from a dream”. It’s obvious that he has seen the multi-layered meanings related to the flesh.
Frankly speaking, our nation has not developed a set of body narration that possesses the strength to penetrate the reality. Our bodies were defined by the traditional rules first and then altered by the mortal aesthetics. The most extreme presentation was Lingci (an ancient Chinese torture in which a man tied up to a stake is submitted to a lingchi by an executioner, who throws the sliced pieces into a basket on his feet). The most public display is the execution square. The most humiliating blow is flogging with a stick. The most daily aesthetics is the “3-inch binded feet”. The most hypocritical expression is the currently ruling aesthetics. It could either be hiding behind a secret curtain to generate murky smiles of debauchery or be amputated mercilessly by the frightening knife of the executioner. Today, the concept of the body is always linked with aesthetics. Then, the pair shamelessly roams all kinds of public functions and becomes subject to the touches of every type of worldly judgmental eyes. You are stung by this numb feeling until you lose sense of feeling eventually.
Liu Zheng hopes that he can rewrite about the body narration. His approaches may seem radical on the surface but deep inside he never loses the calmness. Because of the fine details of the shadows and lines, the fearlessness in the composure, the cutting edge of the images, the height of the spirit and the daring gaze in the microcosmic sense, Liu Zheng’s body narration has been elevated onto the level of visual politics. Just like awakening from a dream, his works make the world of the mortals tremble, fear, bellow and flee. Through his arts, Liu Zheng speaks to us that only when we stare with the most genuine attitude that our action of staring can obtain its full value. Trembles, fears, bellows and attempts to escape only indicate how hypocritical we are.
There are no other options. We have to be honest and at ease if we don’t want to harbor anything hypocritical. Then we will stare, to stare at Liu Zheng’s “Awakening from a Dream”, a body narration in the sense of micro-politics.
2008-11-20-Zhong Shan University
Collection
The collection of photographs could be said to have popularly begun in the 20th century.
| “ | It seems to me that the first stage in the development of the modern collector's market in photography came ... with two bookseller's catalogues in 1939, then considered to be the centenary of photography ... For collectors and dealers the centenary was also a reminder that these early images were now artifacts in their own right, and that the passage of time had ensured that they were no longer capable of being produced in the way they were then ... | ” |
—Stuart Bennet, Christie's (Auction House), address to collector's symposium, Arles, France, 1977. | ||
The pursuit reached relative maturity in the closing decades of the 20th century.
| “ | The current surge of interest in photography as a fine art and the burgeoning of public photographic collections have led to a brand-new phenomenon: private individuals, many of whom previously collected modern paintings or graphic art, are increasingly collecting photographic works. There are now, in New York City alone, more than a dozen photography dealers; moreover, the major art auction houses have entered the field. | ” |
—Preface to The Photograph Collector's Guide (1979), Alan Shestack | ||
Reasons for collecting
editWhy do we collect?
| “ | Collecting (and every collector knows the symptoms) means seeking, desiring, wanting, yearning for, coveting, having to have ... and — as soon as possible — acquiring, possessing, hugging to the bosom, and savoring with all the joys and prides of ownership.
It is impossible to explain to someone who is not consumed by such passions why the purchase of a special painting, book or photograph takes priority over a trip to Europe, a new pair of shoes, or a gold inlay. We all know collecting art is not a pursuit of basic survival. However, it is an exquisite involvement with aesthetic achievements — a kind of mingling with the gods. Though we may not live by bread alone, collecting is one of the few pursuits in which we can have our cake and eat it, too. |
” |
—Lee D. Witkin | ||
Originals versus reproductions
editOriginal prints can often be said to have a beauty distinct from printed reproductions more widely available in books.
| “ | Original prints have unique qualities of tone, luminosity, and "presence" that no book or magazine reproduction can duplicate. From the first day I opened the doors of my gallery, I have repeatedly heard the remark: "I'd only seen the image in books — I had no idea it was so beautiful!" | ” |
—Lee D. Witkin | ||
Selection criteria
editWhile selection criteria are ultimately personal, many collectors have specific strategies based upon raw personal response and/or technical and aesthetic merit.
| “ | I have always used two criteria in my collecting: first, the image must produce a strong emotional feeling in me; and, second, there must be a high quality to the photographic print itself. Because I never collect 'names,' per se, I buy the work of unknown or forgotten photographers as well as famous ones. | ” |
—Dan Berley | ||
| “ | A gut level feeling — but you have to have as informed a gut as possible. | ” |
—Anonymous collector | ||
In addition, many collectors focus their collections on a particular subject (for example a geographic region, or images containing a certain visual subject), group of photographers (for example photographers from a certain country), or time period, images produced using certain cameras or processes, or some combination of these.
Conservation
The conservation of images allows them to be protected and preserved for the appreciation and use of future generations.
| “ | The museum ideal of total atmospheric control and steel-cabinet storage may be impossible for an individual collector, but reasonable protection from sunlight and damaging substances is within the reach of anyone. | ” |
—The Care and Restoration of Photographs, Lee D. Witkin and Barbara London, The Photograph Collector's Guide (1979) | ||
Analog photographs and film
editTraditional, analog photography typically produced prints and film, both of which are subject to physical decay due to chemical and physical processes. High end conservation is really the complex domain of professionals. One of the leading institutions in this area is the Getty Museum in Los Angeles, who periodically publish the results of in-depth investigations in these areas. For the rest of us, there are simple threats that we can be aware of to minimize damage to our images:
- Avoid ultra-violet light, such as sunlight, especially directly. Exposure to UV light can rapidly destroy many types of images. If an image must be placed in a location that threatens exposure to UV light for a temporary period, then there are UV-protective transparent materials available that will provide increased protection versus regular glass or perspex.
- Careful handling
- Use single use or rare use white cotton gloves when handling pieces.
- Avoid touching images with your hands. Hands can carry acids, oil, bacteria, and all sorts of nasties which can discolour and destroy an image over time. This is most frequently seen with paper medium as brown stains on the edges of old images or postcards, though it also definitely affects film.
- Avoid dragging images over surfaces. If you absolutely must place an image face-down on a surface, then it may be better to work with images on a clean, soft surface such rather than risk scratching them on something hard. This is particularly the case with film.
- Use single use or rare use white cotton gloves when handling pieces.
- Store in a cool, dry, dark location.
- Avoid high humidity. In addition, especially for organic medium, avoid rapid changes in humidity which can accelerate decay. High humidity can cause condensation which will destroy organic medium. It is also a favorable environment for some bacteria and fungi.
- Avoid high temperatures. In addition, especially for organic medium, avoid rapid changes in temperature which can accelerate decay. High temperature is a favorable environment for some bacteria and fungi.
- Avoid unnecessary exposure to bright light.
- Protection
- Appropriate use of matting and framing to help preserve images on display from physical contact or light based degradation
In addition to the above processes, you can consider digitizing your images, in which case you should read on.
Digital images
editDigital systems do not care what data is stored upon them, therefore the conservation of digital images essentially equates to the conservation of other types of digital data, with the exception of care needing to be taken in the process of initial digitization should the image have been formed through analog processes and digitized rather than originally having come in to being as a digital image. In general, digital data preservation takes the approach of redundancy at multiple levels, since copying digital data is virtually free. First, redundancy is achieved at the device-level to ensure that data is not lost if a storage device fails. Second, at the site level, to ensure that data is not lost of an individual site such as a house, business or museum is bombed, burgled, burns to the ground, etc. Finally, publishing copies of the data to interest parties (such as through peer to peer technologies such as Bittorrent) can further assist with the global distribution of data. An additional technology that may be utilized is integrity-checking within the storage subsystem, for example the modern ZFS computer file system provides guarantees against data corruption due to failures in other system components.
Restoration
Restoration is the process of attempting to wind-back the ravages of time on a photograph.
Types of damage that photos (positives) and/or film (negatives) may incur include:
- Dust
- Folding
- Scratching
- Chemical staining due to oil, solvents, impurities in development chemicals, physical proximity to other materials, water, condensation, oxidization, etc.
- Loss of contrast
- Tearing
- Sticking to other surfaces
Most of these types of damage can be repaired to some extent, usually by digitizing the photo or negative (if it's not already digitized) and then using image editing software such as the Darktable or the GIMP (both free and open source software), Lightroom or Photoshop (both commercial products from Adobe) or similar software packages.
Strategies
editSome of the strategies or general approaches that may be taken to restoration include the following.
Cloning
editCloning is the act of duplicating the subject, color, texture or other visual properties from one part of an image to another. In restoration, this is usually used to mask out damaged areas such as dust, folding, staining or scratches.
Obfuscation
editObfuscation is the act of reducing the apparent visual presence or impact of part of an image. This may be achieved, for instance, by reducing its contrast, lightening or darkening it, or changing its color to a more neutral tone.
Contrast restoration
editFaded images may often be significantly enhanced by restoring their original contrast, or even digitally enhancing contrast beyond what was probably originally there. This process is generally very easy to achieve with photo manipulation software, either through a dedicated image contrast function (generally preserving the existing color balance of the image) or through finer grained control over individual color channels such as red, green and blue.
Cropping
editCropping or outright removing parts of an image is sometimes the fastest and cheapest way to restore an image to a higher apparent overall quality, and can be particularly useful if significant damage has occurred at the edges or corners of an image, for example through a bent or dog-eared corner. Unfortunately, it is not always possible since it relies upon no other significant elements within the image being similarly close to the cropped-away edge. For example, in a portrait it is generally unacceptable to cut away part of the subject's head.
Digiscoping
Introduction
editDigiscoping is a photographic technique in which a camera (digital or film) is used to take photographs via the image projected by the eyepiece of a telescope or spotting scope. It is generally attributed as a technique first demonstrated by Laurence Poh.
More information exists regarding the technique at digiscoping.
There exist three basic ingredients to digiscoping:
Scope
editScopes of various types can be used for digiscoping including binoculars, telescopes (refractors, reflectors, cat's and so on) and spotting scopes.
Eyepiece
editMany spotting scopes come with eyepieces, some (like the Pentax 65 and 80 series also use 1.25" eyepieces (like many astronomy scopes). Generally speaking magnifications of 20x to 30x are considered appropriate for digiscoping terrestrial objects.
Camera
editThere are a number of cameras suitable for digiscoping.
Threading/adapter: Built-in threading or a manufacturer supplied threading adapter. Many compact cameras, SLR-like and DSLRs now have threaded lenses or tube/body attachments with threading that will allow direct connections to scope eyepieces (via eyepiece threading on eyepieces like the Baader Hyperion) or via another adapter (like the Swarovski DCA attachment). There are also a number of universal digiscoping adapters from William Optics, SRB Film, Baader Astronomy and Swarovski which allow connection via a mounting plate using the cameras tripod threading as a support for those cameras without threading or threaded adapters.
Vignetting performance: Exhibits vignetting when used. If so at what level does vignetting stop? Performance will vary due to scope, eyepiece and attachment configuration
High ISO performance: (>400) ISO film speed performance as noted by various review sites and comments in digiscoping forums. Digiscopers will use higher ISO sensitivities settings which allows both faster shutter speeds (1/250 sec, 1/500 sec) as well as a smaller apertures (f/8, etc..) for greater depth of field and potentially greater sharpness of the object being photographed.
Large screen: Has a large (2.5" or greater) screen (useful for outdoor focusing)
Manual controls: Has at least one of the following manual controls (focus, shutter priority, aperture priority)
RAW image format output: Has capability to output shots in RAW format for post-processing
IS/VR: Has image stabilization (other than being achieved via High ISO) useful for reducing camera shake which can be more pronounced at high magnification levels
Video OUT: Has a Video signal connector (e.g. S-video/PAL/NTSC) useful to view camera scene on external monitor(s).
Compact Cameras
edit* Fujifilm F30 (not yet released, some comments below relate to F11)
-Threading/adapter: No
-Vignetting performance: Some at lower zoom levels, less with fixed length eyepieces
-High ISO performance: Yes
-Large bright screen: Yes (230k pixels)
-Manual controls: Yes
-RAW output: Yes
-IS/VR: No
* Sony DSC-W100 (not yet released, comments below relate to DSC-W7 which has similar lens)
-Threading/adapter: Unknown, one does exist for W70, but conflicting information exists as to if that same adapter will work with the W100.
-Vignetting performance: Some at lower zoom levels
-High ISO performance: Unknown with DSC-W100 which reports ISO's to 1250
-Large bright screen: Yes and reportedly the DSC-W100's is viewable from very wide angles
-Manual controls: Yes
-RAW output: No
-IS/VR: No
* Canon A620
-Threading/adapter: Yes, Canon part# LA-DC58F
-Vignetting performance: Some at lower zoom and higher zoom levels, less with fixed length eyepieces
-High ISO performance: Good
-Large bright screen: No, but swivels which is very useful for digiscoping
-Manual controls: Yes
-RAW output: No
-IS/VR: No
* Fujifilm E900
-Threading/adapter: Yes, Fujifilm part# AR-FXE02
-Vignetting performance: Some at lower zoom levels with fixed eyepieces
-High ISO performance: Fair
-Large bright screen: No
-Manual controls: Yes
-RAW output: Yes
-IS/VR: No
* Nikon P3
-Threading/adapter: Yes, but only for Nikon Fieldscope Spotting Scope eyepieces
-Vignetting performance: None with fixed length eyepieces
-High ISO performance: Good
-Large bright screen: Yes
-Manual controls: Yes
-RAW output: No
-IS/VR: Yes
* Nikon Coolpix 5400
-Threading/adapter: Yes, with adapter Nikon UR-E11 to get 28mm threading for Hyperion SP54/28mm eyepiece adapter
-Vignetting performance: depending on your eyepiece-zoom matching
-High ISO performance: some noise at 400 ISO
-Large bright screen: not exactly large: 1,5" flip monitor
-Manual controls: yes
-Video Output: yes, PAL/NTSC composite video out.
-RAW output: yes (with firmware update to last version 1.4)
-IS/VR: No
* Canon S80
-Threading/adapter: Yes Canon part# DCA-LC20
-Vignetting performance: Some at zoom levels under 2.5x
-High ISO performance: Good
-Large bright screen: Yes
-Manual controls: Yes
-RAW output: No
-IS/VR: No
Mid-sized SLR-like cameras
editlike the Olympus C-7070 and the Nikon Coolpix 8400 are well-respected for their ability as digiscoping cameras. They are moderately priced and have good overall performance as well as threading to allow for easier scope attachment.
Full-sized dSLR's (and SLR's)
editcan be attached directly to many telescopes and spotting scopes with various T-adapters. In this configuration the scopes become, in many respects, a manually focused and metered telephoto lens. Full-sized SLR's hold a distinct advantage over many compact cameras in that they generally perform better at higher ISO levels. Some recent popular models are the Canon Rebel 350 series and the Nikon D2/50/70/80/200 series.
History
Louis Daguerre worked with Joseph Niepce, developing the heliograph.
After Niepce's death, Daguerre invented the daguerreotype. It used mercury gas. The pictures it produced had to be viewed at an angle. The wet-plate process was developed from calotype. It created crisp images on glass plates with collodion. It was used to make the first photos of Egypt. Wet-plate was very difficult to travel with, however. The materials would freeze in cold climates, and boil in hot ones.
William Henry Jackson used wet-plate to photograph Yosemite and other national parks. Edward S. Curtis used it to document Native American culture.
Alfred Stieglitz, after studying engineering, studied photography in Berlin. One of his favorite subjects was New York cityscapes.
He was part of the "photo-secession", with Edward Steichen. He published Camera Work magazine. His salon, 291 Galleries, showed work by Rodan, Cézanne, and Picasso. He popularized the work of Georgia O'Keefe through his gallery.
Steichen joined the US Air Corps to protect France during World War II. Stieglitz went bankrupt and considered quitting photography. However, his correspondence with O'Keefe kept him going. Stieglitz and O'Keefe married later. After coming back from the war, Steichen was made curator for the Museum of Modern Art's "Family of Man" exhibit, which toured the world and was the basis for an art book.
Photo Journalism
editThe press is known as the "fourth estate." In the US, print isn't restricted, but TV and radio are.
Emmett Till was a black boy who was lynched for whistling at a white woman. Photos of the body were published in the black press.
The Students Non-violent Coordinating Committee is an anti-segregation group. They were victims of police brutality. This was not covered by the media, until the Birmingham riot. Photos of the riot caused difficulties for the US in foreign affairs.
Famous photos taken during this era include the burning monk Quang Duc, a Vietnamese policeman executing a suspect, napalm victims fleeing a village, and a girl crying over a student shot at Kent State.
Modernist Photography
editStyles of modernist photography championed a sharp, crisp focus in the images and generally leaned toward realism in the images.
Surrealist Photography
edit
Hints and Tips
General technique
editAwareness
editWhen focusing on a shot, it is easy to forget your surroundings and accidentally move into a dangerous position. This is especially important in a number of situations such as:
- Near a cliff.
- Near traffic, especially automobiles, but even cyclists or pedestrian traffic can be dangerous.
- Near bodies of water.
- Near expensive objects. Think of Art museums, industrial machinery, etc.
Film
edit- At freezing temperatures the film base can become brittle. Do not apply excessive force on the film, or better warm up the film first.
- Accidental double exposure of a roll can be prevented by winding the film entirely into its cartridge (i. e. getting hands on the film requires prying out the film in a dark room). Another more convenient method is to make a fold in the lead (the couple inches of film that stick out ex works), the fold being a reminder for you that you have exposed the film completely. Keep in mind if you finished exposing a film at freezing temperatures, making a fold may physically break the film, so be gentle.
- Once you add multiple kinds of film to your repertoire (color film, black and white film), you should use the film memo holder many analog cameras provide on their back.
Subject-related hints
editPortraits
edit- People knowing being photographed (and not being used to that) tend to appear “tense” in the final picture. One way to alleviate that a bit is to shoot a series of pictures in short succession: The first one being a “throw-away picture” just to relieve the subject of some tension, the second and following being the pictures you actually want to consider as the right one.
Street Photography
edit- Sometimes (during daytime) you want to isolate an object in a heavily frequented place: Do a long-time exposure, this will eliminate pedestrians and cars passing through (unless, of course, they stand for too long at one spot).
Nature
edit- If you plan to take a picture with a celestial object appearing low on the horizon, look up the weather forecast for the location 30, 40 miles in the direction of this object. While it may be a clear sky right above your head, (high-altitude) clouding in the distance may thwart your plan.
- Have a towel with you. Not only The Hitchhiker’s Guide To The Galaxy recommends you to always carry a towel with you, but so do we: If you are photographing in the morning, especially in fog, or whenever there is a high relative humidity, condensation water will gather on your equipment. You may want to wipe that away. Also, you can use the towel as a cushion, e. g. to wrap your tripod or other items that are not too sensitive to moisture. Taking pictures from very low positions may require you to kneel or lie down. If the ground is moist (say wet grass in the morning) or just dirty, you may prefer to spread the towel.
- Related to the previous point: Bag your equipment in resealable (transparent) plastic bags.
Night Picture
editIf you are not using a flash and doing a long-time exposure:
- If you want trees’ twigs and leaves to appear sharp, ensure the weather forecast predicts no wind.
- If you are using a camera system with a replaceable viewfinder, use the brightest viewfinder you have available.
- Remember to take a flashlight with you. If it is permissible, you can illuminate the scene to check the frame.
- Your eyes need time to adapt to the darkness. Take account of that time and arrive on location earlier, just for the sake of that if you are not already planning to re-scout the area anyway.
Exposure tables
Film speed, aperture, shutter speed, and exposure value
edit| Film speed vs f-stop | Shutter speed vs Exposure value (EV) | ||||||||||||||||||
|---|---|---|---|---|---|---|---|---|---|---|---|---|---|---|---|---|---|---|---|
| 50 | 100 | 200 | 400 | 800 | 1600 | 3200 | 1 | 1/2 | 1/4 | 1/8 | 1/15 | 1/30 | 1/60 | 1/125 | 1/250 | 1/500 | 1/1000 | 1/2000 | 1/4000 |
| 1.4 | -4 | -3 | -2 | -1 | 0 | 1 | 2 | 3 | 4 | 5 | 6 | 7 | 8 | ||||||
| 1.4 | 2.0 | -3 | -2 | -1 | 0 | 1 | 2 | 3 | 4 | 5 | 6 | 7 | 8 | 9 | |||||
| 1.4 | 2.0 | 2.8 | -2 | -1 | 0 | 1 | 2 | 3 | 4 | 5 | 6 | 7 | 8 | 9 | 10 | ||||
| 1.4 | 2.0 | 2.8 | 4.0 | -1 | 0 | 1 | 2 | 3 | 4 | 5 | 6 | 7 | 8 | 9 | 10 | 11 | |||
| 1.4 | 2.0 | 2.8 | 4.0 | 5.6 | 0 | 1 | 2 | 3 | 4 | 5 | 6 | 7 | 8 | 9 | 10 | 11 | 12 | ||
| 1.4 | 2.0 | 2.8 | 4.0 | 5.6 | 8.0 | 1 | 2 | 3 | 4 | 5 | 6 | 7 | 8 | 9 | 10 | 11 | 12 | 13 | |
| 1.4 | 2.0 | 2.8 | 4.0 | 5.6 | 8.0 | 11 | 2 | 3 | 4 | 5 | 6 | 7 | 8 | 9 | 10 | 11 | 12 | 13 | 14 |
| 2.0 | 2.8 | 4.0 | 5.6 | 8.0 | 11 | 16 | 3 | 4 | 5 | 6 | 7 | 8 | 9 | 10 | 11 | 12 | 13 | 14 | 15 |
| 2.8 | 4.0 | 5.6 | 8.0 | 11 | 16 | 22 | 4 | 5 | 6 | 7 | 8 | 9 | 10 | 11 | 12 | 13 | 14 | 15 | 16 |
| 4.0 | 5.6 | 8.0 | 11 | 16 | 22 | 32 | 5 | 6 | 7 | 8 | 9 | 10 | 11 | 12 | 13 | 14 | 15 | 16 | 17 |
| 5.6 | 8.0 | 11 | 16 | 22 | 32 | 6 | 7 | 8 | 9 | 10 | 11 | 12 | 13 | 14 | 15 | 16 | 17 | 18 | |
| 8.0 | 11 | 16 | 22 | 32 | 7 | 8 | 9 | 10 | 11 | 12 | 13 | 14 | 15 | 16 | 17 | 18 | 19 | ||
| 11 | 16 | 22 | 32 | 8 | 9 | 10 | 11 | 12 | 13 | 14 | 15 | 16 | 17 | 18 | 19 | 20 | |||
| 16 | 22 | 32 | 9 | 10 | 11 | 12 | 13 | 14 | 15 | 16 | 17 | 18 | 19 | 20 | 21 | ||||
| 22 | 32 | 10 | 11 | 12 | 13 | 14 | 15 | 16 | 17 | 18 | 19 | 20 | 21 | 22 | |||||
| 32 | 11 | 12 | 13 | 14 | 15 | 16 | 17 | 18 | 19 | 20 | 21 | 22 | 23 | ||||||
Exposure value equivalences
edit| EV | Description | LUX |
|---|---|---|
| 16 | Direct sunlight on snow or sand | 128k |
| 15 | Bright or hazy sunlight (with shadow) | 64k |
| 14 | Weak, hazy sun (with shadow) | 32k |
| 13 | Diffuse light, thin clouds (no shadow) | 16k |
| 12 | Heavy overcast (no shadow) | 8k |
| 11 | Open shade or sunrise/sunset | 4k |
| 10 | Landscapes immediately before sunrise or after sunset | 2k |
| 9 | Landscapes 10 minues before sunrise or after sunset | 1k |
| 8 | Night: sports stadium, brightly lit cityscape | 500 |
| 7 | Night: brightly lit street (close) Under dense rainforest canopy |
250 |
| 6 | Night: fairs, amusement parks | 125 |
| 5 | Night: home interiors Night: subjects lit by campfires |
60 |
| 4 | Night: under street lamps, floodlit buildings, monuments, etc. | 30 |
| 3 | Night: fireworks | 15 |
| 2 | Night: candle at 20 cm (8 inches) | 8 |
| 1 | Night: lighted skyline in distance | 4 |
Flash tables
Studio delta EV Contrast ratios
edit| ΔEV | Contrast |
|---|---|
| 1.0 | 1:2 |
| 1.6 | 1:3 |
| 2.0 | 1:4 |
| 2.3 | 1:5 |
| 2.6 | 1:6 |
| 2.8 | 1:7 |
| 3.0 | 1:8 |
| 3.2 | 1:9 |
| 3.3 | 1:10 |
Studio flash ratios
edit| Ratio | f/5 | f/5.6 | f/6.3 | f/7.1 | f/8 | f/9 | f/10 | f/11 | f/13 | f/14 | f/16 | f/18 | f/20 | f/22 |
| f/6.3 | 1:1.5 | 1:1.5 | - | 1:1.5 | 1:1.5 | 1:2.0 | 1:2.5 | 1:3.0 | 1:4.5 | 1:5.0 | 1:6.5 | 1:8.0 | 1:10.0 | 1:12.0 |
| f/7.1 | 1:20 | 1:1.5 | 1:1.5 | - | 1:1.5 | 1:1.5 | 1:2.0 | 1:2.5 | 1:3.5 | 1:4.0 | 1:5.0 | 1:6.5 | 1:8.0 | 1:9.5 |
| f/8 | 1:2.5 | 1:2.0 | 1:1.5 | 1:1.5 | - | 1:1.5 | 1:1.5 | 1:2.0 | 1:2.5 | 1:3.0 | 1:4.0 | 1:5.0 | 1:6.5 | 1:7.5 |
| f/9 | 1:3.0 | 1:2.5 | 1:2.0 | 1:1.5 | 1:1.5 | - | 1:1.0 | 1:1.5 | 1:2.0 | 1:2.5 | 1:3.0 | 1:4.0 | 1:5.0 | 1:6.0 |
| f/10 | 1:4.0 | 1:3.0 | 1:2.5 | 1:2.0 | 1:1.5 | 1:1.0 | - | 1:1.0 | 1:1.5 | 1:2.0 | 1:2.5 | 1:3.0 | 1:4.0 | 1:5.0 |
| f/11 | 1:5.0 | 1:4.0 | 1:3.0 | 1:2.5 | 1:2.0 | 1:1.5 | 1:1.0 | - | 1:1.5 | 1:1.5 | 1:2.0 | 1:2.5 | 1:3.5 | 1:4.0 |
| f/13 | 1:7.0 | 1:5.5 | 1:4.5 | 1:3.5 | 1:2.5 | 1:2.0 | 1:1.5 | 1:1.5 | - | 1:1.0 | 1:1.5 | 1:2.0 | 1:2.5 | 1:3.0 |
| f/14 | 1:8.0 | 1:6.5 | 1:5.0 | 1:4.0 | 1:3.0 | 1:2.5 | 1:2.0 | 1:1.5 | 1:1.0 | - | 1:1.5 | 1:1.5 | 1:2.0 | 1:2.5 |
| f/16 | 1:10.0 | 1:8.0 | 1:6.5 | 1:5.0 | 1:4.0 | 1:3.0 | 1:2.5 | 1:2.0 | 1:1.15 | 1:1.5 | - | 1:1.5 | 1:1.5 | 1:2.0 |
| f/18 | 1:13.0 | 1:10.5 | 1:8.0 | 1:6.5 | 1:5.0 | 1:4.0 | 1:3.0 | 1:2.5 | 1:2.0 | 1:1.5 | 1:1.5 | - | 1:1.0 | 1:1.5 |