Trainz/Reskinning Auran's Basic Traincar with Gmax
|
|||
|


| Glossary |
| HKeys-CM |
| HKeys-DVR |
| HKeys-SUR |
| HKeys-WIN |
| Mouse use |
| Notations |
This older Trainz Wikibooks topic page is undergoing an Overhaul for eventually fitting images into sizing templates and breaking it up into navigable sections. THIS SAVE is a merge between the head ends of two different page titles, both evolved independently before realization struck they were the same topic. It was last edited on 28 August 2015, and is still undergoing remodeling-construction. This 'Dated Page' now Earmarked for revisions and updating... UNDERCONSTRUCTION: Content here is likely to be changed significantly in a short amount of time. All Trainzer's and Wikibookians with knowledge in this subject are welcome to help out. You can remove this tag and replace it with {{Trainz-stub}} or with section stub templates ({{Trainz-sect-stub}}) on unfinished sections when the 'page' has become more mature. |
Reskinning a Traincar Example edit
- Contributing author: John Weylan
The example used here will take you through both reskinning and modifying the GMAX source of an existing model.
|
Seven steps to reskinning edit
- You need to do seven things in general to reskin an rolling stock asset
-
- first Identify your victim, historically or aesthetically, and get a clear idea of how you want to evolve the asset
- second clone the item and the texture group
- third point the item to the new texture group
- fourth do the reskin
- fifth reskin the texture group
- sixth adjust the wagon number position
- finally do the lods. This takes me about ten minutes once the reskin is done.
It one relies heavily on textures rather than the shape of the mesh for its effect. All the textures are in one file which is good for performance and it has lod. It is also scripted for couplings, Chameleon for the wagon numbers and is capable of using vacuum pipes. The texture file is modified from one created by Paul Hobbs. The GMAX source and some alternative tga files are included in wagonzip.txt, just change the file extension to zip and unzip it, this allows you to make modifications to the wagon or adjust the position and size of the wagon numbers.
Acquire the asset edit
First step is to download <kuid 86627:1654> with its 'texture group' <kuid 86627:1657> from the DLS.
- CSL
- <kuid 86627:1654>,<kuid 86627:1657>
Clone the asset edit
Then if using TC we clone the item in CMP. Another method if PEVtools are in your toolkit is to open the asset for edit using PEV's Images2TGA and copy that file to another locale on your HDDs. Revert the original. Note, CM also has a clone capability in the menuing.

|
Open the Clone in Windows Explorer edit
Now we open the file in edit in explorer.

In this example we can see a number of folders and by convention (back to the original Content Creator's Guide and the original folder organization in Trainz 0.9/1.0–2.4), we are interested in the '_body folder'.
|
|||
|
| Glossary |
| HKeys-CM |
| HKeys-DVR |
| HKeys-SUR |
| HKeys-WIN |
| Mouse use |
| Notations |
Resources to get started edit
- Paul Hobbs tutorials in 3D digital modeling and applications
While for fine graphics effects Gmax has gone out of favor in most Trainz sub-communities, the old girl still has it's uses in upgrading and modifying assets—perhaps most especially those provided by Auran in the early years of Trainz.
Gmax was promotionally bundled with Trainz until 2005 and while N3V Games now uses Autodesk's 3ds Max package, that software is directly related to Gmax, which is a subset of the full up product. A fully licensed version that suffices for many Trainz basic assets can still be obtained from Turbosquid com under one of those strange but fortuitous and happy-making accidents of life.
- A real rarity: A lawyer forgetting to put an expiration date on a contract!
Before pursuing our content here, work through the excellent Gmax tutorials by long time Trainzer and master Content Creator Paul Hobbs.
|
- Highly recommended for introductory material and coverage on similar topics
Other informational resources edit
Tip: If you are not a registered Trainz owner, these next two links will not be viewable.
Auran forums Thread containing references to scripting:
Auran forums Thread containing references to many tutorials
Gmax Reskinning Example edit
The example used here will take you through both reskinning and modifying the Gmax source of an existing model.
The basic wagon kuid2:86627:1654:6 is more than just a basic wagon, it also contains a renamed zip file with alternative texture files and the Gmax meshes to enable to move the wagon numbers and to change it to a 2 plank, 3 plank, 6 plank etc. very easily. It is also designed to be easy to change the length or change the bogey to one that uses a different height. It has couplings, changeable wagon numbers, it can take air pipes or vacuum pipes, it can carry visible loads or bulk loads. It is slightly more complicated to reskin but not that much. You need to do six things, first clone the item and the texture group, second point the item to the new texture group, third do the reskin, fourth reskin the texture group, fifth adjust the wagon number position, finally do the lods. It takes me about ten minutes once the reskin is done.
It one relies heavily on textures rather than the shape of the mesh for its effect. All the textures are in one file which is good for performance and it has lod. It is also scripted for couplings, Chameleon for the wagon numbers and is capable of using vacuum pipes. The texture file is modified from one created by Paul Hobbs. The Gmax source and some alternative tga files are included in wagonzip.txt, just change the file extension to zip and unzip it, this allows you to make modifications to the wagon or adjust the position and size of the wagon numbers.
First step is to download kuid2:86627:1654:6 with its texture group kuid 86627:1657 from the DLS.
Then if using TC we clone the item in CMP.
This basically assigns one of your kuids to the cloned item. Now we open the file in edit in explorer.
In this example we can see a number of folders and by convention we are interested in the body folder.

We can see a number of .tga files and generally speaking we are interested in the largest one, cs_skin.tga. Note that this particular model as a couple of alternative cs_skin.tga files that have had their colours changed in a recent version of PaintShop Pro are available in the wagonzip.txt file in the parent folder. To use them overwrite the cs_skin.tga with the appropriate one.
N.B. Do not unzip this file without copying it out of Trainz first or CMP will get upset.
There are two other associated files with similar names in this example cs_skin_med.tga, and cs_skin_low.tga which are used by the two lower level lod.im files.
When we edit the file notice the two different sides and ends. Also note the two squares in the top right that are used to colour parts of the buffers, if you are changing the colour then these must be changed also.

If you open the cs_skin_reskin.tga in the zip file you can see the sizes of these sides and ends. For a photo reskin simply resize the side photo and end photos to these sizes and position them appropriately. You will still need to change the colour of the two squares in the top right corner.

To change the colour of the wagon in Paintshop Pro Xi or later use the colour changer tool.

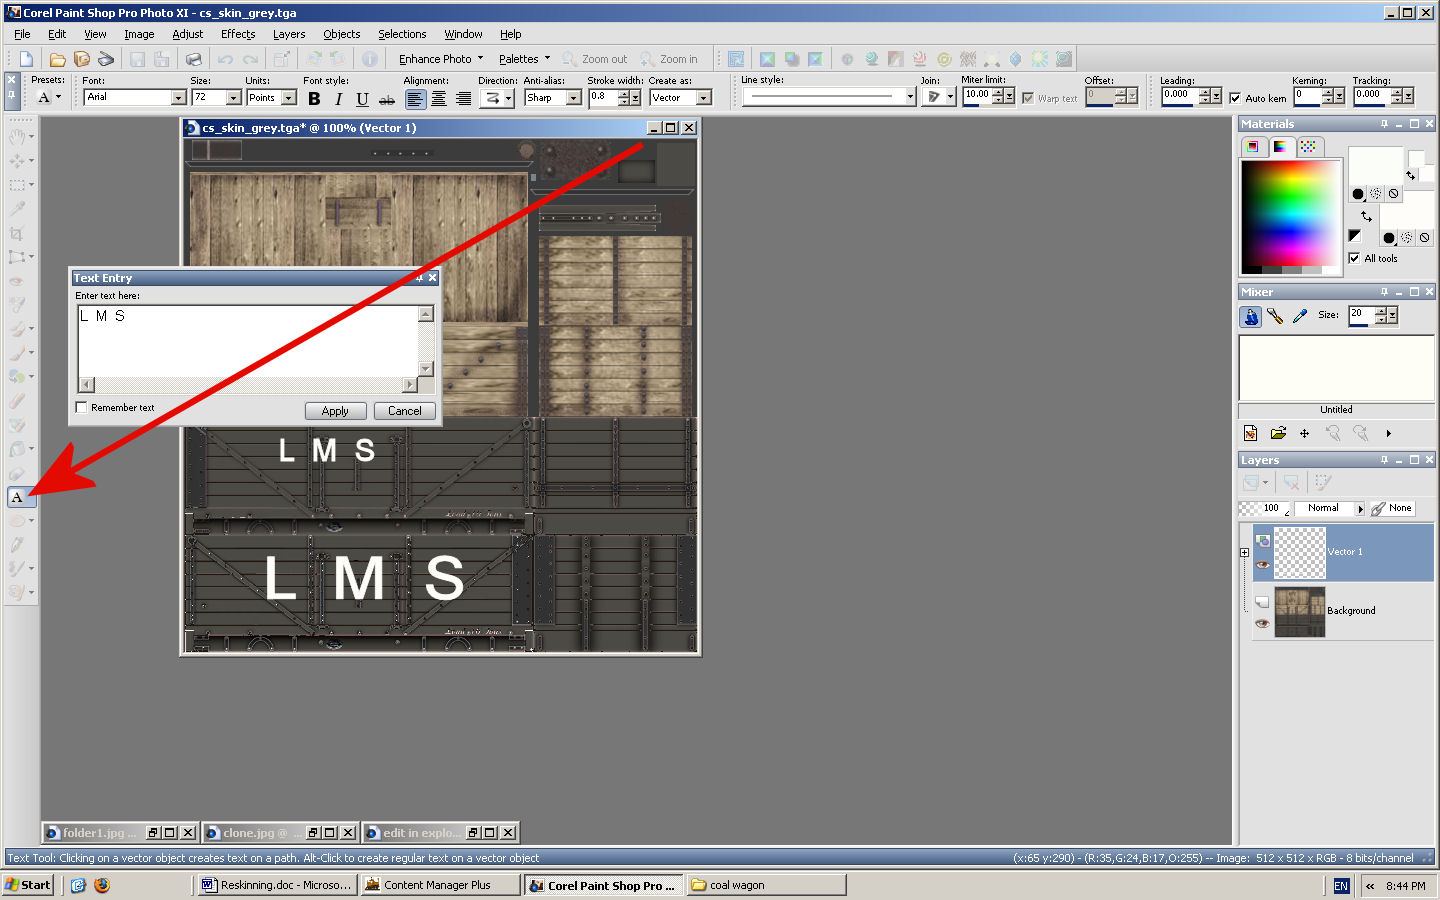
To add lettering use the letter tool seen here adding white lettering to the grey version of the cs_skin.tga file.

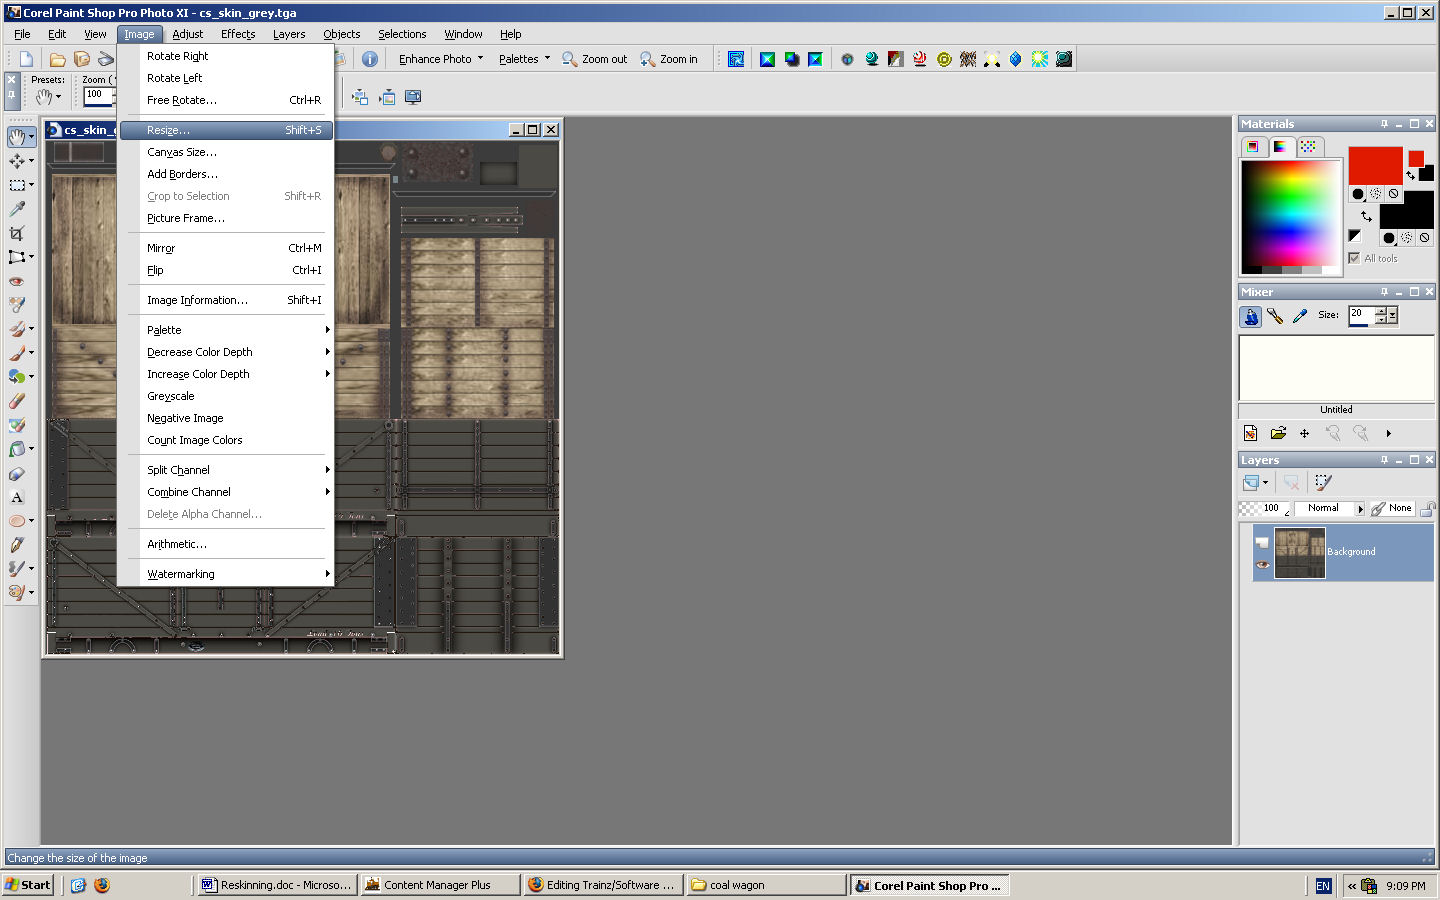
There are two other associated files with similar names in this example cs_skin_med.tga, and cs_skin_low.tga which are used by the two lower level lod.im files. When you have finished your reskin resize the image by 50% and 50% to make the med then once again to make the low versions for the lod meshes.


This gives you the basic reskin. This particular reskin uses changeable wagon numbers. If they stay in the same place we just need to reskin the numbers, if they need to be moved we will need to invoke Gmax. To reskin the wagon numbers we edit the files in the texture group or kuid 86627:1657. The wagon numbers themselves are on a plane roughly one tenth of an inch above the model and this plane uses a separate texture file called in this case ssa.tga.
The following example uses the texture files from a US Army boxcar to illustrate this found in "25647 ssa.tga" in the zip file. Note the files ssa1.tga through ssa15.tga are used by Chameleon wherever ssa.tga is referenced. So since we textured the wagon number with ssa.txt Chameleon replaces the wagon number texture with the appropriate ssa?.tga.

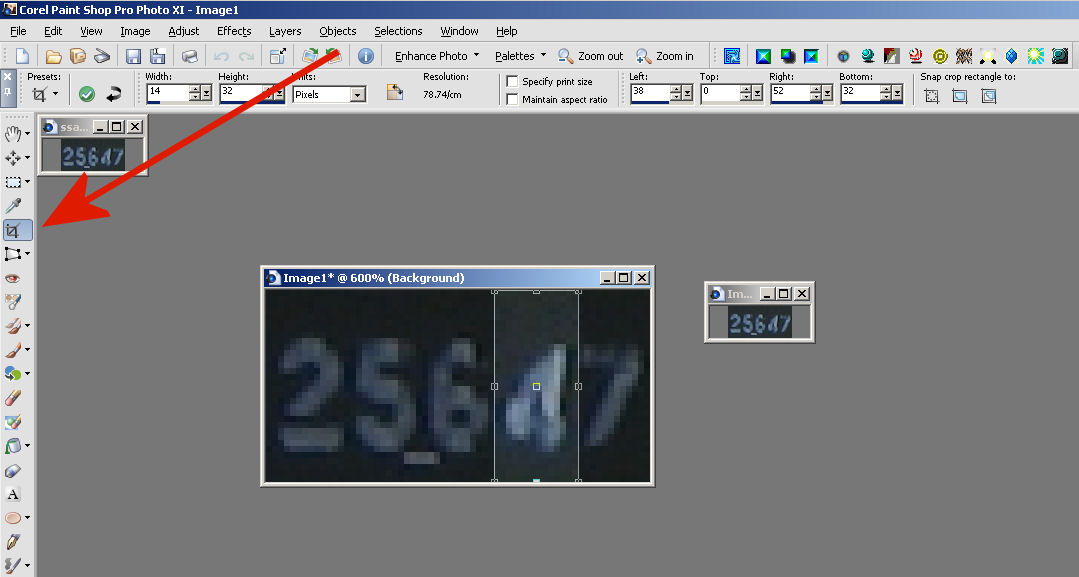
One difficulty with wagon numbers is matching the typeface used so one technique is to crop them number off a photograph and then edit that to give a set of wagon numbers. When we crop use the largest initial photograph available and if possible crop on a power of two so resizing is not required. 64 pixels by 16 pixels etc. The planes can always be resized so that the cropped image matches the wagon.

The first step is to copy the crop to a new image.

Then paste a new copy twice to give us two images to play with.

Next we cut a single digit out using the crop tool.


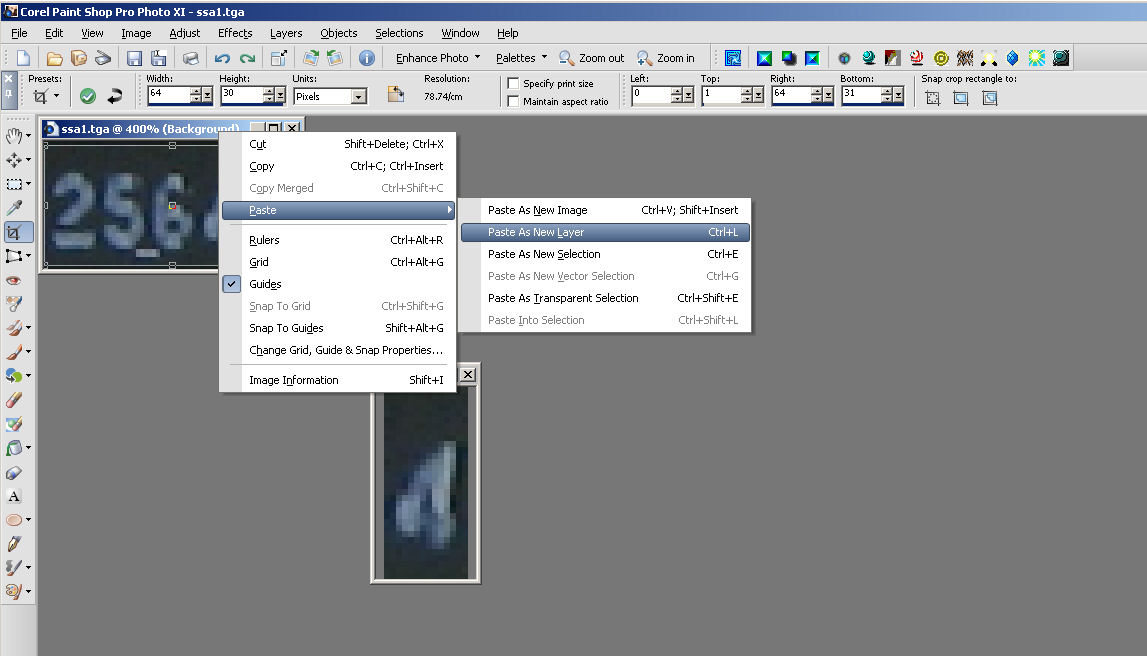
Copy this, then activate the ssa1.tga image by clicking on the blue stripe above and paste as a new layer.


Now use the move tool (1) to position the digit where we want it to be (2).

Finally we save the edited file using save as.

Repeat the process to create ssa2.tga, ssa3.tga etc. each with a different number.[note 1]
Moving the wagon numbers will be covered in the Gmax part.
To upload to the DLS see the CM section on uploading. ∅
Notes edit
- ↑ BlueStar / Couplestar attachment points found by the empirical method. The limfront should be .435 meters Y axis from the edge of the wagon and a.couple0. The air hose attachment point should be .350 meters displaced on the x axis. The vacuum hose typically uses the a.couple attachment points.
Footnotes edit